(Just a start, more to come soon) |
(→To the Sea of Storms: Maybe 50 percent of the first part done, more to come soon) |
||
| Line 1: | Line 1: | ||
{{Header Nav|game=The Legend of Zelda: Oracle of Ages}} | {{Header Nav|game=The Legend of Zelda: Oracle of Ages}} | ||
{{wip}} | |||
== To the Sea of Storms == | == To the Sea of Storms == | ||
:Items: [[Image:Zelda Oracles Piece of Heart.png]] '''Piece of Heart''', [[Image:Zelda Oracles Gasha Seed.png]] '''Gasha Seed''' | :Items: [[Image:Zelda Oracles Piece of Heart.png]] '''Piece of Heart''', [[Image:Zelda Oracles Gasha Seed.png]] '''Gasha Seed''', '''Zora Flippers'''. '''Cheval's Rope''' | ||
[[Image:Zelda Ages Piece of Heart 5.png|left]] | [[Image:Zelda Ages Piece of Heart 5.png|left]] | ||
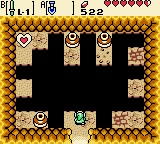
After refilling your bombs by cutting the bush to the right of the Wing Dungeon entrance, go west and up. Jump over the holes and enter the cave. Push the blocks around to get to the chest. Inside is a [[Image:Zelda Oracles Gasha Seed.png]] '''Gasha Seed'''. go right, up, left, up. Jump with the feather over the hole. Head up, right and two times up. If you killed enough enemies, the witch Maple will appear again. Quickly lift the stones with your power bracelet. Bump into her then and gather the rupees (if there is nothing worth more) with your sword. When she's gone, take out your shovel and dig in the middle spot of the cross to reveal a soil patch. If you want, you can plant your Gasha Seed here. | After refilling your bombs by cutting the bush to the right of the Wing Dungeon entrance, go west and up. Jump over the holes and enter the cave. Push the blocks around to get to the chest. Inside is a [[Image:Zelda Oracles Gasha Seed.png]] '''Gasha Seed'''. go right, up, left, up. Jump with the feather over the hole. Head up, right and two times up. If you killed enough enemies, the witch Maple will appear again. Quickly lift the stones with your power bracelet. Bump into her then and gather the rupees (if there is nothing worth more) with your sword. When she's gone, take out your shovel and dig in the middle spot of the cross to reveal a soil patch. If you want, you can plant your Gasha Seed here. | ||
Go down in on the left side and left. Enter the cave. Use your feather and power bracelet to get the fifth [[Image:Zelda Oracles Piece of Heart.png]] '''Piece of Heart'''. Beware: the both darker floor tiles may collapse. Take the way on the left side back and out. | Go down in on the left side and left. Enter the cave. Use your feather and power bracelet to get the fifth [[Image:Zelda Oracles Piece of Heart.png]] '''Piece of Heart'''. Beware: the both darker floor tiles may collapse. Take the way on the left side back and out. | ||
[[Image:Zelda Ages Overworld Flippers.png|thumb|right|In the Yoll Graveyard, you'll get Zora Flippers...]][[Image:Zelda Ages Overworld Rope.png|thumb|right|...and Cheval's Rope.]] | |||
Go two screens south, then three screens east, up, east two times and down three times. Fill your ember seeds on the way if you need to. Go to the east again and jump over the hole. Follow the path into the northern direction until you arrive at a house. Go in and talk to the man. He will introduce himself as Cheval. Once the talk is over, go out and watch the sequence. Go down, jump over the hole and up until you see the ball playing men. Go left here and use the harp. Go into the warp to the present. | |||
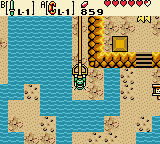
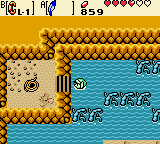
Go south, south, east, north, east, south, east to get to the Yoll Graveyard once more. Burn the tree. Go east and destroy the three ghosts. Talk to the bear then. Go west and north. Use the bear to get to the end of the path and push the tombstone there. Go into the grave. Walk north, east, south. Use the feather to jump over the water and the power bracelet to pull out the lever as far as possible. Jump back and go up the stairs to the '''Zora Flippers''' quickly. You can stand between the stones there to see a funny way to lose a heart. Since you use the flippers automatically, you just can jump into the water. Go one screen north and swim on the upper side to the west (you have to go to the right first to get there). Eventually you'll get to stairs and the '''Cheval's Rope'''. Swim back and go back to the entrance. Go out of the grave. Lift the stone, jump over the hole and go south. Burn the tree and go west to leave the graveyard. Go back to the town then. Go to the tree and then one screen east. Use the harp and go back to the past. | |||
Go south, west, south, south, west, south, Go over the bridge, then south to the house. In the house, talk to the guy and give him the rope. Go out of the house and north one screen. After the chat, go west two screens and use the shovel on the westernmost point after clearing the stones. You'll find another hidden soil location. If you want, plant a Gasha Seed. Go back two screens east and return to the north (four screens north, one east, one more north) to the warp. Use the harp to go back to the present. | |||
Here, go to the entrance to the Yoll Graveyard again. Talk to the big kangaroo there. | |||
{{Footer Nav|game=The Legend of Zelda: Oracle of Ages|prevpage=Wing Dungeon|nextpage=Moonlit Grotto}} | {{Footer Nav|game=The Legend of Zelda: Oracle of Ages|prevpage=Wing Dungeon|nextpage=Moonlit Grotto}} | ||
Revision as of 23:58, 25 October 2007
To the Sea of Storms

After refilling your bombs by cutting the bush to the right of the Wing Dungeon entrance, go west and up. Jump over the holes and enter the cave. Push the blocks around to get to the chest. Inside is a ![]() Gasha Seed. go right, up, left, up. Jump with the feather over the hole. Head up, right and two times up. If you killed enough enemies, the witch Maple will appear again. Quickly lift the stones with your power bracelet. Bump into her then and gather the rupees (if there is nothing worth more) with your sword. When she's gone, take out your shovel and dig in the middle spot of the cross to reveal a soil patch. If you want, you can plant your Gasha Seed here.
Gasha Seed. go right, up, left, up. Jump with the feather over the hole. Head up, right and two times up. If you killed enough enemies, the witch Maple will appear again. Quickly lift the stones with your power bracelet. Bump into her then and gather the rupees (if there is nothing worth more) with your sword. When she's gone, take out your shovel and dig in the middle spot of the cross to reveal a soil patch. If you want, you can plant your Gasha Seed here.
Go down in on the left side and left. Enter the cave. Use your feather and power bracelet to get the fifth ![]() Piece of Heart. Beware: the both darker floor tiles may collapse. Take the way on the left side back and out.
Piece of Heart. Beware: the both darker floor tiles may collapse. Take the way on the left side back and out.


Go two screens south, then three screens east, up, east two times and down three times. Fill your ember seeds on the way if you need to. Go to the east again and jump over the hole. Follow the path into the northern direction until you arrive at a house. Go in and talk to the man. He will introduce himself as Cheval. Once the talk is over, go out and watch the sequence. Go down, jump over the hole and up until you see the ball playing men. Go left here and use the harp. Go into the warp to the present.
Go south, south, east, north, east, south, east to get to the Yoll Graveyard once more. Burn the tree. Go east and destroy the three ghosts. Talk to the bear then. Go west and north. Use the bear to get to the end of the path and push the tombstone there. Go into the grave. Walk north, east, south. Use the feather to jump over the water and the power bracelet to pull out the lever as far as possible. Jump back and go up the stairs to the Zora Flippers quickly. You can stand between the stones there to see a funny way to lose a heart. Since you use the flippers automatically, you just can jump into the water. Go one screen north and swim on the upper side to the west (you have to go to the right first to get there). Eventually you'll get to stairs and the Cheval's Rope. Swim back and go back to the entrance. Go out of the grave. Lift the stone, jump over the hole and go south. Burn the tree and go west to leave the graveyard. Go back to the town then. Go to the tree and then one screen east. Use the harp and go back to the past.
Go south, west, south, south, west, south, Go over the bridge, then south to the house. In the house, talk to the guy and give him the rope. Go out of the house and north one screen. After the chat, go west two screens and use the shovel on the westernmost point after clearing the stones. You'll find another hidden soil location. If you want, plant a Gasha Seed. Go back two screens east and return to the north (four screens north, one east, one more north) to the warp. Use the harp to go back to the present.
Here, go to the entrance to the Yoll Graveyard again. Talk to the big kangaroo there.

