(Continued with details on getting the chart. Please finish the section about finding the items.) |
(Finish item recovery section.) |
||
| Line 26: | Line 26: | ||
===Searching for your items=== | ===Searching for your items=== | ||
After reaching Crescent Island, you will find that all of your items have been stolen by the island's inhabitants, the Tokay. in order to continue, you must get all of your items back, as they are necessary to reach the Moonlit Grotto. | After reaching Crescent Island, you will find that all of your items have been stolen by the island's inhabitants, the Tokay. in order to continue, you must get all of your items back, as they are necessary to reach the Moonlit Grotto. | ||
Without your items, you can't get far. The only thing you can do is to head south to find the Tokay with your shovel. While not much, it lets you get past the first obstacles. | |||
Head north to the cave, and dig through the dirt obstructions. In this cave, you will have to approach from the north. This Tokay will give you your wooden sword, allowing you to reach the eastern part of the island. | |||
With the power bracelet, walk on the path overlooking the Eastern beach. Move the rock with the bracelet, and head down the stairs. The second staircase brings you to the back of the Cucoo hut and get bombs. | |||
Once you retrieve your bombs, you can head to the area between the cucco hut and trading hut. One wall on the left may be bombed. This leads to thw Wild Tokay minigame, where you need to throw food at each Tokay on the left and right. Completing the game rewards you with a sapling. This sapling can be given to the Tokay found at the North of the island (which can be done later.) | |||
To the left of the two-rock barricade is a cave with a blocked entrance. While carrying the feather, use a bomb on this entry to open it. Jump over the patches of water, using a bomb on the cracked block, to reach the Tokay with the flippers. This allows you to swim in the water again. | |||
Switch to the power bracelet and re-enter the same cave. Move the rocks at the north-west corner, and dive into the water. This will eventually lead to the stairs that reach the central plateau, and where you can retrieve your seeds. The seed bag should have 10 mystery seeds (which may be harvested if necessary) that can be used to permanently purchase the feather - if not, you can harvest them from a patch of grass. | |||
Obtain both the feather (using 10 mystery seeds) and bracelet. This lets you move through the south cave, and speak with the Tokay carrying your harp. As you return to the hut, make sure that all three vine sprouts are near the associated strange wall. Take the north path to the hut and give the sapling to the Tokay, and warp to the present. With the vines in place, you can reach the scent tree. The scent seeds allow you to purchase the bracelet without having to use the shovel, and let you have all necessary items. | |||
With the feather, shovel and bracelet, you have everything you need to reach the Moonlit Grotto. Return to where you retrieved your harp, and enter the time portal to reach the present. The sole path leads to the Grotto, where you can find the next essence. | |||
== Moonlit Grotto == | == Moonlit Grotto == | ||
{{sect-stub}} | {{sect-stub}} | ||
Revision as of 04:35, 23 December 2013
When you collect the second Essence of Time, you're teleported out and contacted by the Maku Tree again. You're told you should go south to the Crescent Island to find the Echoing Howl. Anyway, you're back at the Overworld.
Crescent Island
To the Sea of Storms

After refilling your bombs by cutting the bush to the right of the Wing Dungeon entrance, go west and up. Jump over the holes and enter the cave. Push the blocks around to get to the chest. Inside is a ![]() Gasha Seed. go right, up, left, up. Jump with the feather over the hole. Head up, right and two times up. If you killed enough enemies, the witch Maple will appear again. Quickly lift the stones with your power bracelet. Bump into her then and gather the rupees (if there is nothing worth more) with your sword. When she's gone, take out your shovel and dig in the middle spot of the cross to reveal a soil patch. If you want, you can plant your Gasha Seed here.
Gasha Seed. go right, up, left, up. Jump with the feather over the hole. Head up, right and two times up. If you killed enough enemies, the witch Maple will appear again. Quickly lift the stones with your power bracelet. Bump into her then and gather the rupees (if there is nothing worth more) with your sword. When she's gone, take out your shovel and dig in the middle spot of the cross to reveal a soil patch. If you want, you can plant your Gasha Seed here.
Go down in on the left side and left. Enter the cave. Use your feather and power bracelet to get the fifth ![]() Piece of Heart. Beware: the both darker floor tiles may collapse. Take the way on the left side back and out.
Piece of Heart. Beware: the both darker floor tiles may collapse. Take the way on the left side back and out.


Getting to Crescent Island
Go two screens south, then three screens east, up, east two times and down three times. Fill your ember seeds on the way if you need to. Go to the east again and jump over the hole. Follow the path into the northern direction until you arrive at a house. Go in and talk to the man. He will introduce himself as Cheval. Once the talk is over, go out and watch the sequence. Go down, jump over the hole and up until you see the ball playing men. Go left here and use the harp. Go into the warp to the present.
Go south, south, east, north, east, south, east to get to the Yoll Graveyard once more. Burn the tree. Go east and destroy the three ghosts. Talk to the bear then. Go west and north. Use the bear to get to the end of the path and push the tombstone there. Go into the grave. Walk north, east, south. Use the feather to jump over the water and the power bracelet to pull out the lever as far as possible. Jump back and go up the stairs to the Zora Flippers quickly. You can stand between the stones there to see a funny way to lose a heart. Since you use the flippers automatically, you just can jump into the water. Go one screen north and swim on the upper side to the west (you have to go to the right first to get there). Eventually you'll get to stairs and the Cheval's Rope. Swim back and go back to the entrance. Go out of the grave. Lift the stone, jump over the hole and go south. Burn the tree and go west to leave the graveyard. Go back to the town then. Go to the tree and then one screen east. Use the harp and go back to the past.
Go south, west, south, south, west, south, Go over the bridge, then south to the house. In the house, talk to the boy and give him the rope. Go out of the house and north one screen. After the chat, go west two screens and use the shovel on the westernmost point after clearing the stones. You'll find another hidden soil location. If you want, plant a Gasha Seed. Go back two screens east and return to the north (four screens north, one east, one more north) to the warp. Use the harp to go back to the present.
Here, go to the entrance to the Yoll Graveyard again. Talk to the big kangaroo there. He says that his name is Ricky and that he has lost his boxing gloves, which are hidden inside the grass near the shore, three screens south and two screens west. If you bring these to him, he will thank you and let you ride in his pouch. Use his jumping ability to jump to the top of the mountain structure to the southwest. There, get out of his pouch and jump in front of the man with the balloon while making a sword strike. talk to him after he falls. He will introduce himself as Tingle and ask if you want to be his friend. Accept his request, and you will receive the island chart.
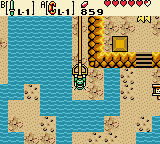
After getting the chart, go to the past and talk to the boy with the raft. He will tell you it is outside the right door and instruct you on how to use it. Get on it, and head south, east, and north. After a short cutscene, you will land on Crescent Island.
Searching for your items
After reaching Crescent Island, you will find that all of your items have been stolen by the island's inhabitants, the Tokay. in order to continue, you must get all of your items back, as they are necessary to reach the Moonlit Grotto.
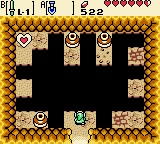
Without your items, you can't get far. The only thing you can do is to head south to find the Tokay with your shovel. While not much, it lets you get past the first obstacles.
Head north to the cave, and dig through the dirt obstructions. In this cave, you will have to approach from the north. This Tokay will give you your wooden sword, allowing you to reach the eastern part of the island.
With the power bracelet, walk on the path overlooking the Eastern beach. Move the rock with the bracelet, and head down the stairs. The second staircase brings you to the back of the Cucoo hut and get bombs.
Once you retrieve your bombs, you can head to the area between the cucco hut and trading hut. One wall on the left may be bombed. This leads to thw Wild Tokay minigame, where you need to throw food at each Tokay on the left and right. Completing the game rewards you with a sapling. This sapling can be given to the Tokay found at the North of the island (which can be done later.)
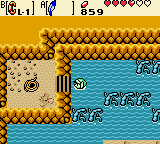
To the left of the two-rock barricade is a cave with a blocked entrance. While carrying the feather, use a bomb on this entry to open it. Jump over the patches of water, using a bomb on the cracked block, to reach the Tokay with the flippers. This allows you to swim in the water again.
Switch to the power bracelet and re-enter the same cave. Move the rocks at the north-west corner, and dive into the water. This will eventually lead to the stairs that reach the central plateau, and where you can retrieve your seeds. The seed bag should have 10 mystery seeds (which may be harvested if necessary) that can be used to permanently purchase the feather - if not, you can harvest them from a patch of grass.
Obtain both the feather (using 10 mystery seeds) and bracelet. This lets you move through the south cave, and speak with the Tokay carrying your harp. As you return to the hut, make sure that all three vine sprouts are near the associated strange wall. Take the north path to the hut and give the sapling to the Tokay, and warp to the present. With the vines in place, you can reach the scent tree. The scent seeds allow you to purchase the bracelet without having to use the shovel, and let you have all necessary items.
With the feather, shovel and bracelet, you have everything you need to reach the Moonlit Grotto. Return to where you retrieved your harp, and enter the time portal to reach the present. The sole path leads to the Grotto, where you can find the next essence.
Moonlit Grotto

