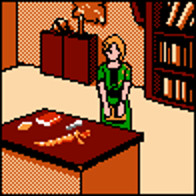
;LOOK at anything:Anne will introduce herself. She tells you that the professor's notes and a few artifacts were found in the Well of Sacrifice, in the north of the ruins. The well had been emptied of water somehow, but it was rapidly filling up. There was more treasure with the note, but they could only recover the notes and the items on the desk. The guide Jose can tell you more and is on his way.
;LOOK at anything:Anne will introduce herself. She tells you that the professor's notes and a few artifacts were found in the Well of Sacrifice, in the north of the ruins. The well had been emptied of water somehow, but it was rapidly filling up. There was more treasure with the note, but they could only recover the notes and the items on the desk. The guide Jose can tell you more and is on his way.
;TAKE the Lighter
;TAKE the Lighter
Line 23:
Line 38:
* "...lost another man. We seem to have accidentally released the demons that were sealed in here by the ancient Mayans. My only chance is to defeat the demon Tentacula, but first I must find the Sun Key..."
* "...lost another man. We seem to have accidentally released the demons that were sealed in here by the ancient Mayans. My only chance is to defeat the demon Tentacula, but first I must find the Sun Key..."
;LOOK at Jose:He introduces himself and tells you that he worked with the professor. He doesn't know what happened to him. He regrets not being able to find the Sun Key. He confirms that they found the Sun Necklace in the Warrior's Temple, but that the demons appear to have put everything back as it was. He tells you that you'll want to go to the High Priest's Tomb to find the mosaic tile that will open the door to the treasure room. Before you do that, you should go to the Nunnery and find the Ixmol Jewel, which gives you a password so that you can continue your game.
;LOOK at Jose:He introduces himself and tells you that he worked with the professor. He doesn't know what happened to him. He regrets not being able to find the Sun Key. He confirms that they found the Sun Necklace in the Warrior's Temple, but that the demons appear to have put everything back as it was. He tells you that you'll want to go to the High Priest's Tomb to find the mosaic tile that will open the door to the treasure room. Before you do that, you should go to the Nunnery and find the Ixmol Jewel, which gives you a password so that you can continue your game.
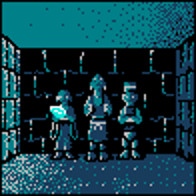
You step out into the ruins. You will find the Nunnery one screen to the north. Step inside, and you will find three statues standing in a low-ceiling room.
You step out into the ruins. You will find the Nunnery one screen to the north. Step inside, and you will find three statues standing in a low-ceiling room.
;LOOK at the Warrior statue:You will notice that it looks as though it once held something.
;TAKE the Ixmol Jewel:Don't worry about the light dying. It will still provide you with a password when you look at it in your inventory.
;TAKE the Ixmol Jewel:Don't worry about the light dying. It will still provide you with a password when you look at it in your inventory.
;GO ⇓
;GO ⇓
== The Tomb of the High Priest ==
{{Footer Nav|game=Tombs & Treasure|prevpage=Getting Started|nextpage=The treasure of El Castillo}}
Travel north-west until you reach a pyramid. Climb to the top and enter the tomb. When you arrive, it will appear to be empty.
;LOOK at anything: A "Skorpor" will appear.
;FIGHT the Skorpor: Even at Level 1, you should be able to badly damage the Skorpor until it is defeated.
;LOOK at the Wall: Although it looks ordinary, something suggests that it is not.
;MOVE or PUSH the Wall: It moves slightly, but you're not strong enough.
;CHANGE to Jose
;MOVE or PUSH the Wall: Jose creates an opening that you can pass through.
;GO ⇒
;LOOK at the Mosaic Tile: Jose will inform you that the professor said he needed that tile to open the treasure room in El Castillo Pyramid.
;TAKE the Mosaic Tile: The lid of the coffin will slide open. Inside, you will find a skeleton that you notice is wearing a mask.
;TAKE the Mask
;LOOK at the Skeleton
;MOVE the Skull: You will notice a keyhole under the skull. However, nothing currently in your possession will fit the keyhole.
;GO ⇓
;GO ⇐
;GO ⇓
== El Castillo Pyramid ==
This pyramid is found to the east of the High Priest's Tomb. It is also known as the Temple of Kukulcan.
;LOOK at anything: A "Two Beak" will appear.
;FIGHT the Two Beak: At Level 2, you will be strong enough to badly damage the Two Beak until it is defeated.
;LOOK at the Hollow: You will notice a hole in the floor measuring 1" by 2" and between 1 and 2 inches deep. Nothing you currently have will fit the hole.
;GO ⇑: You will reach a wall at a dead-end
;LOOK at the Hollow: The girl will suggest that if you have something that fits in the hole, the door might open up.
;PUT the Mosaic Tile: The tile will fit in the hole, and the wall slides up to reveal a treasure room.
;TAKE the Shallow Bowl
;TAKE the Gold Mirror
;TAKE the Gold Stand
;LOOK at the Silver Globe: It's called the Globe of Light, and you should take it to Caracol.
;TAKE the Silver Globe
;LOOK at the Flask: You will obtain a small iron rod from it.
::''Note: Just because you can join the Small Rod and the Shallow Bowl doesn't mean that you should. Once you do this, you can't undo it. And if you do it too soon, you will be unable to use the Small Rod for another purpose, and thus be unable to complete and win the game!''
;LOOK at the Tall Flask: You'll notice something shiny inside that you can't get out.
;SMASH the Tall Flask: The girl will discover a ring with a stunning jewel that fits on her finger perfectly. Jose explains that it's the Ring of Itza, which is said to have the power to defeat evil. He doesn't know what use it will be, but suggests that you do not lose it.
;MOVE the Gold Pile: Looking through the gold, you find a red jewel. Jose explains that it looks like the legendary jewel that the professor was searching for. The girl adds the professor said that, used in a one-eyed mask, it would make secrets become visible. Jose continues saying that, used on a sword, it would create a magical power.
;LOOK at the Stone Box: You find tiles inside, but you can't understand them.
;JOIN the Red Jewel and the One-eyed Mask.
;USE the One-eyed Mask: You will be able to understand the tiles. You see men digging up the censer at dusk. A trumpet at noon, and the jaguar becomes a statue. Men drinking a potion at night and shrinking. To solve this riddle, you will have to discover the Sun Necklace and find the position of the sun.
;GO ⇓
;GO ⇓
== Well of Paradise ==
Find the Well of Paradise to the east of your starting point. Walk to the spot between the water and the structure to access the well.
;WASH the Gold Mirror: You will clean off the mirror. As you do, you will notice something else in the water that resembles Pan pipes.
;TAKE the Pan Pipes.
;LOOK at the Pan Pipes: You will notice a hole in the pipes, preventing them from being used.
;JOIN the Pan Pipes and the Bandage: Applying the bandage to the pipes will block the hole and fix the pipes.
;GO ⇓
== El Caracol ==
You will find El Caracol to the south-west of El Castillo. It looks like an oddly shaped pyramid. Inside, you will find a round room with a pedestal in the center.
;LOOK at anything: A "Snake Master" will appear.
;JOIN the Red Jewel and the Sword
;FIGHT the Snake Master: Even at Level 5, you will have a difficult time defeating the Snake Master if you do not join the Red Jewel and the Sword first. Once you do, you should be able to defeat the Snake Master. However, if you feel you are running too low on Hit Points, escape the fight by leaving the room, and return to try again.
;LOOK at the small window: You can see the Court of Columns in the distance.
;GO ⇓
;LOOK at the Pedestal: It appears to be designed to hold a globe.
::''Note: Whatever you do, do not have Jose PUSH the pedestal at this time. If you do, you will not be able to move it back, and you will not be able to complete the game.''
;PUT the Silver Globe: It will fit on the pedestal.
;LOOK at the Silver Globe: It's said that a beautiful sound will awaken the globe.
;CHANGE to the girl
;USE the Pan Pipes: The globe will become transparent and a beam of light will shoot out from the globe.
;LOOK at the light: It goes out the window and shines like a laser.
;GO ⇓
== Court of Columns ==
In order to find this, you must walk one screen to the east of the tall ornate pyramid known as the Temple of Warriors. While on this screen walk among the columns until you find the entrance,
;LOOK at anything: "El Slug" will appear.
;FIGHT El Slug: If you have reached Level 8, you should be able to defeat El Slug before you become too badly damaged.
;LOOK at the Column: You will discover one particular column that is shining in the back of the court.
;LOOK at the Gound: You may notice something unusual about it.
;SMASH the Ground: You will discover a Golden Globe.
;LOOK at the Golden Globe: It looks to be about 3 to 4 inches in size, and music is said to make it glow brighter.
;TAKE the Golden Globe
;GO ⇓
;GO ⇓
=== El Caracol Revisited ===
;TAKE the Silver Globe
;PUT the Gold Globe
;CHANGE to the Girl
;USE the Pan Pipes
;GO ⇓
=== Court of Columns Revisited ===
;LOOK at the Column
;SMASH the Ground: A Silver Head will appear. It's a head with both eyes open, but you can't tell the gender.
;TAKE the Silver Head
;GO ⇓
=== El Castillo Revisited ===
;GO ⇑
;PUT the Silver Head: The head will fit on the headless statue, and a secret entrance will appear.
;GO downstairs: You will arrive in a secret basement.
;LOOK at the Stone Box: You will find a leather bag inside. The bag contains incense.
;TAKE the Small Flask: It contains something like water, and it's the size of a bottle of eye drops.
;TAKE the Large Flask: It also contains something like water.
;GO upstairs
;GO ⇓
;GO ⇓
== El Caracol's second floor ==
;TAKE the Golden Globe
;CHANGE to Jose
;PUSH the Pedestal: A staircase to the second floor will appear.
;GO ⇒ or upstairs: You will arrive on the second floor, which looks a lot like the first floor, but with an extra window.
;PUT the Golden Globe: The globe will sit on the pedestal, but nothing may happen initially.
;WAIT: Wait for as long as it takes until light comes through the window and strikes the globe. The globe will reflect the light back onto the wall.
;LOOK at the Wall: You will notice one section glowing particularly brightly.
;SMASH the Wall: You will create a hole that will reveal the Crystal Key.
;TAKE the Crystal Key
;Go ⇓
;TAKE the Golden Globe
;PUT the Gold Stand
;PUT the Golden Globe: The globe will now sit on top of the stand, on top of the pedestal. Light will come through the other window and strike the globe.
;SWITCH to the girl
;USE the Pan Pipes: The globe will change and reflect light onto another portion of the wall.
;LOOK at the Wall: Another section is now glowing brightly.
;SMASH the Wall: You will discover the Silver Censer
;TAKE the Censer
;Go ⇓
;Go ⇓
;Go ⇓
== Temple of Warriors ==
One screen to the left of the Court of Columns, you will find the pyramid that represents the Temple of Warriors. Step inside to find three statues, including one of a jaguar with a blue jewel in its forehead.
;LOOK at anything: A Cadaver will appear.
;FIGHT the Cadaver: You should be around Level 10, if not 11, and the Cadaver should go down without much of a fight.
;LOOK at the Sun Necklace
;TAKE the Sun Necklace
;LOOK at the Warrior: It used to hold something in its hands.
;TAKE the Blue Jewel: The jaguar will come to life.
;GO ⇓: Exit the temple, and then immediately return inside. The Jaguar should disappear for a short while.
;LOOK at the hole: You find a rusty key inside.
;TAKE the key: You will find that the boy's fingers are not small enough.
;CHANGE to the girl
;TAKE the key: Her fingers are not small enough as well. She will suggest that if you have something magnetic, you could pull it out.
;USE the Small Rod: The key sticks to it like a magnet, and you retrieve it.
;GO ⇓
;GO ⇓
=== Wash the Sun Necklace ===
Return to the Well of Paradise, several screens south of the Temple of Warriors
;WASH the Sun Necklace: The circle at the top of the screen will flash. It's color will indicate the time of day; yellow is dawn, white is noon, red is dusk, and black is midnight.
;GO ⇓
=== Back to the Temple of Warriors ===
Now that you can tell time, you will know when it's noon. As one of the tablets in El Castillo illustrated, if you play a sound a noon, the jaguar will become a statue. Enter the temple and wait until it attack you.
;CHANGE to the girl
;USE the Pan Pipes: The jaguar will return to a statue.
;TAKE the Blue Jewel: Like the Red Jewel, this jewel can be joined with the mask and the sword.
;JOIN the Blue Jewel and the Sword
;GO ⇓
== The Ball Court ==
Several screens west of the Temple of Warriors, you'll find the entrance to the ball court. It's unassuming, but it can be found around the set of steps near the northern portion of the grassy field.
;LOOK at anything: A Hornskull will appear
;FIGHT the Hornskull: Provided you are above Level 15, and have joined the Blue Jewel with the Sword, you should be able to defeat the Hornskull.
;LOOK at the Cog: You will notice that it's being held in place by a pawl.
;GO ⇑
;LOOK at the Blue Block: Your instinct might be to try and smash it, but that won't work. However, you can actually take the block.
;TAKE the Blue Block: An entrance will appear on the right. You can go through it if you want, but don't do anything in the room beyond. Instead, exit the court.
;GO ⇓
;GO ⇓
=== Return to the High Priest Tomb ===
Head south a few screens to return to the High Priests Tomb.
;GO ⇒
;LOOK at the Skeleton
;MOVE the Skull: You will find a keyhole behind the skull.
;USE the Iron Key: The lid will close and the coffin moves away to reveal a hole that leads to a corridor.
;GO downstairs: You will arrive in the underground corridor that is actually below the Ball Court. The entrance will close behind you when you enter.
;GO anywhere: No matter where you go, it all looks the same. Eventually, the girl will suggest that you make a compass.
;JOIN the Small Rod and the Shallow Bowl: This will make a compass and allow you to find your way through the corridors.
;USE the Shallow Bowl: You follow the compass until you reach a small room with a stand in the middle that holds a small jewel. You should also notice two exits from this room. You came through the right door, but the left door was created when you took the blue block. If you do not see two exits, then you will be stuck here forever, unable to complete the game.
;LOOK at the Akbal Jewel: It is said that this jewel has the ability to rob demons of their power.
;TAKE the Akbal Jewel: The door that you just came through, the right door, will slam shut, but the left door should remain open.
;GO ⇐: From here, if you go forward, you will find that it's too dark to continue. Furthermore, if you examine the wall, Jose will explain that you might be able to see something if you had a mask. However, no combination of the One-eyed Mask with either jewel will produce any results, so he must be referring to a different mask.
;GO ⇓
;TAKE the Stone Pawl: This will cause the path to the corridor beyond to close behind you. Attempting to replace the pawl will have no effect. However, you need this pawl to continue, so take it with you.
;GO ⇓
== The next step ==
At this point, it isn't entirely clear where you should visit next. However, having obtained the Blue Block, there is a location where you might be able to place this block. Return to El Castillo.
;PUT the Blue Block: Doing so will cause an entrance to appear in the floor.
;GO downstairs: You will arrive in a room with a mechanism on the wall. The mechanism is made of many cogs. If you allow Jose to try and move the Stone Handle, it will move, but then return as soon as you let it go.
;LOOK at the Shaft: It looks as if something was once attached there.
;PUT the Stone Pawl: The Pawl will attach to the shaft.
;CHANGE to Jose
;MOVE the Stone Handle: You will hear a loud roar. The girl will remark that it sounds like water flowing.
;GO upstairs
;GO ⇓
== The Well of Sacrifice ==
There are two bodies of water in the game. You have visited the Well of Paradise, but now it's time to check the Well of Sacrifice, to the east of the Temple of Warriors. If you visited it earlier, you have seen the well full of water. But now when you visit, it is empty.
;GO downstairs: Before you enter, Jose warns you that people who entered the well were trapped by a Crystal Prison and light, and tells you to make sure you have the Crystal Key and a mirror. To fight the demons, you'll need the blue jewel and the Akbal jewel. You should have all of these items.
;GO downstairs: Jose will suggest that the girl should wait behind. But the girl does not want to be alone, so Jose stays with her, sending you in alone.
;LOOK at anything: A "Venom" will appear.
;USE the Akbal Jewel: After you chant over the jewel, the Venom will be more susceptible to your attacks.
;FIGHT the Venom: Provided you use the Akbal jewel, and combine the blue jewel with the sword, you should be able to defeat the Venom.
;MOVE the right Head: The door will open.
;GO ⇑: The door will close behind you. The room you enter contains a coffin and a beam of light coming down from the ceiling.
;USE the Golden Mirror: The mirror will reflect the light on to the pattern on the wall, and cause an exit to appear. If you do not do this first, you will become trapped in the room.
;LOOK at the Coffin: You will discover that the coffin is hollow, and you can see a body wearing a mask inside. The coffin has a hole on the side.
;USE the Crystal Key: The key will open the coffin.
;TAKE the Two-eyed Mask
;GO ⇓: The light is gone, rendering any chance of escape hopeless if you did not already use the mirror.
;GO ⇑: You will now find yourself back in the room below the treasure room of El Castillo.
;GO upstairs
;GO ⇓
;GO ⇓
=== Return to the Well ===
When you arrive, you will find Jose lying unconscious on the ground, and the girl will be nowhere in sight.
;LOOK at Jose: He will wake up.
;LOOK at Jose: Jose will explain that some group kidnapped the girl, and that they took her to their lair, somewhere in Ball Court.
;GO ⇓
== Getting back into Ball Court ==
When you left Ball Court, you took the Stone Pawl which was keeping the entrance to the corridor open. With the pawl gone, the entrance is shut. However, there is still another way to enter the court. If you remember, you had to travel through the High Priest Tomb in order to reach the passages below Ball Court. Return to the tomb now and retrace your steps.
;GO ⇒
;GO downstairs
;USE the Shallow Bowl: You will return to the room where you obtained the Akbal Jewel.
;GO ⇐
;GO ⇑
;LOOK at the Wall: Jose will suggest that you might be able to see something if you use a mask. However, just using either mask alone reveals nothing.
;JOIN the Red Jewel and the Two-eyed Mask
;JOIN the Blue Jewel and the Two-eyed Mask
;USE the Two-eyed Mask: You will notice a white block along the left wall.
;PUSH the White Block: You will create an entrance on the left.
;GO ⇐: You will enter a new room.
;LOOK at anything: A "Tezcat" will appear.
;JOIN the Blue Jewel and the Sword: You must reset this connection in order to damage the Tezcat.
;FIGHT the Tezcat
;LOOK at the Temple: You will see a golden key inside, but you need to open the model temple to get it.
;WAIT until midnight: If you recall, one of the tablets in El Castillo mentioned drinking a potion at night to become smaller. Wait until the circle at the top of the screen turns black.
;USE the Large Flask: Jose will turn into a demon Scareface and demand the flask! He will explain that it was his friends who kidnapped the girl, and that all he needs is the Sun Key in order to rule the world. He plans to defeat Tentacula himself, and kill you too.
;USE the Akbal Jewel: You'll need to do this in order to harm Scareface.
;FIGHT Scareface: Even if you've done everything right, this fight can be a close call. Leave the room and come back to try again if you get too close to dying. You will retrieve the Ring of Itza upon defeating him.
;USE the Large Flask: This time, you will shrink down to the size of the temple.
;GO ⇑: You will enter the temple. There is a keyhole on the left.
;USE the Silver Key: The whole temple will shake. It is now unlocked.
;GO ⇓
;USE the Small Flask: You will return to your normal size.
;MOVE the Temple: Unfortunately, even after using the Silver Key, the Sun Key is still not quite accessible from the Temple. You have to move it first in order to open the doors.
;TAKE the Sun Key: The scene will immediately change, the room will shake, and you will find yourself in the Shrine of Tentacula.
== The Shrine of Tentacula ==
It looks like you found the girl, who is lying on the stand in the back.
;LOOK at anything: Tentacula will appear before you.
;USE the Akbal Jewel: As usual, you need this to harm Tentacula.
;USE the Itza Ring: This is also necessary to protect you from harm.
;FIGHT Tentacula: This fight will go on for a considerable amount of time, primarily due to the frequent dodging of attacks on both of your parts.
;LOOK at the Stand: You will find the girl lying down.
;LOOK at her Face: You will notice that she's not dead, but merely in a deep sleep. You'll need to use the Censer to wake her.
;GO ⇓
;PUT the Censer: You will place the Censer on the floor.
;PUT the Incense: You will place the Incense in the Censer.
;USE the Lighter: You will light the Incense and it will give off a pleasant smell. It will wake the girl from her sleep. After you catch her up on the details, she will instruct you to use the Sun Key.
;USE the Sun Key: The shrine will begin to collapse, and the ending to the game will begin. Congratulations.
Professor Imes sets out for Chichen Itza with 7 men.
June 22nd
One man disappears while studying El Castillo Pyramid
July 9th
Three men disappear while researching the Well of Sacrifice.
July 14th
Professor Imes and 2 others vanish mysteriously while excavating the Ball Court. Only the guide returns.
July 17th
The professor's notes and a few artifacts are found in the Well of Sacrifice.
Prof. Imes was an expert on ancient Mayan writing. He read in an old book that the mythical Sun Key was hidden at Chichen Itza & set out to discover it. Prof. Imes' daughter was a close friend. Since it was summer vacation, we
decided to go to Mexico to solve the mystery of his disappearance.
Starting a new game
You begin inside the professor's laboratory where his secretary Anne is waiting.
LOOK at anything
Anne will introduce herself. She tells you that the professor's notes and a few artifacts were found in the Well of Sacrifice, in the north of the ruins. The well had been emptied of water somehow, but it was rapidly filling up. There was more treasure with the note, but they could only recover the notes and the items on the desk. The guide Jose can tell you more and is on his way.
TAKE the Lighter
TAKE the Silver Key
TAKE the Sword
LOOK at the Notebook
You can only read parts of some passages:
"I must have the Sun Necklace to continue. I found it in the Warrior's Temple, but it was too dirty to show the sun's position..."
"...Who would have guessed there was a trick like that in El Castillo pyramid. There's a mountain of treasure..."
"...There are demons in the ruins, three men have already been killed..."
"...the demons, I must get the sword of..."
"...lost another man. We seem to have accidentally released the demons that were sealed in here by the ancient Mayans. My only chance is to defeat the demon Tentacula, but first I must find the Sun Key..."
GO ⇓
LOOK at Jose
He introduces himself and tells you that he worked with the professor. He doesn't know what happened to him. He regrets not being able to find the Sun Key. He confirms that they found the Sun Necklace in the Warrior's Temple, but that the demons appear to have put everything back as it was. He tells you that you'll want to go to the High Priest's Tomb to find the mosaic tile that will open the door to the treasure room. Before you do that, you should go to the Nunnery and find the Ixmol Jewel, which gives you a password so that you can continue your game.
GO ⇑
The Nunnery
You step out into the ruins. You will find the Nunnery one screen to the north. Step inside, and you will find three statues standing in a low-ceiling room.
TAKE the Ixmol Jewel
Don't worry about the light dying. It will still provide you with a password when you look at it in your inventory.