Battlezone is a hybrid of vehicular combat, first person shooter, and real time strategy game. As such, the game utilizes a number of mechanics from both genres.
[edit]
As a first person shooter, players will be required to use FPS mechanics such as strafing to dodge enemy attacks. Refer to the Controls page for the exact buttons. By utilizing the strafe buttons, however, you can keep your guns on target while simultaneously dodging enemy attacks. Some attacks, however, strike the moment the trigger is pulled, and thus can't be dodged.
Without your vehicle, you are extremely vulnerable. Only two to four hits from a rapid-firing minigun or chaingun are enough to give you a game over. Enemy vehicles do not even need to shoot to harm you - they can just as easily ram you. Your default plasma rifle, while effective against other dismounted infantry, is no match for even the lightest enemy vehicles.

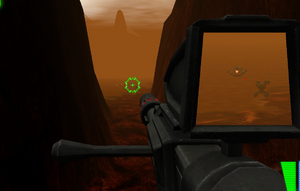
Your primary weapon of choice as an infantryman will therefore be the sniper rifle. Changing your weapon to the sniper will render you immobile, but activate the scope on the weapon. Aiming at an enemy vehicle will show a bright white dot in the scope, indicating where the driver of the enemy vehicle is. Killing the driver in this manner will leave the enemy vehicle unmanned, and you can then take it over.
Alternatively, you can select any friendly unit and give them an order to pick you up. The vehicle will drive over to your location, and the driver will hop out. The AI driver will attempt to return to base, or take over a nearby unoccupied vehicle.
Hop into any driverless vehicle by walking into it. You will have a lot more mobility, but the controls will mostly remain the same.
Commanding Units[edit]

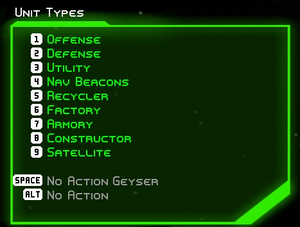
Allied units can be controlled by either aiming at them and pressing , or by navigating the unit interface at the top left of the screen.
Units can be mass-selected by holding down while selecting units.
In addition to basic move orders, which can be given by aiming at the ground the selected unit is to travel to and pressing Spacebar again, there are a number of other orders that can be given as well:
- Follow Me: The designated unit will follow your lead. Following units will engage targets they see. Effective for when you lead the charge yourself against enemies. Units will follow the vehicle you are driving - if you switch vehicles, selected units will follow your former vehicle.
- Go to Nav: Nav beacons are cameras used to mark points of interest. As you cannot order your units to places outside of your own field of view, nav beacons can be a way to tell units to gather outside an enemy base, or to head back to friendly territory. Nav beacons may also act as cameras for you to observe distant locations.
- Attack: Opens a list of targets for your units to attack. Attack orders can also be issued by selecting a friendly vehicle, then aiming at the enemy to engage and pressing Spacebar.
- Pick Me Up: Available only when you are outside a vehicle. The unit will drive to your location, and the driver will hop out and give you his vehicle.
- Get Repairs: Only available if you have an armoury built. The armoury will fling a repair powerup to the selected vehicle's location. The vehicle will then try to pick it up.
- Get Reloads: Only available if you have an armoury built. The armoury will fling an ammo powerup to the selected vehicle's location. The vehicle will then try to pick it up.
- Hunt: The targeted vehicle will roam the battlefield on its own and attempt to engage the enemy.
- Follow Close: Similar to Follow Me, but the vehicle will prioritize following you over engaging the enemy.
- Defend: Opens a list of allied units for the vehicle to follow and defend. Defend orders can also be issued by selecting a friendly vehicle, aiming at a friendly unit or structure, and pressing Spacebar.
- Recycle: Sends the selected unit to the recycler, disassembling it and regaining the resources and pilot.
Resources and Map Features[edit]

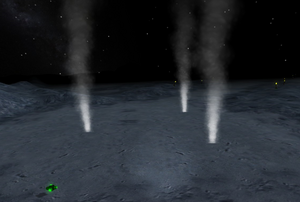
One of the most important map features you can find are geysers. These plumes of smoke rising from the ground are sites where you can deploy your Recycler, Mobile Unit Factory, or Armory and begin building a base. Geysers may also decoy thermal hornet missiles. If possible, try to find a collection of three, one for each unit.

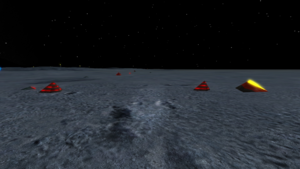
Bio-metal scrap is the main building material, used by the Recycler, Mobile Unit Factory, Armory, and the Constructor to build things. Besides finding it on the map naturally, it is also created when a vehicle or building is destroyed. A failed attack on an enemy can thus inadvertently give the enemy a large scrap field to harvest from. Bio-metal scrap is collected by harvesters.
Pilots are a third resource, and nearly every unit requires one. The maximum number of pilots possible is 30. The Recycler and the Mobile Unit Factory provide five pilots each, and unlocking more requires players to build barracks. Destroyed vehicles will still count against your pilot count if the pilot inside is killed, so ensure any bailed out pilots return to base if possible.