m (→Floor 3: deleted incorrect info) |
Tags: Mobile edit Mobile web edit |
||
| (22 intermediate revisions by 8 users not shown) | |||
| Line 1: | Line 1: | ||
{{Header Nav|game=Pokémon FireRed and LeafGreen}} | {{Header Nav|game=Pokémon FireRed and LeafGreen}} | ||
'''''Cinnabar Island is an island located in the southwestern part of the Kanto region. It is home to the Cinnabar Lab and the Pokémon Mansion, as well as a gym, where you'll face leader Blaine, bearer of the Volcano Badge. However, access to the gym is at first barred.''''' | |||
__TOC__ | |||
{| {{prettytable|notwide=1}} align="left" | |||
|- align="center" style="background:red; color:white" | |||
{| {{prettytable|notwide=1}} align=" | |||
|- align="center" style="background: | |||
|colspan="2"|Poké Mart | |colspan="2"|Poké Mart | ||
|- | |- | ||
| Line 14: | Line 11: | ||
|- | |- | ||
|Great Ball||[[File:Pokebuck.png]]600 | |Great Ball||[[File:Pokebuck.png]]600 | ||
|- | |- | ||
|Hyper Potion||[[File:Pokebuck.png]]1200 | |Hyper Potion||[[File:Pokebuck.png]]1200 | ||
|- | |- | ||
| Line 26: | Line 23: | ||
|} | |} | ||
[[File:Pokemon FRLG CinnabarIsland.png|right|thumb|380px|Cinnabar Island]] | |||
{{-}} | {{-}} | ||
==Pokémon Lab== | ==Pokémon Lab== | ||
[[File:Pokemon FRLG PokémonLabMH.png|left|thumb|400px|Pokémon Lab Main Hall]] | |||
The Pokémon Lab is a laboratory founded by Dr. Fuji. It reveals important bits of information regarding the obscure storyline, if you can tie all the dots together correctly. | |||
The Pokémon Lab is a laboratory founded by Dr. Fuji. | |||
Here, you should hand your Fossil from Mt. Moon and your Old Amber from Pewter City's Science Museum to get two resurrected Pokémon otherwise unobtainable. | |||
{{-}} | {{-}} | ||
===Room 1=== | ===Room 1=== | ||
[[File:Pokemon FRLG PokémonLabR1.png|left|thumb|300px|Pokémon Lab Room 1]] | |||
In the first room of the laboratory, there are two people who will offer to trade Pokémon. The old man will offer his Electrode for a Raichu, and the girl will want to trade her Tangela for a Venonat. | |||
In the first room of the | |||
{| {{prettytable|notwide=1|text center=1}} | {| {{prettytable|notwide=1|text center=1}} | ||
| Line 171: | Line 52: | ||
'''Items''' | '''Items''' | ||
* Stardust ( | * Stardust (Held by Tangeny, the Tangela up for trading) | ||
{{-}} | {{-}} | ||
===Room 2=== | ===Room 2=== | ||
[[File:Pokemon FRLG PokémonLabR2.png|left|thumb|300px|Pokémon Lab Room 2]] | |||
In the second room, there is a '''Move Tutor''' on the left who will teach {{bpm|Metronome}} to one of your Pokémon. Metronome randomly selects a move to perform, so it's more of a gimmick and not really a reliable move. | |||
In the second room, there is a Move Tutor on the left who will teach | |||
{{-}} | {{-}} | ||
===Room 3=== | ===Room 3=== | ||
[[File:Pokemon FRLG PokémonLabR3.png|left|thumb|300px|Pokémon Lab Room 3]] | |||
In the third room, there is a weird doctor who will revive the fossils you obtained at Mt. Moon and the museum in Pewter City, but you just need to walk out of the building and then return to claim the fossil Pokémon. They're all revived at level 5. | |||
There is also another in-game trade: {{bp|Ponyta}} for {{bp|Seel}}, just talk to the blond guy in green. | |||
{| {{prettytable|notwide=1|text center=1}} | {| {{prettytable|notwide=1|text center=1}} | ||
| Line 215: | Line 73: | ||
!style= |For | !style= |For | ||
|- | |- | ||
|[[File:HelixFossil.png|40px]][[bulbapedia: | |[[File:HelixFossil.png|40px]][[bulbapedia:Dome and Helix Fossils|Helix Fossil]] | ||
|style="background-color:#{{Pokemon color|Rock}};"|[[File:Pokemon 138Omanyte.png|40px]]{{bp|Omanyte}} | |style="background-color:#{{Pokemon color|Rock}};"|[[File:Pokemon 138Omanyte.png|40px]]{{bp|Omanyte}} | ||
|- | |- | ||
|[[File:DomeFossil.png|40px]][[bulbapedia: | |[[File:DomeFossil.png|40px]][[bulbapedia:Dome and Helix Fossils|Dome Fossil]] | ||
|style="background-color:#{{Pokemon color|Rock}};"|[[File:Pokemon 140Kabuto.png|40px]]{{bp|Kabuto}} | |style="background-color:#{{Pokemon color|Rock}};"|[[File:Pokemon 140Kabuto.png|40px]]{{bp|Kabuto}} | ||
|- | |- | ||
|[[File:OldAmber.png|40px]][[bulbapedia: | |[[File:OldAmber.png|40px]][[bulbapedia:Old Amber|Old Amber]] | ||
|style="background-color:#{{Pokemon color|Rock}};"|[[File:Pokemon 142Aerodactyl.png|40px]]{{bp|Aerodactyl}} | |style="background-color:#{{Pokemon color|Rock}};"|[[File:Pokemon 142Aerodactyl.png|40px]]{{bp|Aerodactyl}} | ||
|- | |- | ||
| Line 227: | Line 85: | ||
|style="background-color:#{{Pokemon color|Water}};"|[[File:Pokemon 086Seel.png|40px]]{{bp|Seel}} | |style="background-color:#{{Pokemon color|Water}};"|[[File:Pokemon 086Seel.png|40px]]{{bp|Seel}} | ||
|} | |} | ||
{{ContentBoxContainer}} | |||
{{Pokemon/New|title=#140 Kabuto|contents=[[File:Pokemon 140Kabuto.png|Kabuto|right]] | |||
{{bp|Kabuto}}, one of the Fossil Pokémon you can choose at '''Mt. Moon''', is a Rock/Water Pokémon that possesses great attack and defense stats. | |||
Kabuto's moveset is somewhat better than its counterpart, including moves such as {{bpm|Mega Drain}} and {{bpm|Ancient Power}}. | |||
Unfortunately, Kabuto's special stats are somewhat low, a major weakness for a Water Pokémon, and given that you receive it so late and at a pitiful level 5, it just is not worth adding to your team. Kabuto evolves into {{bp|Kabutops}} at level 40.}} | |||
{{Pokemon/New|title=#138 Omanyte|contents=[[File:Pokemon 138Omanyte.png|Omanyte|left]] | |||
{{bp|Omanyte}}, the other Fossil Pokémon you can choose at '''Mt. Moon''', is a Rock/Water Pokémon with excellent Special Attack and defense stats. | |||
Omanyte lacks a good moveset, but can unlock great potential if it is obtained with the {{bpa|Swift Swim}} ability and then taught {{bpm|Rain Dance}} by TM. This combo exponentially increases its speed, and combined with other choice TM's and HM's such as {{bpm|Surf}}, it can become a worthwhile Water Pokémon for your team. | |||
Unfortunately, you'll obtain Omanyte at level 5, and for many players it may not be worth raising it when other Water Pokémon are available much earlier and with similar stats. Omanyte evolves into {{bp|Omastar}} at level 40.}} | |||
{{Pokemon/New|title=#142 Aerodactyl|contents=[[File:Pokemon 142Aerodactyl.png|left]] | |||
{{bp|Aerodactyl}}, the Fossil Pokemon, is arguably one of the best Flying Pokemon in the game. Sporting Rock/Flying types, strong Attack and Speed stats, and a good moveset, Aerodactyl is an excellent choice for any team. | |||
Aerodactyl will learn great moves such as {{bpm|Ancient Power}} and {{bpm|Wing Attack}} that will benefit from STAB, and can be taught a variety of TM's as well. Unfortunately, Aerodactyl is obtained very late in the game, and at a measly Level 5, it becomes quite a hassle to raise it to a respectable level. | |||
If you do choose to add Aerodactyl to your team, it is heavily recommended that you obtain it with the {{bpa|Rock Head}} ability, as it allows it to combo with {{bpm|Double-Edge}}, a taught move that will help Aerodactyl decimate most opponents in one shot.}} | |||
</div> | |||
{{-}} | {{-}} | ||
==Pokémon Mansion== | ==Pokémon Mansion== | ||
{{sidebar|width=300px|title=Get the Secret Key|contents=Find the Secret Key to unlock the Cinnabar Gym door and fight Blaine for a shot at the Volcano Badge.}} | |||
{{sidebar|width= | |||
The Pokémon Mansion is a decrepit, burned-down mansion. It got its name because a famous Pokémon Researcher once lived there. Amongst the rubble and wreckage is information that the scientists who once worked there obtained a Mew and impregnated it with the genetically altered Mewtwo, who destroyed the Mansion in its escape. | The Pokémon Mansion is a decrepit, burned-down mansion. It got its name because a famous Pokémon Researcher once lived there. Amongst the rubble and wreckage is information that the scientists who once worked there obtained a Mew and impregnated it with the genetically altered Mewtwo, who destroyed the Mansion in its escape. | ||
To access the Cinnabar Gym, you have to enter the mansion and find the Secret Key to unlock the door of the | To access the Cinnabar Gym, you have to enter the mansion and find the '''Secret Key''' to unlock the door of the gym. The Pokémon Mansion has four floors. Doors can be unlocked in the mansion by pressing switches hidden in Pokémon statues. | ||
=== | ===1F=== | ||
[[File:Pokemon FRLG PokémonMansion1F.png|left|thumb|400px|Pokémon Mansion 1F]] | |||
Look for items, but proceed to the second floor from the stairs at the end of the main hall. There are plenty of interesting wild Pokémon. | |||
====Trainers==== | |||
{{ContentBoxContainer}} | |||
{{Pokemon/Trainer|FRLG}} | |||
{{Pokemon/Trainer row|FRLG|Youngster|Johnson|544}} | |||
{{Pokemon/Trainer mon|FRLG|023|33}} | |||
{{Pokemon/Trainer mon|FRLG|023|33}} | |||
{{Pokemon/Trainer mon|FRLG|020|34}} | |||
{{Pokemon/Trainer row|FRLG|Scientist|Ted|1392}} | |||
{{Pokemon/Trainer mon|FRLG|101|29}} | |||
{{Pokemon/Trainer mon|FRLG|110|29}} | |||
|} | |||
</div> | |||
{ | ====Pokémon found==== | ||
| | {{ContentBoxContainer}} | ||
| | {{Pokemon/Wild|FR}} | ||
{{Pokemon/Wild row|FRLG||019|26,28|15|bp=1}} | |||
{{Pokemon/Wild row|FRLG||020|32,36|30|bp=1}} | |||
{{Pokemon/Wild row|FRLG||058|30,32|15|bp=1}} | |||
{{Pokemon/Wild row|FRLG||088|28|5|bp=1}} | |||
{{Pokemon/Wild row|FRLG||109|28,30|30|bp=1}} | |||
| | {{Pokemon/Wild row|FRLG||110|32|5|bp=1}} | ||
| | |||
| | |||
| | |||
| | |||
| | |||
| | |||
|} | |} | ||
{{Pokemon/Wild|LG}} | |||
{{Pokemon/Wild row|FRLG||019|26,28|15}} | |||
| | {{Pokemon/Wild row|FRLG||020|32,36|30}} | ||
| | {{Pokemon/Wild row|FRLG||037|30,32|15|bp=1}} | ||
{{Pokemon/Wild row|FRLG||088|28,30|30}} | |||
{{Pokemon/Wild row|FRLG||089|32|5|bp=1}} | |||
{{Pokemon/Wild row|FRLG||109|28|5}} | |||
| | |||
|32 | |||
|30 | |||
| | |||
|30 | |||
| | |||
| | |||
| | |||
| | |||
| | |||
| | |||
| | |||
| | |||
| | |||
| | |||
| | |||
| | |||
|5 | |||
|} | |} | ||
</div> | |||
====Items==== | |||
* Escape Rope ( | * Moon Stone (Hidden in a pile of rubble on the west side of the main foyer and its pillars) | ||
* Carbos ( | * Escape Rope (In the middle of a row of pillars) | ||
* Protein ( | * Carbos (In a room with rows of plants, near the stairs to the basement) | ||
* Protein (In a locked room, alongside a barrier of rubble) | |||
{{-}} | {{-}} | ||
=== | ===2F=== | ||
Turn off the switch in the room where you entered, to open the northwest room sliding door and go up the stairs to the third floor. | Turn off the switch in the room where you entered, to open the northwest room sliding door and go up the stairs to the third floor. | ||
[[File: | [[File:Pokemon FRLG PokémonMansion2F.png|left|thumb|400px|Pokémon Mansion 2F]] | ||
{ | ====Trainers==== | ||
| | {{ContentBoxContainer}} | ||
| | {{Pokemon/Trainer|FRLG}} | ||
{{Pokemon/Trainer row|FRLG|Burglar|Arnie|2992}} | |||
{{Pokemon/Trainer mon|FRLG|004|34}} | |||
{{Pokemon/Trainer mon|FRLG|005|34}} | |||
| | |||
| | |||
|} | |} | ||
</div> | |||
{ | ====Pokémon found==== | ||
| | {{ContentBoxContainer}} | ||
| | {{Pokemon/Wild|FR}} | ||
{{Pokemon/Wild row|FRLG||019|26,28|15|bp=1}} | |||
{{Pokemon/Wild row|FRLG||020|32,36|30|bp=1}} | |||
{{Pokemon/Wild row|FRLG||058|30,32|15|bp=1}} | |||
{{Pokemon/Wild row|FRLG||088|28|5|bp=1}} | |||
{{Pokemon/Wild row|FRLG||109|28,30|30|bp=1}} | |||
{{Pokemon/Wild row|FRLG||110|32|5|bp=1}} | |||
| | |} | ||
| | {{Pokemon/Wild|LG}} | ||
| | {{Pokemon/Wild row|FRLG||019|26,28|15}} | ||
|30 | {{Pokemon/Wild row|FRLG||020|32,36|30}} | ||
| | {{Pokemon/Wild row|FRLG||037|30,32|15|bp=1}} | ||
| | {{Pokemon/Wild row|FRLG||088|28,30|30}} | ||
| | {{Pokemon/Wild row|FRLG||089|32|5|bp=1}} | ||
| | {{Pokemon/Wild row|FRLG||109|28|5}} | ||
| | |||
|28 | |||
|30 | |||
| | |||
| | |||
| | |||
| | |||
| | |||
|26 | |||
|15 | |||
| | |||
| | |||
|30 | |||
|15 | |||
| | |||
| | |||
| | |||
| | |||
| | |||
| | |||
| | |||
| | |||
| | |||
| | |||
| | |||
|} | |} | ||
</div> | |||
====Items==== | |||
* Calcium ( | * Calcium (In the most northeastern room, behind a pile of rubble) | ||
* Zinc ( | * Zinc (On the balcony) | ||
* HP Up ( | * HP Up (In the eastern room, accessible by a balcony stairway from the third floor) | ||
{{-}} | {{-}} | ||
=== | ===3F=== | ||
Turn the switch in front of the stairs where you entered on and go to the hallway in the middle of the floor. Drop from the pit on the left (the widest one), you will fall on the previously inaccessible southeast area of the first floor. Go down the stairway to the basement. | Turn the switch in front of the stairs where you entered on and go to the hallway in the middle of the floor. Drop from the pit on the left (the widest one), you will fall on the previously inaccessible southeast area of the first floor. Go down the stairway to the basement. | ||
[[File: | [[File:Pokemon FRLG PokémonMansion3F.png|left|thumb|400px|Pokémon Mansion 3F]] | ||
{ | ====Trainers==== | ||
| | {{ContentBoxContainer}} | ||
{{Pokemon/Trainer|FRLG}} | |||
{{Pokemon/Trainer row|FRLG|Burglar|Simon|3344}} | |||
{{Pokemon/Trainer mon|FRLG|038|38}} | |||
{{Pokemon/Trainer row|FRLG|Scientist|Braydon|1584}} | |||
{{Pokemon/Trainer mon|FRLG|081|33}} | |||
{{Pokemon/Trainer mon|FRLG|082|33}} | |||
{{Pokemon/Trainer mon|FRLG|100|33}} | |||
| | |||
| | |||
| | |||
| | |||
| | |||
|} | |} | ||
</div> | |||
{ | ====Pokémon found==== | ||
| | {{ContentBoxContainer}} | ||
| | {{Pokemon/Wild|FR}} | ||
{{Pokemon/Wild row|FRLG||019|26,28|15|bp=1}} | |||
{{Pokemon/Wild row|FRLG||020|32,36|30|bp=1}} | |||
{{Pokemon/Wild row|FRLG||058|30,32|15|bp=1}} | |||
{{Pokemon/Wild row|FRLG||088|28|5|bp=1}} | |||
{{Pokemon/Wild row|FRLG||109|28,30|30|bp=1}} | |||
{{Pokemon/Wild row|FRLG||110|32|5|bp=1}} | |||
| | |} | ||
| | {{Pokemon/Wild|LG}} | ||
| | {{Pokemon/Wild row|FRLG||019|26,28|15}} | ||
|30 | {{Pokemon/Wild row|FRLG||020|32,36|30}} | ||
| | {{Pokemon/Wild row|FRLG||037|30,32|15|bp=1}} | ||
| | {{Pokemon/Wild row|FRLG||088|28,30|30}} | ||
| | {{Pokemon/Wild row|FRLG||089|32|5|bp=1}} | ||
| | {{Pokemon/Wild row|FRLG||109|28|5}} | ||
| | |||
|28 | |||
|30 | |||
| | |||
| | |||
| | |||
| | |||
| | |||
|26 | |||
|15 | |||
| | |||
| | |||
|30 | |||
|15 | |||
| | |||
| | |||
| | |||
| | |||
| | |||
| | |||
| | |||
| | |||
| | |||
| | |||
| | |||
|} | |} | ||
</div> | |||
====Items==== | |||
* Iron ( | * Iron (In the northeast corner room) | ||
* Max Potion ( | * Max Potion (In the southwestern room) | ||
* Rare Candy (Hidden at the eastern end of an otherwise-empty dead-end hallway) | * Rare Candy (Hidden at the eastern end of an otherwise-empty dead-end hallway) | ||
{{-}} | |||
{{ | ===B1F=== | ||
{{sidebar|width=300px|title=What does a man with power want?|contents=Don't forget to grab TM22 {{bpm|Solar Beam}} and TM14 {{bpm|Blizzard}}, these are two very powerful Grass and Ice moves, respectively.}} | |||
Proceed to the south center room and turn the switch off, exit from the west side and enter the north area from the east door, which now will be open. Turn the switch on the northeastern room and then go to the northwestern room to get the '''Secret Key''' from the desk, you'll finally be able to open the Cinnabar Gym. | |||
[[File:Pokemon FRLG PokémonMansionB.png|left|thumb|400px|Pokémon Mansion B1F]] | |||
====Trainers==== | |||
{{ContentBoxContainer}} | |||
{{Pokemon/Trainer|FRLG}} | |||
{{Pokemon/Trainer row|FRLG|Burglar|Lewis|2992}} | |||
{{Pokemon/Trainer mon|FRLG|058|34}} | |||
{{Pokemon/Trainer mon|FRLG|077|34}} | |||
{{Pokemon/Trainer row|FRLG|Scientist|Ivan|1632}} | |||
{{Pokemon/Trainer mon|FRLG|081|34}} | |||
{{Pokemon/Trainer mon|FRLG|101|34}} | |||
|} | |||
</div> | |||
====Pokémon found==== | |||
{| {{ | {{ContentBoxContainer}} | ||
| | {{Pokemon/Wild|FR}} | ||
| | {{Pokemon/Wild row|FRLG||019|26|5|bp=1}} | ||
{{Pokemon/Wild row|FRLG||020|34,38|30|bp=1}} | |||
{{Pokemon/Wild row|FRLG||058|30,32|15|bp=1}} | |||
{{Pokemon/Wild row|FRLG||088|28|5|bp=1}} | |||
{{Pokemon/Wild row|FRLG||109|28,30|30|bp=1}} | |||
| | {{Pokemon/Wild row|FRLG||110|34|5|bp=1}} | ||
| | {{Pokemon/Wild row|FRLG||132|30|10|bp=1}} | ||
| | |} | ||
| | {{Pokemon/Wild|LG}} | ||
| | {{Pokemon/Wild row|FRLG||019|26|5}} | ||
| | {{Pokemon/Wild row|FRLG||020|34,38|30}} | ||
| | {{Pokemon/Wild row|FRLG||037|30,32|15|bp=1}} | ||
| | {{Pokemon/Wild row|FRLG||088|28,30|30}} | ||
{{Pokemon/Wild row|FRLG||089|34|5|bp=1}} | |||
{{Pokemon/Wild row|FRLG||109|28|5}} | |||
{{Pokemon/Wild row|FRLG||132|30|10}} | |||
|} | |} | ||
</div> | |||
====Items==== | |||
* {{bpm|Solar Beam}} (In the western room with many plants) | |||
* Full Restore (In the southwest corner) | |||
* '''Secret Key''' (On a table in the northwestern room) | |||
* {{bpm|Blizzard}} (In the northern room, in front of four identical machines) | |||
* Elixir (Hidden in the northeastern room) | |||
{{-}} | |||
{| {{ | ==Pokémon found== | ||
| | {{ContentBoxContainer}} | ||
|- | {{Pokemon/Fishing|FR|1|1|1}} | ||
{{Pokemon/Fishing row|FRLG|129|5|100|0|0|bp=1}} | |||
{{Pokemon/Fishing row|FRLG|098|5-15|0|20|0|bp=1}} | |||
{{Pokemon/Fishing row|FRLG|116|5-15|0|60|0|bp=1}} | |||
{{Pokemon/Fishing row|FRLG|129|5-15|0|20|0|bp=1}} | |||
{{Pokemon/Fishing row|FRLG|054|25-35|0|0|1|bp=1}} | |||
{{Pokemon/Fishing row|FRLG|090|15-25|0|0|40|bp=1}} | |||
|- | {{Pokemon/Fishing row|FRLG|116|15-25|0|0|40|bp=1}} | ||
| | {{Pokemon/Fishing row|FRLG|117|25-35|0|0|4|bp=1}} | ||
| | {{Pokemon/Fishing row|FRLG|130|15-25|0|0|15|bp=1}} | ||
| | |} | ||
| | {{Pokemon/Fishing|LG|1|1|1}} | ||
| | {{Pokemon/Fishing row|FRLG|129|5|100|0|0}} | ||
| | {{Pokemon/Fishing row|FRLG|098|5-15|0|60|0}} | ||
| | {{Pokemon/Fishing row|FRLG|116|5-15|0|20|0}} | ||
| | {{Pokemon/Fishing row|FRLG|129|5-15|0|20|0}} | ||
| | {{Pokemon/Fishing row|FRLG|079|25-35|0|0|1|bp=1}} | ||
| | {{Pokemon/Fishing row|FRLG|080|25-35|0|0|4|bp=1}} | ||
| | {{Pokemon/Fishing row|FRLG|098|15-25|0|0|40|bp=1}} | ||
| | {{Pokemon/Fishing row|FRLG|120|15-25|0|0|40|bp=1}} | ||
| | {{Pokemon/Fishing row|FRLG|130|15-25|0|0|15}} | ||
| | |||
| | |||
| | |||
| | |||
| | |||
| | |||
|15 | |||
| | |||
| | |||
| | |||
| | |||
| | |||
| | |||
| | |||
|- | |||
| | |||
| | |||
|5 | |||
| | |||
| | |||
| | |||
|- | |||
| | |||
| | |||
| | |||
| | |||
| | |||
| | |||
|- | |||
| | |||
| | |||
| | |||
| | |||
| | |||
| | |||
|} | |} | ||
</div> | |||
==New Pokémon== | ==New Pokémon== | ||
{{ContentBoxContainer}} | |||
{{Pokemon/New|title=#109 Koffing|contents=[[File:Pokemon 109Koffing.png|Koffing|right]] | |||
Fans of the show will probably recognize this Pokemon. {{bp|Koffing}} is a pure Poison Pokemon with a very high defense and decent attack stats. Koffing's moveset appears to be focused upon Self-Sacrifice for the better good. | |||
This moveset includes {{bpm|Selfdestruct}} and {{bpm|Explosion}}, moves which will make the user faint, but will inflict massive damage onto the opponent. In addition, {{bpm|Destiny Bond}} and {{bpm|Memento}} also entail fainting to take down the opponent, or severely weaken it. | |||
This moveset includes {{bpm|Selfdestruct}} and {{bpm|Explosion}}, moves which will make the user faint, but will inflict massive damage onto the opponent. In addition, {{bpm|Destiny Bond}} and {{bpm|Memento}} also entail fainting to take down the opponent, or severely weaken it. | |||
Including Koffing in your team | Including Koffing in your team to use self-destructing attacks is certainly feasible, but most players will probably seek different strategies to defeat the Elite Four. Koffing evolves into {{bp|Weezing}} at level 35.}} | ||
| [[File:Pokemon 088Grimer.png|Grimer|left]] Another pure Poison | {{Pokemon/New|title=#088 Grimer|contents=[[File:Pokemon 088Grimer.png|Grimer|left]] | ||
Another pure Poison-type, {{bp|Grimer}} is a Pokémon clearly shaped as a "tank" type of battle Pokémon, being used to stall and delay opponents. | |||
A player seeking to use Grimer in battle will probably take advantage of its defensive moves such as {{bpm|Minimize}} and {{bpm|Acid Armor}}, to deflect and endure the attacks of the opponent, while attacking with {{bpm|Sludge}} or {{bpm|Sludge Bomb}} and letting the poison status ailment take the opponent down. | A player seeking to use Grimer in battle will probably take advantage of its defensive moves such as {{bpm|Minimize}} and {{bpm|Acid Armor}}, to deflect and endure the attacks of the opponent, while attacking with {{bpm|Sludge}} or {{bpm|Sludge Bomb}} and letting the poison status ailment take the opponent down. | ||
Despite Grimer's strong HP and defensive stats, there are other Poison | Despite Grimer's strong HP and defensive stats, there are other Poison Pokémon that are much more versatile and appropriate to the "tank" role. Thus, Grimer is best left behind in your PC. Grimer evolves into {{bp|Muk}} at level 38.}} | ||
| | {{Pokemon/New|title=#090 Shellder|contents=[[File:Pokemon 090Shellder.png|Shellder|right]] | ||
A Pokémon exclusive to FireRed, {{bp|Shellder}}'s defenses are off the scale, and also brings not too shabby attack and Special Attack stats to the table. | |||
Shellder's moveset is mostly focused on Ice attacks such as {{bpm|Icicle Spear}} and {{bpm|Aurora Beam}}, but can also learn {{bpm|Surf}} and {{bpm|Waterfall}} through HM's. | |||
Shellder's moveset is mostly focused on Ice attacks such as {{bpm|Icicle Spear}} and {{bpm|Aurora Beam}}, but can also | |||
Once evolved into {{bp|Cloyster}} through a Water Stone, this | Once evolved into {{bp|Cloyster}} through a Water Stone, this Pokémon will become a great choice for your Water/Ice spot in your team, competing with {{bp|Lapras}} or {{bp|Vaporeon}}.}} | ||
| [[File:Pokemon 120Staryu.png|Staryu|left]] A | {{Pokemon/New|title=#120 Staryu|contents=[[File:Pokemon 120Staryu.png|Staryu|left]] | ||
A Pokémon exclusive to LeafGreen, {{bp|Staryu}}, has decent stats across the board, and a great moveset. | |||
Staryu's moves are very varied, including {{bpm|Recover}}, {{bpm|Light Screen}} and {{bpm|Bubblebeam}}. In addition, when evolved to {{bp|Starmie}} by a Water Stone, it gains the Psychic type as well, allowing it to take full advantage of strong TM's and HM's such as {{bpm|Psychic}} and {{bpm|Surf}}. | Staryu's moves are very varied, including {{bpm|Recover}}, {{bpm|Light Screen}} and {{bpm|Bubblebeam}}. In addition, when evolved to {{bp|Starmie}} by a Water Stone, it gains the Psychic type as well, allowing it to take full advantage of strong TM's and HM's such as {{bpm|Psychic}} and {{bpm|Surf}}. | ||
Starmie makes a good sweeper and a great choice for the Water spot in your team, but remember to capture a Staryu that carries the {{bpa|Natural Cure}} ability, to allow it to cure itself of any status ailments. | Starmie makes a good sweeper and a great choice for the Water spot in your team, but remember to capture a Staryu that carries the {{bpa|Natural Cure}} ability, to allow it to cure itself of any status ailments.}} | ||
</div> | |||
==Cinnabar Gym== | ==Cinnabar Gym== | ||
[[File:Pokemon FRLG CinnabarGym.png|right|thumb|400px|Cinnabar Gym]] | |||
The Cinnabar Gym is the official gym of Cinnabar Island. It specializes on Fire-type Pokémon. The gym leader is Blaine. If you defeat him, you'll receive the Volcano Badge. | |||
The Cinnabar Gym is the official gym of Cinnabar Island. It specializes on Fire-type Pokémon. The | |||
The Cinnabar Gym is a high-tech affair featuring a series of sealed doors. You must answer trivia questions about various Pokémon to unseal the doors, do this by interacting with the machines connected to the walls. However, when you fail to answer a trivia question correctly, a battle with either a Burglar or Super Nerd results, an alternative to unsealing the doors. The questions are: | The Cinnabar Gym is a high-tech affair featuring a series of sealed doors. You must answer trivia questions about various Pokémon to unseal the doors, do this by interacting with the machines connected to the walls. However, when you fail to answer a trivia question correctly, a battle with either a Burglar or Super Nerd results, an alternative to unsealing the doors. The questions are: | ||
| Line 666: | Line 365: | ||
Even if you answer the question right, you still have the option to challenge the Trainer. | Even if you answer the question right, you still have the option to challenge the Trainer. | ||
{{ContentBoxContainer}} | |||
{{Pokemon/Trainer|FRLG}} | |||
{{Pokemon/Trainer row|FRLG|Burglar|Quinn|3168}} | |||
{{Pokemon/Trainer mon|FRLG|058|36}} | |||
{{Pokemon/Trainer mon|FRLG|037|36}} | |||
{{Pokemon/Trainer mon|FRLG|038|36}} | |||
{{Pokemon/Trainer row|FRLG|Super Nerd|Erik|864}} | |||
{{Pokemon/Trainer mon|FRLG|037|36}} | |||
{{Pokemon/Trainer mon|FRLG|037|36}} | |||
{{Pokemon/Trainer mon|FRLG|038|36}} | |||
{{Pokemon/Trainer row|FRLG|Super Nerd|Avery|816}} | |||
| | {{Pokemon/Trainer mon|FRLG|077|34}} | ||
{{Pokemon/Trainer mon|FRLG|004|34}} | |||
{{Pokemon/Trainer mon|FRLG|037|34}} | |||
{{Pokemon/Trainer mon|FRLG|058|34}} | |||
| | {{Pokemon/Trainer row|FRLG|Burglar|Ramon|3608}} | ||
| | {{Pokemon/Trainer mon|FRLG|077|41}} | ||
| | {{Pokemon/Trainer row|FRLG|Super Nerd|Derek|984}} | ||
{{Pokemon/Trainer mon|FRLG|078|41}} | |||
{{Pokemon/Trainer row|FRLG|Burglar|Dusty|3256}} | |||
{{Pokemon/Trainer mon|FRLG|037|37}} | |||
{{Pokemon/Trainer mon|FRLG|058|37}} | |||
{{Pokemon/Trainer row|FRLG|Super Nerd|Zac|888}} | |||
| | {{Pokemon/Trainer mon|FRLG|058|37}} | ||
| | {{Pokemon/Trainer mon|FRLG|037|37}} | ||
| | |} | ||
</div> | |||
===Leader=== | |||
{{ContentBoxContainer}} | |||
{{Pokemon/Trainer|FRLG}} | |||
|+'''Gym Leader''' | |||
{{Pokemon/Trainer row|FRLG|Leader Blaine||4700}} | |||
{{Pokemon/Trainer mon|FRLG|058|42}} | |||
{{Pokemon/Trainer mon|FRLG|077|40}}{{Pokemon/Trainer mon|FRLG|078|42}}{{Pokemon/Trainer mon|FRLG|059|47}} | |||
| | |||
| | |||
| | |||
| | |||
| | |||
| | |||
| | |||
| | |||
| | |||
| | |||
| | |||
| | |||
| | |||
| | |||
| | |||
| | |||
| | |||
| | |||
| | |||
| | |||
|} | |} | ||
</div> | |||
===Items=== | |||
* | * TM38 Fire Blast (Given to you by gym leader Blaine for defeating them) | ||
==A surprise twist in the plot== | |||
Now that you've acquired the Volcano Badge, Bill will meet you outside the gym. He mentions that he's going to one of the '''Sevii Islands''' and wants you to come along. You may very well say "NO" for now and Bill will wait at the Pokémon Center for you when you're ready. This is because, although you're not told, there will be no way to return to Kanto for a good while! So make sure you wrap up your tasks around Kanto before you feel like departing for a while to some remote islands. Finish up route 21 and take with you anything that you might need before leaving to the new Sevii Islands. Just don't get your hopes up for entirely new Pokémon... This isn't it yet. | |||
{{Footer Nav|game=Pokémon FireRed and LeafGreen|prevpage=Seafoam Islands |nextpage=Route 21}} | {{Footer Nav|game=Pokémon FireRed and LeafGreen|prevpage=Seafoam Islands |nextpage=Route 21}} | ||
Revision as of 01:05, 29 February 2024
Cinnabar Island is an island located in the southwestern part of the Kanto region. It is home to the Cinnabar Lab and the Pokémon Mansion, as well as a gym, where you'll face leader Blaine, bearer of the Volcano Badge. However, access to the gym is at first barred.
| Poké Mart | |
| Ultra Ball | |
| Great Ball | |
| Hyper Potion | |
| Revive | |
| Full Heal | |
| Escape Rope | |
| Max Repel | |
Pokémon Lab
The Pokémon Lab is a laboratory founded by Dr. Fuji. It reveals important bits of information regarding the obscure storyline, if you can tie all the dots together correctly.
Here, you should hand your Fossil from Mt. Moon and your Old Amber from Pewter City's Science Museum to get two resurrected Pokémon otherwise unobtainable.
Room 1
In the first room of the laboratory, there are two people who will offer to trade Pokémon. The old man will offer his Electrode for a Raichu, and the girl will want to trade her Tangela for a Venonat.
| Trade | For |
|---|---|
Items
- Stardust (Held by Tangeny, the Tangela up for trading)
Room 2
In the second room, there is a Move Tutor on the left who will teach Metronome to one of your Pokémon. Metronome randomly selects a move to perform, so it's more of a gimmick and not really a reliable move.
Room 3
In the third room, there is a weird doctor who will revive the fossils you obtained at Mt. Moon and the museum in Pewter City, but you just need to walk out of the building and then return to claim the fossil Pokémon. They're all revived at level 5.
There is also another in-game trade: Ponyta for Seel, just talk to the blond guy in green.
| Trade | For |
|---|---|
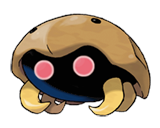
Kabuto, one of the Fossil Pokémon you can choose at Mt. Moon, is a Rock/Water Pokémon that possesses great attack and defense stats.
Kabuto's moveset is somewhat better than its counterpart, including moves such as Mega Drain and Ancient Power.
Unfortunately, Kabuto's special stats are somewhat low, a major weakness for a Water Pokémon, and given that you receive it so late and at a pitiful level 5, it just is not worth adding to your team. Kabuto evolves into Kabutops at level 40.
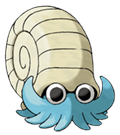
Omanyte, the other Fossil Pokémon you can choose at Mt. Moon, is a Rock/Water Pokémon with excellent Special Attack and defense stats.
Omanyte lacks a good moveset, but can unlock great potential if it is obtained with the Swift Swim ability and then taught Rain Dance by TM. This combo exponentially increases its speed, and combined with other choice TM's and HM's such as Surf, it can become a worthwhile Water Pokémon for your team.
Unfortunately, you'll obtain Omanyte at level 5, and for many players it may not be worth raising it when other Water Pokémon are available much earlier and with similar stats. Omanyte evolves into Omastar at level 40.
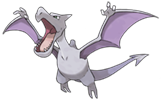
Aerodactyl, the Fossil Pokemon, is arguably one of the best Flying Pokemon in the game. Sporting Rock/Flying types, strong Attack and Speed stats, and a good moveset, Aerodactyl is an excellent choice for any team.
Aerodactyl will learn great moves such as Ancient Power and Wing Attack that will benefit from STAB, and can be taught a variety of TM's as well. Unfortunately, Aerodactyl is obtained very late in the game, and at a measly Level 5, it becomes quite a hassle to raise it to a respectable level.
If you do choose to add Aerodactyl to your team, it is heavily recommended that you obtain it with the Rock Head ability, as it allows it to combo with Double-Edge, a taught move that will help Aerodactyl decimate most opponents in one shot.
Pokémon Mansion
The Pokémon Mansion is a decrepit, burned-down mansion. It got its name because a famous Pokémon Researcher once lived there. Amongst the rubble and wreckage is information that the scientists who once worked there obtained a Mew and impregnated it with the genetically altered Mewtwo, who destroyed the Mansion in its escape.
To access the Cinnabar Gym, you have to enter the mansion and find the Secret Key to unlock the door of the gym. The Pokémon Mansion has four floors. Doors can be unlocked in the mansion by pressing switches hidden in Pokémon statues.
1F
Look for items, but proceed to the second floor from the stairs at the end of the main hall. There are plenty of interesting wild Pokémon.
Trainers
Pokémon found
| FireRed | |||
|---|---|---|---|
| Pokémon | Level | Rate | |
| Rattata | 26,28 | 15% | |
| Raticate | 32,36 | 30% | |
| Growlithe | 30,32 | 15% | |
| Grimer | 28 | 5% | |
| Koffing | 28,30 | 30% | |
| Weezing | 32 | 5% | |
| LeafGreen | |||
|---|---|---|---|
| Pokémon | Level | Rate | |
| Rattata | 26,28 | 15% | |
| Raticate | 32,36 | 30% | |
| Vulpix | 30,32 | 15% | |
| Grimer | 28,30 | 30% | |
| Muk | 32 | 5% | |
| Koffing | 28 | 5% | |
Items
- Moon Stone (Hidden in a pile of rubble on the west side of the main foyer and its pillars)
- Escape Rope (In the middle of a row of pillars)
- Carbos (In a room with rows of plants, near the stairs to the basement)
- Protein (In a locked room, alongside a barrier of rubble)
2F
Turn off the switch in the room where you entered, to open the northwest room sliding door and go up the stairs to the third floor.
Trainers
Pokémon found
| FireRed | |||
|---|---|---|---|
| Pokémon | Level | Rate | |
| Rattata | 26,28 | 15% | |
| Raticate | 32,36 | 30% | |
| Growlithe | 30,32 | 15% | |
| Grimer | 28 | 5% | |
| Koffing | 28,30 | 30% | |
| Weezing | 32 | 5% | |
| LeafGreen | |||
|---|---|---|---|
| Pokémon | Level | Rate | |
| Rattata | 26,28 | 15% | |
| Raticate | 32,36 | 30% | |
| Vulpix | 30,32 | 15% | |
| Grimer | 28,30 | 30% | |
| Muk | 32 | 5% | |
| Koffing | 28 | 5% | |
Items
- Calcium (In the most northeastern room, behind a pile of rubble)
- Zinc (On the balcony)
- HP Up (In the eastern room, accessible by a balcony stairway from the third floor)
3F
Turn the switch in front of the stairs where you entered on and go to the hallway in the middle of the floor. Drop from the pit on the left (the widest one), you will fall on the previously inaccessible southeast area of the first floor. Go down the stairway to the basement.
Trainers
Pokémon found
| FireRed | |||
|---|---|---|---|
| Pokémon | Level | Rate | |
| Rattata | 26,28 | 15% | |
| Raticate | 32,36 | 30% | |
| Growlithe | 30,32 | 15% | |
| Grimer | 28 | 5% | |
| Koffing | 28,30 | 30% | |
| Weezing | 32 | 5% | |
| LeafGreen | |||
|---|---|---|---|
| Pokémon | Level | Rate | |
| Rattata | 26,28 | 15% | |
| Raticate | 32,36 | 30% | |
| Vulpix | 30,32 | 15% | |
| Grimer | 28,30 | 30% | |
| Muk | 32 | 5% | |
| Koffing | 28 | 5% | |
Items
- Iron (In the northeast corner room)
- Max Potion (In the southwestern room)
- Rare Candy (Hidden at the eastern end of an otherwise-empty dead-end hallway)
B1F
Proceed to the south center room and turn the switch off, exit from the west side and enter the north area from the east door, which now will be open. Turn the switch on the northeastern room and then go to the northwestern room to get the Secret Key from the desk, you'll finally be able to open the Cinnabar Gym.
Trainers
Pokémon found
| FireRed | |||
|---|---|---|---|
| Pokémon | Level | Rate | |
| Rattata | 26 | 5% | |
| Raticate | 34,38 | 30% | |
| Growlithe | 30,32 | 15% | |
| Grimer | 28 | 5% | |
| Koffing | 28,30 | 30% | |
| Weezing | 34 | 5% | |
| Ditto | 30 | 10% | |
| LeafGreen | |||
|---|---|---|---|
| Pokémon | Level | Rate | |
| Rattata | 26 | 5% | |
| Raticate | 34,38 | 30% | |
| Vulpix | 30,32 | 15% | |
| Grimer | 28,30 | 30% | |
| Muk | 34 | 5% | |
| Koffing | 28 | 5% | |
| Ditto | 30 | 10% | |
Items
- Solar Beam (In the western room with many plants)
- Full Restore (In the southwest corner)
- Secret Key (On a table in the northwestern room)
- Blizzard (In the northern room, in front of four identical machines)
- Elixir (Hidden in the northeastern room)
Pokémon found
| FireRed | |||||
|---|---|---|---|---|---|
| Pokémon | Level | Old Rod | Good Rod | Super Rod | |
| Magikarp | 5 | 100% | - | - | |
| Krabby | 5-15 | - | 20% | - | |
| Horsea | 5-15 | - | 60% | - | |
| Magikarp | 5-15 | - | 20% | - | |
| Psyduck | 25-35 | - | - | 1% | |
| Shellder | 15-25 | - | - | 40% | |
| Horsea | 15-25 | - | - | 40% | |
| Seadra | 25-35 | - | - | 4% | |
| Gyarados | 15-25 | - | - | 15% | |
| LeafGreen | |||||
|---|---|---|---|---|---|
| Pokémon | Level | Old Rod | Good Rod | Super Rod | |
| Magikarp | 5 | 100% | - | - | |
| Krabby | 5-15 | - | 60% | - | |
| Horsea | 5-15 | - | 20% | - | |
| Magikarp | 5-15 | - | 20% | - | |
| Slowpoke | 25-35 | - | - | 1% | |
| Slowbro | 25-35 | - | - | 4% | |
| Krabby | 15-25 | - | - | 40% | |
| Staryu | 15-25 | - | - | 40% | |
| Gyarados | 15-25 | - | - | 15% | |
New Pokémon
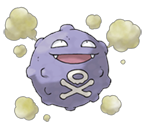
Fans of the show will probably recognize this Pokemon. Koffing is a pure Poison Pokemon with a very high defense and decent attack stats. Koffing's moveset appears to be focused upon Self-Sacrifice for the better good. This moveset includes Selfdestruct and Explosion, moves which will make the user faint, but will inflict massive damage onto the opponent. In addition, Destiny Bond and Memento also entail fainting to take down the opponent, or severely weaken it.
Including Koffing in your team to use self-destructing attacks is certainly feasible, but most players will probably seek different strategies to defeat the Elite Four. Koffing evolves into Weezing at level 35.
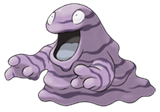
Another pure Poison-type, Grimer is a Pokémon clearly shaped as a "tank" type of battle Pokémon, being used to stall and delay opponents.
A player seeking to use Grimer in battle will probably take advantage of its defensive moves such as Minimize and Acid Armor, to deflect and endure the attacks of the opponent, while attacking with Sludge or Sludge Bomb and letting the poison status ailment take the opponent down.
Despite Grimer's strong HP and defensive stats, there are other Poison Pokémon that are much more versatile and appropriate to the "tank" role. Thus, Grimer is best left behind in your PC. Grimer evolves into Muk at level 38.
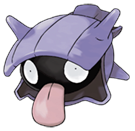
A Pokémon exclusive to FireRed, Shellder's defenses are off the scale, and also brings not too shabby attack and Special Attack stats to the table. Shellder's moveset is mostly focused on Ice attacks such as Icicle Spear and Aurora Beam, but can also learn Surf and Waterfall through HM's.
Once evolved into Cloyster through a Water Stone, this Pokémon will become a great choice for your Water/Ice spot in your team, competing with Lapras or Vaporeon.
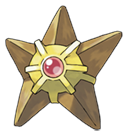
A Pokémon exclusive to LeafGreen, Staryu, has decent stats across the board, and a great moveset.
Staryu's moves are very varied, including Recover, Light Screen and Bubblebeam. In addition, when evolved to Starmie by a Water Stone, it gains the Psychic type as well, allowing it to take full advantage of strong TM's and HM's such as Psychic and Surf.
Starmie makes a good sweeper and a great choice for the Water spot in your team, but remember to capture a Staryu that carries the Natural Cure ability, to allow it to cure itself of any status ailments.
Cinnabar Gym
The Cinnabar Gym is the official gym of Cinnabar Island. It specializes on Fire-type Pokémon. The gym leader is Blaine. If you defeat him, you'll receive the Volcano Badge.
The Cinnabar Gym is a high-tech affair featuring a series of sealed doors. You must answer trivia questions about various Pokémon to unseal the doors, do this by interacting with the machines connected to the walls. However, when you fail to answer a trivia question correctly, a battle with either a Burglar or Super Nerd results, an alternative to unsealing the doors. The questions are:
- "Pokémon Quiz! Get it right and the door opens to the next room! Get it wrong and face a trainer! If you want to conserve your Pokémon for the Gym Leader... Then get it right! Here we go! Caterpie evolves into Metapod?"
- Yes, Caterpie evolves into Metapod, then into Butterfree.
- "There are 9 certified Pokémon League Badges?"
- No, there are only 8.
- "Poliwag evolves 3 times?"
- No, he evolves only twice; first into Poliwhirl, then into Poliwrath.
- "Are thunder moves effective against ground element-type Pokémon?"
- No, it's the other way around.
- "Pokémon of the same kind and level are not identical?"
- Yes, they're not.
- "TM28 contains Tombstony?"
- No, it contains Dig.
Even if you answer the question right, you still have the option to challenge the Trainer.
Leader
Items
- TM38 Fire Blast (Given to you by gym leader Blaine for defeating them)
A surprise twist in the plot
Now that you've acquired the Volcano Badge, Bill will meet you outside the gym. He mentions that he's going to one of the Sevii Islands and wants you to come along. You may very well say "NO" for now and Bill will wait at the Pokémon Center for you when you're ready. This is because, although you're not told, there will be no way to return to Kanto for a good while! So make sure you wrap up your tasks around Kanto before you feel like departing for a while to some remote islands. Finish up route 21 and take with you anything that you might need before leaving to the new Sevii Islands. Just don't get your hopes up for entirely new Pokémon... This isn't it yet.


