Hilda has charged you with finding out more about Airships from the man who knows the most about them in the world: Cid. Cid is still based out of Poft, so you need to return there to speak with him. Ask him about Airships, and he'll mention Sunfire to you. Be sure to learn the term. if you ask Cid about it, he won't have any advice on where you can find it. You'll need to return to Altair with the information you received.
Back in Altair, speak with Hilda and ask about Sunfire. She will acknowledge that it is the crest of Kashuan, and that the flame still burns in Kashuan Keep. Firion will suggest that Sunfire can be used to destroy the Dreadnought, and Hilda will agree that you should collect the Sunfire, but first you need an item that you can use to transport the flame. However, it is Hilda's father, the king, who mentions an item you need to break the seal to the flame: the Goddess Bell. Return to Hilda and mention the bell to her. She will reveal that the bell is held in the snow plains, and that Josef may have some ideas to retrieve it.
With this new knowledge, you must return to Salamand and speak with Josef. After making the journey back to Salamand, locate him and ask him about the Goddess Bell. He will tell you that you'll need his snowcraft to reach it, and that he keeps the snowcraft hidden in the mine at Semitt Falls. He says it's in a secret room near a blue stone on the first floor, behind and to the right. Regretful that he couldn't help you with the Mythril, he agrees to join you now.
By default, Josef possesses no weapon because he is skilled in bare hand combat. There is no need to equip him with a weapon since he fights better without one. Don't invest too heavily on armor for Josef, opting to provide him whatever you find for free in dungeons.
After making your way back to the cave entrance above Semitt Falls, and walk around to the blue stone that's visible from the entrance. Stand above and to the right of the stone, and examine the wall on your right. Josef will ask you to stand back while he presses the switch which grants access to the hidden room beyond. Inside, you will find the snowcraft.
Now that you have the snowcraft, you can attempt to cross the freezing snowy plains north of Salamand. In order to reach the entrance, you must walk west from Salamand until the mountain range above allows you to head north. Walk north enough and you will see the entrance to the plains. Like the canoe on water, the snowcraft will automatically engage as soon as you step onto the snow.
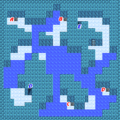
The snowy climate is host to a number of enemies you have not yet encountered, like Snowmen and Icicles, so be prepared. To reach the cave where the Goddess Bell is contained, you must travel far across the snow plains to the east. Near the end of the plains, you'll find the entrance to the cave in small mountain range in the center.
Your exploration through the cave will start out fairly linearly. You'll only have to travel short distances off course to open two treasure chests which contain some Gil. Watch out for new enemies like the Icicles or the Dead Heads. Beware of Grenades that self-destruct in the middle of battle for a good amount of damage to one character. You may notice a door near the bottom of the floor, but you can't enter it; it's an exit from a shortcut found lower down.
2nd floor
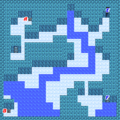
On your initial visit to this floor, you'll only be able to explore the upper left portion. Ignore the door that you pass by and head down to the third floor. By taking a different staircase down there, you'll be able to return to this floor purely for the sake of collecting the contents of the treasure chests.
3rd floor
When you first arrive here, take the path to the left in order to find a chest which contains Antartic Wind, a usable item in combat which casts the equivalent of a high level Blizzard spell. Then return the way you came and head left. Follow the path up to find the staircase which leads you to the unexplored portion of the second floor. When you're finished, continue down to the bottom, and then to the left to reach the fourth floor.
4th floor
Collect the two chests at the top, along with the two other chests near the bottom, before heading up the path along the right side to the staircase below. Ignore the entrance to the room along the way.
5th floor
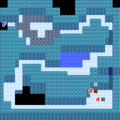
Explore the upper and lower left portions of the floor to find more treasure chests, including one with an Ancient Sword. Then make your way to the lower right corner of the floor. There, you will find a door, and if you step through it, you will find a small colony of large beavers. They won't make sense to you until you try to speak with the leader, at which point Guy will indicate that he is capable of understanding, and communicating with, these animals. Have Guy ask about the Goddess Bell, and the beaver will inform him of a secret passage to the right. Push against the right wall until you are able to walk through and reach the final floor.
6th floor
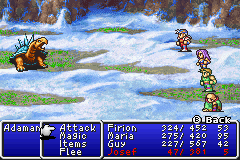
The journey through the final floor will be a linear expedition from the entrance at the top to the exit below. Waiting for you at the bottom is one of the bosses, an adamantoise. The adamantoise is incredibly resistant to physical attacks, so you'll need to use magic if you want to get rid of it quickly. As a reptile, he is particularly susceptible to Blizzard. You may want to consider using the Arctic Wind item that you collected if you don't have anyone capable of casting Blizzard. Defeating it will open up access to the path beyond, where you will find the Goddess Bell. Collect it, and a shortcut staircase will be provided for you to gain very quick access back to the first floor.
Floor 1: A) 100 Gil, B) 150 Gil
Floor 2: A) Battle Axe, B) Antidote, C) Mythril Mace
Floor 3: A) Arctic Wind
Floor 4: A) Potion, B) Blizzard Tome, C) Potion, D) Mythril Spear
Back on the first floor, make your way around to the staircase that leads out of the cave. As you approach, you will be stopped by none other than Borghen himself. He'd rather take you on in battle than present his defeat to the emperor. (Before the fight, it is recommended to remove all Josef's gear, as he won't need it anymore and you may need the gold.) Borghen can be defeated using regular attacks, but he will sometimes cast CURE 3 on himself.
Angered by his defeat, he will release a boulder that will threaten to crush your entire party. Sensing your impending doom, Josef will sacrifice himself by delaying the boulder and giving the rest of you a chance to escape before ultimately dying.
Once you're back outside, use the snowcraft to return to the West, and then visit Salamand to restore your health. Everyone in Salamand will be sorry to hear about Josef's fate, but they will encourage you to get the Goddess Bell to Kashuan.
You are by no means required to return to Altair. However, if you choose to do so, you will have to break the bad news about Josef to Hilda. She will reconfirm that you need to take the Goddess Bell to Kashuan to break the seal. Then she reports that she and Cid will meet you out there when you are finished.