Jump to navigation
Jump to search


(Created framework) |
(Added HP for all buildings.) |
||
| Line 4: | Line 4: | ||
===Field Headquarters=== | ===Field Headquarters=== | ||
{{AoA Unit|image=[[File:AOA USAHeadquarters.png|250px]]|HP= | {{AoA Unit|image=[[File:AOA USAHeadquarters.png|250px]]|HP=400|cost={{AOAResource|Credits|200}}|upgrades=Green Zone}} | ||
[[Image:AOA USAHeadquarters.png|left]] | [[Image:AOA USAHeadquarters.png|left]] | ||
<gallery width=120 height=120> | <gallery width=120 height=120> | ||
| Line 12: | Line 12: | ||
{{-}} | {{-}} | ||
===Refinery=== | ===Refinery=== | ||
{{AoA Unit|image=[[File:AOA USARefinery.png|250px]]|HP= | {{AoA Unit|image=[[File:AOA USARefinery.png|250px]]|HP=150|cost={{AOAResource|Credits|200}}|upgrades=Green Zone, Deep Mining, Hydrofracking}} | ||
[[Image:AOA USARefinery.png|left]] | [[Image:AOA USARefinery.png|left]] | ||
<gallery width=120 height=120> | <gallery width=120 height=120> | ||
| Line 20: | Line 20: | ||
{{-}} | {{-}} | ||
===Barracks=== | ===Barracks=== | ||
{{AoA Unit|image=[[File:AOA USABarracks.png|250px]]|HP= | {{AoA Unit|image=[[File:AOA USABarracks.png|250px]]|HP=60|cost={{AOAResource|Credits|200}}|upgrades=Green Zone}} | ||
[[Image:AOA USABarracksIcon.png|left]] | [[Image:AOA USABarracksIcon.png|left]] | ||
{{-}} | {{-}} | ||
===LEM=== | ===LEM=== | ||
{{AoA Unit|image=[[File:AOA LEM.png|250px]]|HP= | {{AoA Unit|image=[[File:AOA LEM.png|250px]]|HP=50|cost={{AOAResource|Credits|200}}|upgrades=Green Zone}} | ||
[[Image:AOA LEMIcon.png|left]] | [[Image:AOA LEMIcon.png|left]] | ||
<gallery width=120 height=120> | <gallery width=120 height=120> | ||
| Line 32: | Line 32: | ||
{{-}} | {{-}} | ||
===MG Nest=== | ===MG Nest=== | ||
{{AoA Unit|image=[[File:AOA MGNest.png|250px]]|HP= | {{AoA Unit|image=[[File:AOA MGNest.png|250px]]|HP=400|cost={{AOAResource|Credits|200}}|upgrades=Green Zone}} | ||
[[Image:AOA MGNestIcon.png|left]] | [[Image:AOA MGNestIcon.png|left]] | ||
<gallery width=120 height=120> | <gallery width=120 height=120> | ||
| Line 41: | Line 41: | ||
{{-}} | {{-}} | ||
===Field Generator=== | ===Field Generator=== | ||
{{AoA Unit|image=[[File:AOA FieldGenerator.png|250px]]|HP= | {{AoA Unit|image=[[File:AOA FieldGenerator.png|250px]]|HP=25|cost={{AOAResource|Credits|200}}|upgrades=Green Zone}} | ||
[[Image:AOA FieldGeneratorIcon.png|left]] | [[Image:AOA FieldGeneratorIcon.png|left]] | ||
{{-}} | {{-}} | ||
===Light Vehicle Bay=== | ===Light Vehicle Bay=== | ||
{{AoA Unit|image=[[File:AOA LightVehicleBay.png|250px]]|HP= | {{AoA Unit|image=[[File:AOA LightVehicleBay.png|250px]]|HP=120|cost={{AOAResource|Credits|200}}|upgrades=Green Zone}} | ||
[[Image:AOA LightVehicleBayIcon.png|left]] | [[Image:AOA LightVehicleBayIcon.png|left]] | ||
{{-}} | {{-}} | ||
===Field Hospital=== | ===Field Hospital=== | ||
{{AoA Unit|image=[[File:AOA FieldHospital.png|250px]]|HP= | {{AoA Unit|image=[[File:AOA FieldHospital.png|250px]]|HP=120|cost={{AOAResource|Credits|200}}|upgrades=Green Zone}} | ||
[[Image:AOA FieldHospitalIcon.png|left]] | [[Image:AOA FieldHospitalIcon.png|left]] | ||
{{-}} | {{-}} | ||
===Logistical Center=== | ===Logistical Center=== | ||
{{AoA Unit|image=[[File:AOA LogisticalCenter.png|250px]]|HP= | {{AoA Unit|image=[[File:AOA LogisticalCenter.png|250px]]|HP=60|cost={{AOAResource|Credits|200}}|upgrades=Green Zone}} | ||
[[Image:AOA LogisticalCenterIcon.png|left]] | [[Image:AOA LogisticalCenterIcon.png|left]] | ||
{{-}} | {{-}} | ||
===Armoury=== | ===Armoury=== | ||
{{AoA Unit|image=[[File:AOA Armoury.png|250px]]|HP= | {{AoA Unit|image=[[File:AOA Armoury.png|250px]]|HP=60|cost={{AOAResource|Credits|200}}|upgrades=Green Zone}} | ||
[[Image:AOA ArmouryIcon.png|left]] | [[Image:AOA ArmouryIcon.png|left]] | ||
{{-}} | {{-}} | ||
| Line 67: | Line 67: | ||
==DEFCON 2 Structures== | ==DEFCON 2 Structures== | ||
===Power Plant=== | ===Power Plant=== | ||
{{AoA Unit|image=[[File:AOA PowerPlant.png|250px]]|HP= | {{AoA Unit|image=[[File:AOA PowerPlant.png|250px]]|HP=120|cost={{AOAResource|Credits|200}}|upgrades=Green Zone}} | ||
[[Image:AOA PowerPlantIcon.png|left]] | [[Image:AOA PowerPlantIcon.png|left]] | ||
{{-}} | {{-}} | ||
===FOB=== | ===FOB=== | ||
{{AoA Unit|image=[[File:AOA FOBIcon.png|250px]]|HP= | {{AoA Unit|image=[[File:AOA FOBIcon.png|250px]]|HP=125|cost={{AOAResource|Credits|200}}|upgrades=Green Zone}} | ||
[[Image:AOA FOBIcon.png|left]] | [[Image:AOA FOBIcon.png|left]] | ||
{{-}} | {{-}} | ||
===Heavy | ===Heavy Vehicles Bay=== | ||
{{AoA Unit|image=[[File:AOA HeavyVehicleBay.png|250px]]|HP= | {{AoA Unit|image=[[File:AOA HeavyVehicleBay.png|250px]]|HP=140|cost={{AOAResource|Credits|200}}|upgrades=Green Zone}} | ||
[[Image:AOA HeavyVehicleBayIcon.png|left]] | [[Image:AOA HeavyVehicleBayIcon.png|left]] | ||
{{-}} | {{-}} | ||
===Helipad=== | ===Helipad=== | ||
{{AoA Unit|image=[[File:AOA USAHelipad.png|250px]]|HP= | {{AoA Unit|image=[[File:AOA USAHelipad.png|250px]]|HP=70|cost={{AOAResource|Credits|200}}|upgrades=Green Zone}} | ||
[[Image:AOA USAHelipadIcon.png|left]] | [[Image:AOA USAHelipadIcon.png|left]] | ||
{{-}} | {{-}} | ||
===Air Control Center=== | ===Air Control Center=== | ||
{{AoA Unit|image=[[File:AOA AirControlCenter.png|250px]]|HP= | {{AoA Unit|image=[[File:AOA AirControlCenter.png|250px]]|HP=80|cost={{AOAResource|Credits|200}}|upgrades=Green Zone}} | ||
[[Image:AOA AirControlCenterIcon.png|left]] | [[Image:AOA AirControlCenterIcon.png|left]] | ||
{{-}} | {{-}} | ||
===Phalanx=== | ===Phalanx=== | ||
{{AoA Unit|image=[[File:AOA Phalanx.png|250px]]|HP= | {{AoA Unit|image=[[File:AOA Phalanx.png|250px]]|HP=100|cost={{AOAResource|Credits|200}}|upgrades=Green Zone}} | ||
[[Image:AOA PhalanxIcon.png|left]] | [[Image:AOA PhalanxIcon.png|left]] | ||
{{-}} | {{-}} | ||
| Line 98: | Line 98: | ||
==DEFCON 1 Structures== | ==DEFCON 1 Structures== | ||
===Processing Center=== | ===Processing Center=== | ||
{{AoA Unit|image=[[File:AOA ProcessingCenter.png|250px]]|HP= | {{AoA Unit|image=[[File:AOA ProcessingCenter.png|250px]]|HP=150|cost={{AOAResource|Credits|200}}|upgrades=Green Zone, Deep Mining, Hydrofracking}} | ||
[[Image:AOA ProcessingCenterIcon.png|left]] | [[Image:AOA ProcessingCenterIcon.png|left]] | ||
{{-}} | {{-}} | ||
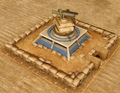
===Accumulator=== | ===Accumulator=== | ||
{{AoA Unit|image=[[File:AOA Accumulator.png|250px]]|HP= | {{AoA Unit|image=[[File:AOA Accumulator.png|250px]]|HP=180|cost={{AOAResource|Credits|200}}|upgrades=Green Zone}} | ||
[[Image:AOA AccumulatorIcon.png|left]] | [[Image:AOA AccumulatorIcon.png|left]] | ||
{{-}} | {{-}} | ||
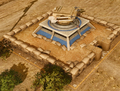
===Administrative Center=== | ===Administrative Center=== | ||
{{AoA Unit|image=[[File:AOA AdministrativeCenter.png|250px]]|HP= | {{AoA Unit|image=[[File:AOA AdministrativeCenter.png|250px]]|HP=50|cost={{AOAResource|Credits|200}}|upgrades=Green Zone}} | ||
[[Image:AOA AdministrativeCenterIcon.png|left]] | [[Image:AOA AdministrativeCenterIcon.png|left]] | ||
{{-}} | {{-}} | ||
===Patriot Defence System=== | ===Patriot Defence System=== | ||
{{AoA Unit|image=[[File:AOA Patriot.png|250px]]|HP= | {{AoA Unit|image=[[File:AOA Patriot.png|250px]]|HP=60|cost={{AOAResource|Credits|200}}|upgrades=Green Zone}} | ||
[[Image:AOA PatriotIcon.png|left]] | [[Image:AOA PatriotIcon.png|left]] | ||
{{-}} | |||
===Rare Earth LEM=== | |||
{{AoA Unit|image=[[File:AOA RareEarthLEM.png|250px]]|HP=50|cost={{AOAResource|Credits|200}}|upgrades=Green Zone}} | |||
[[Image:AOA RareEarthLEMIcon.png|left]] | |||
{{-}} | {{-}} | ||
===Peacekeeper Missile Silo=== | ===Peacekeeper Missile Silo=== | ||
{{AoA Unit|image=[[File:AOA USAHeadquarters.png|250px]]|HP= | {{AoA Unit|image=[[File:AOA USAHeadquarters.png|250px]]|HP=250|cost={{AOAResource|Credits|200}}|upgrades=Green Zone}} | ||
[[Image:AOA PeacekeeperSiloIcon.png|left]] | [[Image:AOA PeacekeeperSiloIcon.png|left]] | ||
<gallery width=120 height=120> | <gallery width=120 height=120> | ||
Revision as of 00:35, 28 January 2016
The US Army advances through three tiers, starting at DEFCON 3 and proceeding to DEFCON 1. Each level unlocks additional research technologies and stronger units. Advancing to the next DEFCON level is done through the Headquarters building.
DEFCON 3 Structures
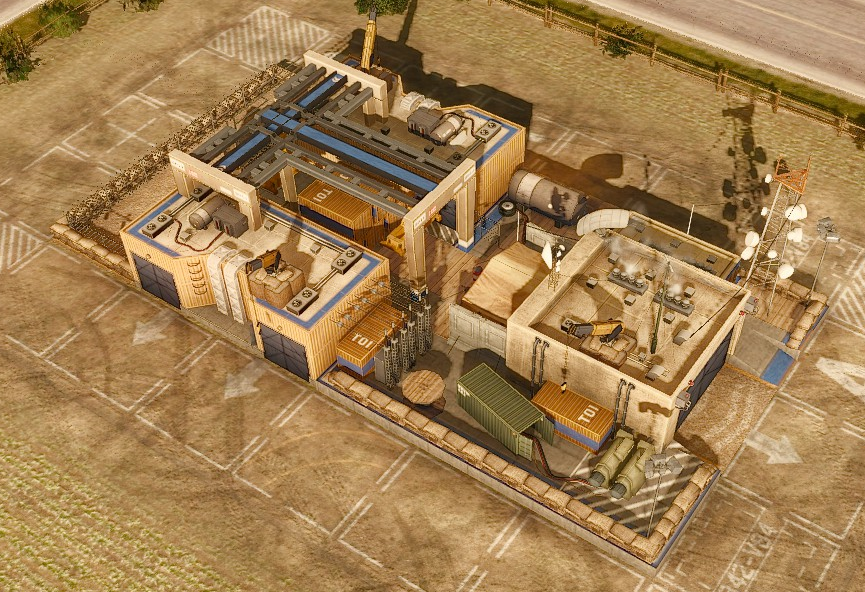
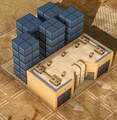
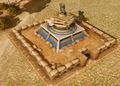
Field Headquarters
 | |
| HP | 400 |
|---|---|
| Cost | |
| Upgrades | Green Zone |
-
At DEFCON 2
-
At DEFCON 1


Refinery
 | |
| HP | 150 |
|---|---|
| Cost | |
| Upgrades | Green Zone, Deep Mining, Hydrofracking |
-
Fully stocked (oil)
-
Fully stocked (aluminum)
Barracks
 | |
| HP | 60 |
|---|---|
| Cost | |
| Upgrades | Green Zone |

LEM
 | |
| HP | 50 |
|---|---|
| Cost | |
| Upgrades | Green Zone |

-
Fully stocked (aluminum)
-
Fully stocked (rare earth)


MG Nest
 | |
| HP | 400 |
|---|---|
| Cost | |
| Upgrades | Green Zone |

-
With Stinger missiles
-
With TOW missile launcher
-
Fully upgraded


Field Generator
 | |
| HP | 25 |
|---|---|
| Cost | |
| Upgrades | Green Zone |

Light Vehicle Bay
 | |
| HP | 120 |
|---|---|
| Cost | |
| Upgrades | Green Zone |

Field Hospital
 | |
| HP | 120 |
|---|---|
| Cost | |
| Upgrades | Green Zone |

Logistical Center
 | |
| HP | 60 |
|---|---|
| Cost | |
| Upgrades | Green Zone |

Armoury
 | |
| HP | 60 |
|---|---|
| Cost | |
| Upgrades | Green Zone |

DEFCON 2 Structures
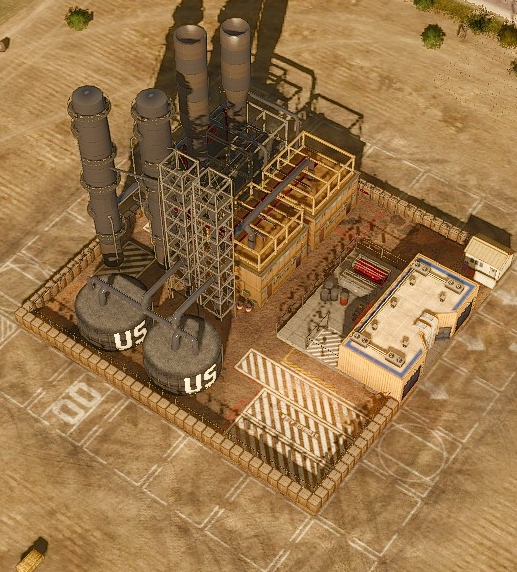
Power Plant
 | |
| HP | 120 |
|---|---|
| Cost | |
| Upgrades | Green Zone |

FOB
 | |
| HP | 125 |
|---|---|
| Cost | |
| Upgrades | Green Zone |
Heavy Vehicles Bay
 | |
| HP | 140 |
|---|---|
| Cost | |
| Upgrades | Green Zone |

Helipad
 | |
| HP | 70 |
|---|---|
| Cost | |
| Upgrades | Green Zone |

Air Control Center
| File:AOA AirControlCenter.png | |
| HP | 80 |
|---|---|
| Cost | |
| Upgrades | Green Zone |

Phalanx
 | |
| HP | 100 |
|---|---|
| Cost | |
| Upgrades | Green Zone |

DEFCON 1 Structures
Processing Center
 | |
| HP | 150 |
|---|---|
| Cost | |
| Upgrades | Green Zone, Deep Mining, Hydrofracking |

Accumulator
 | |
| HP | 180 |
|---|---|
| Cost | |
| Upgrades | Green Zone |

Administrative Center
 | |
| HP | 50 |
|---|---|
| Cost | |
| Upgrades | Green Zone |

Patriot Defence System
 | |
| HP | 60 |
|---|---|
| Cost | |
| Upgrades | Green Zone |

Rare Earth LEM
 | |
| HP | 50 |
|---|---|
| Cost | |
| Upgrades | Green Zone |

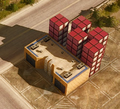
Peacekeeper Missile Silo
| |
| HP | 250 |
|---|---|
| Cost | |
| Upgrades | Green Zone |

-
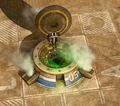
Tactical weapon ready.
