This one isn't too tough. You'll need to aim your shots at the Alma.
Get 3 of the 4 hearts and shoot the Skull twice before getting the 4th heart.
Wait on I4 for Leeper to come up and touch you.
Move the Snakey all the way left.
Wait for Alma to come into range and shoot it so you can move it to the upper wall. Head over to the chest.
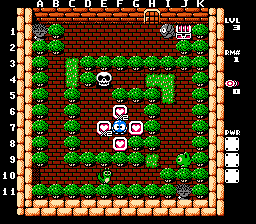
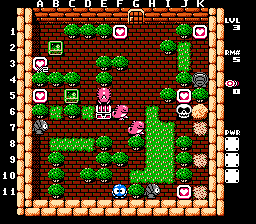
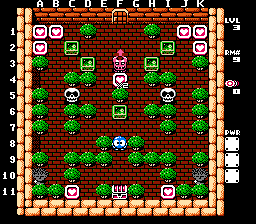
3-2
A Gol level where getting the right heart last can count.
Work your way to getting the heart on G6.
Take the long way around in the K-column and move the F9 EF to D8. Move the B8 one to C7. Move the B6 one to D5.
Go get the hearts on A1 and E5.
Take the D1 heart and again take the long way around in the K-column and head to the chest. You'll pass by some of the Gols, but they will miss you with their shots.
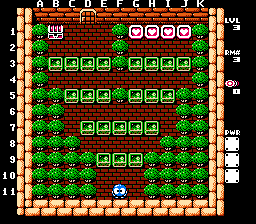
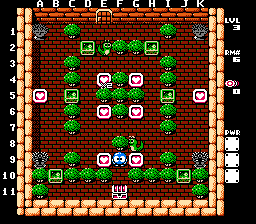
3-3
No enemies here. Just a bunch of EFs to move around.
Move the E9 and G9 EFs up one. Move the F9 right one.
Move the now E8 EF left one.
Move the E7 EF up one. Move the D7 EF left one. Move the now E6 EF right one.
Move the C5 and E5 EFs up one. Move the D5 EF right one. Move the now E4 EF all the way right.
Move the G3 and I3 EFs up one. Move the H3 EF left one. Get the 4 hearts.
Move the E3 EF all the way up and get the chest.
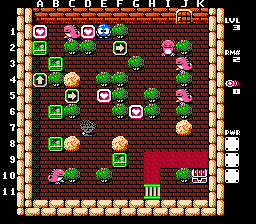
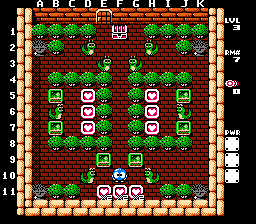
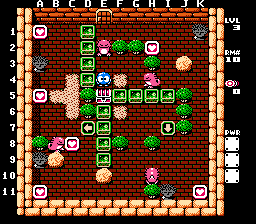
3-4
You'll need to reuse the Snakeys a few times in here.
Get all 5 central hearts. Move the G7 EF to G10, the G5 EF to J5, the E5 EF to E2, and the E7 EF to B7.
Quickly move the C8 Snakey all the way left and the D9 Snakey all the way down. Get the A11 heart and shoot both eggs again from a clear spot.
Move the C3 Snakey to A3 and move the I9 Snakey to I11.
When the 2 Snakeys from earlier return, move the D9 one all the way right and move the C8 one all the way up. Get the A1 and K11 hearts.
Move the H3 Snakey all the way up and move the I4 one all the way right. Get the last heart and the chest.
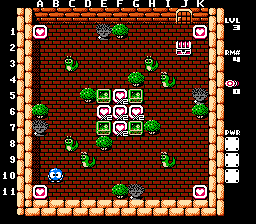
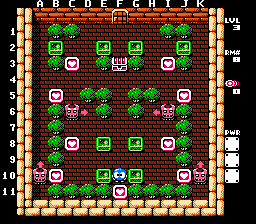
3-5
This room isn't too tough. Just save the A5 heart for last.
Go up across the big grass and get the F1 and A3 hearts.
Move the B2 EF to K3 and trap the Alma below it. Get the K1 heart.
Shoot the J6 Skull twice and get the heart above it.
Maneuver the C5 EF up, over, and down to I11 to trap the Alma. Get the J11 heart.