Fake Shemp (talk | contribs) (→Part 2) |
Fake Shemp (talk | contribs) (→Part 2: clean-up) |
||
| Line 49: | Line 49: | ||
{{control selector|Xbox 360,PlayStation 3,Keyboard (Arrows),Keyboard (WASD)}} | {{control selector|Xbox 360,PlayStation 3,Keyboard (Arrows),Keyboard (WASD)}} | ||
[[File:Braid World 2-2 puzzle 3+4.jpg|thumb|left|The two hard-to-reach puzzle pieces.]] | [[File:Braid World 2-2 puzzle 3+4.jpg|thumb|left|The two hard-to-reach puzzle pieces.]] | ||
Now that you have the necessary | Now that you have the necessary part—that is, either {{im|Braid Puzzle-2-3-1.png|x16px}}'''Puzzle Piece 2-3-1''' or {{im|Braid Puzzle-2-4-3.png|x16px}}'''Puzzle Piece 2-4-3'''—for accessing the last two puzzle pieces on this level you can move over to the puzzle piece canvas. Notice that painted on the two pieces necessary for solving this conundrum there seem to be an image which looks a fair bit like the platforms right next to the top part of the large canvas. That's because it ''is'' the same kind of platform; place it anywhere on the canvas and Tim can jump up on it, just like any other platform. This neat feature you will have to take advantage of to get the remaining puzzle pieces. | ||
{{-}} | {{-}} | ||
{{YouTube | {{YouTube | ||
| Line 59: | Line 59: | ||
|description= | |description= | ||
}} | }} | ||
Let's start with the one on the top. Place one of the platform pieces near lower right corner of the canvas and jump up on it. Then jump up again and press {{control|{{xbox|B}}|{{psx|C}}|{{kbd|up}}|{{kbd|W}}}} when at the top of the jump to open up the puzzle menu. Move the piece slightly up so that when Tim lands on it again it'll be a bit further up. Repeat until you're as far up as you can. It shouldn't be a problem to jump off and pick up {{im|Braid Puzzle-2-2-4.png|x16px}}'''Puzzle Piece 2-2-4''' now. | Let's start with the one on the top. Place one of the platform pieces near the lower right corner of the canvas and jump up on it. Then jump up again and press {{control|{{xbox|B}}|{{psx|C}}|{{kbd|up}}|{{kbd|W}}}} when at the top of the jump to open up the puzzle menu. Move the piece slightly up so that when Tim lands on it again it'll be a bit further up. Repeat until you're as far up as you can. It shouldn't be a problem to jump off and pick up {{im|Braid Puzzle-2-2-4.png|x16px}}'''Puzzle Piece 2-2-4''' now. | ||
{{-}} | {{-}} | ||
[[File:Braid World 2-2 extend platform.jpg|thumb|left|The monstar can walk on the piece as well.]] | [[File:Braid World 2-2 extend platform.jpg|thumb|left|The monstar can walk on the piece as well.]] | ||
Jump on down to the puzzle canvas again. Press {{control|{{xbox|B}}|{{psx|C}}|{{kbd|up}}|{{kbd|W}}}} and grab the piece you just used to get the previous puzzle piece with. Move it up to the upper left corner of the canvas and try to get it aligned with the platform the monstar is walking on. If aligned well enough the monstar will walk out on the extended platform. As soon as he does, press {{control|{{xbox|B}}|{{psx|C}}|{{kbd|up}}|{{kbd|W}}}} to open up the puzzle menu again. Move the platform piece away from the upper right corner and exit the menu. The monstar will fall down to where Tim is. Make sure he falls the right way; he need to be facing the puzzle piece you want to get. If not, rewind time and try again. When he makes his way over to the exit door with the puzzle piece over it, jump on him to bounce up to {{im|Braid Puzzle-2-2- | Jump on down to the puzzle canvas again. Press {{control|{{xbox|B}}|{{psx|C}}|{{kbd|up}}|{{kbd|W}}}} and grab the piece you just used to get the previous puzzle piece with. Move it up to the upper left corner of the canvas and try to get it aligned with the platform the monstar is walking on. If aligned well enough the monstar will walk out on the extended platform. As soon as he does, press {{control|{{xbox|B}}|{{psx|C}}|{{kbd|up}}|{{kbd|W}}}} to open up the puzzle menu again. Move the platform piece away from the upper right corner and exit the menu. The monstar will fall down to where Tim is. Make sure he falls the right way; he need to be facing the puzzle piece you want to get. If not, rewind time and try again. When he makes his way over to the exit door with the puzzle piece over it, jump on him to bounce up to {{im|Braid Puzzle-2-2-1.png|x16px}}'''Puzzle Piece 2-2-1'''. | ||
{{-}} | {{-}} | ||
Revision as of 20:28, 18 July 2015

The cloud room
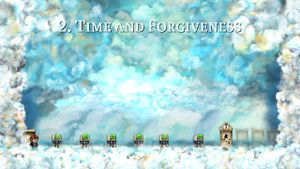
Before entering any world, you'll be taken to the cloud room. This room is the portal to any and all levels available in that particular world. The books resting on their pedestals will tell you the tale of Braid; of Tim's motivation.
To the right will be doors leading to the various levels in the world. In World 2, you can see there will be four levels to visit, but right now, only the first one is accessible. The rest will unlock as you travel through the world, discovering new levels.
The lunette above the door will tell you that there are three puzzle pieces to collect in the level behind that door. I you do collect one, that number will tick down, so you can easily keep track of which levels you haven't cleared yet.
 2-1 Three Easy Pieces
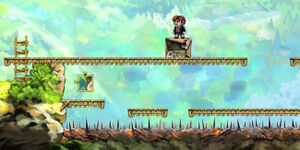
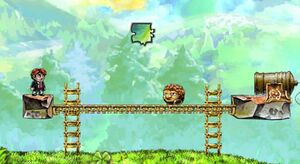
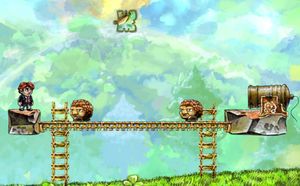
Here is the first level of the game and it's really simple. It introduces the game's controls and some basic game mechanics. You will begin by learning to jump over some steps then climb some fences. You will continue and see the first puzzle piece, then you will see the first enemy, a monstar. You will travel forward and see the second and third puzzle pieces and soon the end of the first level. Simple, right?
 |
 |
 |
 2-2 The Cloud Bridge
Almost all levels in Braid can be traversed simply by going right until you reach the exit door, but that makes for a very short and uninteresting game. The beauty of the levels lie in their obstacles. "Braid is about the journey, not the destination," to quote the official walkthrough. Hence, almost all of this walkthrough will explain how to get all puzzle pieces and other secrets of the game, not how to get through to the level's exit.
Part 1
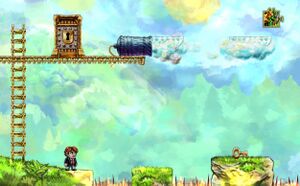
![]() 2-2 The Cloud Bridge will introduce you to new obstacles, and the first one you will notice right away is the locked gate. Luckily though, the key isn't so far away. Jump over the spikes and get it, then climb the ladder and open the gate. After the gate you will encounter floating clouds being shot out of a cannon. Simply jump onto one of them and glide on forward to
2-2 The Cloud Bridge will introduce you to new obstacles, and the first one you will notice right away is the locked gate. Luckily though, the key isn't so far away. Jump over the spikes and get it, then climb the ladder and open the gate. After the gate you will encounter floating clouds being shot out of a cannon. Simply jump onto one of them and glide on forward to ![]() Puzzle Piece 2-2-3.
Puzzle Piece 2-2-3.
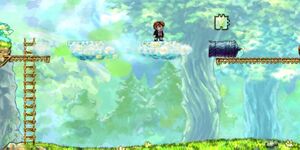
There will then be another cannon—with a puzzle piece on it—shooting clouds in the opposite direction. Jump on the clouds to get to the other side and get ![]() Puzzle Piece 2-2-2. Going on, there is a giant canvas where all your puzzle pieces can be placed together to form a painting. Further right you'll see an above platform with a puzzle piece on it, as well as another piece hovering right above the exit door. Sadly both pieces are unattainable at the moment and the exit to World 2-3 waits for you.
Puzzle Piece 2-2-2. Going on, there is a giant canvas where all your puzzle pieces can be placed together to form a painting. Further right you'll see an above platform with a puzzle piece on it, as well as another piece hovering right above the exit door. Sadly both pieces are unattainable at the moment and the exit to World 2-3 waits for you.
Part 2

Now that you have the necessary part—that is, either ![]() Puzzle Piece 2-3-1 or
Puzzle Piece 2-3-1 or ![]() Puzzle Piece 2-4-3—for accessing the last two puzzle pieces on this level you can move over to the puzzle piece canvas. Notice that painted on the two pieces necessary for solving this conundrum there seem to be an image which looks a fair bit like the platforms right next to the top part of the large canvas. That's because it is the same kind of platform; place it anywhere on the canvas and Tim can jump up on it, just like any other platform. This neat feature you will have to take advantage of to get the remaining puzzle pieces.
Puzzle Piece 2-4-3—for accessing the last two puzzle pieces on this level you can move over to the puzzle piece canvas. Notice that painted on the two pieces necessary for solving this conundrum there seem to be an image which looks a fair bit like the platforms right next to the top part of the large canvas. That's because it is the same kind of platform; place it anywhere on the canvas and Tim can jump up on it, just like any other platform. This neat feature you will have to take advantage of to get the remaining puzzle pieces.
Let's start with the one on the top. Place one of the platform pieces near the lower right corner of the canvas and jump up on it. Then jump up again and press ![]() when at the top of the jump to open up the puzzle menu. Move the piece slightly up so that when Tim lands on it again it'll be a bit further up. Repeat until you're as far up as you can. It shouldn't be a problem to jump off and pick up
when at the top of the jump to open up the puzzle menu. Move the piece slightly up so that when Tim lands on it again it'll be a bit further up. Repeat until you're as far up as you can. It shouldn't be a problem to jump off and pick up ![]() Puzzle Piece 2-2-4 now.
Puzzle Piece 2-2-4 now.
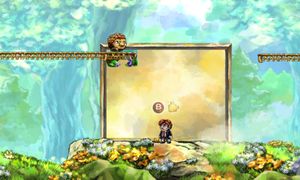
Jump on down to the puzzle canvas again. Press ![]() and grab the piece you just used to get the previous puzzle piece with. Move it up to the upper left corner of the canvas and try to get it aligned with the platform the monstar is walking on. If aligned well enough the monstar will walk out on the extended platform. As soon as he does, press
and grab the piece you just used to get the previous puzzle piece with. Move it up to the upper left corner of the canvas and try to get it aligned with the platform the monstar is walking on. If aligned well enough the monstar will walk out on the extended platform. As soon as he does, press ![]() to open up the puzzle menu again. Move the platform piece away from the upper right corner and exit the menu. The monstar will fall down to where Tim is. Make sure he falls the right way; he need to be facing the puzzle piece you want to get. If not, rewind time and try again. When he makes his way over to the exit door with the puzzle piece over it, jump on him to bounce up to
to open up the puzzle menu again. Move the platform piece away from the upper right corner and exit the menu. The monstar will fall down to where Tim is. Make sure he falls the right way; he need to be facing the puzzle piece you want to get. If not, rewind time and try again. When he makes his way over to the exit door with the puzzle piece over it, jump on him to bounce up to ![]() Puzzle Piece 2-2-1.
Puzzle Piece 2-2-1.
 2-3 Hunt!
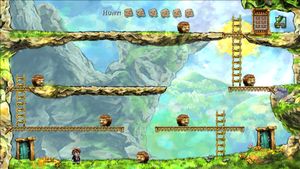
This stage is a little different than the previous ones since it introduces the monstar gate. With the new "Hunt!" section of the HUD it makes it pretty obvious how to open the gate. Once a monstar is defeated, a red cross is placed over its HUD image, and when they are all defeated the gate will open.
There is only one puzzle piece in this level and is located at the top right. To get it, begin by jumping on the first monstar you encounter and climb up the ladder. Do not kill the second monstar, jump over it and keep on going. After continuing forward and jumping on the next two, jump down and aim for the monstar you let be previously. It'll give you a boost for a slightly higher jump onto the next platform. Defeat the last two and get ![]() Puzzle Piece 2-3-1 behind the now open gate.
Puzzle Piece 2-3-1 behind the now open gate.
You should now have all you need to be able to grab the two puzzle pieces in ![]() 2-2 The Cloud Bridge that you couldn't get before. Walk back through the door you came in through if you want to grab them now, or continue through the door on the right if you want to pick them up later.
2-2 The Cloud Bridge that you couldn't get before. Walk back through the door you came in through if you want to grab them now, or continue through the door on the right if you want to pick them up later.
 2-4 Leap of Faith
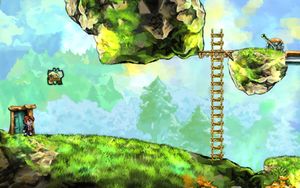
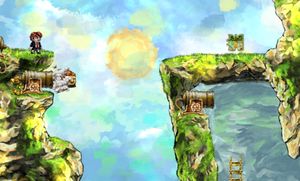
At this stage you'll find yourself just out of reach from a puzzle piece. Ignore it for a bit and continue further to reach a ladder with a lever at the top of it. Using the lever will operate the nearby platform. You can use this platform to guide a Monstar over to the other side of the fire pit below and then use the Monstar to get the first puzzle piece.
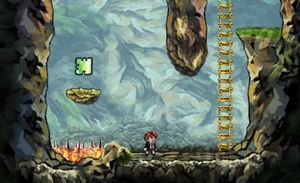
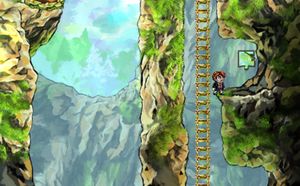
Now, continue onward by transporting Tim over the fire pit via the moving platform. On the other side you'll spot another puzzle piece and find another cannon firing Monstars down an abyss. Time your jump onto the Monstar and you'll reach the second piece. Take a leap of faith down the abyss and guide Tim down the left side to reach another puzzle piece. Continue up the ladder and try to avoid the incoming Monstars by taking shelter inside the small caves. On your way you'll find the final puzzle piece of the stage. At the end of the ladder you'll encounter your first Claw. Simply time your jump over it and continue to the checkered flag.
There are 4 puzzle pieces on this level, and a couple of them are a bit tricky to get.
|
|
 |
 |
|
|
 |
 |
