 4-1 The Pit
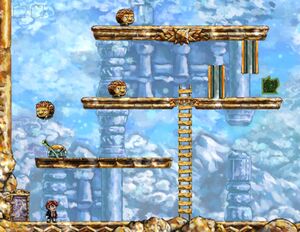
Introducing us to this new, fourth world is the usual Pit level. Moving around this level you probably notice something strange, as you move the time for all other objects flow with you. Moving right moves time forward, moving left moves it backward.
Move as far right as you can to make the Monstar grab the key. Notice how the green-glowing items are still unaffected by time manipulation. Jump down and steal the key from the unsuspecting Monstar, rewind time the usual way and move through the gate. As there are no puzzle pieces on this level, make your way through the exit door.
 4-2 Jumpman
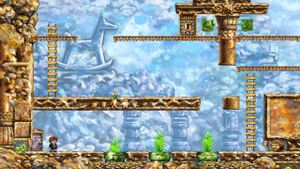
The start of this level will surely feel familiar to any fans of the old Donkey Kong. Do like Mario would've done and begin to climb your way up toward the big monkey at the top. When you've climbed up two ladders, you might notice that the third will be blocked off by a Monstar as soon as you try to climb it. You will need to find another way around, so go back to the second ladder and jump up the small platform beside it. Now, jump to your left and land on the Monstar falling down this side. You should be able to bounce off him several times all the way up to the monkey cannon as long as you move ever so slightly left while bouncing. Up here it's simply a matter of grabbing the piece.
From here you can probably see two locked gates with a puzzle piece between, so let's go find a key for them. Jump down to the ground level again and continue right. Move up the first ladder and make your way up to the key, jumping over any fireballs. Remember, the fireballs only move when you do, so take your time going up. When you've reached the key at the top, grabbing the second puzzle piece is a piece of cake, just jump down next to the cannon and take it.
With the key in hand you can now rewind time to the point where you took the first puzzle piece. Do not try to use it on the right hand side gate. If you try to open that gate, the gate will open, but as you'll be moving left, time will rewind and it will immediately close again. The key will be broken and used up, since it was green-glowing and not affected by time manipulation. So use it on the left gate and take the final piece of the level. Now, you can move out and continue your journey right. A Claw will stop your path if you try to reach the exit underneath the fireball obstacle course, so climb into it and jump over a cannon to reach the other side of the Claw as well as the exit.
In total, 3 puzzle pieces can be found on this level.
|
|
 |
 |
| |
 |
 4-3 Just Out of Reach
Start to climb up the first ladder you see when you enter the level. Climbing all the way up it is tricky though, because a Monstar will block the path for you. Instead, jump of at the platform with the lever on it. Flip it and nothing will happen; you will have to make it work by moving right. As you move right you might notice that the Monstar will move past the ladder this time, so you're free to climb up it. But this time, the very same Monstar is blocking the path to the puzzle piece. If only you could un-flip that lever somehow. Move on to the left and jump down on the falling Monstar and use it to bounce back up to the same platform again. You should now have guided Tim so far back left when you jumped that the switch will have un-flipped. Now you can use the Monstar which was blcoking your path to jump over the barrier sealing you off from the puzzle piece.
When you've reached the previous puzzle piece, you might wonder where the next on is. See that ladder on Tim's right leading up into the sky? It's up there. Unfortunately it's sealed off by a gate, so we will have to get the key located in the crawlspace under the sky-reaching ladder. Tim is too big to reach it, only the Monstar falling down close to you can pick it up from there. If you try to jump down you'll notice that either you kill the Monstar, or the Monstar kills you in the process. We need the Monstar alive, and the trick to keeping him alive is to kill him as far to the right in your jump as you can. When he dies you'll most likely be bounced up to the platform with the ladder. Carefully move to the left edge of the platform (Tim can change his direction mid-air, so maybe even feign-jump of its side, and move on back.) When you move left enough, the Monstar will be brought back to life. Move right and let him get the key for you. On the other side of the crawlspace, jump on him and get the key. Go back and climb the ladder to the sky, open the gate and collect the puzzle piece.
|
|
 |
 |
 4-4 Hunt!
It's another "Hunt!" level! The mechanic to open the gate is just as in the previous one; kill all the Monstars and the gate will open. However, if you try to kill all the same way as you did before—just picking them off as you make your way up the structure—you'll notice they come back to life as you start going left. Time is a cruel mistress.
The solution is to take note of the position of the Monstars when Tim is at his leftmost position on the map, for instance when at the entry door. When Tim is at this position, the Monstar which is furthest to the left is the one you have to deal with firstly. Then deal with them in order going right, the furthest right one being the last.
The leftmost one is the Monstar at the very top of the level, so climb all the way up and jump on him. The next two shared almost the exact same position on the map when Tim was at his leftest, so which one to kill first might be a bit tricky. You will have to check which one will be furthest lift when Tim kills it. As it turns out, that is the one on the platform just below the first one you killed. Climb down and jump on him. You can use the Monstar on the platform below to clear the big gap, just like when going up to the top.
Next is the third one. You can't go down the ladder since you will go too far left and resurrect the Monstars already killed. Go right, drop down to the level below and jump over the gap and kill your third Monstar. On the way back right you can drop down onto the lowest-most Monstar and dispose of him too.
There's only two Monstars left, and getting rid of the fifth one is as easy as walking over and jumping on it. But how can Tim make up to the last ones platform then? As long as you're moving left, the Monstars won't die, so if you continue moving slightly left when jumping on a Monstar, you can use it to gain significant jump boosts. Get on the right hand side of the lower Monstar and jump on his head, then try to guide Tim right and land on him again. This should give enough of a boost to be able to jump up to the last surviving Monstar. Jump on him too and the gate will open. The gate was green-glowing, so you can now move left again and go pick up your piece.
 4-5 Movement by Degrees

Three Claws greet you at this level. All of them are glowing green and as such move freely in and out their pipes, regardless of Tim's movement. To the left of you is a key which will be used to open the gate at the top of screen. Tim is too big to get the key himself, so you will have to guide the Monstar through the path of Claws so he can grab it for you.
The two first Claws the Monstar need to pass are simply a question of timing right. While Tim moves right the Monstar will move right. When both Claws are down, make a run for it and remember to jump over the Monstar as he crosses your path. Don't worry if he gets killed by the third Claw; you can just walk back a bit and he'll come back to the living. Climb up the ladder and jump off on the floating bit of pillar on Tim's left. Now wait for a good moment for the Monstar to pass the last Claw. When the Claw is down, jump on over to the right platform and continue on. When the Monstar reaches the key, you'll hear a ding sound. Go back to the area where the key was located and pick up the key. Climb up to the gate, open it and then grab the first puzzle piece.

The second piece is a fair bit trickier to get at. The roles will be reversed for the enemies this time; Tim can control the movement of the three Claws, but the Monstars are unaffected by time manipulation. Go back to the place where you heard the ding from the key. You can see Monstars popping out into a field of Claws. By moving left and right you can control whether the Claws are up or down, and thus guide a Monstar past them. However, you can't move up the ladder fast enough to get them past the third Claw. What you need to do is plan ahead for the third one. Climb up the ladder and get of it on the left. Move to a position on the giant square where the third Claw is all the way down its pipe and wait for a bit. Now jump down and guide a Monstar through the first two Claws. As soon as it passes the third one, very quickly rewind time to the point where you were waiting with the third Claw down. The Monstar should be able to pass it if you were quick enough. Then just wait for it to fall down to Tim's level, jump on it and bounce up to the final puzzle piece. That was all of them for this level so carry on to the next.