Defences & Countermeasures video overview.
The carrier is equipped with a variety of defences and countermeasures to protect itself from attack. There is considerable overlap between offensive weapons and defensive weapons, as most carrier weapons systems do not discriminate between air and surface targets.

Missiles

| |
| Type | Large Munitions |
| Weight | 1000 |
| Cost | |
| Build Time | 10 sec |

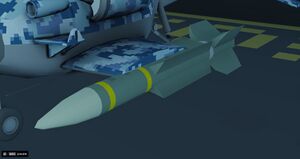
The carrier is equipped with AA missiles to destroy incoming enemies. Modeled after the British Rapier missile system, the AA missiles will track enemy aircraft - but not surface threats - that enter range.

Each of the two launchers, located on the starboard side of the carrier (and visible from the bridge), loads four missiles before taking time to reload.
The default state of the missiles is "ARMED". Once an enemy enters ranged, the status will change to "TRACKING" and a white light will begin flashing underneath the missile arming switch. Pressing this button will launch a missile. It is not possible to determine what target the missile locks onto - it merely attacks the nearest enemy.
Close In Weapons System (CIWS)
| File:CC2 20mm.jpg | |
| Type | Small Munitions |
| Weight | 1 |
| Cost | |
| Build Time | 1 sec |
The carrier is also equipped with four CIWS (pronounced sea-whizz) rotary cannons that accept 20mm ammunition. Like missiles, the CIWS will automatically engage targets that enter range. Unlike the missiles, CIWS will also engage enemy missiles that enter range, protecting the carrier and any nearby units.
The CIWS' range is extremely short and can only be practically used as a self defence tool.
As with the missiles, the CIWS cannot be set to engage a specific target, and will simply attack targets to the best of its ability.
Noisemakers
| File:CC2 TorpedoNoise.jpg | |
| Type | Large Munitions |
| Weight | 1000 |
| Cost | |
| Build Time | 10 sec |
Loaded into and launched from torpedo tubes, noisemakers offer a long range defence against incoming enemy torpedoes by decoying them away from your carrier. They appear as circles on the vehicle control screen, as shown to the left. Noisemakers must be set to travel on a specific bearing and will turn active after their timer expires, just like normal torpedoes.
Noisemakers, however, do not last long and require more precise timing in order to be effective. Noisemakers cannot decoy torpedoes that are inactive.

To load a noisemaker into a torpedo tube, press the "Load Noisemaker" button next to the relevant torpedo tube (L1, L2, R1, or R2). Noisemakers, like torpedoes, cannot be unloaded, so ensure you only load them as you need them
Noisemakers will continue to travel in their set bearing until they are destroyed or run aground.
Noisemakers are referred to in-game as "Torpedo (Noisemaker)".
Countermeasures

| |
| Type | Large Munitions |
| Weight | 1000 |
| Cost | |
| Build Time | 10 sec |
Countermeasures, similar to noisemakers, will cause torpedoes to lose their target. Unlike noisemakers, which operate at a distance, countermeasures are fired from the rear of the carrier and do not move once deployed. An enemy torpedo will lose its target but it can still hit the carrier, so moving the carrier after firing countermeasures is advised.
Countermeasures are referred to in-game as "Torpedo (Countermeasure)".