(Create stub) |
(Describe defensive locations) |
||
| Line 2: | Line 2: | ||
{{Header Nav|game=Killing Floor}} | {{Header Nav|game=Killing Floor}} | ||
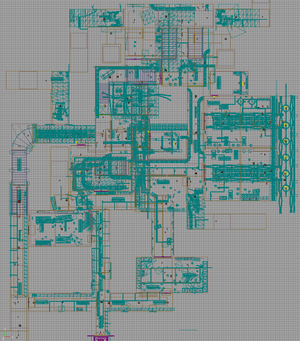
[[Image:KF-BioticsLab.png|thumb|right|Map of the floor]] | |||
The Biotics Lab Horzine's London laboratory, he incubators for growing additional zombie clones are still operational. After entering the deep facility by the now-broken elevator, you need to destroy the zombie infestation. | |||
Although there is no in-game overhead map, your team starts at the southern edge of the map. | |||
== Southern section == | |||
The southern section is dangerous with the retreat tactic, as the zombies can easily split into two groups depending on your movement and tactics. However, the layout can be used to your advantage in this case, as you can decide to retreat through the dormitory. | |||
There are three exits; the western exit leads through a lower passage to the upper northern area, the upper north exit leads directly to the upper northern area, and the central exit provides a staircase to the eastern section. | |||
== Eastern Section == | |||
The eastern section is highly defensible early in the game. you should have a small loop with two double doors. Weld the one near the trader, and wait at the other entrance. Enemies will walk through one door, allowing an easy defence against the incoming monsters. | |||
A single player should abandon this defensive location once fleshpounds start arriving. However, a team of players could hold most of the enemies at bay. | |||
Should you need to escape, you can run to the west to reach the southern area, or to the north. | |||
== Northern section == | |||
This section has two staircases to a lower level, a direct corridor to the southern section, and two areas where zombies arrive. | |||
While not easily defensible, you can use this area to slip past zombies. In the south-east corner of the room, you can climb up some fallen grating to reach the upper part of the room and snipe at the various zombies. When they get close, jump down and escape through the corridor or stairs. | |||
== Trader locations == | == Trader locations == | ||
| Line 11: | Line 30: | ||
* Upper floor, on right-side of map behind lab. | * Upper floor, on right-side of map behind lab. | ||
{{Footer Nav|game=Killing Floor|prevpage=Walkthrough|nextpage=KF-Farm}} | |||
{{Footer Nav|game=Killing Floor|prevpage=|nextpage=}} | |||
Revision as of 17:48, 30 May 2009

The Biotics Lab Horzine's London laboratory, he incubators for growing additional zombie clones are still operational. After entering the deep facility by the now-broken elevator, you need to destroy the zombie infestation.
Although there is no in-game overhead map, your team starts at the southern edge of the map.
Southern section
The southern section is dangerous with the retreat tactic, as the zombies can easily split into two groups depending on your movement and tactics. However, the layout can be used to your advantage in this case, as you can decide to retreat through the dormitory.
There are three exits; the western exit leads through a lower passage to the upper northern area, the upper north exit leads directly to the upper northern area, and the central exit provides a staircase to the eastern section.
Eastern Section
The eastern section is highly defensible early in the game. you should have a small loop with two double doors. Weld the one near the trader, and wait at the other entrance. Enemies will walk through one door, allowing an easy defence against the incoming monsters.
A single player should abandon this defensive location once fleshpounds start arriving. However, a team of players could hold most of the enemies at bay.
Should you need to escape, you can run to the west to reach the southern area, or to the north.
Northern section
This section has two staircases to a lower level, a direct corridor to the southern section, and two areas where zombies arrive.
While not easily defensible, you can use this area to slip past zombies. In the south-east corner of the room, you can climb up some fallen grating to reach the upper part of the room and snipe at the various zombies. When they get close, jump down and escape through the corridor or stairs.
Trader locations
- Lower floor, after staircase on left-side of map.
- Lower floor, in Sector B observatory area.
- Upper floor, on right-side of map behind lab.
