Notmyhandle (talk | contribs) (cleanup/FN) |
WhosAsking (talk | contribs) (→Bosspider: Noted the Ghost Leg pattern and that it moves faster as it's damaged.) |
||
| (21 intermediate revisions by 16 users not shown) | |||
| Line 1: | Line 1: | ||
{{subpage}} | |||
{{Header Nav|game=Mega Man X}} | {{Header Nav|game=Mega Man X}} | ||
Note that you can defeat every single boss listed here without the need to obtain any Heart Tanks, Sub Tanks, or upgrades (however without glitching the game, there's no way to legitimately reach the end of the game without the leg upgrade). | Note that you can defeat every single boss listed here without the need to obtain any Heart Tanks, Sub Tanks, or upgrades (however without glitching the game, there's no way to legitimately reach the end of the game without the leg upgrade). | ||
==Vile in Mech Armor== | == Intro stage boss == | ||
[[ | === Vile in Mech Armor=== | ||
[[File:Mega Man X Opening Vile Fight.png|right|thumb]] | |||
This is a storyline battle, so you can't "win" (Vile is invincible). Once your energy meter drops below a certain point (at around four or five left), Vile will start shooting "energy nets" (glowing yellow orbs) at you, making you unable to move. Once you're hit by one, the story will proceed and the level will end. Keep in mind that if you're hit enough times before being trapped by the "net" you can still die; so try and get hit. | This is a storyline battle, so you can't "win" (Vile is invincible). Once your energy meter drops below a certain point (at around four or five left), Vile will start shooting "energy nets" (glowing yellow orbs) at you, making you unable to move. Once you're hit by one, the story will proceed and the level will end. Keep in mind that if you're hit enough times before being trapped by the "net" you can still die; so try and get hit. | ||
{{-}} | {{-}} | ||
==Chill Penguin== | == Main 8 bosses == | ||
[[ | === Chill Penguin=== | ||
[[File:Mega Man X Chill Penguin Title.png|right|thumb]] | |||
*'''Weakness''': Fire Wave | *'''Weakness''': Fire Wave | ||
*'''Weapon Received''': Shotgun Ice | *'''Weapon Received''': Shotgun Ice | ||
Chill Penguin can shoot ice | Chill Penguin has a variety of attacks. He can shoot ice pellets at you (either straight across at speed or slower along the floor), blow freezing breath to create two ice decoys (if you get caught in the breath, you get stuck to the floor), leap at you, and slide along the floor. He can also pull a hook in the ceiling to blow you around briefly with a blizzard. Ice blocks shots and he's invincible in his slide. The Fire Wave will make short work of him; just be careful when attacking as the Fire Wave has a very short range. | ||
<gallery> | <gallery> | ||
File:Mega Man X Chill Penguin Fight Start.png|Start off with a fully-charged blaster shot... | |||
File:Mega Man X Chill Penguin Corner.png|...then let it go and hide in the corner, as shown. | |||
File:Mega Man X Chill Penguin Blizzard.png|Dash when the blizzard is blowing you towards him. | |||
File:Mega Man X Chill Penguin Slide.png|Chill Penguin is invulnerable when he's sliding. | |||
</gallery> | </gallery> | ||
{{-}} | {{-}} | ||
==Spark Mandrill== | === Spark Mandrill=== | ||
[[ | [[File:Mega Man X Spark Mandrill Title.png|right|thumb]] | ||
*'''Weakness''': Shotgun Ice | *'''Weakness''': Shotgun Ice | ||
*'''Weapon Received''': Electric Spark | *'''Weapon Received''': Electric Spark | ||
Spark Mandrill will frequently jump across the screen and try to crush you. He will also dash at you, swing across the ceiling and try to drop on you, and shoot Electric Sparks at you. Shooting Spark Mandrill with Shotgun Ice will momentarily freeze him and do significant damage to him. If | Spark Mandrill will frequently jump across the screen and try to crush you. He will also dash at you, swing across the ceiling and try to drop on you, and shoot Electric Sparks at you. Shooting Spark Mandrill with Shotgun Ice will momentarily freeze him and do significant damage to him. If you shoot Spark Mandrill after he breaks out of the ice and right as he lowers his arms, then you won't give him a chance to move. You can repeat this timing with Shotgun Ice to defeat him easily. | ||
<gallery> | <gallery> | ||
File:Mega Man X Spark Mandrill Fight.png|Immediately fire once the fight begins. | |||
File:Mega Man X Spark Mandrill Frozen.png|Just keep freezing him and he'll be gone in no time. | |||
</gallery> | </gallery> | ||
{{-}} | {{-}} | ||
==Armored Armadillo== | === Armored Armadillo=== | ||
[[ | [[File:Mega Man X Armored Armadillo Title.png|right|thumb]] | ||
*'''Weakness''': Electric Spark | *'''Weakness''': Electric Spark | ||
*'''Weapon Received''': Rolling Shield | *'''Weapon Received''': Rolling Shield | ||
| Line 40: | Line 43: | ||
This battle is made much easier if you shoot Armored Armadillo with at least one Electric Spark; it will electrocute him and cause his armor to fall off, making it impossible for him to block attacks. Armored Armadillo will attack by shooting Hadoken-like fireballs and rolling across the screen at you. Simply move out of the way of his rolling and jump over the fireballs (or climb the wall) and Armadillo is a pushover. | This battle is made much easier if you shoot Armored Armadillo with at least one Electric Spark; it will electrocute him and cause his armor to fall off, making it impossible for him to block attacks. Armored Armadillo will attack by shooting Hadoken-like fireballs and rolling across the screen at you. Simply move out of the way of his rolling and jump over the fireballs (or climb the wall) and Armadillo is a pushover. | ||
<gallery> | <gallery> | ||
File:Mega Man X Arm Arm Fight Start.png|The beginning of the fight; shoot him once with the E. Spark to make his armor disappear. | |||
File:Mega Man X Arm Arm Corner.png|Hide in one of the corners once he starts shooting his plasma bolts. | |||
</gallery> | </gallery> | ||
{{-}} | {{-}} | ||
==Launch Octopus== | === Launch Octopus=== | ||
[[ | [[File:Mega Man X Launch Octopus Title.png|right|thumb]] | ||
*'''Weakness''': Rolling Shield | *'''Weakness''': Rolling Shield | ||
*'''Weapon Received''': Homing Torpedo | *'''Weapon Received''': Homing Torpedo | ||
| Line 52: | Line 55: | ||
Launch Octopus has two main attacks. He'll either fire torpedoes at you or leap across the screen and create a whirlpool vortex to pull you towards him. If he grabs you during this move, Lauch Octopus will begin to drain some of your energy and regain his. This can be countered by either dashing away from the whirlpool or by cutting off his extra tentacles with the Boomerang Cutter. By using the charged version of Rolling Shield, you can protect yourself from torpedoes, but in order to hurt Octopus you must get very close, leaving yourself open to attack after the shield evaporates. | Launch Octopus has two main attacks. He'll either fire torpedoes at you or leap across the screen and create a whirlpool vortex to pull you towards him. If he grabs you during this move, Lauch Octopus will begin to drain some of your energy and regain his. This can be countered by either dashing away from the whirlpool or by cutting off his extra tentacles with the Boomerang Cutter. By using the charged version of Rolling Shield, you can protect yourself from torpedoes, but in order to hurt Octopus you must get very close, leaving yourself open to attack after the shield evaporates. | ||
<gallery> | <gallery> | ||
File:Mega Man X Launch Octo Fight Start.png|Launch Octopus even taunts you in the beginning of the fight. | |||
File:Mega Man X Launch Octo Typhoon.png|Keep dashing if he does his typhoon attack. | |||
</gallery> | </gallery> | ||
{{-}} | {{-}} | ||
==Boomer Kuwanger== | === Boomer Kuwanger=== | ||
[[ | [[File:Mega Man X Boomer Kuwanger Title.png|right|thumb]] | ||
*'''Weakness''': Homing Torpedo | *'''Weakness''': Homing Torpedo | ||
*'''Weapon Received''': Boomerang Cutter | *'''Weapon Received''': Boomerang Cutter | ||
| Line 64: | Line 67: | ||
This is one of the easiest bosses in the game if you have the right weapon. Boomer Kuwanger's main attacks are to throw Boomerang Cutters at you and to try and charge at you. If you get too close, Kuwanger will also grab you with his horns and throw you into the ceiling. Equip the Homing Torpedo and continuously wall jump to defeat him easily; Boomer won't jump and the torpedoes will fly straight at him. If a boomerang is flying your way, dash jump across the room to the other wall. | This is one of the easiest bosses in the game if you have the right weapon. Boomer Kuwanger's main attacks are to throw Boomerang Cutters at you and to try and charge at you. If you get too close, Kuwanger will also grab you with his horns and throw you into the ceiling. Equip the Homing Torpedo and continuously wall jump to defeat him easily; Boomer won't jump and the torpedoes will fly straight at him. If a boomerang is flying your way, dash jump across the room to the other wall. | ||
<gallery> | <gallery> | ||
File:Mega Man X Boomer Kuwanger Fight Start.png|Open up with a single Homing Torpedo. | |||
File:Mega Man X Boomer Kuwanger Dodging Attacks.png|Hide in the corner and just fire from there. | |||
File:Mega Man X Boomer Kuwanger Wall Dash.png|Wall Dash once he gets too close, and then hide in the opposite wall's corner. | |||
</gallery> | </gallery> | ||
{{-}} | {{-}} | ||
==Sting Chameleon== | === Sting Chameleon=== | ||
[[ | [[File:Mega Man X Sting Chameleon Title.png|right|thumb]] | ||
*'''Weakness''': Boomerang Cutter | *'''Weakness''': Boomerang Cutter | ||
*'''Weapon Received''': Chameleon Sting | *'''Weapon Received''': Chameleon Sting | ||
Sting Chameleon is one of the trickier bosses to defeat, mainly because he uses so many different attacks. He will jump across the screen, hit you with his tongue, hang on the wall, throw Chameleon Sting at you, or hang from the ceiling (by his tongue) and make spikes fall from the ceiling. If you hit Sting Chameleon with a Boomerang Cutter, he will immediately stop whatever he's doing and jump to hang from the ceiling by his tongue and drop spikes. He is in a perfect position to be hit by another Boomerang Cutter while hanging, making the battle a simple process of jump, shoot and repeat. | Sting Chameleon is one of the trickier bosses to defeat, mainly because he uses so many different attacks. He will jump across the screen, hit you with his tongue, hang on the wall, throw Chameleon Sting at you, or hang from the ceiling (by his tongue) and make spikes fall from the ceiling. He can also camouflage himself, making himself temporarily invincible while he repositions. If you hit Sting Chameleon with a Boomerang Cutter, he will immediately stop whatever he's doing and jump to hang from the ceiling by his tongue and drop spikes. He is in a perfect position to be hit by another Boomerang Cutter while hanging, making the battle a simple process of jump, shoot and repeat. | ||
<gallery> | <gallery> | ||
File:Mega Man X Sting Chameleon Fight Start.png|Start the fight off with a Boomerang Cutter, which will cause him to hang from the ceiling. | |||
File:Mega Man X Sting Chameleon Boomerang.png|Once he gets hit by one, he'll stop what he's doing and hang from the ceiling again, opening him up for another attack. | |||
</gallery> | </gallery> | ||
{{-}} | {{-}} | ||
==Storm Eagle== | === Storm Eagle=== | ||
[[ | [[File:Mega Man X Storm Eagle Title.png|right|thumb]] | ||
*'''Weakness''': Chameleon Sting | *'''Weakness''': Chameleon Sting | ||
*'''Weapon Received''': Storm Tornado | *'''Weapon Received''': Storm Tornado | ||
Storm Eagle has very few moves that directly attack you; he is more likely to try and shove you off the edge of the platform. He will flap his wings to slightly push you towards the edge or he will fire Storm Tornadoes that do no damage but shove you backwards very forcefully; | Storm Eagle has very few moves that directly attack you; he is more likely to try and shove you off the edge of the platform. He will flap his wings to slightly push you towards the edge or he will fire Storm Tornadoes that do no damage but shove you backwards very forcefully; you can dash to counter his wings and jump to escape the push of the Storm Tornado. He will also frequently dive bomb from the top of the screen to the bottom towards you but can easily be avoided by walking or dashing. His last attack involves launching an egg that explodes into four small birds that fly towards you, but they can be destroyed by shooting them. Chameleon Sting makes it easier to hit Storm Eagle, as it fires in three directions, but with careful timing it's just as easy to hit him with regular charged shots. | ||
<gallery> | <gallery> | ||
File:Mega Man X Storm Eagle Fight Start.png|Use his weakness, Chameleon Sting, to end the fight quickly. | |||
File:Mega Man X Storm Eagle Gust.png|Keep dashing if he tries to blow you away. | |||
File:Mega Man X Storm Eagle Hatchlings.png|Either dodge or destroy the hatchlings (you can also destroy the egg as it drops down). | |||
File:Mega Man X Storm Eagle Tornado.png|Jump upwards if he uses a tornado projectile. | |||
</gallery> | </gallery> | ||
{{-}} | {{-}} | ||
==Flame Mammoth== | === Flame Mammoth=== | ||
[[ | [[File:Mega Man X Flame Mammoth Title.png|right|thumb]] | ||
*'''Weakness''': Storm Tornado. | *'''Weakness''': Storm Tornado. | ||
*'''Weapon Received''': Fire Wave. | *'''Weapon Received''': Fire Wave. | ||
Flame Mammoth's main attacks are to jump towards you, switch the direction that the conveyor belt moves, and shoot oil and fireballs at you. If a fireball hits an oil puddle it will create a Fire Wave that travels across the screen. By repeatedly wall jumping to the top of either wall, Flame Mammoth cannot hit you by jumping into you. When hit with Storm Tornado, Flame Mammoth will be momentarily stunned. Keep dodging and shooting and Flame Mammoth is easily beaten. | Flame Mammoth's main attacks are to jump towards you and shake the floor (stunning you if you're on the floor when he lands), switch the direction that the conveyor belt moves (by crying out), and shoot oil and fireballs at you. If a fireball hits an oil puddle it will create a Fire Wave that travels across the screen. To avoid this, use the Boomerang Cutter to cut off his trunk so he can no longer shoot oil puddles. By repeatedly wall jumping to the top of either wall, Flame Mammoth cannot hit you by jumping into you. When hit with Storm Tornado, Flame Mammoth will be momentarily stunned. Keep dodging and shooting and Flame Mammoth is easily beaten. | ||
<gallery> | <gallery> | ||
File:Mega Man X Flame Mammoth Fight.png|Get that first shot off! | |||
File:Mega Man X Flame Mammoth Corner.png|When he has you cornered, use the same trick from Chill Penguin's fight... | |||
File:Mega Man X Flame Mammoth Almost Dead.png|...and then jump over him using a wall dash, shooting him when you hit the ground. | |||
</gallery> | </gallery> | ||
{{-}} | {{-}} | ||
==Bosspider== | == Final stages bosses == | ||
=== Bosspider=== | |||
*'''Weakness''': Shotgun Ice and X Buster. | *'''Weakness''': Shotgun Ice and X Buster. | ||
The Bosspider can only be damaged when its red eye is open and moves much faster as it takes damage. It will move along a predetermined track as it drops from the ceiling and rushes to the floor. It's only real "attack" is to launch baby spiders which will rush towards you and run up the wall. Shotgun Ice is your best bet since it fires fast and takes little weapon energy to use. | The Bosspider can only be damaged when its red eye is open and moves much faster as it takes damage. It will move along a predetermined "Ghost Leg" track as it drops from the ceiling and rushes to the floor. The more it's damaged, the faster it drops. It's only real "attack" is to launch baby spiders which will rush towards you and run up the wall. Shotgun Ice is your best bet since it fires fast and takes little weapon energy to use. | ||
<gallery> | <gallery> | ||
File:Mega Man X Bosspider Fight Start.png|Remember to watch where he's going to go. | |||
File:Mega Man X Bosspider Weakness.png|Shoot his eye with Shotgun Ice once it opens. | |||
</gallery> | </gallery> | ||
{{-}} | {{-}} | ||
==Rangda Bangda== | === Rangda Bangda=== | ||
*'''Weakness''': Chameleon Sting | *'''Weakness''': Chameleon Sting | ||
| Line 128: | Line 132: | ||
Note that only the moving eyes can be hit with a Hadoken, which only destroys part of the boss (Rangda Bangda can't be beaten in one hit). | Note that only the moving eyes can be hit with a Hadoken, which only destroys part of the boss (Rangda Bangda can't be beaten in one hit). | ||
<gallery> | <gallery> | ||
File:Mega Man X SS2 RB Nose.png|When the walls close in and the nose detaches, you'll be able to shoot it with the Chameleon Sting. | |||
File:Mega Man X SS2 RB Blue Eye.png|Once the eye opens, shoot it! | |||
File:Mega Man X SS2 RB Blue Eye Detach.png|The blue and red eyes can also come towards you, so watch out. | |||
File:Mega Man X SS2 RB Green Eye.png|Rangda Bangda's open green eye. | |||
File:Mega Man X SS2 RB Red Eye.png|Rangda Bangda's open red eye. | |||
</gallery> | </gallery> | ||
{{-}} | {{-}} | ||
==D-Rex== | === D-Rex=== | ||
*'''Weakness''': Boomerang Cutter | *'''Weakness''': Boomerang Cutter | ||
D-Rex will try to charge you with either its top or bottom half, sometimes one after the other. It can also charge up an energy ball and launch it across the middle of the screen. Boomerang Cutters will do the most damage here. D-Rex | D-Rex will try to charge you with either its top or bottom half, sometimes one after the other. It can also charge up an energy ball and launch it across the middle of the screen. Boomerang Cutters will do the most damage here. D-Rex can be destroyed by the Hadoken if the bottom section of its body comes at you first. Simply stand on the bottom half and time it correctly to launch the Hadouken as the top half approaches. You'll take the most damage from being hit by its projectiles or being squished in between the lower and upper portions. Taking a hit from being rammed is better than letting the upper portion fall on you. | ||
<gallery> | <gallery> | ||
File:Mega Man X SS3 D-Rex.png|Use the Boomerang Cutter on his top half when you have the opportunity. | |||
File:Mega Man X SS3 D-Rex Orb.png|Either hide in the corner or dash forwards to dodge the orb attack. | |||
</gallery> | </gallery> | ||
{{-}} | {{-}} | ||
==Velguader== | === Velguader=== | ||
*'''Weakness''': Shotgun Ice | *'''Weakness''': Shotgun Ice | ||
Sigma's dog bounds across the room and can even use a limited wall jump. It also shoots a fire wave and electric wave towards the ground, which then archs up to the ceiling. Velguader is very fast and is vulnerable to Shotgun Ice. | Sigma's dog bounds across the room and can even use a limited wall jump. It also shoots a fire wave and electric wave towards the ground, which then archs up to the ceiling. Velguader is very fast and is vulnerable to Shotgun Ice. | ||
<gallery> | <gallery> | ||
File:Mega Man X SS4 Velgauder Fight Start.png|He'll jump to the left, so dash to the right and wait for him to come, then wall dash over him. | |||
File:Mega Man X SS4 Velgauder Wall Scale.png|You can also hide in the corner, but keep in mind that he can get to you! | |||
</gallery> | </gallery> | ||
{{-}} | {{-}} | ||
==Sigma== | === Sigma=== | ||
*'''Weakness''': Electric Spark | *'''Weakness''': Electric Spark | ||
*'''Weak spot''': Body, while moving | *'''Weak spot''': Body, while moving | ||
Sigma will block your attacks and charge you to attack with his | Sigma will block your attacks and charge you to attack with his beam saber if you stay on the ground but if you wall jump he will jump diagonally from wall to wall until he is at your level. If you drop, he will jump back down as well, so use this to your advantage. Drop from the wall while firing Electric Spark and he will be unable to block it. Repeat the wall jumping and dropping/firing until he's dead. | ||
Alternatively, if you managed to acquire the Hadouken, keep performing the combination immediately after the two screens of dialogue prior to the fight. If done correctly, you will fire off a Hadouken that will obliterate him immediately. | |||
<gallery> | <gallery> | ||
File:Mega Man X SS4 Sigma Scaling Wall.png|Equip E. Spark and hide in the left-hand corner. | |||
File:Mega Man X SS4 Sigma Dodge.png|Jump down and shoot as soon as he's about to jump towards you. | |||
File:Mega Man X SS4 Sigma Defeated.png|Is Sigma finally dead? | |||
</gallery> | </gallery> | ||
{{-}} | {{-}} | ||
==Sigma | === Wolf Sigma === | ||
*'''Weakness''': Rolling Shield | *'''Weakness''': Rolling Shield | ||
*'''Name note''': the name is conjectural and is not named in the credits. Some refer to it as "Sigma 2". | |||
Sigma has four attacks, two from his mouth, and two from each hand: he can breathe fire or shoot electric sparks from his mouth in an arc across the ground, and his hands can either shoot lightning or try and stab you. This will be a long and difficult battle as Sigma doesn't take damage quickly, but you do. | Sigma has four attacks, two from his mouth, and two from each hand: he can breathe fire or shoot electric sparks from his mouth in an arc across the ground, and his hands can either shoot lightning or try and stab you. This will be a long and difficult battle as Sigma doesn't take damage quickly, but you do. | ||
| Line 176: | Line 184: | ||
The spikes you see on Sigma's shoulders in the background cannot damage you, so wall jumping can be utilized to an extent. If you're up in one of the corners, most likely one of the hands will try and charge you. Also note that the electricity sent from the hands can hit you if you're in the corner, so it's definitely not a good place to stay. | The spikes you see on Sigma's shoulders in the background cannot damage you, so wall jumping can be utilized to an extent. If you're up in one of the corners, most likely one of the hands will try and charge you. Also note that the electricity sent from the hands can hit you if you're in the corner, so it's definitely not a good place to stay. | ||
<gallery> | <gallery> | ||
File:Mega Man X SS4 Sigma Velgauder.png|Get Rolling Shield out and stay in the center. | |||
File:Mega Man X SS4 SV Claw.png|Jump on the claw that comes towards you can stay in the position as shown in the picture. | |||
File:Mega Man X SS4 SV Rolling Shield.png|Once you get to the top, jump off and shoot Sigma's head with the Rolling Shield (careful not to bump into him though). | |||
File:Mega Man X SS4 SV Flames.png|Dodge the flames (or orbs) if he shoots them. | |||
File:Mega Man X SS4 Sigma Destruction.png|Sigma finally defeated. | |||
</gallery> | </gallery> | ||
== Damage Chart== | |||
For the Special Weapons, the left number is uncharged shot and right number is charged shot. Also, when using your fully charged pink X-Buster against any boss, you only do 1 damage if you are too close to the enemy. | |||
For X-Buster: | |||
* 1st number = uncharged shot, | |||
* 2nd number = 1st charge shot (green), | |||
* 3rd number = 2nd charge shot (blue), | |||
* 4th number = 3rd charge shot (arm upgrade)(pink). | |||
The '''dashing uncharged X-buster''' always deals 2 damages. The '''Hadouken''' always instantly defeats any boss. The only exception is Sigma 2nd form, that cannot be reached by these two attacks. | |||
{|{{prettytable|text center=1}} | |||
! Maverick !! X-Buster !! Shotgun<br />Ice !! Electric<br />Spark !! Rolling<br />Shield !! Homing<br />Torpedo !! Boomerang<br />Cutter !! Chameleon<br />Sting !! Storm<br />Tornado !! Fire<br />Wave | |||
|- | |||
| Chill Penguin || 1:2:3:3 || 1:2 || 1:2 || 1:2 || 1:2 || 1:2 || 1 || 1:2 || {{yes|3:4}} | |||
|- | |||
| Spark Mandrill || 1:2:3:3 || {{yes|3:4}} || 1:2 || 1:2 || 1:2 || 1:2 || 1 || 1:2 || 1:2 | |||
|- | |||
| Armored Armadillo || 1:1:1:1 || 1:2 || {{yes|3:6}} || 1:2 || 1:2 || 1:2 || 1 || 0:2 || 0:2 | |||
|- | |||
| Launch Octopus || 1:2:3:3 || 1:2 || 1:2 || {{yes|3:4}} || 1:2 || 1:2 || 1 || 1:2 || 0:0 | |||
|- | |||
| Boomer Kuwanger || 1:2:3:3 || 1:2 || 1:2 || 1:2 || {{yes|3:4}} || 1:2 || 1 || 1:2 || 1:2 | |||
|- | |||
| Sting Chameleon || 1:1:2:2 || 1:2 || 1:2 || 1:2 || 1:2 || {{yes|3:4}} || 1 || 1:2 || 1:2 | |||
|- | |||
| Storm Eagle || 1:1:2:2 || 1:2 || 1:2 || 1:2 || 1:2 || 1:2 || {{yes|3}} || 1:2 || 1:2 | |||
|- | |||
| Flame Mammoth || 1:1:2:2 || 1:2 || 1:2 || 1:2 || 1:2 || 1:2 || 1 || {{yes|3:4}} || 1:2 | |||
|- | |||
!colspan=10| Final Mavericks | |||
|- | |||
| Vile || 1:2:4:4 || 2:8 || 2:6 || {{yes|4:4}} || {{yes|3:3}} || 2:6 || 2 || 1:4 || 1:1 | |||
|- | |||
| Bosspider || 1:2:3:3 || {{yes|3:4}} || 1:2 || 1:2 || 1:2 || 1:2 || 1 || 1:2 || 1:2 | |||
|- | |||
| Rangda Bangda || 1:1:2:2 || 1:2 || 1:2 || 1:2 || 1:2 || 1:2 || {{yes|3}} || 1:2 || 1:2 | |||
|- | |||
| D-Rex || 1:1:2:2 || 1:2 || 1:2 || 1:2 || 1:2 || {{yes|3:4}} || 1 || 1:2 || 1:2 | |||
|- | |||
| Velguarder || 1:2:3:3 || {{yes|3:4}} || 1:2 || 1:2 || 1:2 || 1:2 || 1 || 1:2 || 1:2 | |||
|- | |||
| Sigma 1 || 1:1:1:1 || 1:1 || {{yes|2:3}} || 1:1 || 1:1 || 1:1 || 1 || 1:1 || 1:1 | |||
|- | |||
| Sigma 2 || 0:0:0:1 || 0:0 || 0:0 || {{yes|2:2}} || 0:0 || 0:0 || 0 || 0:0 || 0:0 | |||
|} | |||
{{Footer Nav|game=Mega Man X|prevpage=Sigma Stage 4|nextpage=Enemies}} | {{Footer Nav|game=Mega Man X|prevpage=Sigma Stage 4|nextpage=Enemies}} | ||
Latest revision as of 17:07, 11 October 2018
Note that you can defeat every single boss listed here without the need to obtain any Heart Tanks, Sub Tanks, or upgrades (however without glitching the game, there's no way to legitimately reach the end of the game without the leg upgrade).
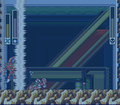
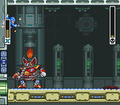
Intro stage boss[edit]
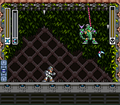
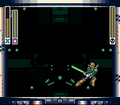
Vile in Mech Armor[edit]

This is a storyline battle, so you can't "win" (Vile is invincible). Once your energy meter drops below a certain point (at around four or five left), Vile will start shooting "energy nets" (glowing yellow orbs) at you, making you unable to move. Once you're hit by one, the story will proceed and the level will end. Keep in mind that if you're hit enough times before being trapped by the "net" you can still die; so try and get hit.
Main 8 bosses[edit]
Chill Penguin[edit]

- Weakness: Fire Wave
- Weapon Received: Shotgun Ice
Chill Penguin has a variety of attacks. He can shoot ice pellets at you (either straight across at speed or slower along the floor), blow freezing breath to create two ice decoys (if you get caught in the breath, you get stuck to the floor), leap at you, and slide along the floor. He can also pull a hook in the ceiling to blow you around briefly with a blizzard. Ice blocks shots and he's invincible in his slide. The Fire Wave will make short work of him; just be careful when attacking as the Fire Wave has a very short range.
-
Start off with a fully-charged blaster shot...
-
...then let it go and hide in the corner, as shown.
-
Dash when the blizzard is blowing you towards him.
-
Chill Penguin is invulnerable when he's sliding.


Spark Mandrill[edit]

- Weakness: Shotgun Ice
- Weapon Received: Electric Spark
Spark Mandrill will frequently jump across the screen and try to crush you. He will also dash at you, swing across the ceiling and try to drop on you, and shoot Electric Sparks at you. Shooting Spark Mandrill with Shotgun Ice will momentarily freeze him and do significant damage to him. If you shoot Spark Mandrill after he breaks out of the ice and right as he lowers his arms, then you won't give him a chance to move. You can repeat this timing with Shotgun Ice to defeat him easily.
-
Immediately fire once the fight begins.
-
Just keep freezing him and he'll be gone in no time.


Armored Armadillo[edit]

- Weakness: Electric Spark
- Weapon Received: Rolling Shield
This battle is made much easier if you shoot Armored Armadillo with at least one Electric Spark; it will electrocute him and cause his armor to fall off, making it impossible for him to block attacks. Armored Armadillo will attack by shooting Hadoken-like fireballs and rolling across the screen at you. Simply move out of the way of his rolling and jump over the fireballs (or climb the wall) and Armadillo is a pushover.
-
The beginning of the fight; shoot him once with the E. Spark to make his armor disappear.
-

Hide in one of the corners once he starts shooting his plasma bolts.


Launch Octopus[edit]

- Weakness: Rolling Shield
- Weapon Received: Homing Torpedo
Launch Octopus has two main attacks. He'll either fire torpedoes at you or leap across the screen and create a whirlpool vortex to pull you towards him. If he grabs you during this move, Lauch Octopus will begin to drain some of your energy and regain his. This can be countered by either dashing away from the whirlpool or by cutting off his extra tentacles with the Boomerang Cutter. By using the charged version of Rolling Shield, you can protect yourself from torpedoes, but in order to hurt Octopus you must get very close, leaving yourself open to attack after the shield evaporates.
-
Launch Octopus even taunts you in the beginning of the fight.
-
Keep dashing if he does his typhoon attack.


Boomer Kuwanger[edit]

- Weakness: Homing Torpedo
- Weapon Received: Boomerang Cutter
This is one of the easiest bosses in the game if you have the right weapon. Boomer Kuwanger's main attacks are to throw Boomerang Cutters at you and to try and charge at you. If you get too close, Kuwanger will also grab you with his horns and throw you into the ceiling. Equip the Homing Torpedo and continuously wall jump to defeat him easily; Boomer won't jump and the torpedoes will fly straight at him. If a boomerang is flying your way, dash jump across the room to the other wall.
-
Open up with a single Homing Torpedo.
-
Hide in the corner and just fire from there.
-

Wall Dash once he gets too close, and then hide in the opposite wall's corner.


Sting Chameleon[edit]

- Weakness: Boomerang Cutter
- Weapon Received: Chameleon Sting
Sting Chameleon is one of the trickier bosses to defeat, mainly because he uses so many different attacks. He will jump across the screen, hit you with his tongue, hang on the wall, throw Chameleon Sting at you, or hang from the ceiling (by his tongue) and make spikes fall from the ceiling. He can also camouflage himself, making himself temporarily invincible while he repositions. If you hit Sting Chameleon with a Boomerang Cutter, he will immediately stop whatever he's doing and jump to hang from the ceiling by his tongue and drop spikes. He is in a perfect position to be hit by another Boomerang Cutter while hanging, making the battle a simple process of jump, shoot and repeat.
-
Start the fight off with a Boomerang Cutter, which will cause him to hang from the ceiling.
-
Once he gets hit by one, he'll stop what he's doing and hang from the ceiling again, opening him up for another attack.


Storm Eagle[edit]

- Weakness: Chameleon Sting
- Weapon Received: Storm Tornado
Storm Eagle has very few moves that directly attack you; he is more likely to try and shove you off the edge of the platform. He will flap his wings to slightly push you towards the edge or he will fire Storm Tornadoes that do no damage but shove you backwards very forcefully; you can dash to counter his wings and jump to escape the push of the Storm Tornado. He will also frequently dive bomb from the top of the screen to the bottom towards you but can easily be avoided by walking or dashing. His last attack involves launching an egg that explodes into four small birds that fly towards you, but they can be destroyed by shooting them. Chameleon Sting makes it easier to hit Storm Eagle, as it fires in three directions, but with careful timing it's just as easy to hit him with regular charged shots.
-
Use his weakness, Chameleon Sting, to end the fight quickly.
-
Keep dashing if he tries to blow you away.
-

Either dodge or destroy the hatchlings (you can also destroy the egg as it drops down).
-
Jump upwards if he uses a tornado projectile.


Flame Mammoth[edit]

- Weakness: Storm Tornado.
- Weapon Received: Fire Wave.
Flame Mammoth's main attacks are to jump towards you and shake the floor (stunning you if you're on the floor when he lands), switch the direction that the conveyor belt moves (by crying out), and shoot oil and fireballs at you. If a fireball hits an oil puddle it will create a Fire Wave that travels across the screen. To avoid this, use the Boomerang Cutter to cut off his trunk so he can no longer shoot oil puddles. By repeatedly wall jumping to the top of either wall, Flame Mammoth cannot hit you by jumping into you. When hit with Storm Tornado, Flame Mammoth will be momentarily stunned. Keep dodging and shooting and Flame Mammoth is easily beaten.
-

Get that first shot off!
-
When he has you cornered, use the same trick from Chill Penguin's fight...
-

...and then jump over him using a wall dash, shooting him when you hit the ground.


Final stages bosses[edit]
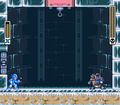
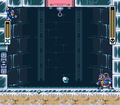
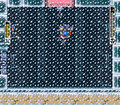
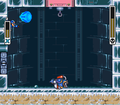
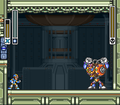
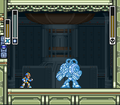
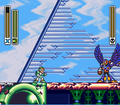
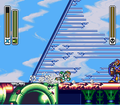
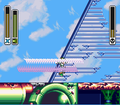
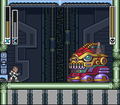
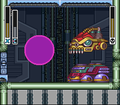
Bosspider[edit]
- Weakness: Shotgun Ice and X Buster.
The Bosspider can only be damaged when its red eye is open and moves much faster as it takes damage. It will move along a predetermined "Ghost Leg" track as it drops from the ceiling and rushes to the floor. The more it's damaged, the faster it drops. It's only real "attack" is to launch baby spiders which will rush towards you and run up the wall. Shotgun Ice is your best bet since it fires fast and takes little weapon energy to use.
-
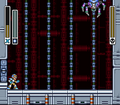
Remember to watch where he's going to go.
-
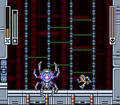
Shoot his eye with Shotgun Ice once it opens.


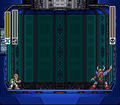
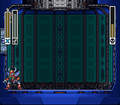
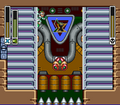
Rangda Bangda[edit]
- Weakness: Chameleon Sting
Rangda Bangda is a boss made up of three parts: two eyes and a nose, however there are three different eyes (colors). Throughout the fight, the walls will close up and the nose will become active. After a short period, the nose will become inactive and the walls will open once again. If two eyes are destroyed, the walls will no longer retract. The best strategy for this fight is to keep all three eyes alive for as long as possible so that you spend less time away from the nose (since the nose moves in a random direction, and you're in a small area, it's easier to be hit). This means you should try and divide the damage you deal between all three colors before destroying them all. Remember, do not destroy the nose first, or the walls will close and you will have to fight the eyes in an enclosed space.
Throughout the fight, one of the eyes will become active (vulnerable) and pop out of the background. Depending on the color, the eye will move towards you (blue), fire shots at you (green), or both (red). When the walls close in, spikes appear underneath them and you must cling to the walls as Rangda Bangda's nose moves between the two walls trying to collide with you. Chameleon Sting does the most damage and using it charged (making you temporarily transparent) can really make the battle easier.
Note that only the moving eyes can be hit with a Hadoken, which only destroys part of the boss (Rangda Bangda can't be beaten in one hit).
-
When the walls close in and the nose detaches, you'll be able to shoot it with the Chameleon Sting.
-
Once the eye opens, shoot it!
-
The blue and red eyes can also come towards you, so watch out.
-
Rangda Bangda's open green eye.
-
Rangda Bangda's open red eye.


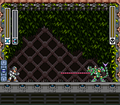
D-Rex[edit]
- Weakness: Boomerang Cutter
D-Rex will try to charge you with either its top or bottom half, sometimes one after the other. It can also charge up an energy ball and launch it across the middle of the screen. Boomerang Cutters will do the most damage here. D-Rex can be destroyed by the Hadoken if the bottom section of its body comes at you first. Simply stand on the bottom half and time it correctly to launch the Hadouken as the top half approaches. You'll take the most damage from being hit by its projectiles or being squished in between the lower and upper portions. Taking a hit from being rammed is better than letting the upper portion fall on you.
-
Use the Boomerang Cutter on his top half when you have the opportunity.
-
Either hide in the corner or dash forwards to dodge the orb attack.


Velguader[edit]
- Weakness: Shotgun Ice
Sigma's dog bounds across the room and can even use a limited wall jump. It also shoots a fire wave and electric wave towards the ground, which then archs up to the ceiling. Velguader is very fast and is vulnerable to Shotgun Ice.
-
He'll jump to the left, so dash to the right and wait for him to come, then wall dash over him.
-
You can also hide in the corner, but keep in mind that he can get to you!


Sigma[edit]
- Weakness: Electric Spark
- Weak spot: Body, while moving
Sigma will block your attacks and charge you to attack with his beam saber if you stay on the ground but if you wall jump he will jump diagonally from wall to wall until he is at your level. If you drop, he will jump back down as well, so use this to your advantage. Drop from the wall while firing Electric Spark and he will be unable to block it. Repeat the wall jumping and dropping/firing until he's dead.
Alternatively, if you managed to acquire the Hadouken, keep performing the combination immediately after the two screens of dialogue prior to the fight. If done correctly, you will fire off a Hadouken that will obliterate him immediately.
-
Equip E. Spark and hide in the left-hand corner.
-
Jump down and shoot as soon as he's about to jump towards you.
-
Is Sigma finally dead?


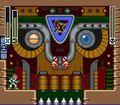
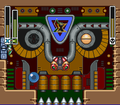
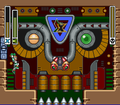
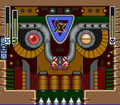
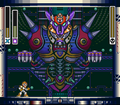
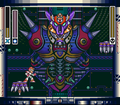
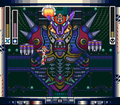
Wolf Sigma[edit]
- Weakness: Rolling Shield
- Name note: the name is conjectural and is not named in the credits. Some refer to it as "Sigma 2".
Sigma has four attacks, two from his mouth, and two from each hand: he can breathe fire or shoot electric sparks from his mouth in an arc across the ground, and his hands can either shoot lightning or try and stab you. This will be a long and difficult battle as Sigma doesn't take damage quickly, but you do.
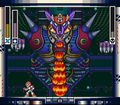
The only way to damage Sigma is to jump on his floating hands when they drop to ground level and ride them up to face level and blast his head with either a fully charged, upgraded X Buster or a Rolling Shield. Rolling Shield will do more damaged than your X Buster, but don't bother charging the weapon because getting too close can be very dangerous. If you can stay on his hands in a safe spot for the duration of the fight, there's no reason for you to take damage.
The spikes you see on Sigma's shoulders in the background cannot damage you, so wall jumping can be utilized to an extent. If you're up in one of the corners, most likely one of the hands will try and charge you. Also note that the electricity sent from the hands can hit you if you're in the corner, so it's definitely not a good place to stay.
-
Get Rolling Shield out and stay in the center.
-
Jump on the claw that comes towards you can stay in the position as shown in the picture.
-
Once you get to the top, jump off and shoot Sigma's head with the Rolling Shield (careful not to bump into him though).
-
Dodge the flames (or orbs) if he shoots them.
-
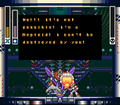
Sigma finally defeated.


Damage Chart[edit]
For the Special Weapons, the left number is uncharged shot and right number is charged shot. Also, when using your fully charged pink X-Buster against any boss, you only do 1 damage if you are too close to the enemy.
For X-Buster:
- 1st number = uncharged shot,
- 2nd number = 1st charge shot (green),
- 3rd number = 2nd charge shot (blue),
- 4th number = 3rd charge shot (arm upgrade)(pink).
The dashing uncharged X-buster always deals 2 damages. The Hadouken always instantly defeats any boss. The only exception is Sigma 2nd form, that cannot be reached by these two attacks.
| Maverick | X-Buster | Shotgun Ice |
Electric Spark |
Rolling Shield |
Homing Torpedo |
Boomerang Cutter |
Chameleon Sting |
Storm Tornado |
Fire Wave |
|---|---|---|---|---|---|---|---|---|---|
| Chill Penguin | 1:2:3:3 | 1:2 | 1:2 | 1:2 | 1:2 | 1:2 | 1 | 1:2 | 3:4 |
| Spark Mandrill | 1:2:3:3 | 3:4 | 1:2 | 1:2 | 1:2 | 1:2 | 1 | 1:2 | 1:2 |
| Armored Armadillo | 1:1:1:1 | 1:2 | 3:6 | 1:2 | 1:2 | 1:2 | 1 | 0:2 | 0:2 |
| Launch Octopus | 1:2:3:3 | 1:2 | 1:2 | 3:4 | 1:2 | 1:2 | 1 | 1:2 | 0:0 |
| Boomer Kuwanger | 1:2:3:3 | 1:2 | 1:2 | 1:2 | 3:4 | 1:2 | 1 | 1:2 | 1:2 |
| Sting Chameleon | 1:1:2:2 | 1:2 | 1:2 | 1:2 | 1:2 | 3:4 | 1 | 1:2 | 1:2 |
| Storm Eagle | 1:1:2:2 | 1:2 | 1:2 | 1:2 | 1:2 | 1:2 | 3 | 1:2 | 1:2 |
| Flame Mammoth | 1:1:2:2 | 1:2 | 1:2 | 1:2 | 1:2 | 1:2 | 1 | 3:4 | 1:2 |
| Final Mavericks | |||||||||
| Vile | 1:2:4:4 | 2:8 | 2:6 | 4:4 | 3:3 | 2:6 | 2 | 1:4 | 1:1 |
| Bosspider | 1:2:3:3 | 3:4 | 1:2 | 1:2 | 1:2 | 1:2 | 1 | 1:2 | 1:2 |
| Rangda Bangda | 1:1:2:2 | 1:2 | 1:2 | 1:2 | 1:2 | 1:2 | 3 | 1:2 | 1:2 |
| D-Rex | 1:1:2:2 | 1:2 | 1:2 | 1:2 | 1:2 | 3:4 | 1 | 1:2 | 1:2 |
| Velguarder | 1:2:3:3 | 3:4 | 1:2 | 1:2 | 1:2 | 1:2 | 1 | 1:2 | 1:2 |
| Sigma 1 | 1:1:1:1 | 1:1 | 2:3 | 1:1 | 1:1 | 1:1 | 1 | 1:1 | 1:1 |
| Sigma 2 | 0:0:0:1 | 0:0 | 0:0 | 2:2 | 0:0 | 0:0 | 0 | 0:0 | 0:0 |