Brinstar is a main area of Planet Zebes. It is being divided to a jungle-like, lively area (upper Brinstar), and a silent, red-soiled area (lower Brinstar).
First Visit
Reaching Brinstar
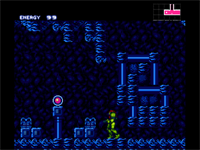
Although it may seem like it isn't accessible from the get-go, Brinstar is the first place to go when arriving on Zebes. After you pass through old Tourian, an elevator leads to a deserted cave which seems to be not connected to the main section of Brinstar, though it actually is, as you will see when getting the Power Bomb upgrade. This place is the original start point of Metroid for the NES, where you can find the Morphball. See Crateria if you haven't gotten it yet.
However, you will be able to visit the main part of Brinstar after acquiring the Morph Ball Bomb from the Chozo Statue. After getting the bomb, battling the statue and leaving its chamber, go back the way you came until you reach the spot where you had to morph into a ball. Take the way on the right by climbing the steps and bombing away the blocks with your new item (![]()
![]()
![]() , as shown when getting it).
, as shown when getting it).
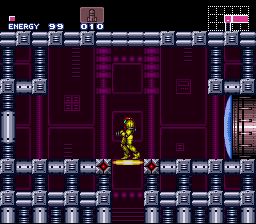
After leaving the tunnel, head left until you reach a wall made of violet-grey stones. You can simply blast this wall. Pass the gate behind it, and run through the cave. At its end, you will find your first ![]() Energy Tank. The next room holds green Space Pirates, which are immune to your standard beam. Use Missiles instead, or, if you're insane, bombs should also work. When reaching the bottom, you can choose between two gates. Take the left one. The right door leads to Tourian, an area you will explore much later on.
Energy Tank. The next room holds green Space Pirates, which are immune to your standard beam. Use Missiles instead, or, if you're insane, bombs should also work. When reaching the bottom, you can choose between two gates. Take the left one. The right door leads to Tourian, an area you will explore much later on.
Another corridor awaits you, which leads to the room that contains the elevator that will lower you down into Brinstar.
The first Room

The first room contains five gates. If you're interested in getting the Brinstar map, take the upper left gate first. When you reach a wall, place bombs at it to pass. After getting the map, you'll have to kill all the enemies to leave the corridor.
Thereafter, enter the opposite room. It contains a bridge that will collapse when you try standing on it. Try to fall down into the first "box" to get a ![]() Missile Tank. Leave the box by placing bombs at the left wall (you can also enter the box that way). You can hardly cross the bridge until you get the Speed Booster, so exit the room. The middle left gate contains a save point. Save, if you want, and head for the bottom of the room. The left door leads to a a Missile Recharging Station. If you choose to get there, watch out for the firefly-like aliens. They can hurt you, but if you kill them all, the room will be completely dark.
Missile Tank. Leave the box by placing bombs at the left wall (you can also enter the box that way). You can hardly cross the bridge until you get the Speed Booster, so exit the room. The middle left gate contains a save point. Save, if you want, and head for the bottom of the room. The left door leads to a a Missile Recharging Station. If you choose to get there, watch out for the firefly-like aliens. They can hurt you, but if you kill them all, the room will be completely dark.
Finally, take the right door as soon as you're finished.
Getting an Upgrade
After running along that shaft, you will arrive in a huge, pink hall. Your objective now is to go to the upper right to battle Spore Spawn, but before that you can get the charge beam and more Missile Tanks, which should prove useful against the miniboss. Head for the lower part to collect a ![]() Missile Tank along the bottom left. The
Missile Tank along the bottom left. The ![]() Charge Beam is found just right of this tank.
Charge Beam is found just right of this tank.
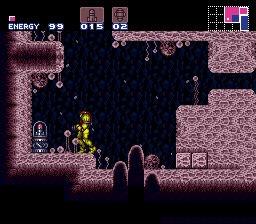
The Charge Beam
Your first Beam upgrade lies beneath this container. Blast the two conspicuous stones on the right with a bomb and roll into the hole. As you fall downwards, a Chozo statue holding the Charge Beam upgrade will become visible.
Operating the Charge Beam
This part refers to standard controls. For further details, see Controls.
To charge up the beam, press and hold ![]() . To shoot, release
. To shoot, release ![]() again. The longer you charge, the more damage causes your shoot.
again. The longer you charge, the more damage causes your shoot.
If you spin jump while your beam is fully charged, you can perform something like a "pseudo Screw Attack": you can cause damage or kill little enemies with this move.
By morphing into a ball with a charged beam, you drop five bombs at once around you.
To Spore Spawn
While you head back up, you may notice a ![]() Missile Tank in an alcove high up with a Sidehopper, across and above from an orange door. You can attempt to get this now by walljumping along the wall leading to it, but if that proves to be too difficult, just remember to come back here after getting the Hi-Jump Boots soon. At any rate, head to the upper left section of this room.
Missile Tank in an alcove high up with a Sidehopper, across and above from an orange door. You can attempt to get this now by walljumping along the wall leading to it, but if that proves to be too difficult, just remember to come back here after getting the Hi-Jump Boots soon. At any rate, head to the upper left section of this room.
As you arrive, you can see that the wall is thinner on the left side. You can reveal a save station by placing a bomb at the spot on the very left (→ picture). Save, and head right. You will encounter some kihunters; kill them to get to the next room.

Fighting Spore Spawn
That next room is Spore Spawn's lair. It's a giant spore, spawning little spores that can hurt you. It will immediately start moving around the room. Stand in the left corner of the room and Morph into a ball during this phase. The spores it shoots will not go into this part of the room. As it stops moving, it will open its "mouth". Shoot a missile or a charged shot into it (your standard beam won't have any effect). Now, simply keep that strategy for the rest of the fight. The boss will become faster over time, but that doesn't really matter. If you run out of missiles, shoot the small spores and collect their drops. 10 missiles should be enough for this boss.
As soon as it's dead, collect its drops, jump up the vertical shaft above and pass through the gate. At the end of the following room, you will find a spawner pipe that does not spawn enemies. Jump on its top to make it collapse. You'll fall down a long duct and land in front of a Chozo statue holding the first ![]() Super Missile Tank.
Super Missile Tank.
About Super Missiles
Super Missiles cause fives times as much damage as normal missiles, i. e. 1 Super Missile is worth 5 standard Missiles. They can be used to easily kill enemies, and to open red and green gates.
Going deeper
After picking up the Super Missiles, head left and walk along the two rooms. As you encounter a green gate, shoot it with a Super Missile to get through. In the following room, a single stone will block your way. If you try to use a standard bomb on it, it will show you the icon of a Super Missile, which means that it can be blasted using one of those. When you've made your way through the tunnel, keep heading left until you reach a wall, where a missile tank was above the charge beam.
Disintegrating Bridge
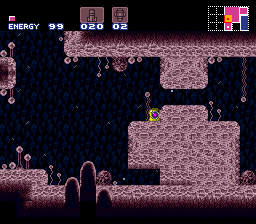
Pass the upper tunnel by climbing on the step above the hole, morphing into a ball and setting a bomb on the very right (→ picture (left)). Keep pressing ![]() all the time. As the bomb explodes, the force will carry you into the air. The next room holds a secret
all the time. As the bomb explodes, the force will carry you into the air. The next room holds a secret ![]() Missile Tank, which can be reached by walljumping up the way to the pipe which doesn't spawn enemies, then entering it as a ball. You can decide to return with the Hi-Jump boots if you prefer not to walljump. The shutter at the end of the room can only be passed from the left side until you get the wave beam, i. e. you can't return to Upper Brinstar using that passage for now. Open the shutter by shooting the blue button.
Missile Tank, which can be reached by walljumping up the way to the pipe which doesn't spawn enemies, then entering it as a ball. You can decide to return with the Hi-Jump boots if you prefer not to walljump. The shutter at the end of the room can only be passed from the left side until you get the wave beam, i. e. you can't return to Upper Brinstar using that passage for now. Open the shutter by shooting the blue button.

As soon as you're in the next room, you'll encounter a disintegrating bridge. Some players get stuck here, because they are unfamiliar with the run button. Press and hold ![]() while crossing the bridge to reach the other side. By walking through the next gate, you will enter Lower Brinstar!
while crossing the bridge to reach the other side. By walking through the next gate, you will enter Lower Brinstar!
Norfair gets a visitor!
The next place to go is Norfair, namely to obtain the Hi-Jump Boots. First, jump off the ledge you are standing on and keep going downwards. As you encounter a couple of rocks with a yellow gate nearby, place some bombs at the ground. As a part of the ground will collapse, place another bomb in the pit. Alternatively, you can shoot the ground as well. Continue going lower and lower until you reach the bottom. The green gate on the left side leads to an energy recharger. Use it if you want, then enter the gate on the right.

You'll instantly have to deal with a spot quite similar to the bridge described above. But this time, you have to jump over a water pit. Simply go to the very left, press and hold ![]() , run a few steps and jump as far as you can.
, run a few steps and jump as far as you can.
The Spazer hides in the next room, however, you can't gain it until you get the Hi-Jump or by doing a Wall Jump to the top. Keep going forward until you reach the elevator, then use it.
Your journey continues in Norfair.
Second Visit

Hidden Upgrade
Before bashing Kraid, you might want to obtain an upgrade for your beam. So, head left again until you reach the first red-solied room. Leftmost, you can notice a breakable block on the ceiling. Shoot it with your beam and jump up through the hole. At the morph-ball tunnel, break the first block with a bomb as usual. But you have to use your beam on the second one. If you use a bomb, a hole will emerge directly under you, causing you to fall down into the water.
Open the gate, then enter it and get the ![]() Spazer.
Spazer.
Operating the Spazer
Utilising the Spazer, you will fire three beams at once. This can be pretty helpful when aiming at enemies, not to mention the ability to kill green Space Pirates using the beam.
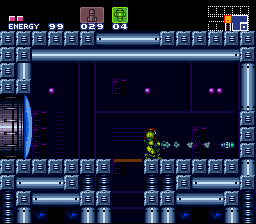
Battling Kraid
You'll have to shoot and break certain blocks a lot to reach Kraid, which can sometimes be tricky, so read carefully.
Return to the elevator room. As soon as you're there, shoot the lowermost block in the right wall with a Super Missile. Enter the hole, then jump upon the platform beneath the creepy alien head. Enter the gate behind it.
You'll now arrive in a factory-like room. Shoot the platform's leftmost block and go through the hole. In the lower chamber, set a bomb at the lowest block of the right wall and pass through it. Open the gate and kill the mantis-like aliens in the next room. If you want to save before visiting Kraid (which is actually advisable), go to the right, morph into a ball and roll into the pit. Place a bomb and roll to the right. The Save Station is right behind the gate.
To get to Kraid, hold out for a cracked spot on the floor of the room with the mantis enemies. As you find it, shoot it, go through the hole and the gate. The Space Pirates in the next room can easily be killed by using the beam (thanks to the Spazer). At the end of the room, you will encounter a mini version of Kraid. The best way to beat him is simply using Missiles (two should do). The next corridor hides a refiller room, but it's not too hard to find it. Shoot the ceiling at the spot without solid blocks above. Recharge, if necessary, and go to the next room to meet Kraid.
The battle itself
Kraid is one of the easiest bosses to beat. The best way to finish him is using Super Missiles, since he can only take four of them. As he hatches out of the ground, shoot his eyes using your beam. His eyes will flash if done properly and his mouth will open. As he opens his mouth, shoot a Super Missile inside. Try to time your shots so that Kraid's hand doesn't block your attacks, as he'll periodically raise his hand, covering his eyes and mouth. If you run out of ammo, shoot the claws flying around in the room. Also, watch out for the spikes shot out of Kraid's stomach and chest. You can ride them without taking damage if you land directly atop them, but it's best to try to jump over them entirely.
After hitting him with 4 Super Missiles or 20 Normal Missiles, he will drop into the ground again, and that's it!
After the fight, go to the next room to obtain your new item: the ![]() Varia Suit! Its main purpose is to protect you from heat, which will be quite handy in Norfair! Plus, it halves the damage Samus will take.
Varia Suit! Its main purpose is to protect you from heat, which will be quite handy in Norfair! Plus, it halves the damage Samus will take.

Off to Norfair
After beating Kraid and getting the Varia Suit, your next destination is Norfair. Leave Kraid's lair the way you came. As you return to the "factory", you're best off saving your game again. But before you start exploring the vastnesses of Norfair, it's time to collect another item! As you head for the elevator, you'll notice a door you couldn't access before can now be opened. When you enter the room, you'll only find a bunch of enemies which will attach to you and drain your energy. They can be killed using either missiles or bombs. After destroying them all, you'll find but an empty room. However, in Super Metroid (and any other Metroid game as well), you should always be skeptical whenever you encounter a dead end that doesn't seem to have any goodies. This room, for example, has an ![]() Energy Tank hidden in its ceiling. If you shoot a specific spot, the Tank will appear and you'll be able to collect it.
Energy Tank hidden in its ceiling. If you shoot a specific spot, the Tank will appear and you'll be able to collect it.
For now, you're through with Brinstar, so it's time to head for the elevator again.
Your journey continues in Norfair.
Third Visit for the Power Bombs
When the elevator arrives in Brinstar, head left, back to the room with the rippers floating back and forth. On your way there, the Ice Beam can prove useful in stopping enemies in your way, especially the yapping maws whose lunges for you will be stopped short if frozen.
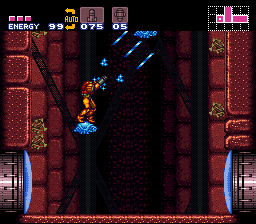
You should recognize the room with the rippers, as you dropped down this shaft to get to Norfair. You used to be trapped, but now you can freeze the rippers and use them as platforms to get up. This path leads to the place where Spore Spawn was located. You can go back for items you may have missed if you have the Wave Beam, since that beam will let you through the shutter that previously blocked you. To progress, though, take the upper path in the ripper room, which you can now access due to Hi-Jump Boots. There are more rippers to freeze, then take the right upper door.

This new area is rife with traps. The zeelas patrolling the platforms aren't a big deal, they're similar to geemers. Watch out, though, for the spikes as well as the aptly named flowers: Samus Eaters. The Samus Eaters will drain a good chunk of energy and trap you if you fall into them, only allowing you to jump to freedom once you've already been hurt a good deal. Also, some of the Samus Eaters contain insect-like zebbos which fly horizontally in your direction. Because they respawn when killed, you can use the zebbos to restore missiles and energy, just be careful if you do. Make your way right to the door, making sure to time your movements carefully since there are traps on both the ceiling and floor.
Here, shoot the floor when you enter or bomb down. You'll see a pair of larvae called zero on the walls, but they don't pose too much of a threat. Enter the green door down here.
A music change suggests a new item may be here. Continue left to get newfound ![]() Power Bombs from the statue. You can test out this new item right now by pressing Select to switch to them, then default X while in ball mode. After the explosion, the left wall will be gone, letting you go left for a
Power Bombs from the statue. You can test out this new item right now by pressing Select to switch to them, then default X while in ball mode. After the explosion, the left wall will be gone, letting you go left for a ![]() Missile Tank.
Missile Tank.
Explanation of Power Bombs
The Power Bombs release a large explosion, usually instantly destroying any minor enemies onscreen. They can also be used in rooms to check for bombable areas, since they remove anything that can be bombed normally. You use them while they're equipped and you're in ball mode, and like Missiles there is a finite number. Also, this item lets you open orange doors. There are a total of 10 Power Bomb pack locations, with each one adding 5 to your total, for a grand total of 50.
Power Bombs also let you pull off a technique called the Crystal Flash, which can restore lost energy. To pull this off, your energy must be 50 or lower, with empty Reserve Tanks, as well as at least 10 Missiles, 10 Super Missiles, and 11 Power Bombs. With these conditions, Hold both diagonal aim buttons (default L and R), Down, and the fire button (default X). It'll occur if done right, and the previously mentioned number of Missiles, Super Missiles, and Power Bombs will be consumed.
Finally, Power Bombs can be used to pull off Charge Combos. To do this, only one beam type and the Charge Beam can be equipped under the Beam section of the equipment menu. Then, make sure Power Bombs are selected with default Select, and charge the beam. The combo will then be pulled off, consuming a Power Bomb. These combos are not necessary for progress or secrets, but provide an option for defeating enemies and using up Power Bombs.
Returning to Norfair After Power Bombs
You now must go back to Norfair, but you can get another Power Bomb pack first. Exit this Power Bomb room, and head back up. Where you came in from is now an orange door, requiring Power Bombs. Activate it now or skip it, but you'll be returning here shortly. The blue door on the right contains a Save Station if you want to save. Continue up and go through the green door on the left.
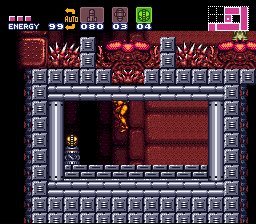
In here, there are yapping maws inside Samus Eaters, a dangerous combination. Watch out for the big hoppers, then head left. Drop a Power Bomb over the part of the floor with the last Samus Eater, the one lacking a yapping maw. Don't worry, because you'll just fall safely through to a spot in which you can pick up another ![]() Power Bombs pack. Now, head back right to the door, being mindful of the spikes and now free yapping maws.
Power Bombs pack. Now, head back right to the door, being mindful of the spikes and now free yapping maws.
With Power Bombs, you can reach a new spot in Norfair. So then, backtrack all the way back to the elevator down to Norfair, and use it to return down there.
Your journey continues in Norfair.
Fourth Quick Visit on Way to Crateria

You now should return back up to the surface of Crateria, where your ship is parked. On the way, you can pick up the new X-Ray Scope. Return the the left room in Brinstar with the Rippers after the elevator up from Norfair. On your way up, stop when you see an orange door. Drop a Power Bomb to open the path and door.

If this is your first time seeing Firefleas (the circling creatures with glowing orbs), know that they keep this room lit. Killing them darkens the room, so try to avoid that to help you avoid the traps. Merely touching them can kill them. Freezing them, however, keeps the room lit and they won't die. As such, just freeze them with one hit and jump on them, continuing right and being careful as there are spikes on the top and bottom of this room, and other enemies.

Eventually, you'll see grappling points, indicating you need to grapple left. When you swing on the points, don't worry if you bump the Fireflea here. Destroying one or two shouldn't make things too difficult. Be careful as you continue grappling, because Yapping Maws are placed further left to try and pull you into the trap, and flying Wavers will try to hit you. You may want to rely on grappling close to each point, unless you can move fast enough to dodge the enemies. At the top left end is a red door to go through, leading to an item room.
In here, lay a bomb on the block sticking out on the left, with the pipe underneath. In response, the pipe will rise, where you can continue left.
The Chozo Statue holds the ![]() X-Ray Scope.
X-Ray Scope.
Examining with the X-Ray Scope
The X-Ray Scope is the final item equipped with ![]() . When equipped, hold default
. When equipped, hold default ![]() to use it, whereupon the screen will darken except for a cone emanating from Samus' visor. Within this cone, any hidden and bombable areas will be revealed. While holding
to use it, whereupon the screen will darken except for a cone emanating from Samus' visor. Within this cone, any hidden and bombable areas will be revealed. While holding ![]() , press
, press ![]() , or
, or ![]() , to move the cone up or down. You can also press
, to move the cone up or down. You can also press ![]() or
or ![]() to switch the direction you are facing, keeping the scope active.
to switch the direction you are facing, keeping the scope active.
Activating the scope will freeze everything on screen except Samus. It will not, however, stop the ingame timer. This includes countdowns. Also, you cannot dash while it is equipped.
Return to the Surface
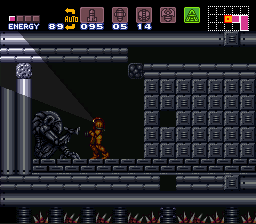
You get the opportunity to test out your new item here. Activate the X-Ray Scope while facing left, revealing a path blocked by a bombable block. If you turn around, you'll notice this hidden path extends right. Take this path, and drop a bomb when you can go no further right to let a pipe take you back up.
To easily return to Crateria, go back to the right Ripper room. Head up, then take the right path, and finally go up in here to see the elevator which will lead you to your destination. You'll need to Power Bomb the orange door on the ceiling if you haven't been here yet.
Your journey continues in Crateria.