To Maridia[edit | edit source]
Now, you need to go to the section of Brinstar with the glass tube leading to Norfair to get to Maridia. From Samus' ship, you can take the right path to get there quicker. On the other hand, you can take the left path to get some items in Brinstar on the way to Maridia.
Optional Items In Brinstar Before Maridia[edit | edit source]

Return to the left area, and head down to Brinstar, backtracking to the area where the second Missile Tank was found. Using the right door, head right, stopping before the obstruction of blocks leading to where the Tank was. Drop a Power Bomb to clear it, giving space to run. Aim at the upper left part of the wall to show a hidden ![]() Energy Tank, then get run from the right and jump and grab it.
Energy Tank, then get run from the right and jump and grab it.
Now, observe the black spot in the obstruction that was just removed. You can Speed Boost from the left, then Shinespark through this spot to reach a secret area. Take the door.
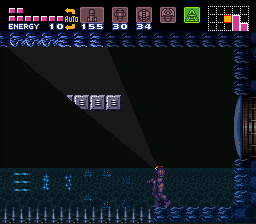
Over the pool with spikes, there is a hidden bridge revealed with the X-Ray Scope. Jump atop it, moving left, looking out for falling boulders. The next room holds a ![]() Missile Tank in plain sight. Next, bomb the left part of the platform holding the pedestal and pipe to get another
Missile Tank in plain sight. Next, bomb the left part of the platform holding the pedestal and pipe to get another ![]() Missile Tank. Return to the initial room, bombing to get through the part you Shinesparked from.
Missile Tank. Return to the initial room, bombing to get through the part you Shinesparked from.
Keep heading left, back to the part where the Morph Ball was found. Keep Power Bombing the left wall and moving left, until you get back to the green section of Brinstar. Then, head back to where the Chozo Statue was with the Charge Beam, in the room left of here. You'll have to bomb the two side-by-side blocks again to get there. Down here, use a Power Bomb. The right side of the pipe under the Statue will open, where you can roll to a red door.
In the next room, kill the Zeros in the path, then go back right and get a Speed Boost left. You'll get rid of the obstructions and enemies, leading to Brinstar's last item: an ![]() Energy Tank.
Energy Tank.
Now, return right, this time taking the lower path.
Breaking the Glass Tube in Brinstar[edit | edit source]
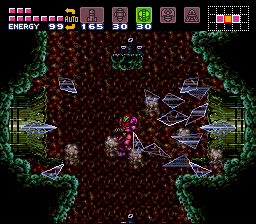
However you got here, you should be in the glass tube room left of the elevator room to Norfair. Lay a Power Bomb in the tube. As soon as you try to move afterward, the glass will shatter, and you'll be in the water. You could have done this earlier, but it would have been inconvenient to get to either side of the tube without the Gravity Suit, and getting to Maridia would pretty much be impossible. You can start by heading down to get to the red door leading to a Save Station. Then, you can take the upper path with the door in the ceiling to actually reach the aquatic Maridia.
Maridia Proper[edit | edit source]
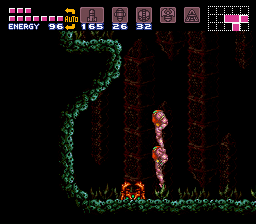
There is a Missile Tank to get here by Shinesparking, though it may be difficult. If you want it, start by going right, through the red door. Get rid of the Scisers roaming about, and activate the green shutter. Start by shooting the left door to open it, then go right. Speed Boost back left, ducking to store it, then head back to the left room. Shinespark up as soon as you get to the left plant which is closest to the foreground. If done correctly, you'll jump between the upper platforms, where you'll go through part of the ceiling to get a ![]() Missile Tank.
Missile Tank.
Now then, head up and left in the initial Maridia room. You may notice a Super Missile Tank, but it cannot be gotten now. Take the upper right door.

To progress, you must use the single grapple points to get right. If you want items, however, instead drop straight down. After the metal section, head right on the green part before a cliff. Short jump right, to reach the high ground after the pit. You may notice a Sciser walking into a hidden passage on the left cliff. To get there yourself, jump left and morphball on the way down, and hold left while falling. From here, keep moving left to get to the last room, where you can get a ![]() Super Missile Tank. Now head back right.
Super Missile Tank. Now head back right.
Back here, keep going right, then take the rightmost door on the floor. Pink Space Pirates are in this room, though there is currently no easy way of defeating them, so avoiding them is best for now. Go left, down the third gap. At the bottom, there is a hidden passage to the right through the wall that you can get through by jumping into the side. At the end is a door to go through.

Move right, and you'll see the turtle-esque Tatori and its children. If you attack the little ones, the Tatori will spin left and right which will damage you greatly. While its active, jump on top of it, where it'll fly up to a grapple point. You can spin 180 degrees on this point, then land to get an ![]() Energy Tank. After, there is a
Energy Tank. After, there is a
![]() Missile Tank to be found by shooting the middle of the right wall. You can jump on the Tatori while it's near the right to get it, or you can try to Walljump for it.
Missile Tank to be found by shooting the middle of the right wall. You can jump on the Tatori while it's near the right to get it, or you can try to Walljump for it.
Now, return left, then up, back to the room with the grapple points. From the top left, use the points to reach the top right. The round Powamp enemies here can be grappled to if you fall. Wait until they reach their highest point before trying to swing back up, and try not to touch them as they can do damage. Take the top right door. If you are having any trouble grappling across the top of this large room, try taking OFF your Gravity Suit. Samus moves very slowly in water without it and that applies to grappling also and can make hitting the grapple blocks easier as you "float" slower through the water. But be careful, the enemies in Maridia do a lot of damage without Gravity!
Here, the bottom part leads to progress, but you can head through the top ceiling door to get some items.
The top door leads to a room with sand and grass. Spiked Owtch enemies pop up from the ground every so often in nearby rooms, so watch where you step. A quick Super Missile can end them if they're troublesome. Go right carefully, and after the Owtch continue right through the wall to get a ![]() Missile Tank. Then go back left, taking the left upper door.
Missile Tank. Then go back left, taking the left upper door.
Just keep moving left, through the hidden passages. In addition to Owtches, there are flying Menu enemies, which are like the earlier Mellas, but might be quicker to home in on you. You want to go through the upper left door.

Keep left, and drop down the large pit with a Chute. Under the Chute is a secret area which you can drop down to reach a ![]() Missile Tank as well as a
Missile Tank as well as a ![]() Super Missile Tank.
Super Missile Tank.
Return to the room composed of metal with a lone Sciser. Shoot the middle of the floor, where you can drop down and move right to a green door.
Another Section of Maridia: To Draygon[edit | edit source]
You should now be in an area made up of metal and bricks, with different music to suggest a new area of Maridia. There are Yard enemies here, which are shelled creatures similar to crabs. If you face them, they'll remain in their shell. If you look away, though, they will approach. If you attack them, they'll bounce around and respond by quickly moving toward you. So, it may be best to avoid trying to harm them, as touching their shells does no damage. You can knock them around by running, and they should bounce far enough away to not be too much of a problem.
From the start, use a Power Bomb to get below. You can take the lower red door to a Save Station. Speed Boost to the right past the walls with grapple points, and before the end there is a gap without points. Shinespark up this gap to reach a ![]() Missile Tank. After it, head right a bit and use the X-Ray Scope to spot hidden crumbling blocks. Jump over them to get to a
Missile Tank. After it, head right a bit and use the X-Ray Scope to spot hidden crumbling blocks. Jump over them to get to a ![]() Super Missile Tank. You can fall down the crumbling blocks now. Walljump, Shinespark, or grapple to get to the upper left section. Then, take a door in the ceiling.
Super Missile Tank. You can fall down the crumbling blocks now. Walljump, Shinespark, or grapple to get to the upper left section. Then, take a door in the ceiling.

In this room, you will spot Metroid-like Mochtroids trapped by shootable walls, with Speed Boost blocks nearby. Unlike the more powerful Metroids, basic attacks are enough to take out these creatures.
Shoot the walls and Mochtroids until enough of the path is clear at the bottom that you are able to Speed Boost. Dash right to activate it, allowing you to get to the right door. Ensure you're ready, because a miniboss is inside.
Maridia's Miniboss: Botwoon[edit | edit source]
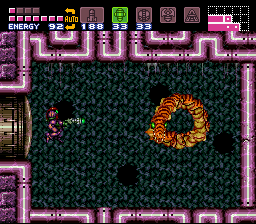
In this room you should notice four holes in the wall. The snakelike miniboss Botwoon can freely move between these holes. When Botwoon appears, aim for its head with Missiles, Super Missiles, or charged shots to damage it. Charged shots and Super Missiles do the same amount of damage. Thus, it is probably ideal to rely on Super Missiles to defeat Botwoon, since they are both the fastest and most damaging option.
Botwoon's main method of attack is swimming around after exiting a hole, trying to hit you. To avoid this, merely remain near the left corner, firing at its head when you get a chance. Sometimes, only the head of the miniboss will be visible from the wall. Botwoon will then spit a wave of green orbs from its mouth. This gives you a good opportunity to hit the enemy's head, but the attack can be also hard to avoid considering the number of orbs heading toward you. So if you see Botwoon's stationary head, be prepared to move from the corner to dodge it. If the attack seems too close for comfort, try morphballing to make yourself a smaller target.
Botwoon will redden and speed up upon taking damage. Eventually, Botwoon may forego the spitting attack and instead merely move around at high speeds. This means the battle is close to ending, so aim carefully to defeat the miniboss. Upon Botwoon's destruction, the right wall will explode, allowing you to get to a blue door on the other side.
Heading to Draygon[edit | edit source]
In the room after Botwoon, continue right but stop before the sinking sand. Try not to fall all the way down it, or you'll end up back at the initial metallic room and have to get back up. There’s an ![]() Energy Tank you can see above. While it’s possible to get by dashing right, morphballing, and pressing right, timing is hard to get right. An easier way to get the energy tank is to speed boost to the right of the room, underneath the structure where the energy tank is. On the right side of the structure, you can jump up, morphball, and move left through the structure to get the energy tank. There’s one spot where you need to use a morph bomb to go up and left or you’ll drop out of the structure and you’ll need to start over.
Energy Tank you can see above. While it’s possible to get by dashing right, morphballing, and pressing right, timing is hard to get right. An easier way to get the energy tank is to speed boost to the right of the room, underneath the structure where the energy tank is. On the right side of the structure, you can jump up, morphball, and move left through the structure to get the energy tank. There’s one spot where you need to use a morph bomb to go up and left or you’ll drop out of the structure and you’ll need to start over.
Once you’ve got the energy tank, head out the door on the right side of the room.
In this room, there are grapple points on the walls on both sides leading up. Use the points or walljump up. If you grapple, the beam is an effective way of removing the Mochtroids in the way. Continue through the top right blue door.
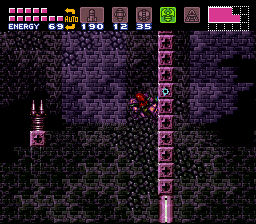
In the next room, drop down. If you end up in the sinking sand, quickly jump or grapple out because there are spikes at the bottom. There are grapple points you need to use in this room. After the first pit of sinking sand, use the single point over the next pit of sand, and grapple to the wall of points right of it. Whenever you're using a group of vertical grapple points, if you allow yourself towards the points as much as possible Samus should face away from them if you have enough room. When this happens, you can let go of everything then immediately jump to gain some height. Do this to get up, and over this group of points. After that, go right and you'll have to do something similar, but with the lone point you need to make sure you get high enough because the vertical points are fewer in number. Next, grapple to a square group of points to a group of two, then make sure you jump high to a lone point after that. The top red door holds a Save Station if you want to save now as well as an Energy Recharge Station right of that, while the bottom green one leads to progress.
Do not worry about the spikes after the green door, because they are inactive and won't harm you. Jump over the spikes and shoot the end of the pipe that sticks out toward you on the right wall to get a ![]() Missile Tank. Now fall under the first spikes' pipes to get to an eye door that must be defeated, signaling an upcoming boss.
Missile Tank. Now fall under the first spikes' pipes to get to an eye door that must be defeated, signaling an upcoming boss.
Versus Draygon[edit | edit source]
In the boss room, notice the dome-like structures on the walls. These are turrets which shoot green spheres of energy, and it'd be best to use Missiles or Super Missiles to get rid of them before trying to deal with the boss. After going in, you'll see a bunch of smaller versions of the boss called Evirs. Ignore them, and after they are gone, the boss Draygon will swoop in.
The boss has two main attacks. First, it'll move quickly from one side of the room to the other, trying to ram you. You should be able to morphball to avoid damage from this when Draygon comes close. If the boss instead comes from one side slowly, it'll do its other attack phase. In this phase, it'll spit low moving projectiles from its mouth, which will slow you down if they reach you. You can shoot them for pickups or try to avoid them. Draygon will continue slowly from one side to the other, unless you get trapped by a projectile in which case the boss will speed up and grab you, so you should try to do what you can to avoid contact with the boss at this point. If you do get grabbed, perform as much different movement as possible, or else you'll take a good deal of damage from its tail.
Now, there are three methods of defeating Draygon, one easier than the others. The “normal” method will be described first.
First Method: Missiles and Super Missiles[edit | edit source]

If you choose this method, you must aim at Draygon's stomach area with strong attacks including charged shots, Missiles, and Super Missiles. The swooping attack should make it rather easy to hit the weak spot, just remember to morphball when the enemy closes in. For the other phase, the spit projectiles make it problematic since your attacks will hit those instead. So, move in the opposite direction and get rid of the spit with normal shots. Additionally, you can lay a Powerbomb to clear the spit projectiles and fire at Draygon's stomach. Once it's gone, then unleash Missiles and Super Missiles into the boss' weak point.
The boss' damage will be indicated by the color of its stomach, as it become more red depending on how much damage has been inflicted. Just keep up this pattern, as it will take 20 super missiles or 60 missiles to defeat Draygon.
Second Method: Grappling Beam Current[edit | edit source]

This method is quicker, but guarantees some damage. First, ensure the turrets are taken out, and there should be blue electric currents in their place. Dodge the first swooping attacks from Draygon. You don't need to worry about damaging Draygon here. Stand close to a wall. Once the boss spits at you, purposely get hit by it and grabbed by Draygon, making sure the Grappling Beam is equipped. The boss will move in an oval pattern while holding you, and eventually you should get close enough that you can grapple to one of the blue electric currents. It may take until after one tail hit before you can get close enough. Once the grapple connects, hold the button and it'll drain your health. The current affects Draygon as well, and as long as you hold the beam, Draygon will die after a short amount of time.
Third Method: Shinespark[edit | edit source]
The shinespark can do the most damage against Draygon, but it is the most difficult of all three methods.
First, get hit by the mucus when in the corner, then immediately dash towards the other corner. At the other corner, you have a small window where speed boost activates, and where you can charge the shinespark. If you are successful, Draygon will attempt to flee by flying upwards, but you can still land a shinespark when she starts a swoop from the left.
There is also an exploit known as Short Charging, where you only have pressed during a specific frames (specifically one where the front leg is about to touch the ground). This exploit allows a shinespark without the aid of mucus, and allows for quickly killing the boss much more quickly than any other method.
You will also want to include the wave shield in the attack. To create one, switch to power bomb, and charge your laser until you have four spheres launched. Combined with the short charged spineshark, this creates a combination which can do more damage than half of Drayon's health.
Reward: The Space Jump[edit | edit source]
After defeating Draygon with whichever method you choose, the Evirs will come in to bury Draygon. After this, the left room will unlock whereupon you can get from the Chozo Statue the ![]() Space Jump. This upgrade allows you to jump indefinitely, meaning new areas can be reached.
Space Jump. This upgrade allows you to jump indefinitely, meaning new areas can be reached.

Note the new animation when flip jumping. To keep jumping with this, do a flip jump. Now, you have a small window of opportunity to jump again. Press default before falling more than halfway down from the top of the jump's arc to be able to jump again. It may be best to wait until right after the jump reaches its maximum height, right as you begin to fall. As long as you have proper timing, you can jump continuously as much as you want. You will have to try it out back in the boss room, as you need to utilize the Space Jump to get back through the top right door. Space jump works differently in and out of water/lava/acid (water/lava/acid are more forgiving with the timing of when to initiated the consecutive jumps) so don't get frustrated if it takes a while to get the timing down.
Return up to the room with grapple points. Due to the maneuverability of the Space Jump, you don't need to grapple anymore. Just jump all the way back left, but still be careful of Mochtroids and spikes. Return through the left door.
Here, ignore the flashing door. Open the bottom one, then dash from the right side to Speed Boost when you get through. Destroy the enemies and blocks in the path. Now, go back right and fall down one of the sinking sand pits that does not have a bottom. The next screen will have Bulls charging you while you sink, so try to avoid them. Once you fall through, you'll end up in a new area. Just go left to end up back at the metallic area, which is where you first entered the second part of Maridia.
Back in here, shoot a small section of piped floor on the bottom right to fall through. Head left here, and let yourself sink through the sand. On the other side, you'll be in a secret room.
First, quickly hop left out of the sand before sinking. Jump up the left side to find a ![]() Missile Tank. Then, go right past the sandfall and jump into the passage. Follow it and morphball before landing on the right square piece of ground, which actually crumbles. As soon as you land, you'll bounce. Hold right to get into the passage where you can bomb the obstruction to get
Missile Tank. Then, go right past the sandfall and jump into the passage. Follow it and morphball before landing on the right square piece of ground, which actually crumbles. As soon as you land, you'll bounce. Hold right to get into the passage where you can bomb the obstruction to get ![]() Power Bombs. Head back down and fall through the sand.
Power Bombs. Head back down and fall through the sand.
Keep going right in the next room. There are Evirs here in the falling sand, so be watchful, as they will shoot projectiles. Keep jumping right. The sandfalls will try to force you down, so be prepared as this will alter the timing of the Space Jump. Go right to the next room.

Activate the lone grapple point and allow it to disappear. You'll have to Space Jump through the small opening, but do not worry if it takes some time, as the point will not reappear. Now keep going up, and try to stay near the right so that you make it to the right ledge, as Menus at the top will try to fly down and knock you out of your jump, forcing you to start from below. Once up top, continue right and fall through crumbling platforms on the metal areas. When you see a door on the right, go through.
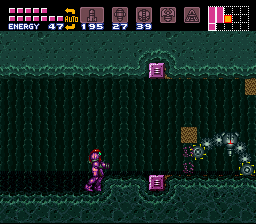
When you get here, lay a Power Bomb to remove the right wall. Do not mess with the mechanical Shaktool in here, as you want it to keep going right and removing the sand in the way. Follow it right, and once the door appears go through.
Go through the path in the floor as a ball, then take the left tunnel to reach a Chozo Statue which gives you the ![]() Spring Ball. With this, press default
Spring Ball. With this, press default in ball mode to jump as a ball, meaning you don't have to rely on bomb jumping from here on. Return left and use it to get out of the tunnel.
Return two screens left, and fall down the crumbling platforms. Go two more screens left until you reach the sandfall room with Evirs. Then, take the left door and you'll be in a short metal room with blocks you can destroy overhead.
To the Plasma Beam[edit | edit source]
In here, use a Power Bomb to get rid of the top metallic part. Head up, and through the green door. You'll be forced through a tube, and deposited in an area with grass and sand.
Go right and follow the upper path until you get to a flashing door on the upper right. It was locked until Draygon's death, so now you can go through. If you fall to the bottom, just Space Jump back until you can get to the door.
Head up this room with Chutes and Puyos to the upper right door. In the next area, there is a grouping of Puyos. Get rid of them, and continue right.

In the next room, you will see Pink Space Pirates. Ignore them and drop to the bottom right to find a Chozo Statue. It will give you the ![]() Plasma Beam upgrade. This beam does triple the damage granted by the Spazer, and the Spazer and Plasma Beam cannot be equipped at the same time, so the Spazer will automatically be unequipped. Because the Plasma Beam is more powerful, there is no real reason to equip the Spazer again. This Plasma Beam can kill the Pink Space Pirates, so remove them to unlock the door and return to the upper left. The Plasma Beam keeps going through enemies and damaging them, rather than stopping upon contact like previous beams. This is proven if you shoot the Puyos here. Continue left.
Plasma Beam upgrade. This beam does triple the damage granted by the Spazer, and the Spazer and Plasma Beam cannot be equipped at the same time, so the Spazer will automatically be unequipped. Because the Plasma Beam is more powerful, there is no real reason to equip the Spazer again. This Plasma Beam can kill the Pink Space Pirates, so remove them to unlock the door and return to the upper left. The Plasma Beam keeps going through enemies and damaging them, rather than stopping upon contact like previous beams. This is proven if you shoot the Puyos here. Continue left.
Return through the bottom left door. In the room with sand and grass, fall left into the water and continue left until you get to the bottom path, then go right to get through the bottom door. Enter the flashing door to a room with blue Cacatacs. Continue right.
Here, fall down but be careful because there are spikes at the bottom. Spring Ball into the right path. Now, Space Jump until you get to the blue door on the right. Through it is the room with vertical grapple points and Mochtroids, close to the Draygon's boss room.
Fall down, open the left door, and Speed Boost left to the next room once again. Fall down the sand and return to the initial metallic and bricked area. Shoot the floor to the sinking sand pits, but this time hop past the first one and take the leftmost one.
Once you emerge from the sand, jump on the ledge directly left of the sandfall. Shoot the obstructing square block. Watch out for falling boulders. The block to the left crumbles, but the block above it can be shot, allowing you to continue up. To prevent yourself from falling through the crumble block, morph into a ball and hold jump; springball will allow you to continue to bounce and you will bounce off the crumble blocks up through the hole. Go up to get a ![]() Missile Tank on the left, and a
Missile Tank on the left, and a ![]() Reserve Tank on the right. This is the last Reserve Tank, and concludes Maridia's items. Now fall into the sand below and sink to the next area.
Reserve Tank on the right. This is the last Reserve Tank, and concludes Maridia's items. Now fall into the sand below and sink to the next area.
Another room with sandfalls and Evirs. Go left, and in the next room morphball under the two blocks to fall down. Take the left room to reach Brinstar again.
Back in Brinstar[edit | edit source]
Continue left and Super Missile the green shutter. The second to last pit on the left drops you left of the elevator to Norfair. Norfair is your next destination, but you can get a Missile Tank in Kraid's lair real quick if you would like to.

Super Missile the blocks on the right in the elevator room to Norfair, and in Kraid's Hideout keep going until you return to the room with Kihunters. Use a Power Bomb to clear a way to the ![]() Missile Tank, which you can Spring Ball up through the path to.
Missile Tank, which you can Spring Ball up through the path to.
Now then, return to the elevator room and head down it to Norfair.
Your journey continues in Norfair.