Norfair is a main area of Planet Zebes. It is made out of a rather stony area (Upper Norfair) and ancient ruins (Lower Norfair).
First Visit
Fleeting Visit
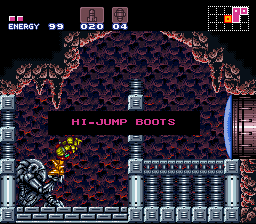
You'll just have to visit Norfair for a few minutes for now. The Hi-Jump Boots are few steps behind the lower left gate of the first room, which is quite similar to the first room of Upper Brinstar. Don't bother exploring any other areas, because there's nothing to obtain now and you will end up in superheated areas which will damage you (for now).
Enter the gate, then obtain the Energy Tank. Look for cracking blocks behind the tank, then morph into a ball and head left, then enter the gate.
In the next room, you can shoot the upper part of the column to destroy it. Do a spin jump up over it. Next, pick up the Hi-Jump Boots. As soon as you're back in the previous room, head upwards, get the Missile Tank and pass through the tunnel using bombs. If you can't open the gate, wait for enemies and kill them. The gate won't open until all enemies in the room are dead.
After leaving the chamber, keep going upwards, then use the elevator.
Your journey continues in Brinstar.
Second Visit with the Varia Suit
With the Varia Suit, you can survive Norfair's heated areas. Once you arrive after the elevator, take the first door on the right. The geemers and hoppers in here are more dangerous than the ones seen before, but should pose little threat. Just head right, through the red gate. In the next room you'll see pincers flying about similar to mothulas. Drop down the third pit. In the bottom right corner, in the lava, there is a hidden Missile Tank you can find if you hit the wall with your beam. If you're good on energy, turn into a ball and risk the damage in the lava to get it. With that, use a super missile on the green gate at the right side of this room.
Don't be too scared of the rising lava in this room, it stops eventually. Just make sure you don't get stuck below while it's rising. Lava dragons will rise from the lava and try to arc fireballs at you. They, and the rest of the enemies, can be easily ignored if you cautiously rush to the next room.
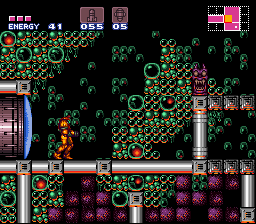
You now should be in a room comprised of what appears to be green bubbles. Head right, looking out for the red waver. You should see a metallic looking area that stands apart from the bubbles. Here, bomb each of the tube-like areas to fall down to a pit with a red ripper II and a Missile Tank.
Now, return to the upper area. Bomb the floor between the two face statues. Then, follow the path to the right in ball form, bombing the obstructing blocks and geemers until you get to a part with a door on the left, and one on the floor. Take the one one the floor.
Head down. The first blue door on the right leads to gamet enemies which come out of the middle of the floor. They arrive in packs of five. If you shoot them as soon as they appear while they're bunched up, you'll kill all of them at once, with the possibility of increasing your pickup count. So, you can use this room to restock on missiles and energy if you need it. Otherwise, return to the room you came from and head further down, to the right door.
In the next room, you'll see some multiviolas flying around, which are pretty easy to take care of. The magdollites in the lava are more of a problem, though. When you move towards them, they'll grow to match your vertical location. They then will throw three side-by-side fireballs. The fireballs can be shot, but it's difficult to hit them all at once so the best solution would be to avoid this projectile altogether. The magdollites return to the lava after their attack so you can pass then. Head to the right room.
In here, blue violas patrol platforms, and are a minor problem. The way down is blocked by a yellow door, so you have no choice but to keep going right, past the blue one.
This is another room where the lava level rises. Again, it stops at a certain point, but this time it can reach higher ground. Therefore, you must hurry to the right, aim up at the ceiling on the far right side to be rid of it, and jump up. You'll be safe from the lava here, just beware of the fune sticking out of the walls and the fire they spit in a slow horizontal trajectory. You want to head to the upper left room.
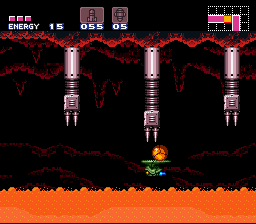
Once you enter this room, it may seem like a dead-end, but a green tripper soon greets you from the left side. This creature is actually beneficial as you can jump on top of it and ride it across the lava. As soon as you're on it, turn into a ball to avoid the spikes from the ceiling. Then, jump to the left. Beware of the spikes from below on the next set of thin platforms, and wait until the pipe from the ceiling moves up out of your way before continuing onto the next tripper and morph like before. The pipe cycles up and down constantly so you may need to be patient. Notice that the next tripper will have trouble supporting your weight, so you must quickly unmorph and jump left and head to the next room before being dunked into the lava.
Look out as you head up in the next room, because alcoons will try to surprise you from the ground. These creatures are similar to the dragons seen earlier, but they have legs and walk slowly toward you. They fire three fireballs in sequence a good ways, then they step forward. You can use missiles to take them out quickly but regular beam shots will suffice, it'll just take longer. Ignore the first blue door on the way up, and instead take the righthand red one.
Jump across the yellow platforms. On the third one, you may want to wait until the it goes down so that you have enough space to get to the final one. Then, you'll reach a shutter you can open which when heading through leads to a Missile Tank.
Wave Beam, Now or Later
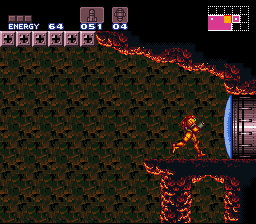
Now then, it's very dangerous, but you can get a beam upgrade slightly early if you want to risk it. It may be better to get to it with the Speed Booster, which you'll get soon, but you can try for it now. With the Speed Booster method, run on the right spikes then jump and you should have enough momentum from the boost to make it up. The safest way is to use the grapple beam on the grapple points above the spikes, but that won't be available until later. To get the Wave Beam now, move left to get a running start, then jump across the spike pit here, making sure to avoid the central spikes since you'll fall through, aiming instead for the rightmost spikes. You now must walljump to the right, to the red door.
If you're taking too much damage from the spikes, go towards the central set of spikes which will let you fall through to safety. However you get here, inside you'll find the Wave Beam. This beam upgrade allows you to shoot through walls, as well as doubling your damage output.
To the Speed Booster
Whether you want to get the Wave Beam now or wait, return to the left room, then take the high leftmost door. You're back in the first bubble room, on the upper right. Try not to fall below, because you'll have to traverse the previous rooms to return here if you do. Watch out for the enemies up here, then take the upper green door.
Kill the skrees on the ceiling here, then shoot towards the right part of the ceiling to reveal an opening. A simple jump will reveal a new upper area. You can use the gamets on the left to replenish energy and missiles, but either way you now want to head to the right door.
Continually run to the right in here. The gray parts of the floor will crumble as you pass and release enemies but ignore them. Once you get to the red door, shoot up to reveal a hidden Missile Tank which you can jump and get. Now, head right through the door to get your prize.
Literal Trial by Fire
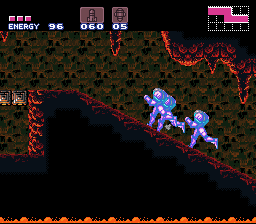
In here, you'll get the Speed Booster from the chozo statue. Do not waste time celebrating, because lava will instantly start to rise from the floor. Return to the next room. You must dash across the room (move left or right while holding by default A) to the left without stopping. If you did it right, you should see the Speed Booster activate and you'll make it to the upper left side without incident. Head back left. Now, return to the bubble room, going down the bombable path between the two face statues. This time, take the left door instead of the one on the floor.
About the Speed Booster
The Speed Booster causes you to run much faster, so long as you have enough distance to run long enough for it to activate. You'll know when it's activated by the sound, as well as a flashing effect across Samus, with afterimages trailing behind her. While it's active, weaker enemies will be killed instantly. With the Speed Booster, you can perform a technique known as the “shinespark”. To perform it, activate the boost, then crouch. If done right, you'll “store” your boost for a little bit. You can jump and hold left, right, up, or diagonal to zoom towards the direction held until you hit an obstacle. You'll have to sacrifice some health to do it, though, and you won't be able to pull it off if you don't have enough.
While not necessary to get to the end, shinesparking is a useful ability if aiming for 100% completion.
To the Ice Beam
Unlike the optional Spazer and Wave Beam, you'll need the Ice Beam to make progress, so be sure to get it. In the room after the next one, you might have noticed the obstruction with trapped breetoms if you tried to come from the other side. With the Speed Booster, though, you can easily destroy the obstruction, as well as the trapped enemies. Do so, save at the next room if you'd like, then head left again to reach a familiar place: the initial Norfair area with the elevator. Go through the green door below the elevator on the left side.
Speed Boost as soon as you enter this new room. Shutters will try to keep you out, but if you dashed correctly, you should make it to the end where you can head through the left door.
Head up on the left platforms, minding the fune. Then, bomb the tube before the door. You'll fall through. In ball form, fall into each small alcove, until you get to a part where you can head right. In here, you'll get your reward from a chozo statue: the Ice Beam beam upgrade. Head back to the left room. You can test out the freezing properties of your new weapon on the geemers here, and even on the fune which when frozen will not spit fire at you. Now, head back to the top and this time go through the right door.
Concerning the Ice Beam
Hitting most enemies with this will freeze them, preventing them from attacking. What's more, you can jump atop them to use them as platforms. This feature will be necessary to progress. There is a 50% damage modifier to the beam, but even simple enemies may take longer to kill since you will freeze them first. Don't forget that you can turn off this beam by pressing Start then R to get to the equipment menu if you want to forego the ability to freeze enemies to get rid of them quicker. Of course, you can turn it on again from the same menu.
Item Collection in Norfair Before Leaving
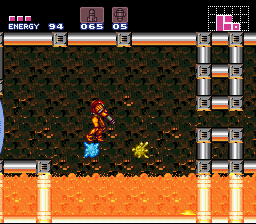
The upper right room past the ice beam may seem strange. There's just lava and boyons in it, with one of them jumping. Well, try freezing the jumping one with the new ice beam when it reaches its maximum height. It'll freeze, and you can jump on it without fear. Just don't waste time, because they will thaw after a short while. Make sure the last one is at its highest point so you can get through the passage in ball form, then freeze the ripper ii over here when it is in the middle of the lava pool, so you can jump on it across then through the next door.
You'll fall through crumbling platforms in here, landing you at the top of the hallway leading to where you just where. Mind the geemer in your path, and roll as a ball through the ceiling passage. You'll land through a crumbling platform near the door you took to get here on the right, so go through. You have what you need to make progress now, but before proceeding back to Brinstar you can get two Missile Tanks in Norfair, as well as your first Reserve Tank which stores extra energy. Read on if you'd like to do this now.
In the main elevator shaft room, take the upper or lower right path to get back to the green bubble room. The lower may be faster, but you'll have to try double bomb jumping in the passage with the geemer. If you do this, remember to lay a bomb, then immediately lay another once the first explodes, continually laying bombs as you're tossed upward. The second bomb requires precise timing, but after that you can just keep mashing the button to lay bombs, just remember to move in the direction you need to go once you're high enough.
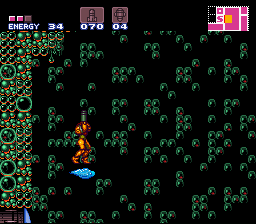
Back in the bubble room, watch for the wavers flying near the top left. Freeze one when it gets close to you, and you should be able to get on top of it where you can reach the green door on the top left. If you kill it before you get up, exit and re-enter the room to respawn it. Normally, you'd need the grapple beam to get here, but doing this allows you to get here sooner. Head on through.
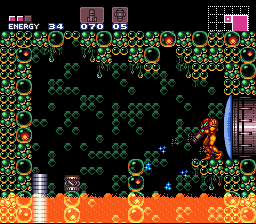
Look out for the geruta here, and nab the Missile Tank. Now, head to the platform with the door but don't go through. Instead, aim diagonally down, to the left, and shoot. A pipe will arise from the left, where you can jump onto it. Morph into a ball up here, and bomb the big bubble to follow a secret passage left. The door here leads to a room with lava at the bottom, with small circular platforms patrolled by geemers. You can freeze all the enemies here if they are a nuisance while you head left. The final circular platform to the left can be shot to reveal a hidden Missile Tank, but be careful because you may need to sacrifice some damage in the lava to get it. Finally, shoot the orb at the end to get your first Reserve Tank.
Storing Energy with the Reserve Tank
The useful Reserve Tank lets you hold more energy than your Energy Tanks usually allow. When you have full energy and collect health restoring energy capsules, the extra energy will be stored in the Reserve Tanks. Know that they start with no stored health initially.
By default, the tanks are set to auto, which gives you the stored energy when your normal energy is depleted, saving you from a game over. You can set it to manual in the equipment menu if you want to get to the reserved energy sooner. The concept with manual is similar to Sub Tanks in the Mega Man X series, if you're familiar with that. There are four Reserve Tanks in total to be found.
Return to Brinstar
To continue with the game, you now need to head to Brinstar to get Power Bombs. If you care about 100% item collection, you should have your initial 5 Super Missiles, 75 Missiles, 3 Energy Tanks, and the 1 Reserve Tank. If you forewent some of the harder to get items like some of the Missile Tanks in Brinstar, don't forget about them for later. At any rate, return to Norfair's elevator room, and take it up.
Your journey continues in Brinstar.
Third Visit to Battle Crocomire
To Crocomire
You will soon face a miniboss in Norfair: Crocomire. Once you arrive down the elevator, take the first left door back to the shutter hall leading to the Ice Beam. Run with the Speed Booster like before, but stay put when the floor breaks. The icons on the blocks here indicate that you should use Power Bombs, so use one to clear away this part of the floor. Deal with the Desgeegas and Mellas as you go left, through the door. Don't rush in the next room. Just stay put near the door because other platforms may crumble, forcing you to the bottom.
If you shoot left in here, a hidden Missile Tank will be revealed in the wall, close to the ceiling. To get it, you need to get to the second platform down. It's offscreen now, but if you jump from the central platform (or fall through it holding left if you're far enough), you should reach this leftmost platform. As soon as you get to the left platform, immediately jump left and shoot the wall. If done right, you should get the Missiles. If you're good at walljumping, you can just try to do so on the left wall to make it up, though you still will need to jump from this platform to shoot the wall. If you fell, it will be difficult to get back up due to all the crumbling platforms. If getting this seems too difficult now, you can return later with the Space Jump. Whatever you decide, you next want to go through the right bottom door, being careful of the Sovas circling the platforms.
Dash to activate the Speed Booster down this hill. All enemies and obstacles will be removed so long as you don't stop. Once you reach the end, you can go up, through the central door on the right if you want to save at the Save Station. A station also exists to recharge your energy on the bottom right path if you need it. Once you are prepared, take the green door on the floor to reach the room in which you will face off against Crocomire.
The Fight Against Crocomire
Head right after falling here to greet your enemy. The goal in this fight is not simply to damage Crocomire. Rather, you want to keep pushing him right. To do this, aim Missiles, Super Missiles, or charged shots into his mouth when he roars. Missiles make him take one step, charged shots make him take two so long as you have the combination of Ice, Wave, and Spazer Beams, and Super Missiles make him take three. If you have the aforementioned beams, you may want to rely on Super Missiles first, and then use just use charged hits after. He will occasionally step forward to counteract his forced steps back, so it is pivotal to try to get a hit in every time he opens his mouth.
The miniboss will try to swipe at you with his claws, but this should be easily avoided by keeping your distance. Sometimes when he opens his mouth, he'll shoot around five balls of fire in horizontal and diagonal directions. These fireballs can be shot, which also can yield energy capsules and Missile pickups if you run low on either. There is a wall of spikes at the far left side, incentivizing you to keep up your assault, lest Crocomire walk too far left forcing you to the trap. If you get stuck on the spikes, try to morphball and move out. Also, do not try to use Power Bombs, as this will actually make Crocomire move left, instead of right like you want.
If Crocomire moves far enough right, you'll see a bridge over acid. Get Crocomire over the center of it, and the bridge will wear away, whereupon Crocomire will plummet and be defeated.
Once Crocomire is gone, head left near the spike wall. The screen will shake, and Crocomire's skeleton will bust through. Don't fear, though, because the dead body will fall harmlessly. You won't even take damage from the spiky debris.
Getting the Grappling Beam
With Crocomire dead, you can head to the left door. Return up to save and refill energy, if you'd like. Jump the thin platforms when going left carefully, because the acid is even more damaging than lava should you fall in.
The bottom right door in this room holds a Save Station. To progress, take the left door in the ground. Then, fall all the way down the shaft on the right side. Next, open up the red door and step inside.
The acid here moves up and down, though the floor is safe at the initial level. When it's down, run right, then morphball to the other side. Again wait for the acid to go down, then jump to the safe platforms to reach a Missile Tank on the right. With that, head back to the previous room and take the bottommost ground door.
First, use a Power Bomb to remove obstructions and even out the ground here. Then, move to the far right then dash left to Speed Boost through the left obstruction, but make sure to stop when passing it to avoid falling in the acid. Now, a Missile Tank is located above, but you'll have to shinespark and sacrifice a good deal of energy to get it at this moment. If you want it now, go back and Speed Boost again, but this time press Down when it activates and you should flash if done right. Head left into the acid, but wait to jump until you're actually in it, between the platform and right ledge. Make sure you're not too close to the ledge, or you'll hit an outcropping instead of the top ceiling. Then, jump up and you'll fly into the ceiling, where you can move right after the collision to get the Missiles, then head right in ball form and bomb up and right to fall through the hidden shaft to return to the entrance. You'll take damage from both colliding with the ceiling and the acid if you do the shinespark method, so only try this if you have at least more than one Energy Tank full of health. If you don't want to try for it now, you can return shortly with the Grappling Beam and use it on the nearby series of flying Grippers for a safer method.
To make progress, go right again and Speed Boost left. This time, jump and hold Left at the end of the ramp to make it to an upper platform on the left. Go through the door here and claim the Grappling Beam from the chozo statue. Climb up the left platforms, and you'll have to test out this new item to get to the door.
Using the Grapple Beam
Press Select to cycle to the fourth option, the Grapple Beam. When selected, the end of your arm cannon will open up similar to when Missiles are selected. The length of the beam is dependent on how long you hold the fire button (default X).
Grapple points look like gray blocks with a + sign in the middle. Aim the Grappling Beam at these points and hold the fire button to swing on them. Some enemies also can be grappled to. You can press Left or Right while holding on to swing left or right, and pressing Down or Up will move the beam down or up, respectively, to help you control your movement. While swinging, let go of the fire button and the momentum will push you in the direction you're heading.
The Grappling Beam can be used offensively to defeat weaker enemies, particularly flying enemies that come from the ground. Furthermore, the beam can be used to get distant pickups like energy capsules. The beam can provide a potential strategy for defeating the boss Draygon later down the line.
To Brinstar and Crateria Again
At the top of the room where you got the new item, you'll see two grapple points. Aim diagonally up, and fire the beam to latch on, making sure to hold the fire button. You can press Down to give yourself more space, then release the fire button when you're swinging right to reach the top door. Go through.
In this room, you'll again have to grapple on one of the grapple points. This time, you have to clear the water below with your jump, or you'll have to slowly climb out of the water and try again. In the room after, you'll get to a vertical part on the right side. Freeze or ignore the Fune, then jump to the top. During your jump, you should notice grapple points on the ceiling. Aim up and grapple to one at the top of the jump to reach the right door.
More grappling with water at the bottom in this room. The concept is similar, just try not to fall because there are Gamets and Puyos in the pools this time. You can test the offensive capabilities of the Grappling Beam against them, but it's better to avoid them if possible because being submerged slows your movements. A shutter with a green button is found after the second set of points. Use a Super Missile on the green part to open it. Through the right door, you'll end up in a familiar area. Here, take the door in the ceiling.
In this room use the yellow platform to get back up right. Don't stand on it too long, or it'll move down. When you're at the top right, spot the Gripper floating back and forth. You can grapple onto it, allowing you the reach the red door which you should go through. Inside, you'll get a pack of Power Bombs.
Now, return right until you get to the room where you fought Crocomire. Head right, and look at the grapple points above the acid. Keep grappling with these points to obtain an Energy Tank on the right side. Grapple back, and take the door in the ceiling and then head straight up this part, taking the top left door.
Climb the right outcroppings, then find another set of grapple points, about the same length as the recent set. Grapple left to get a Missile Tank, which should make your 100th if you've been following along. Super Missile the green-buttoned shutter and go left, which will lead you to the entrance of Norfair. You can head up and shoot the top part to return to the elevator area.
Your next destination is the Wrecked Ship, but you can detour for optional upgrades first. Either way, you'll have to go through Brinstar again.
Your journey continues in Brinstar.