(use {{ContentBox}}) |
|||
| (20 intermediate revisions by 9 users not shown) | |||
| Line 1: | Line 1: | ||
{{Header Nav|game=The Legend of Zelda}} | {{Header Nav|game=The Legend of Zelda}} | ||
__TOC__ | |||
{{-}} | |||
==Swords== | ==Swords== | ||
{ | {{ContentBoxContainer}} | ||
{{ContentBox|title={{a|Wooden Sword}}|contents=[[File:LOZ1 Wooden Sword.png|left|Wooden Sword]] | |||
Damage: 1<br><br>The first sword Link gets in the game. It is the weakest sword. In the game, it is merely referred to as "sword". In both quests it is found in [[../Overworld/Hyrule 6/|Section 6]].}} | |||
{{ContentBox|title={{a|White Sword}}|contents=[[File:LOZ1 White Sword.png|left|White Sword]] | |||
| [[ | Damage: 2<br><br>The ''white sword'' is the second sword Link gets in the game. It is twice as powerful than the ''wooden sword'', but less powerful than the ''magic sword''. Link must have five Heart Containers before he can receive the ''white sword''. In both quests it is found in [[../Overworld/Hyrule 3/|Section 3]].}} | ||
| [[ | {{ContentBox|title={{a|Magic Sword}}|contents=[[File:LOZ1 Magical Sword.png|left|Magic Sword]] | ||
Damage: 4<br><br>The most powerful sword in the game, it is four times as powerful as the ''wooden sword''. Link must have twelve Heart Containers before he can receive the Magic Sword. In the first quest it is found in [[../Overworld/Hyrule 7/|Section 7]], and in the second quest in [[../Overworld/Hyrule 3/|Section 3]].}} | |||
</div> | |||
== | ==Enemy drops== | ||
{{ContentBoxContainer}} | |||
{{ContentBox|title={{a|Fairy}}|contents=[[File:LOZ1 Fairy.png|left|Fairy]] | |||
Fills 3 of Link's hearts. In the fairy ponds, the fairy will fill all of your heart meters.}} | |||
| [[ | {{ContentBox|title={{a|Heart}}|contents=[[File:LOZ1 Heart.png|left|Heart]] | ||
| | A flashing heart. It refills Link's life meter by one full heart.}} | ||
| | {{ContentBox|title={{a|Rupee}}s|contents=[[File:LOZ1 Rupee.png|left|Rupee]] [[File:LOZ1 5 Rupees.png|left|5 Rupees]] | ||
| | The currency of Hyrule. ''Flashing rupees'' are worth one rupee, and '''{{a|Blue Rupees}}''' are worth '''{{a|5 Rupees}}'''. Link can only carry 255 rupees at one time.}} | ||
{{ContentBox|title={{a|Stopwatch}}|contents=[[File:LOZ1 Stopwatch.png|left|Stopwatch]] | |||
When you pick one of these up, time and the enemies freeze. You can take your time in the area or room that you pick it up in, but the effect wears off as soon as you leave.}} | |||
</div> | |||
| [[ | |||
== | ==B Button items== | ||
{| {{ | {{ContentBoxContainer}} | ||
{{ContentBox|title={{a|Bomb}}|contents=[[File:LOZ1 Bomb.png|left|Bomb]] | |||
| | Damage: 4<br><br>As you might expect, the bomb blows stuff up. It can be used to kill enemies or blast holes in weak walls. Link can only carry eight bombs at once at the beginning of the game, but later this capacity can increase to twelve and then to sixteen. Every bomb you pick up is actually a set of four.}} | ||
| [[ | {{ContentBox|title={{a|Boomerang}}|contents=[[File:LOZ1 Wooden Boomerang.png|left|Wooden Boomerang]] [[File:LOZ1 Magical Boomerang.png|left|Magical Boomerang]] | ||
| [[ | The boomerang stuns large enemies, kills small enemies like Keese and Gels, and can be used to retrieve items. The '''{{a|Wooden Boomerang}}''' can travel a distance of roughly half the screen while the '''{{a|Magical Boomerang}}''' has a longer range and can travel from one end of the screen to the other.}} | ||
| [[ | {{ContentBox|title={{a|Bow and Arrows}}|contents=[[File:LOZ1 Bow.png|left|Bow]] [[File:LOZ1 Arrow.png|left|Arrow]] [[File:LOZ1 Silver Arrow.png|right|Silver Arrow]] | ||
| | Damage: 2 (wooden); 4 (silver)<br><br> You need a '''{{a|Bow}}''' to shoots '''{{a|Arrow}}s''' and you must purchase '''{{a|Arrows}}''' from a shop before you can use the bow. When shot from the bow, each arrow shot subtracts one Rupee from Link's total. The ''{{a|Silver Arrow}}'' is required to save Princess Zelda.}} | ||
{{ContentBox|title={{a|Magical Wand|Magical Rod}}|contents=[[File:LOZ1 Magical Wand.png|left|Magical Rod]] | |||
| | Damage: 2; 1 (flame)<br><br>Shoots magical blasts similar to those thrown by Wizzrobes. Unlike your sword, the magical rod will fire even if you don't have full life.}} | ||
| [[ | {{ContentBox|title={{a|Letter}}|contents=[[File:LOZ1 Letter.png|left|Letter]] | ||
| [[ | A key item, this is the proof that you need to show to the Old Woman so that she will sell you the ''Water of Life''.}} | ||
| [[ | {{ContentBox|title={{a|Monster Bait}}|contents=[[File:LOZ1 Monster Bait.png|left|Monster Bait]] | ||
| | Attracts enemies, who will gather on top of the food and eat it. Enemies are vulnerable while they are eating. Monster Bait is costly, but it can sometimes get you out of a jam, and it's even needed sometimes in the underworld dungeons.}} | ||
{{ContentBox|title={{a|Candles}}|contents=[[File:LOZ1 Blue Candle.png|left|Blue Candle]] [[File:LOZ1 Red Candle.png|left|Red Candle]] | |||
Damage: 1<br><br>'''{{a|Candle}}s''' throw a flame a short distance. The '''{{a|Blue Candle}}''' can only be used once per screen. The '''{{a|Red Candle}}''' has the same effect as the ''blue candle'', except there is no limit to the number of times it can be used per screen. Candles can light up dark rooms in dungeons, burn bushes in the overworld, and damage enemies in both.}} | |||
| [[ | {{ContentBox|title={{a|Water of Life}}|contents=[[File:LOZ1 Water of Life.png|left|Water of Life]] [[File:LOZ1 2nd Potion.png|left|2nd Potion]] | ||
| | Completely refills Link's life bar. After the first use of a '''{{a|Red Potion}}''' or '''{{a|2nd Potion}}''', it turns into a '''{{a|Blue Potion}}'''. The ''blue potion'' can only fill up your life once. Drinking a Water of Life can also restore the sword sealing effect brought about by Bubbles.}} | ||
{{ContentBox|title={{a|Whistle}}|contents=[[File:LOZ1 Whistle.png|left|Whistle]] | |||
| | An item that summons a whirlwind which will transport Link to the entrance of any dungeon he has discovered. Facing right or up when the whirlwind whisks Link away will bring him to the next dungeon after the one he last arrived at, while facing left or down will bring him to the previous dungeon. It is especially useful in the 2nd Quest for discovering some secrets.}} | ||
</div> | |||
== Dungeon items == | |||
| [[ | {{ContentBoxContainer}} | ||
| [[ | {{ContentBox|title={{a|Key}}|contents=[[File:LOZ1 Key.png|left|Key]] | ||
Each Key will open one door. Link can carry up to nine of them until he obtains the magic key.}} | |||
{{ContentBox|title={{a|Compass}}|contents=[[File:LOZ1 Compass.png|left|Compass]] | |||
Directs Link to the location of the Triforce. Like maps, one exists in each dungeon. Having them both gives you a big advantage.}} | |||
{{ContentBox|title={{a|Map}}|contents=[[File:LOZ1 Map.png|left|Map]] | |||
Gives a map of the current dungeon so that you won't get lost as easily. Every dungeon has one, try to find it as soon as possible.}} | |||
{{ContentBox|title={{a|Heart Container}}|contents=[[File:LOZ1 Heart Container.png|left|Heart Container]] | |||
Gives an additional heart to Link's life meter permanently, enabling him to take more damage before perishing. <br/>At some points in the game, Link can choose between a Heart Container and a Potion bottle. Since the Heart Container is a permanent item, it is always the best choice.}} | |||
{{ContentBox|title={{a|Piece of Triforce|Piece of}} {{a|Triforce}}|contents=[[File:LOZ1 Piece of Triforce.png|left|Piece of Triforce]] | |||
There are eight of these. One is present in each dungeon. All eight are required to gain access to Level 9.}} | |||
</div> | |||
==Automatic items== | |||
{{ContentBoxContainer}} | |||
{{ContentBox|title={{a|Book of Magic}}|contents=[[File:LOZ1 Book of Magic.png|left|Book of Magic]] | |||
Causes the magic blasts from the Magic Wand to burst into flame when they hit a target. These flames can be used to light a room just like a candle. However, like the candle, the flames will harm Link on contact.}} | |||
{{ContentBox|title={{a|Ladder}}|contents=[[File:LOZ1 Ladder.png|left|Ladder]] | |||
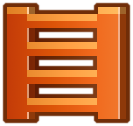
Allows link to cross rivers and chasms that are as wide as he is. Link has an advantage of being able to attack enemies without reprisal when he stands on the ladder.}} | |||
{{ContentBox|title={{a|Magic Key}}|contents=[[File:LOZ1 Magic Key.png|left|Magic Key]] | |||
Opens doors. Can be used any number of times and eliminates the need for Keys. Your key count will read "A" once you have found the Magic Key.}} | |||
{{ContentBox|title={{a|Power Bracelet}}|contents=[[File:LOZ1 Power Bracelet.png|left|Power Bracelet]] | |||
Gives Link the ability to move heavy objects and use the secret Hyrulian passage ways. It is cleverly hidden somewhere in the overworld.}} | |||
{{ContentBox|title={{a|Raft}}|contents=[[File:LOZ1 Raft.png|left|Raft]] | |||
Allows Link to cross lakes and oceans, but it can only be used at a Dock. Neither of the 'double docks' trigger raft use.}} | |||
{{ContentBox|title={{a|Rings}}|contents=[[File:LOZ1 Blue Ring.png|left|Blue Ring]] [[File:LOZ1 Red Ring.png|left|Red Ring]] | |||
The '''{{a|Blue Ring}}''' cuts received damage in half and turns Link's outfit blue. The '''{{a|Red Ring}}''' cuts damage down to a quarter and turns Link's outfit red. The ring color worn will also affect Zelda's dress color. It also affects the shopkeepers clothes.}} | |||
{{ContentBox|title={{a|Shield}}s|contents=[[File:LOZ1 Shield.png|left|Shield]] [[File:LOZ1 Magical Shield.png|right|Magical Shield]] | |||
Shields reflect certain enemy missile attacks. Link starts the game with a '''{{a|Small Shield}}'''. A '''{{a|Magical Shield}}''' reflects more attacks than the ''small shield''. If you are eaten by a Like-Like and fail to escape in time, your ''Magical Shield'' will be eaten and replaced with a ''Small Shield''.}} | |||
</div> | |||
{{Footer Nav|game=The Legend of Zelda|prevpage=Controls|nextpage=Citizens}} | {{Footer Nav|game=The Legend of Zelda|prevpage=Controls|nextpage=Citizens}} | ||
Latest revision as of 21:12, 23 August 2023
Swords[edit]

Damage: 1
The first sword Link gets in the game. It is the weakest sword. In the game, it is merely referred to as "sword". In both quests it is found in Section 6.

Damage: 2
The white sword is the second sword Link gets in the game. It is twice as powerful than the wooden sword, but less powerful than the magic sword. Link must have five Heart Containers before he can receive the white sword. In both quests it is found in Section 3.
Enemy drops[edit]
B Button items[edit]

Damage: 4
As you might expect, the bomb blows stuff up. It can be used to kill enemies or blast holes in weak walls. Link can only carry eight bombs at once at the beginning of the game, but later this capacity can increase to twelve and then to sixteen. Every bomb you pick up is actually a set of four.


The boomerang stuns large enemies, kills small enemies like Keese and Gels, and can be used to retrieve items. The Wooden Boomerang can travel a distance of roughly half the screen while the Magical Boomerang has a longer range and can travel from one end of the screen to the other.


Damage: 1
Candles throw a flame a short distance. The Blue Candle can only be used once per screen. The Red Candle has the same effect as the blue candle, except there is no limit to the number of times it can be used per screen. Candles can light up dark rooms in dungeons, burn bushes in the overworld, and damage enemies in both.

An item that summons a whirlwind which will transport Link to the entrance of any dungeon he has discovered. Facing right or up when the whirlwind whisks Link away will bring him to the next dungeon after the one he last arrived at, while facing left or down will bring him to the previous dungeon. It is especially useful in the 2nd Quest for discovering some secrets.
Dungeon items[edit]
Automatic items[edit]


Shields reflect certain enemy missile attacks. Link starts the game with a Small Shield. A Magical Shield reflects more attacks than the small shield. If you are eaten by a Like-Like and fail to escape in time, your Magical Shield will be eaten and replaced with a Small Shield.


