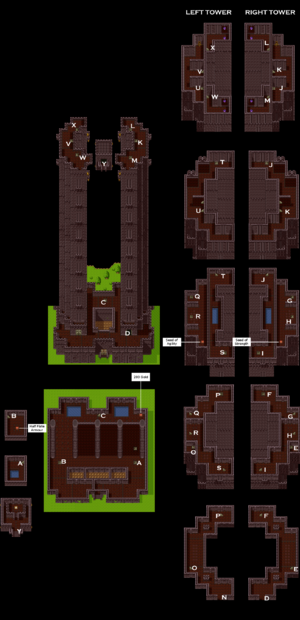
Oddly enough, the boss fight actually comes near the entrance of this tower. In fact, you can fight it immediately just by examining the giant mirror two times (the one just north of point B). Before you do though, be sure to equip the Iron Cuirass on Milly.
VS. 3x Corpsickles[edit]
| Recommended Level: | Rex Lvl 9-10, Carver Lvl 9-10, Milly Lvl 8-9 |
|---|---|
| Recommended A.I. Settings (Remakes Only; SNES A.I. is bad): | Everyone (Focus on Healing) |
| HP: | 360 |
| MP: | 20 |
| Item: | Seed of Life (1/8 of dropping from last enemy defeated) |
| Attack: | 62 |
| Defense: | 43 |
| Agility: | 25 |
| EXP: | 280 |
| Gold: | 57 |
| Attack Patterns: | Attack -> Venom Mist -> Grabs PC [1.25x damage] -> Poison Attack -> Attack -> Heal |
| A.I. Pecularities: | [Attacks in the above pattern as a group from left to right] |
| Resistances: | 30% reduction of Crack spells, 15% resistance to Sap, 50% resistance to Dazzle, Immunity to Lucida Shard and Poison Moth Knife |
This is yet another easy (if rather long) fight; the only danger here is Venom Mist. This will inflict the "Envenomated" status, an especially nasty ailment that will chop off an amount equal to 10% of your max HP per round. In fact, it will also take off 10% of your max HP for every step you take on the world map, so you will want to cast Squelch on it ASAP.
In fact, if you're playing the remakes, you should put Milly on "Focus on Healing". She'll remove Envenom before the turn even has time to end, even if nobody had it at the start of the round; the remake A.I. is borderline psychic that way. You could do this with the SNES A.I. as well, but it is much more wasteful in how it manages MP. It will cast Heal even when it will only restore 15 HP, and you'll want to conserve MP for this dungeon.
So just cast Sap until one of them is hit with it twice, and Buff on all of your PC's at least once. You should take very little damage, spend very little MP, and finish the fight at least semi-quickly while you're at it.
Getting Ra's Mirror[edit]
After that fight, you will wish to take the right tower; it's the only one you can go through right now. Of course, you will have to fight some enemies, and some rather annoying ones at that. The Shadows and Devil Glasses, for example, are extremely durable. The Shadows have 130 Defense, enough to reduce your physical attacks to 2 Damage, max. Crack (which does more damage for you than the enemy version of it) is the only practical way to kill one of them; however, their SNES versions have enough HP to be able to take two of them, and there can be up to four in a single group. To compound a bad situation even further, they also have a 33.3% chance of using Cool Breath (13-16 Damage to everyone).
Granted, the Iron and Dragon Shields have damage reduction against said breath attack, but Milly isn't made out of MP; you will want to run away from any fights that have more than one of them.
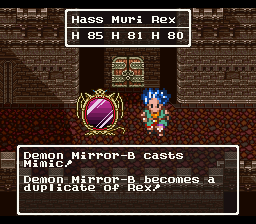
In fact, run away from any battles with more than one Devil Glass, too! They have 70 Defense; not nearly as high as the Shadows, but still twice as much as any other enemy you will encounter here. More troublesome still, they can use the Morph spell to turn into your character! They gain everything except for your current HP, MP, and Agility; even your spells! If they decide to copy Milly, for instance, they will then have instant access to Crack, Heal, Dazzle, and even Buff! To top it all off, they can also use Dazzleflash, which cuts the accuracy of your physical attacks to only 25% of it's original amount!
This is not to say that you can't beat either of those two enemies; you most certainly can. They're just not worth the trouble; they take too long to kill for too little reward.
Whatever you decide to do, go ahead and go up the stairs marked D, the stairs marked F, and then keep taking the linear path until you reach the room with the golden lever (shown in the very top right corner of the above map). Once you do...
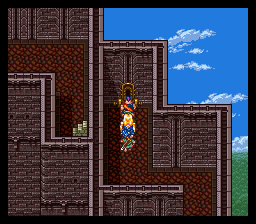
This will unlock the left tower. After you do that, enter points L and M to break the purple spheres found there.
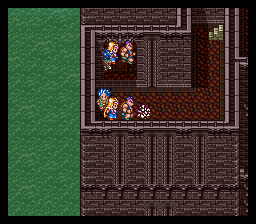
After that, just fall off the ledge on the top floor to return to the bottom floor. The left tower is now available, and is almost exactly identical to the right tower; the only difference is that the point U stairs are hidden. You have to stand in the spot they're located in and use the A button to unearth them; in other words, you discover them the same way you discovered the underground tunnel to Alltrades Abbey. Also, you don't have to pull the golden lever in this tower; you already got everything you needed out of the right tower.
Now, once you get to the end, do not skip the Mirror of Ra! The game never actually makes you pick it up after the cutscenes before it. If you're not careful, you can very easily get to the end, watch the cutscenes, think that you're done, Return to Dream World Somnia...and then discover that you forgot to get the very item that you traveled all this way for. Do not fall into that trap.
Somnia (Dream World)[edit]
If you are playing the remakes, and have recruited Ashlynn, you can get an incredible quality-of-life upgrade to your Zoom spell. Zoom to Madame Luca's, and she will give you the ability to go between the Real World and the Dream World at will. Just select "Switch Worlds" in the Zoom menu, and you will automatically teleport to the Alltrades Abbey in whichever world you're trying to go to.
You do not have this option if you are playing the SNES version. If this is you, Zoom to Real World Alltrades, enter the Dream World through the well, and Zoom to Somnia. Give the Mirror of Ra to the King, watch all the cinematics, then take some time to re-arrange your party; we've got a fourth character to worry about now!
| Carver (Level 11): Steel Broadsword, Fur Cape/Platinum Mail, Iron/Dragon Shield, Hardwood Headware, Gold Bracer |
| Rex (Level 11): Edged Boomerang, Royal Clothes/Platinum Mail, Iron/Dragon Shield, Hardwood Headware, Gold Bracer |
| Milly (Level 10): Thorn Whip, Iron Cuirass, Hairband, Agility Ring |
| Ashlynn (Level 2): 8x Herbs, Thorn Whip, Leather Dress/Enchanted Armour, Bunny Ears, Gold Bracer |
First of all, Murdaw dishes out a lot of damage, and Ashlynn's offense is still behind the others; the best way to use Ashlynn against him is to have her help Sap away his Defense before acting as a secondary healer. Furthermore, Ashlynn is far more fragile than the other characters, as you will soon realize when looking at her HP; it's important to boost her defenses as much as possible.
Aside from that, Milly will be your primary healer in the upcoming fight against Murdaw; it is extremely valuable, therefore, to have her consistently go before him. She will almost always be able to do exactly that with the Agility Ring on.

