1F: The Bathroom[edit]
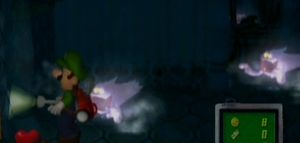
When you return to the Mansion, walk up to the glowing door in the Foyer. It will start to flash, and the spikes will disappear, opening the door to Area 2. Walk up and unlock it. If you check your map, you'll see that the only open door in this corridor is in the north-west. Go there. You can ignore the yellow Bowlers and Purple Bombers you meet along the way, since they are the weakest of ghosts you will meet (other than mice and bats, also found here). This room contains two new ghosts, Grabbers, who grab Luigi to impede his movement. This particular variety can't harm Luigi, but later types of this ghost can. If they grab you, tilt ![]() left and right several times to shake them off. Catch them to turn on the lights. You'll receive a call from the Professor. He'll explain Grabber ghosts. Once he finishes talking, you'll notice that the key is on a shelf. Suck it down with the vacuum. Head for the next room.
left and right several times to shake them off. Catch them to turn on the lights. You'll receive a call from the Professor. He'll explain Grabber ghosts. Once he finishes talking, you'll notice that the key is on a shelf. Suck it down with the vacuum. Head for the next room.
1F: The Ballroom[edit]
In this room, there is some cheerful music playing. There are also some new ghosts, Shy-Guys, dancing in pairs. To defeat these, suck off their masks to expose their hearts, then stun them and catch them as normal. Try to catch both members of a pair at once, since any left alone will try to attack you. Once you have caught the three pairs, the music will change, the checkered panels will begin to rotate, and the Portrait Ghosts, the Floating Whirlindas, will appear.
Their weakness is difficult to find. You must be on the same rotating panel as them to see them, then wait for them to twirl. This will reveal their heart in their moment of separation (despite there being two of them, they share a heart, unlike later grouped Portrait Ghosts). Catch them to turn on the lights and reveal the key to the next room, which is right next to this.
1F: The Storage Room[edit]
This room may seem small at first, but it won't be so for much longer. This room contains two Purple Punchers, two Red Grabbers, which can damage Luigi if they grab him, and a valuable Speedy Spirit, hidden in the boxes, which you should concentrate on first. Once the four main ghosts are caught, the lights will come on, but nothing else happens. Look in the mirror. You'll see a switch. If you look at it with your Game Boy Horror, you'll see it says 'Don't Push!' However, you should push it. Do so, and the entire left wall of the room will move back, revealing a new part of the room. Down here, a poster on the wall reads Danger!!. Remove it with your vacuum (Use ![]() to aim.) to reveal another switch. Push it to open the trap door, and release... the Boos, and their leader, King Boo! King Boo sees the Poltergust 3000 on Luigi's back, and all flee to various rooms throughout the Mansion. Once this fiasco is over, you'll receive a call from the Professor, who tells you that the Boos released the Portrait Ghosts, and invites you back to the Lab.
to aim.) to reveal another switch. Push it to open the trap door, and release... the Boos, and their leader, King Boo! King Boo sees the Poltergust 3000 on Luigi's back, and all flee to various rooms throughout the Mansion. Once this fiasco is over, you'll receive a call from the Professor, who tells you that the Boos released the Portrait Ghosts, and invites you back to the Lab.
The Boo Radar[edit]
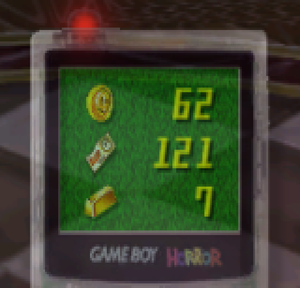
The Professor thinks that the Boos have captured Mario. He says that Boos grow stronger in numbers, and that their combined power must have been too much for Mario. To save Mario, you must now catch each Boo to weaken their power. To help find them, the Game Boy Horror has a secret function: the Boo Radar. It will flash red if a Boo is close to you, and yellow if there is a Boo in the room.
Now, return to the Mansion. Save with the Toad in the Foyer. You can now go back to every room you've completed previously, and capture the Boos hiding in them. There are fifty Boos in total, and they only hide in rooms you have completed, excluding minor rooms like balconies and bathrooms. Unlike other ghosts, Boos do not attract the pull of the Poltergust as they move, so you must also use ![]() to keep your vacuum pointing at them. They also have various levels of health, up to 300hp, and individual names. You will receive a call from the Professor, who will allow you to save, every time you catch one. Sometimes, he will have a piece of information about Boos. Once you've checked every room you've completed earlier, you should have eight Boos. After your fifth Boo, the Professor will advise you to go to the Washroom, which is beside the Bathroom on the first floor.
to keep your vacuum pointing at them. They also have various levels of health, up to 300hp, and individual names. You will receive a call from the Professor, who will allow you to save, every time you catch one. Sometimes, he will have a piece of information about Boos. Once you've checked every room you've completed earlier, you should have eight Boos. After your fifth Boo, the Professor will advise you to go to the Washroom, which is beside the Bathroom on the first floor.
1F: The Washroom[edit]
This small room has a Toad, sitting, crying beside the toilet. Speak to him. 'I dropped a really important thing into the toilet...' Tell him, 'Don't worry about it!' He'll cheer up, and turn on the lights. Check the toilet to find a key. It opens a room in the south-east of the floor.
1F: The Fortune-Teller's Room[edit]
Shine your flashlight on the crystal ball on the table. It will begin to glow, until a Portrait Ghost appears in the chair. This is Madame Clairvoya, and is the only Portrait Ghost who will help you in your quest. She calls herself the 'Seer of dropped items', who can make predictions based on other peoples' lost possessions. You'll come back to her with items later, so go into the next room for now.
1F: The Mirror Room[edit]
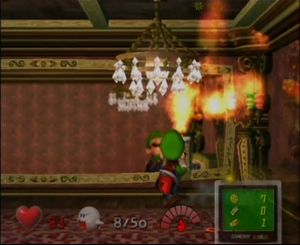
This room has a large mirror on the back wall. As soon as you enter, the door will be covered in spikes. This room contains invisible Grabbers, whose locations can only be seen by their reflections, or the dust risen at the moment of their appearance. They cause Luigi to lose health if they grab him. You must catch all six of these to turn on the lights, and reveal a chest. Open it to find the Fire Element Medal, and receive a call from the Professor, who tells you about them. (See here for more details.) Walk up to the fire to find a Fire Element Ghost, and catch it to fill your vacuum with the Fire Element. You can expel the Element by pressing ![]() . Use it to light the two sets of candles, and open the door. Catch the Boo, and go back to the previous room.
. Use it to light the two sets of candles, and open the door. Catch the Boo, and go back to the previous room.
Light the four sets of candles here to find a key on top of the front-right pillar. Vacuum it down, and go out into the corridor. Near the Washroom, there is a candlebra floating around. Light it up. A Portrait Ghost will appear, and start screaming, and run to the room you found the key for. Follow him there.
1F: The Laundry Room[edit]
The door on the back wall here is fake. You can either avoid it, or burn it off with the Fire Element. This room contains two Purple Punchers, one White Grabber, one Red Grabber, and a Boo. The green chest that appears is full of cash. Check the washing machine to find... Mario's Hat! This is one of the items you need to find and bring to Madame Clairvoya. There are four more, all Mario's items. Now go to the next room, through the front door.
1F: The Butler's Room[edit]
If you were too long in the previous room, the Portrait Ghost, Shivers, the Butler, will have returned to his post in the corridor, in which case you'll need to go back out and light his candles again. Once he's there, he will sit down on the stool and get burnt by the candles. Catch him now, avoiding the mice. A chest will appear, containing a key. Catch the Boo. But before you leave, look in the back-right corner with your Game Boy Horror. You'll see a mouse-hole here. Scan it to start a vacuum, that will pull you in.
1F: The Hidden Room[edit]
This room is full of Bats... and treasure chests! But not all contain money, some contain ghosts. Those that hold ghosts are:
- Small chest, front-right
- Large chest, middle
- Large chest, left
- Small chest, back-left
All ghosts are Icy Punchers, whose hearts must be melted before you can stun them. If you need some Fire Element, some of the candles in the corridor have Fire Element Ghosts. Once all are caught, a green money chest will appear. This chest contains your first gems, which are extremely valuable. Almost everything that moves in this room contains money, even the chandelier. Catch the Boo, and, once you've cleaned out the room, scan the mouse-hole in the back-left corner to escape.
1F: The Conservatory[edit]
Inside this room, there are several instruments. Check each one to start them playing. Together, they play the Super Mario Bros. theme. Once all are playing, approach the grand piano and Melody Pianissima, the Portrait Ghost of this room, will appear and join in. She will complement your arrangement of the Mario theme, and asks you to listen to her sonata. She will play a piece of music, and ask you a question. One is the Super Mario Bros. Underwater Theme. She will ask you what the composer had in mind as he wrote this piece. Answer 'Water'. Alternatively, she may play the Super Mario Bros. 3 Grassland Theme. She will ask you which game it is taken from. If you answer correctly, she will start to play a fast-paced piece and her Music Sheets will fly at you. Suck them up and she will become sad, allowing you to catch her. Open the chest for a key, catch the Boo, and move on.
1F: The Dining Room[edit]
When you enter, catch a Fire Element Ghost from the fire, and clean up the banana skins. Sitting at the table eating is Mr. Luggs. Suck off the tablecloth, and light all of the candles to make him appear when you face him. Start to suck up his food, and he will become angry and demand more. Two Waiter Ghosts will appear. Catch both. Once all his food is gone, he will become very angry, and start to spit fireballs at you. Simply avoid them until he becomes tired, and catch him. A money chest will appear. Open it, and catch the Boo. Make sure you have some Fire, and go into the next room, to the left.
1F: The Kitchen[edit]
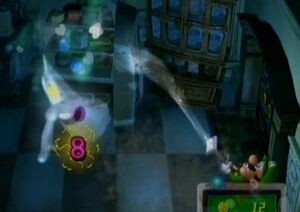
The cooking utensils may throw themselves at you, so suck up any that do. Light the oven beside the fridge for a Red Gem. Open the dishwasher, beside the burning door, to find a Speedy Spirit. Open the fridge, from a distance, (with the Poltergust) to find an Icy Puncher. Don't get close to the fridge, since the door swings open, and can hurt Luigi. Catch the Puncher to turn on the lights and make a large blue chest appear. Open it for the Water Element Medal. The Professor will call, and explain that this attracts Water Element Ghosts, which can be sucked up and used just like Fire Element Ghosts. Water can also be used on plants to make them grow and give you money. Walk up to the sink to catch a Water Element Ghost. This can be used to put out the fire blocking the way out. Catch the Boo, and leave.
1F: The Boneyard[edit]
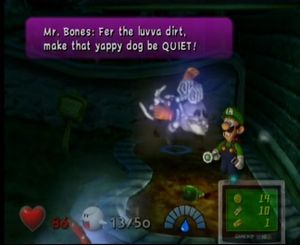
The Mansion's pet dog, Spooky, is asleep in his house. But this is one time where you shouldn't let a sleeping dog lie. Approach him to awaken him, and also Mr. Bones, a skeleton who is very annoyed at Spooky's barking. Suck up Mr. Bones, and one of his bones will be left behind. Spooky will start to chew on it. Now you can catch him. Check the patch of dirt where Mr. Bones came from. You'll see a small plant. Water it, and it'll start to sprout. You can come back here after every boss battle, and water it again. At the beginning of Area 4, it'll be almost fully grown, and one more spray of water will present you with some of the most valuable jewels in the Mansion. Now scan Spooky's doghouse. It'll start a vacuum, and suck you into the next room. If you need any health, or want to save, do it first, since you can't leave the next room until you're finished there.
1F: The Graveyard[edit]
Some of the gravestones here hold hearts. Make sure to get all you need. Check the smallest one in the centre to awaken three Skeletons. Catch all three. When all three are gone, the largest gravestone at the back will start to glow. Step up to it, and the boss ghost, Bogmire, will appear, and teleport you to a large, circular area.
Boss Ghost: Bogmire[edit]
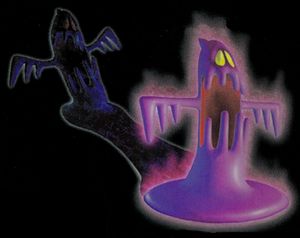
Bogmire will appear again, but between you and him, a Shadow Bogmire will appear, and Bogmire himself will disappear. Suck up the Shadow Bogmire, and it will form a large ball on the end of the Poltergust. Hold ![]() , and hold the Shadow until Bogmire returns. Other Shadows will appear, but you can distinguish them from Bogmire by looking for a shadow on the ground; only Bogmire himself has a 'true' shadow. Also, Bogmire is noticeably differently coloured; purple, rather than black. When Bogmire appears, take aim at him, and release
, and hold the Shadow until Bogmire returns. Other Shadows will appear, but you can distinguish them from Bogmire by looking for a shadow on the ground; only Bogmire himself has a 'true' shadow. Also, Bogmire is noticeably differently coloured; purple, rather than black. When Bogmire appears, take aim at him, and release ![]() to shoot the Shadow at him, stunning him. Suck him up. But, a lightning bolt will almost certainly strike you, breaking your pull on him. Luckily, it does not harm you, but it means you may need to do this 3 or 4 times to catch Bogmire. You also need to watch out for Shadows, who become larger and harder to avoid as the battle goes on.
to shoot the Shadow at him, stunning him. Suck him up. But, a lightning bolt will almost certainly strike you, breaking your pull on him. Luckily, it does not harm you, but it means you may need to do this 3 or 4 times to catch Bogmire. You also need to watch out for Shadows, who become larger and harder to avoid as the battle goes on.
Once you catch Bogmire, you'll return to the Graveyard, and a large, golden chest will appear. Open it for the Key of Clubs. Professor E. Gadd will call. He lost your signal during the lightning storm, but everything is okay now, including the Poltergust 3000. He will invite you back to the Lab. Back there, the Professor will empty the Poltergust, and turn the Portrait Ghosts back into paintings. You've now caught nine Portrait Ghosts, and you're ready to move onto Area 3!
