m (→Items) |
m (updating info via Bulbapedia) |
||
| Line 1: | Line 1: | ||
{{Header Nav|game=Pokémon Mystery Dungeon}} | {{Header Nav|game=Pokémon Mystery Dungeon}} | ||
This is the first and easiest dungeon out of them all. A note beforehand: you ''cannot'' | This is the first and easiest dungeon out of them all. A note beforehand: you ''cannot'' recruit any Pokémon here, even if you have their ''[[Pokémon Mystery Dungeon/Friend Areas|Friend Area]]''. There is also no chance of finding a Monster House, shop, or buried item in this dungeon. | ||
==Pokémon in Peril== | ==Pokémon in Peril== | ||
| Line 21: | Line 21: | ||
==Enemies== | ==Enemies== | ||
{| {{prettytable}} | {| {{prettytable}} | ||
!Name!!Type!!EXP!!Levels seen | !Name!!Type!!Level!!EXP!!Levels seen!!Recruit Rate | ||
|- | |- | ||
| | |{{bp|Wurmple}}||[[Image:PkmnType_Bug.gif]]||1||7/15||B1F, B2F, B3F||N/A | ||
|- | |- | ||
| | |{{bp|Pidgey}}||[[Image:PkmnType_Normal.gif]]/[[Image:PkmnType_Flying.gif]]||1||6/16||B1F, B2F, B3F||N/A | ||
|- | |- | ||
| | |{{bp|Sunkern}}||[[Image:PkmnType_Grass.gif]]||1||8/16||B1F, B2F, B3F||N/A | ||
|- | |- | ||
| | |{{bp|Execcute}}||[[Image:PkmnType_Grass.gif]]/[[Image:PkmnType_Psychic.gif]]||1||22||B3F||N/A | ||
| | |||
| | |||
|} | |} | ||
Revision as of 12:22, 3 February 2008
This is the first and easiest dungeon out of them all. A note beforehand: you cannot recruit any Pokémon here, even if you have their Friend Area. There is also no chance of finding a Monster House, shop, or buried item in this dungeon.
Pokémon in Peril

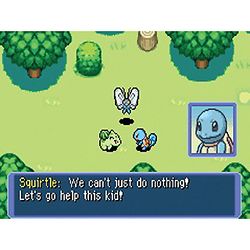
Before you head into the dungeon, a Butterfree flies up to you and tells you that her "precious Caterpie" has fallen into a deep fissure in the ground. You and your partner accept the rescue mission.
In the Dungeon
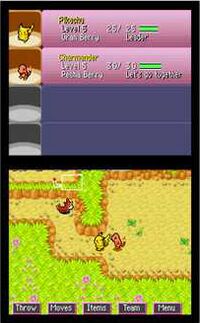
This is a very basic dungeon, as you probably expected. There are typically no more than eight rooms per floor. There are basic items and basic enemies here, with most enemies around level 3 (there are no levels, you have probably noticed, for enemy Pokémon, so this is an educated guess). So search the 8 or so rooms in the dungeon for items and Exp., and head for the stairs when you're ready.
Items
Please note that all items are randomly generated, so this is a general summary of the common items.
Enemies
| Name | Type | Level | EXP | Levels seen | Recruit Rate |
|---|---|---|---|---|---|
| Wurmple | File:PkmnType Bug.gif | 1 | 7/15 | B1F, B2F, B3F | N/A |
| Pidgey | File:PkmnType Normal.gif/File:PkmnType Flying.gif | 1 | 6/16 | B1F, B2F, B3F | N/A |
| Sunkern | File:PkmnType Grass.gif | 1 | 8/16 | B1F, B2F, B3F | N/A |
| Execcute | File:PkmnType Grass.gif/File:PkmnType Psychic.gif | 1 | 22 | B3F | N/A |
The Last Floor
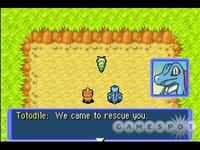
After you exit B3F, you will find a very scared Caterpie at the other end of the room. You will automatically walk over to him and rescue him. You will then warp back outside, and a grateful Butterfree will give you an Oran, Pecha, and Rawst Berry.

