[[File:Portrait DBZSSW Goku.PNG|left|150px]]'''Goku''', the main character of the popular anime and manga, of course makes a role as a playable character, appearing as the first option (though you don't have to play as him from the get-go). He may be referred to as Son Goku or Gokou in other region versions of the game, but he's still the same character.
[[File:Portrait DBZSSW Goku.PNG|left|150px]]
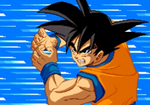
'''Goku''', the main character of the popular anime and manga, of course makes a role as a playable character, appearing as the first option (though you don't have to play as him from the get-go). He may be referred to as Son Goku or Gokou in other region versions of the game, but he's still the same character.
{{-}}
{{-}}
Line 7:
Line 8:
===Level 1 Attacks===
===Level 1 Attacks===
{| {{prettytable}}
{| {{prettytable}}
|-
! Name
! Name
! Move Description
! Move Description
Line 14:
Line 14:
| Grapple
| Grapple
| Simply a grapple, it only works when you're close to your opponent
| Simply a grapple, it only works when you're close to your opponent
| <center>{{gb|B}}
| align="center"|{{gb|B}}
|-
|-
| Knock Away Attacks
| Knock Away Attacks
| Hit back Ki Blasts from opponents (it depends on the size of the Ki Blast)
| Hit back Ki Blasts from opponents (it depends on the size of the Ki Blast)
| <center>{{gb|A}}
| align="center"|{{gb|A}}
|-
|-
| Ki Shield
| Ki Shield
| Block any attacks, close or long-range (similar to knocking away, it doesn't work against stronger attacks)
| Block any attacks, close or long-range (similar to knocking away, it doesn't work against stronger attacks)
| <center>Hold {{gb|A}} or {{gb|B}}
| align="center"|Hold {{gb|A}} or {{gb|B}}
|-
|-
| Power Up
| Power Up
| Power up Ki for stronger attacks
| Power up Ki for stronger attacks
| <center>{{gb|R}}
| align="center"|{{gb|R}}
|-
|-
| Rapid-Fire Ki
| Rapid-Fire Ki
| Quick and small Ki Blasts that won't let your opponent get away. Although small, they do a lot of damage
| Quick and small Ki Blasts that won't let your opponent get away. Although small, they do a lot of damage
| <center>{{gb|R}}{{plus}} Tap {{gb|B}}
| align="center"|{{gb|R}}{{plus}} Tap {{gb|B}}
|-
|-
| Light Ki Blast
| Light Ki Blast
| A simple Ki Blast that can get an opponent that's not within range of you, also the simplest way to win a battle
| A simple Ki Blast that can get an opponent that's not within range of you, also the simplest way to win a battle
| <center>Hold {{gb|R}}{{plus}}{{gb|A}}
| align="center"|Hold {{gb|R}}{{plus}}{{gb|A}}
|-
|-
| Strong Ki Blast
| Strong Ki Blast
| Same as the Light Ki Blast, just stronger. It also involves more Ki to work.
| Same as the Light Ki Blast, just stronger. It also involves more Ki to work.
| <center>Hold {{gb|R}}{{plus}}{{gb|B}}
| align="center"|Hold {{gb|R}}{{plus}}{{gb|B}}
|-
|-
| Grab
| Grab
| Grab an opponent to start working a throw
| Grab an opponent to start working a throw
| <center>{{gb|A}}{{plus}}{{gb|B}}
| align="center"|{{gb|A}}{{plus}}{{gb|B}}
|-
|-
| Release/Throw
| Release/Throw
| The follow-up of grabbing, drop your opponent into the air to release, drop them to the ground to throw
| The follow-up of grabbing, drop your opponent into the air to release, drop them to the ground to throw
| <center>{{gb|A}} or {{gb|B}}
| align="center"|{{gb|A}} or {{gb|B}}
|-
|-
| Dodge/Rush
| Dodge/Rush
| A quick sprint to get away from an attack or just get away to power up Ki
| A quick sprint to get away from an attack or just get away to power up Ki
| <center>{{gb|Neutral|Dpad}} in the direction you want to go
| align="center"|{{gb|Neutral|Dpad}} in the direction you want to go
|-
|-
| Flying Rush
| Flying Rush
| Self-explanatory, a counter-part to the Rush
| Self-explanatory, a counter-part to the Rush
| <center>{{gb|R}}{{plus}} hold {{gb|Neutral|Dpad}} in the direction you want to go
| align="center"|{{gb|R}}{{plus}} hold {{gb|Neutral|Dpad}} in the direction you want to go
|-
|-
| Kaio-ken
| Kaio-ken
| A useful move that multiplies the strength of Goku's Ki. You must have 100% Ki to use it.
| A useful move that multiplies the strength of Goku's Ki. You must have 100% Ki to use it.
| <center>{{gb|R}}{{plus}}{{gb|L}}
| align="center"|{{gb|R}}{{plus}}{{gb|L}}
|-
|-
| Teleportation
| Teleportation
| Self-explanatory, you must have at least 25% Ki to use it
| Self-explanatory, you must have at least 25% Ki to use it
| <center>{{gb|L}}{{plus}}{{gb|Neutral|Dpad}} in the direction you want to go
| align="center"|{{gb|L}}{{plus}}{{gb|Neutral|Dpad}} in the direction you want to go
|-
|-
| Kamehameha
| Kamehameha
| A special move that gives extra damage to the opponent, you must have at least 50% Ki
| A special move that gives extra damage to the opponent, you must have at least 50% Ki
| A special move that has more power and deals more damage to the opponent than the original Kamehameha, but requires more Ki and you also must be left/right from the opponent
| A special move that has more power and deals more damage to the opponent than the original Kamehameha, but requires more Ki and you also must be left/right from the opponent
| Another special move and the last that Goku can use in his normal form, it's a powerful sphere that deals a lot of damage, you must have 100% Ki and also above the opponent
| Another special move and the last that Goku can use in his normal form, it's a powerful sphere that deals a lot of damage, you must have 100% Ki and also above the opponent
| A special move that has more power and deals more damage to the opponent than the original Kamehameha, but requires more Ki and you also must be left/right from the opponent
| A special move that has more power and deals more damage to the opponent than the original Kamehameha, but requires more Ki and you also must be left/right from the opponent
| A special move that has more power and deals more damage to the opponent than the original Kamehameha, but requires more Ki and you also must be left/right from the opponent
| A special move that has more power and deals more damage to the opponent than the original Kamehameha, but requires more Ki and you also must be left/right from the opponent
| Teleport and give your enemies a surprising and powerful Kamehameha, which is impossible to escape. You must be above the opponent and have 100% Ki. Goku can only do this in his Super Saiyan 3 form.
| Teleport and give your enemies a surprising and powerful Kamehameha, which is impossible to escape. You must be above the opponent and have 100% Ki. Goku can only do this in his Super Saiyan 3 form.
Goku, the main character of the popular anime and manga, of course makes a role as a playable character, appearing as the first option (though you don't have to play as him from the get-go). He may be referred to as Son Goku or Gokou in other region versions of the game, but he's still the same character.
Moves
Level 1 Attacks
Name
Move Description
Input
Grapple
Simply a grapple, it only works when you're close to your opponent
Knock Away Attacks
Hit back Ki Blasts from opponents (it depends on the size of the Ki Blast)
Ki Shield
Block any attacks, close or long-range (similar to knocking away, it doesn't work against stronger attacks)
Hold or
Power Up
Power up Ki for stronger attacks
Rapid-Fire Ki
Quick and small Ki Blasts that won't let your opponent get away. Although small, they do a lot of damage
+ Tap
Light Ki Blast
A simple Ki Blast that can get an opponent that's not within range of you, also the simplest way to win a battle
Hold +
Strong Ki Blast
Same as the Light Ki Blast, just stronger. It also involves more Ki to work.
Hold +
Grab
Grab an opponent to start working a throw
+
Release/Throw
The follow-up of grabbing, drop your opponent into the air to release, drop them to the ground to throw
or
Dodge/Rush
A quick sprint to get away from an attack or just get away to power up Ki
in the direction you want to go
Flying Rush
Self-explanatory, a counter-part to the Rush
+ hold in the direction you want to go
Kaio-ken
A useful move that multiplies the strength of Goku's Ki. You must have 100% Ki to use it.
+
Teleportation
Self-explanatory, you must have at least 25% Ki to use it
+ in the direction you want to go
Kamehameha
A special move that gives extra damage to the opponent, you must have at least 50% Ki
++
Super Kamehameha
A special move that has more power and deals more damage to the opponent than the original Kamehameha, but requires more Ki and you also must be left/right from the opponent
++
Spirit Bomb
Another special move and the last that Goku can use in his normal form, it's a powerful sphere that deals a lot of damage, you must have 100% Ki and also above the opponent
++
Level 2 Attacks
Name
Move Description
Input
Grapple
Simply a grapple, it only works when you're close to your opponent
Knock Away Attacks
Hit back Ki Blasts from opponents (it depends on the size of the Ki Blast)
Ki Shield
Block any attacks, close or long-range (similar to knocking away, it doesn't work against stronger attacks)
Hold or
Power Up
Power up Ki for stronger attacks
Rapid-Fire Ki
Quick and small Ki Blasts that won't let your opponent get away. Although small, they do a lot of damage
+ Tap
Light Ki Blast
A simple Ki Blast that can get an opponent that's not within range of you, also the simplest way to win a battle
Hold +
Strong Ki Blast
Same as the Light Ki Blast, just stronger. It also involves more Ki to work.
Hold +
Grab
Grab an opponent to start working a throw
+
Release/Throw
The follow-up of grabbing, drop your opponent into the air to release, drop them to the ground to throw
or
Dodge/Rush
A quick sprint to get away from an attack or just get away to power up Ki
in the direction you want to go
Flying Rush
Self-explanatory, a counter-part to the Rush
+ hold in the direction you want to go
Teleportation
Self-explanatory, you must have at least 25% Ki to use it
+ in the direction you want to go
Kamehameha
A special move that gives extra damage to the opponent, you must have at least 50% Ki
++
Super Kamehameha
A special move that has more power and deals more damage to the opponent than the original Kamehameha, but requires more Ki and you also must be left/right from the opponent
++
Level 3 Attacks
Name
Move Description
Input
Grapple
Simply a grapple, it only works when you're close to your opponent
Knock Away Attacks
Hit back Ki Blasts from opponents (it depends on the size of the Ki Blast)
Ki Shield
Block any attacks, close or long-range (similar to knocking away, it doesn't work against stronger attacks)
Hold or
Power Up
Power up Ki for stronger attacks
Rapid-Fire Ki
Quick and small Ki Blasts that won't let your opponent get away. Although small, they do a lot of damage
+ Tap
Light Ki Blast
A simple Ki Blast that can get an opponent that's not within range of you, also the simplest way to win a battle
Hold +
Strong Ki Blast
Same as the Light Ki Blast, just stronger. It also involves more Ki to work.
Hold +
Grab
Grab an opponent to start working a throw
+
Release/Throw
The follow-up of grabbing, drop your opponent into the air to release, drop them to the ground to throw
or
Dodge/Rush
A quick sprint to get away from an attack or just get away to power up Ki
in the direction you want to go
Flying Rush
Self-explanatory, a counter-part to the Rush
+ hold in the direction you want to go
Teleportation
Self-explanatory, you must have at least 25% Ki to use it
+ in the direction you want to go
Kamehameha
A special move that gives extra damage to the opponent, you must have at least 50% Ki
++
Super Kamehameha
A special move that has more power and deals more damage to the opponent than the original Kamehameha, but requires more Ki and you also must be left/right from the opponent
++
Teleportation Kamehameha
Teleport and give your enemies a surprising and powerful Kamehameha, which is impossible to escape. You must be above the opponent and have 100% Ki. Goku can only do this in his Super Saiyan 3 form.