Dragon Quest VI: Realms of Revelation/The Fungeon
The Fungeon, Part 1

The Fungeon's battles are actually very easy. Walk into them with a party of Dragons (to increase pre-emptives), put everyone but Carver away once you get one, use the Spear of Gracos (with Meteorite Bracer)... then have him spam Forbearance as the others spam C-c-cold Breath & Scorch. You will be functionally immortal, and you won't use a single drop of MP.
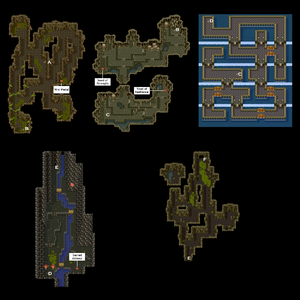
That said, the Fungeon's items are pretty underwhelming, save for one in the "Reaper's Peak" section. As for this part, the Seed of Resilience is the only item with any tangible value. The Mini Medals could also be good if you still haven't gotten the Sands of Time at 50 Medals. Beyond that, the rewards are either equally pointless, or can be bought or found in this page.
Snag the Seed of Resilience for Carver, snag the Sacred Armour if you still don't have it, then move on to Reaper's Peak!
Reaper's Peak

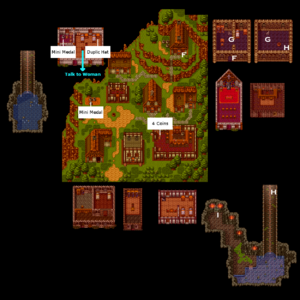
The upper-right house has the entrance to the Fungeon's 2nd half, but there'll be an NPC blocking it. You need to talk to the woman in the upper-left house and change the village in order to unblock the entrance. Get the Duplic Hat for Healie (allows spells to be cast twice in a round at no additional MP cost), talk to the woman, and move on.
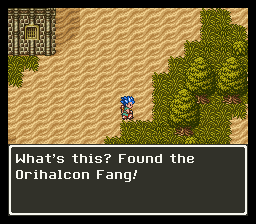
You could also unlock the Orichalcum Fangs, here, if you felt like it. You'd want to find the NPC that tells you about a "secret item" at Aridea, Zoom to Aridea, then search the spot listed in the screenshot. But, like all weapons at this point, it is redundant. Your spells & skills do far more damage than any weapons you might have.

The Fungeon, Part 2

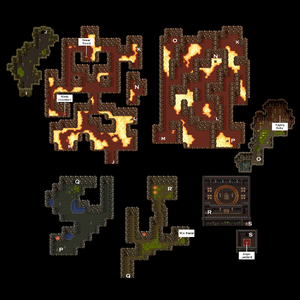
The same battle strategies apply here. Carver will want the Mimic's Seed of Life if you're on the Remakes. Otherwise, you'll want to head straight to Nokturnus' room, snag the Angel Leotard for Healie, and set up your party like so...
Final Preparations
| Goowain (Level 34): Dragon Mail, Metal King Shield, Platinum Mask, Gold Bracer |
| Rex (Level 35): Sword of Ramias, Armour of Orgo, Shield of Valora, Helm of Sebath, Gold Bracer |
| Ashlynn (Level 33): Gringham Whip, Kerplunk Bracer |
| Carver (Level 35): Sacred Armour, Metal King Shield, Metal King Helmet, Gold Bracer |
| Lizzie (Level 15): Dragon Robe, Shield of Max Wynne, Thinking Cap, Gold Bracer |
| Terry (Level 34-37): Yggdrasil Dew, Sands of Time, Platinum Mail & Hela's Armour, Silver Shield, Platinum Mask, Meteorite Bracer |
| Healie (Level 31): Angel Leotard, Silver Shield, Duplic Hat, Gold Ring |
| Amos (Level 32): Enchanted Armour, Dragon Shield, Platinum Mask |
You may not have the Kerplunk Bracer anymore, if on the Remakes... But infinite Sands of Time uses more than make up for that, SNES players WILL have it if they only used it on Mortamor... but their Sands of Time can only be used once.
Regardless, Ashlynn's purpose is basically to use Magic Burst, then die when it's useful; hence the lack of armour. Carver can only be killed by physicals, so high Resilience & HP Regeneration are necessities. Goowain is going to spend the most time on the front lines, so he requires the best gear you can spare after Carver. Healie has the Duplic Hat so he can double-cast Kafrizzle & Multiheal. Amos is there for support, and may also use Kerplunk himself, if needed; hence, his gear doesn't need to be that good. Finally, Terry is there to use the Yggdrasil Dew if Healie is unable to heal. Plus, he can reset the battle if things really go wrong.
Beyond that, it's just standard equipment.
