(corrected typos and grammar, fixed whitespace) |
(→Second visit: spelling) |
||
| (4 intermediate revisions by 2 users not shown) | |||
| Line 1: | Line 1: | ||
{{Header Nav|game=Kingdom Hearts II}} | {{Header Nav|game=Kingdom Hearts II}} | ||
== | [[File:KH2 logo Land of Dragons.png|right|300px]] | ||
==First visit== | |||
===Bamboo Grove | ===Bamboo Grove and Encampment=== | ||
{| {{prettytable|notwide=1|float=left}} | |||
! colspan="2" | Kupo's Moogle Shop | |||
|- | |- | ||
| Elven Bandana || 100 | | Elven Bandana || 100 | ||
|- | |- | ||
| Fire Bangle || | | Fire Bangle || 150 | ||
|- | |- | ||
| Blizzard Armlet || 150 | | Blizzard Armlet || 150 | ||
| Line 47: | Line 23: | ||
|} | |} | ||
[[Image:Land of Dragons Village.jpg|256px|thumb|right|The Land of Dragons, showing the Village]] | |||
Once you have landed, a cutscene will show Mushu and Ping trying to fit in. Once it's finished, you have to decide who has to go between Donald and Goofy (Ping is a compulsory character). On one hand, Donald has magic, and on the other, Goofy is required to use Valor Form. The choice is yours. | |||
Once you have landed, a cutscene will show Mushu and | |||
Now that you've decided your party, look around the | Now that you've decided on your party, look around the Bamboo Grove for some treasures (a '''Hi-Potion''' to the left of the triangle-shaped rock, an '''Ether''' to the left of the save point, and a '''Mythril Shard''' in the north, between the two treasures. You can also speak to Kupo the moogle for some new accessories that you may be interested in. Once finished, head down the only path to the Encampment. | ||
After the cutscene, you have to fight some | After the cutscene, you'll have to fight some Shadow Heartless. This fight is unusual in that there is a morale bar to worry about, a feature exclusive to this world. Morale can be lost by being hit, causing Sora to drop morale orbs. Fortunately, morale can easily be replenished by defeating enemies and picking up the morale orbs that spill out. With the battle completed, you'll receive the '''Encampment Map'''. Now speak to the Captain to start the first of three tasks. | ||
=== The Three Tasks === | === The Three Tasks === | ||
| Line 79: | Line 35: | ||
==== The Surprise Attack ==== | ==== The Surprise Attack ==== | ||
The first of these is to beat all of the | The first of these is to beat all of the Heartless (consisting of Shadows and Nightwalkers) before the morale bar is drained. Unlike the previous battle, this one drains every second, as opposed to every hit (although taking damage will cause it to drain faster). Above this is a counter showing how many enemies have yet to be defeated, starting at 15. This time, the fireworks can also release some morale orbs if you hit them enough to explode. | ||
Once the mission is finished, you can start the next one. Alternatively, you can head to the | Once the mission is finished, you can start the next one. Alternatively, you can head to the Checkpoint area by heading to the North exit, and grab the chests there without fear of enemies. A '''Hi-Potion''' can be found in the northeast corner, between the fence and the barrier, and a '''Mythril Shard''' can be found near the entrance to the Imperial Square to the east, which is currently blocked off. | ||
==== The Ambush ==== | ==== The Ambush ==== | ||
In this next test, the | In this next test, the morale bar only decreases when you sustain hits, rather than being dependent on how much time has passed. This allows you to take your time in destroying the two Assault Riders when they appear. They only appear after defeating some Shadows and Nightwalkers. To deal with the Riders effectively, use Blizzard (which is a long-range spell) to attack from a distance. If they get close and personal, then use Guard to block their attacks before jumping away from them. | ||
Another decent strategy | Another decent strategy is to use Valor Form, assuming that you have a full drive gauge and Goofy in your party. By hitting them quickly with the form's attacks, Sora will deny them the opportunity to attack back. Once finished, talk to the Captain for the penultimate mission. | ||
==== The Search ==== | ==== The Search ==== | ||
The penultimate mission involves you running around the Encampment looking for and eliminating | The penultimate mission involves you running around the Encampment looking for and eliminating eight Heartless in total (five Shadows and three Nightwalkers). This shouldn't be a hard mission, except for the fact that the morale bar drops much more rapidly this time around (every second this time), and the replenishing orbs are much less effective. An easy way to complete the mission is to use {{psx|R1}} to lock onto the Heartless as soon as possible. As in the first mission, destroying the tents will yield morale bar orbs. | ||
Afterwards, you get a free AP Boost. If you want, you can save your game now and/or get the treasures in the Checkpoint if you couldn't be bothered to do so before. When ready, talk to the Captain to activate the final mission. | Afterwards, you get a free '''AP Boost'''. If you want, you can save your game now and/or get the treasures in the Checkpoint if you couldn't be bothered to do so before. When ready, talk to the Captain to activate the final mission. | ||
=== Getting to the Summit === | === Getting to the Summit === | ||
Head back to the checkpoint, then head to the | Head back to the checkpoint, then head to the northern exit. Once there, you will notice that the morale bar has made a return, forcing you to get to the top of the path before the bar runs out. Along the way, you will have to fight enemies, as well as destroy rocks blocking the way. Of note is that you have to use the reaction command (Rockshatter) twice before the rocks will be busted. | ||
As you go up the path, you will probably notice that there are some treasure chests to be collected. Ignore them for now, and get them when you don't have a time limit. On the last set of rocks, two annoying Assault Riders will appear next to you. The best way to deal with the situation is just to use the reaction command as soon as possible, and get the task over and done with. Alternatively, you can use the same tactics as before and use Blizzard from a distance. Once the task is over, you receive the '''Village Area''' map. Of note is that you | As you go up the path, you will probably notice that there are some treasure chests to be collected. Ignore them for now, and get them when you don't have a time limit. On the last set of rocks, two annoying Assault Riders will appear next to you. The best way to deal with the situation is just to use the reaction command as soon as possible, and get the task over and done with. Alternatively, you can use the same tactics as before and use Blizzard from a distance. Once the task is over, you receive the '''Village Area''' map. Of note is that you won't have to deal with the morale bar again. | ||
Once the cutscenes have finished, go to the Cave area. | Once the cutscenes have finished, you can return to the Mountain Trail to collect the treasures and defeat some Heartless without any time limit to worry about. On a ledge to the right as you enter from the Village, pick up a '''Recovery Recipe''' and an '''Ether'''. On a ledge to the upper-left is a '''Mythril Shard''' and on the apex of the curve on the right is a '''Hi-Potion'''. Once ready, go to the Cave area. | ||
=== Assaults on Shang-Yu === | === Assaults on Shang-Yu === | ||
Once in the cave, collect the two chests and destroy the firecracker carts | Once in the cave, collect the two chests (one in the corner of the first bend containing a '''Hi-Potion''' and another in the second containing an '''AP Boost''') and destroy the firecracker carts if you wish, as they contain HP and drive orbs. Once you reach the end, the cave appears empty, but a battle soon starts, with no help from Donald or Goofy. There are two waves of enemies. The first wave contains many Shadows and an Assault Rider. Deal with the Assault Rider first, as it can cause the most damage to you at the moment. Use Blizzard to attack from a distance. If you do manage to get hit, use the Aerial Recovery ability to try and get in a free hit. The Shadows can easily be dealt with by using Fire. | ||
The next wave consists of two Assault Riders. This can be very tricky, so take your time, and continue to use Blizzard on them, because you can't use your Drive Form without Goofy being present. If you run out of MP, then either use an Ether, or run around for a bit whilst the MP Gauge replenishes. Overall, not difficult, just tricky. For completing the battle, Sora will obtain the '''Slide Dash''' ability and Ping will obtain the '''Hyper Healing''' ability as well as a boost in her maximum HP. | |||
When you're ready, head back toward the Village, and then receive orders to go to the Summit. Along the way, you'll find yourself a Ridge, where you can grab two treasure chests (a '''Hi-Potion''' next to the first set of explosives on the right and an '''AP Boost''' in the northeast corner), and begin to get used to fighting a new enemy called Rapid Thruster. You may also notice some pockets of air around the area. Use the reaction command "Ride the Air" to get inside them, then use the command "Soar" to get thrown high into the air (in Final Mix, you can practice utilizing this command by obtaining the puzzle piece up above). When ready, move onto the Summit. | |||
Once you arrive, Sora will find himself alone in a battle against countless enemies. Defeat as many enemies as you can while maintaining your HP for one minute. As well as the Rapid Thrusters, you'll be pitted against yet another new enemy called Bolt Towers. These Heartless can be very irritating. They can lean back, then slam forward to create a massive shockwave. Also, their only weak point is their tiny heads which constantly move around. Therefore, your best bet at defeating them is to lock onto the heads, and hope for the best. If it manages to get you caught in its laser, then press the {{psx|t}} rapidly to deflect it back into the Heartless. | |||
After the battle has finished, Ping will be revealed to be Mulan, and will also reveal some new abilities she has, such as '''Dragon's Blaze''', which allows her to perform her limit, Red Rocket. Sora will also gain '''Auto Limit''', which causes a limit to pop up as a reaction command whenever in battle (if Sora's MP is full). While this can prove a nuisance if you wish to use the {{psx|t}} button for other reaction commands, it is also more efficient than switching to the secondary menu (with {{psx|left|dpad}} and selecting the specific limit) if Sora is caught in a tight spot. Once again, this is your choice to make. | |||
Proceed when you are ready, after possibly training to gain a couple of levels before the boss battle; you may also wish to level Valor Form by landing hits on the various enemies in the world, as well as fill the Drive Gauge to 3. Head back to the Checkpoint, then head east towards the Imperial Square. When you enter, you will be forced to fight seven Heartless in total - four Nightwalkers and three Bolt Towers. Focus on the Bolt Towers first, as their shockwave can be a nuisance when you're fighting other Heartless. When they are defeated, you now have to fight Shan-Yu himself. | |||
=== Boss: Shan-Yu === | |||
{{YouTube | {{YouTube | ||
| Line 144: | Line 83: | ||
}} | }} | ||
This battle has two aims to it. The obvious one is to defeat Shan. The second one is to ensure that the Gates don't break (the health of the gates is indicated in the top-left corner). The gates will take damage from the Heartless attacking it, so kill them. As they attack the gate, orbs will drop out | This battle has two aims to it. The obvious one is to defeat Shan-Yu. The second one is to ensure that the Gates don't break (the health of the gates is indicated in the top-left corner) so that Shan-Yu and his army of Heartless do not reach the emperor. The gates will take damage from the Heartless attacking it, so make sure to kill them every once in a while. As they attack the gate, orbs will drop out; pick them up to restore the gate's health. | ||
As for defeating Shan-Yu himself, one effective manner is to use the Red Rocket limit. This covers a wide area, making it unlikely to miss him and the Heartless (if there are many of them surrounding the gate). While potential damage is reduced (Shan-Yu takes 50% less damage from elemental attacks), it will still deal a significant amount of damage and give Sora the benefit of invincibility while in use. Another effective method is to use Valor Form, which allows Sora to attack quicker, dealing more damage to him. | |||
From Shan-Yu's perspective, he has some basic sword attacks, all of which can easily be dodged or blocked, providing a perfect opportunity to use the Press/Takedown combination reaction commands to deal massive damage to him. If he manages to hit Sora, his attacks will fling him into the air, where his pet falcon, Hayabusa, can deal even more damage. He also has a ramming attack, when his body is surrounded by a purple aura, which can be damaging if not dodged | |||
While killing the bird may seem like a perfectly fine way to be rid of the nuisance, in actuality, even if you manage to deplete its HP, it will return shortly afterward. With this in mind, it is best not to bother with it and lock-on to Shan-Yu (and occasionally the Heartless) exclusively. For completing the battle, Sora will obtain the '''Aerial Sweep''' ability and an increase in his maximum HP. As for his party members, Donald will also obtain an increase in maximum HP, Goofy will obtain the '''Goofy Turbo''' ability, and Mulan, like Sora and Donald, will obtain an increase in her maximum HP, albeit much larger. | |||
After the cutscene, Sora will also receive the '''Hidden Dragon''' Keyblade, as well as the ability to travel to new places. If you wish, you can now equip the Star Seeker Keyblade by swapping it with Hidden Dragon. | |||
This walkthrough will assume that you head to Beast's Castle next, as it has a lower | This walkthrough will assume that you head to [[../Beast's Castle|Beast's Castle]] next, as it has a lower battle level then [[../Olympus Coliseum|Olympus Coliseum]]. | ||
==Second visit== | |||
[[File:KH2 screen Land of Dragons Warp Snipe.png|thumb|right|Use the Warp Snipe reaction command on the Snipers' delayed bullets.]] | |||
After the scene, follow the man in black up to the Summit. There will be many surrounding Heartless in this battle, but you can feel free to ignore them. Take out two of his health bars, then make your way to the Imperial Square. Defeat the Heartless in your path and continue forward to the Palace. Inside, you'll have to do battle with some Nobodies, fittingly those commanded by Xigbar: the Snipers. They will shoot bullets that freeze midway to Sora's location, and will hit him no matter where he moves. This is only if Sora performs the Warp Snipe reaction command to counter the bullets, warping to their location and kicking them right back at the Snipers. After the battle, you'll find yourself in the Throne Room. Pick up the '''Palace Map''' from the highest ledge to the left of the throne, then drop down for an '''Ogre Shield'''. To the right are '''[[../100 Acre Wood|Torn Pages]]''' and a '''Queen Recipe''', and directly behind the throne is a '''Mythril Crystal''' and '''Orichalcum'''. To the side of the staircases to the left and right are two '''AP Boosts'''. Exit the palace to begin the final battle of the world. | |||
===Boss: Storm Rider=== | |||
[[File:KH2 screen Land of Dragons Storm Rider.png|thumb|left|Hang on whenever prompted to stay close to the Storm Rider's weak spot.]] | |||
The party begins the battle on top of the high-flying Heartless. Use the reaction command to make Sora hang onto the Storm Rider's horn, as the presence of the reaction command prompt is an indicator that it will attempt to shake Sora off. Wait for it to finish its flip, then press {{psx|T}} again to let go. Lock on to the large horn in the center of its head (or the two smaller horns on the sides; they won't affect its health, but they will impede its conduction of harmful electricity) and begin to combo it, hanging on again if necessary. Inevitably, the Heartless will shake Sora off, and you'll have to find your way back on top. Fortunately, there are pockets of wind scattered across the ground; measure your jump so that you land on the Storm Rider's back, then continue to attack. | |||
[[File:KH2 screen Land of Dragons Storm Rider 2.png|thumb|right|Carefully time your jump after riding the wind to land on the Storm Rider's back.]] | |||
When the Storm Rider begins to fly low, another reaction command will become available. You also have the option to use Mulan's limit, as the rest of the party is now able to reach their enemy. When enough of its health is depleted, it will perform its desperation move, landing low on the ground but trapping Sora between two walls, making for a narrow arena. It will then send lightning bolts across the area, even going so far as to summon a big mass of energy, creating a blast that takes up most of the field. Attack it before it performs its final attack, and eventually, the walls will be cleared up and it will be back up in the air. Deplete all of its health to get an upgrade in Sora's Thunder magic, an increase in maximum HP for Donald and Mulan, and '''Tornado Fusion''' for Goofy. Continue to [[../Beast's Castle#Second visit|Beast's Castle]]. | |||
{{Footer Nav|game=Kingdom Hearts II|prevpage=Hollow Bastion|nextpage=Beast's Castle}} | {{Footer Nav|game=Kingdom Hearts II|prevpage=Hollow Bastion|nextpage=Beast's Castle}} | ||
Latest revision as of 14:07, 19 December 2022
First visit[edit]
Bamboo Grove and Encampment[edit]
| Kupo's Moogle Shop | |
|---|---|
| Elven Bandana | 100 |
| Fire Bangle | 150 |
| Blizzard Armlet | 150 |
| Thunder Trinket | 150 |
| Abus Chain | 250 |
| Potion | 40 |
| Ether | 120 |
| Tent | 100 |
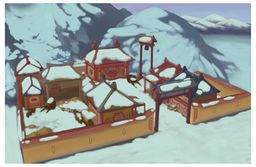
Once you have landed, a cutscene will show Mushu and Ping trying to fit in. Once it's finished, you have to decide who has to go between Donald and Goofy (Ping is a compulsory character). On one hand, Donald has magic, and on the other, Goofy is required to use Valor Form. The choice is yours.
Now that you've decided on your party, look around the Bamboo Grove for some treasures (a Hi-Potion to the left of the triangle-shaped rock, an Ether to the left of the save point, and a Mythril Shard in the north, between the two treasures. You can also speak to Kupo the moogle for some new accessories that you may be interested in. Once finished, head down the only path to the Encampment.
After the cutscene, you'll have to fight some Shadow Heartless. This fight is unusual in that there is a morale bar to worry about, a feature exclusive to this world. Morale can be lost by being hit, causing Sora to drop morale orbs. Fortunately, morale can easily be replenished by defeating enemies and picking up the morale orbs that spill out. With the battle completed, you'll receive the Encampment Map. Now speak to the Captain to start the first of three tasks.
The Three Tasks[edit]
The Surprise Attack[edit]
The first of these is to beat all of the Heartless (consisting of Shadows and Nightwalkers) before the morale bar is drained. Unlike the previous battle, this one drains every second, as opposed to every hit (although taking damage will cause it to drain faster). Above this is a counter showing how many enemies have yet to be defeated, starting at 15. This time, the fireworks can also release some morale orbs if you hit them enough to explode.
Once the mission is finished, you can start the next one. Alternatively, you can head to the Checkpoint area by heading to the North exit, and grab the chests there without fear of enemies. A Hi-Potion can be found in the northeast corner, between the fence and the barrier, and a Mythril Shard can be found near the entrance to the Imperial Square to the east, which is currently blocked off.
The Ambush[edit]
In this next test, the morale bar only decreases when you sustain hits, rather than being dependent on how much time has passed. This allows you to take your time in destroying the two Assault Riders when they appear. They only appear after defeating some Shadows and Nightwalkers. To deal with the Riders effectively, use Blizzard (which is a long-range spell) to attack from a distance. If they get close and personal, then use Guard to block their attacks before jumping away from them.
Another decent strategy is to use Valor Form, assuming that you have a full drive gauge and Goofy in your party. By hitting them quickly with the form's attacks, Sora will deny them the opportunity to attack back. Once finished, talk to the Captain for the penultimate mission.
The Search[edit]
The penultimate mission involves you running around the Encampment looking for and eliminating eight Heartless in total (five Shadows and three Nightwalkers). This shouldn't be a hard mission, except for the fact that the morale bar drops much more rapidly this time around (every second this time), and the replenishing orbs are much less effective. An easy way to complete the mission is to use ![]() to lock onto the Heartless as soon as possible. As in the first mission, destroying the tents will yield morale bar orbs.
to lock onto the Heartless as soon as possible. As in the first mission, destroying the tents will yield morale bar orbs.
Afterwards, you get a free AP Boost. If you want, you can save your game now and/or get the treasures in the Checkpoint if you couldn't be bothered to do so before. When ready, talk to the Captain to activate the final mission.
Getting to the Summit[edit]
Head back to the checkpoint, then head to the northern exit. Once there, you will notice that the morale bar has made a return, forcing you to get to the top of the path before the bar runs out. Along the way, you will have to fight enemies, as well as destroy rocks blocking the way. Of note is that you have to use the reaction command (Rockshatter) twice before the rocks will be busted.
As you go up the path, you will probably notice that there are some treasure chests to be collected. Ignore them for now, and get them when you don't have a time limit. On the last set of rocks, two annoying Assault Riders will appear next to you. The best way to deal with the situation is just to use the reaction command as soon as possible, and get the task over and done with. Alternatively, you can use the same tactics as before and use Blizzard from a distance. Once the task is over, you receive the Village Area map. Of note is that you won't have to deal with the morale bar again.
Once the cutscenes have finished, you can return to the Mountain Trail to collect the treasures and defeat some Heartless without any time limit to worry about. On a ledge to the right as you enter from the Village, pick up a Recovery Recipe and an Ether. On a ledge to the upper-left is a Mythril Shard and on the apex of the curve on the right is a Hi-Potion. Once ready, go to the Cave area.
Assaults on Shang-Yu[edit]
Once in the cave, collect the two chests (one in the corner of the first bend containing a Hi-Potion and another in the second containing an AP Boost) and destroy the firecracker carts if you wish, as they contain HP and drive orbs. Once you reach the end, the cave appears empty, but a battle soon starts, with no help from Donald or Goofy. There are two waves of enemies. The first wave contains many Shadows and an Assault Rider. Deal with the Assault Rider first, as it can cause the most damage to you at the moment. Use Blizzard to attack from a distance. If you do manage to get hit, use the Aerial Recovery ability to try and get in a free hit. The Shadows can easily be dealt with by using Fire.
The next wave consists of two Assault Riders. This can be very tricky, so take your time, and continue to use Blizzard on them, because you can't use your Drive Form without Goofy being present. If you run out of MP, then either use an Ether, or run around for a bit whilst the MP Gauge replenishes. Overall, not difficult, just tricky. For completing the battle, Sora will obtain the Slide Dash ability and Ping will obtain the Hyper Healing ability as well as a boost in her maximum HP.
When you're ready, head back toward the Village, and then receive orders to go to the Summit. Along the way, you'll find yourself a Ridge, where you can grab two treasure chests (a Hi-Potion next to the first set of explosives on the right and an AP Boost in the northeast corner), and begin to get used to fighting a new enemy called Rapid Thruster. You may also notice some pockets of air around the area. Use the reaction command "Ride the Air" to get inside them, then use the command "Soar" to get thrown high into the air (in Final Mix, you can practice utilizing this command by obtaining the puzzle piece up above). When ready, move onto the Summit.
Once you arrive, Sora will find himself alone in a battle against countless enemies. Defeat as many enemies as you can while maintaining your HP for one minute. As well as the Rapid Thrusters, you'll be pitted against yet another new enemy called Bolt Towers. These Heartless can be very irritating. They can lean back, then slam forward to create a massive shockwave. Also, their only weak point is their tiny heads which constantly move around. Therefore, your best bet at defeating them is to lock onto the heads, and hope for the best. If it manages to get you caught in its laser, then press the ![]() rapidly to deflect it back into the Heartless.
rapidly to deflect it back into the Heartless.
After the battle has finished, Ping will be revealed to be Mulan, and will also reveal some new abilities she has, such as Dragon's Blaze, which allows her to perform her limit, Red Rocket. Sora will also gain Auto Limit, which causes a limit to pop up as a reaction command whenever in battle (if Sora's MP is full). While this can prove a nuisance if you wish to use the ![]() button for other reaction commands, it is also more efficient than switching to the secondary menu (with
button for other reaction commands, it is also more efficient than switching to the secondary menu (with ![]() and selecting the specific limit) if Sora is caught in a tight spot. Once again, this is your choice to make.
and selecting the specific limit) if Sora is caught in a tight spot. Once again, this is your choice to make.
Proceed when you are ready, after possibly training to gain a couple of levels before the boss battle; you may also wish to level Valor Form by landing hits on the various enemies in the world, as well as fill the Drive Gauge to 3. Head back to the Checkpoint, then head east towards the Imperial Square. When you enter, you will be forced to fight seven Heartless in total - four Nightwalkers and three Bolt Towers. Focus on the Bolt Towers first, as their shockwave can be a nuisance when you're fighting other Heartless. When they are defeated, you now have to fight Shan-Yu himself.
Boss: Shan-Yu[edit]
Defeating Shan-Yu
This battle has two aims to it. The obvious one is to defeat Shan-Yu. The second one is to ensure that the Gates don't break (the health of the gates is indicated in the top-left corner) so that Shan-Yu and his army of Heartless do not reach the emperor. The gates will take damage from the Heartless attacking it, so make sure to kill them every once in a while. As they attack the gate, orbs will drop out; pick them up to restore the gate's health.
As for defeating Shan-Yu himself, one effective manner is to use the Red Rocket limit. This covers a wide area, making it unlikely to miss him and the Heartless (if there are many of them surrounding the gate). While potential damage is reduced (Shan-Yu takes 50% less damage from elemental attacks), it will still deal a significant amount of damage and give Sora the benefit of invincibility while in use. Another effective method is to use Valor Form, which allows Sora to attack quicker, dealing more damage to him.
From Shan-Yu's perspective, he has some basic sword attacks, all of which can easily be dodged or blocked, providing a perfect opportunity to use the Press/Takedown combination reaction commands to deal massive damage to him. If he manages to hit Sora, his attacks will fling him into the air, where his pet falcon, Hayabusa, can deal even more damage. He also has a ramming attack, when his body is surrounded by a purple aura, which can be damaging if not dodged
While killing the bird may seem like a perfectly fine way to be rid of the nuisance, in actuality, even if you manage to deplete its HP, it will return shortly afterward. With this in mind, it is best not to bother with it and lock-on to Shan-Yu (and occasionally the Heartless) exclusively. For completing the battle, Sora will obtain the Aerial Sweep ability and an increase in his maximum HP. As for his party members, Donald will also obtain an increase in maximum HP, Goofy will obtain the Goofy Turbo ability, and Mulan, like Sora and Donald, will obtain an increase in her maximum HP, albeit much larger.
After the cutscene, Sora will also receive the Hidden Dragon Keyblade, as well as the ability to travel to new places. If you wish, you can now equip the Star Seeker Keyblade by swapping it with Hidden Dragon.
This walkthrough will assume that you head to Beast's Castle next, as it has a lower battle level then Olympus Coliseum.
Second visit[edit]
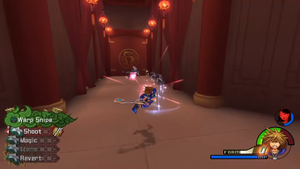
After the scene, follow the man in black up to the Summit. There will be many surrounding Heartless in this battle, but you can feel free to ignore them. Take out two of his health bars, then make your way to the Imperial Square. Defeat the Heartless in your path and continue forward to the Palace. Inside, you'll have to do battle with some Nobodies, fittingly those commanded by Xigbar: the Snipers. They will shoot bullets that freeze midway to Sora's location, and will hit him no matter where he moves. This is only if Sora performs the Warp Snipe reaction command to counter the bullets, warping to their location and kicking them right back at the Snipers. After the battle, you'll find yourself in the Throne Room. Pick up the Palace Map from the highest ledge to the left of the throne, then drop down for an Ogre Shield. To the right are Torn Pages and a Queen Recipe, and directly behind the throne is a Mythril Crystal and Orichalcum. To the side of the staircases to the left and right are two AP Boosts. Exit the palace to begin the final battle of the world.
Boss: Storm Rider[edit]
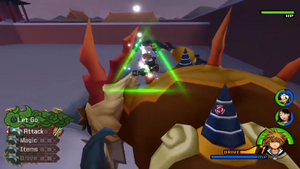
The party begins the battle on top of the high-flying Heartless. Use the reaction command to make Sora hang onto the Storm Rider's horn, as the presence of the reaction command prompt is an indicator that it will attempt to shake Sora off. Wait for it to finish its flip, then press ![]() again to let go. Lock on to the large horn in the center of its head (or the two smaller horns on the sides; they won't affect its health, but they will impede its conduction of harmful electricity) and begin to combo it, hanging on again if necessary. Inevitably, the Heartless will shake Sora off, and you'll have to find your way back on top. Fortunately, there are pockets of wind scattered across the ground; measure your jump so that you land on the Storm Rider's back, then continue to attack.
again to let go. Lock on to the large horn in the center of its head (or the two smaller horns on the sides; they won't affect its health, but they will impede its conduction of harmful electricity) and begin to combo it, hanging on again if necessary. Inevitably, the Heartless will shake Sora off, and you'll have to find your way back on top. Fortunately, there are pockets of wind scattered across the ground; measure your jump so that you land on the Storm Rider's back, then continue to attack.
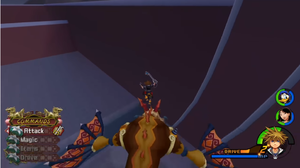
When the Storm Rider begins to fly low, another reaction command will become available. You also have the option to use Mulan's limit, as the rest of the party is now able to reach their enemy. When enough of its health is depleted, it will perform its desperation move, landing low on the ground but trapping Sora between two walls, making for a narrow arena. It will then send lightning bolts across the area, even going so far as to summon a big mass of energy, creating a blast that takes up most of the field. Attack it before it performs its final attack, and eventually, the walls will be cleared up and it will be back up in the air. Deplete all of its health to get an upgrade in Sora's Thunder magic, an increase in maximum HP for Donald and Mulan, and Tornado Fusion for Goofy. Continue to Beast's Castle.
