| Map Name | Initial Coordinates |
|---|---|
| bunk1 | (836 -927 46) : -180° (facing south) |
Armament[edit]
Starting the Bunker Area unit, you should have the Blaster, Shotgun, Machine Gun, a bunch of Grenades (but not the Grenade Launcher) and the Super Shotgun. If you somehow missed both of the secrets in the Base Area unit that contained Super Shotguns (the second of which was really easy), fear not because there's one in plain sight very early in this level. Sharpen your secret-finding skills; one of the secrets in this level gives you the Chain Gun.
Unit objective[edit]
The objective for the Bunker Area unit, displayed by your field computer, is "Destroy Strogg logistical train". This turns out to be a minor incident half way through the unit and isn't actually helpful during play, so just follow the level objectives, which are very simple and understandable.
Level objective[edit]
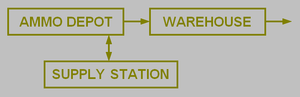
The objective for this level is to find the entrance to the Supply Station.
Strategy[edit]
This is a fairly easy level to start the unit. It's structured as a maze of passages, rooms, elevators and walkways, often requiring you to press wall buttons to open doors, extend bridges and call down elevators. There is plenty of ammunition of all types, so charging ahead with guns blazing is going to work if you keep moving and watch out for enemies hidden around corners, among crates and on walkways above you. There is a particularly good supply of Grenades, so this is your chance to practice throwing them. If you mess up, there's also enough health to keep you alive and one Armor item. You'll encounter two new Strogg types, the Berserker and Technician, so engage them with caution until you've become familiar with their abilities and endurance. Otherwise, it's Guards and Enforcers.
Walkthrough[edit]
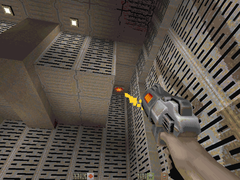
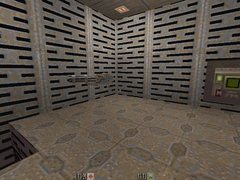
Equip your Machine Gun to deal with the Guards in the first room. Ignore the lower level unless you need to go down there to collect the Super Shotgun or the Grenades (press the wall button by the smaller lift platform to come back up). See Secrets, below, before moving on.
In the second room, walk backwards down the steps until you see the wall ahead begin to slide down, then run back to the first room. You can then take out the Enforcers that emerge from behind the wall one-by-one. Back in the second room, press the wall button, which opens the door to the third room but stay at the lower level and pay attention to what comes through the door. Shoot the dark gray exploding crate to kill the Guards.

Meet the New Strogg Types[edit]
Switch to the Super Shotgun, go back up the steps and and look into the third room. You will see your first Technician. With luck, it is still lurking behind some crates. Rush it and deliver two blasts at short range before it can attack. The scraping noise that you can hear is a Berserker, up above, that you will meet much later. Maybe he is sharpening his spike.
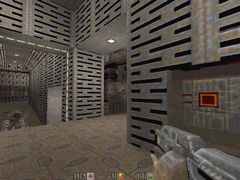
Press the wall button by the door to proceed to the fourth room. Deal first with two Shotgun Guards straight ahead and then two Light Guards on a walkway above and to the right. Use your Blaster and dodge their badly-aimed shots. To call down the elevator on the other side of the room, you need to drop to the lower level and press the wall button that is in plain view. There are two Machine Gun Guards and one Shotgun Guard down there. If you show yourself at the edge of the walkway, they will run out into the open and you can pick them off from above. Come back up using the large lift platform and take the elevator up to the catwalk that was over your head. If you approach the door at the other end, you will receive the message "This door is opened elsewhere". Press the button on the small post and watch the walkway extend from under the door below. To get back down without fall damage, jump on the crates nearby.
Approach the newly accessible door cautiously with the Super Shotgun in hand. You might want to save the game. When the door opens, there will be two Berserkers on the other side. They will run at you and try to hit you with their club arm and spear you with their spike arm. Keep enough distance that they miss and then run in with a point blank Super Shotgun blast. Do this twice for each and they are down. From a distance it can take three or four blasts. You can also try the Machine Gun, but they run around so much that a lot of bullets will miss.
The Goal Comes into Sight[edit]

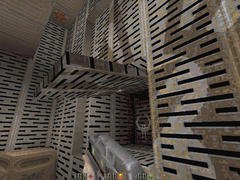
Proceed with your usual caution, or lack thereof, through a passageway to a large room with a canister suspended from a rail. There is a good selection of enemies here, but you can take advantage of exploding barrels and crates. Shoot the glow-button in the small control room to drop the force field and go in. Press the button on the pedestal and watch the canister smash the door over to the left (also, see Secrets, below). The way ahead is through this door; equip either the Super Shotgun or the Machine Gun to deal with lurking Guards. At the next door, before opening it, back up and take a look at the wall to your left. There is a recessed panel; maybe it is hiding something (maybe you should save the game). An interesting way to deal with Berserkers is to get to a place where they can't reach you and just wear them down with the weapon of your choice. There's a pile of crates here with some Grenades on top. If you quickly climbed up there and then tossed down the Grenades ... well, if you try this be sure to crouch to avoid splash damage from the explosions.
Press on, through another passageway with Guards hiding behind crates, to a large room with a tee-shaped catwalk up above. A lone Berserker will attack and this is a good time to get a feel for the Machine Gun against this Strogg type. Also deal with Guards in various places. Shoot the exploding crates in the far corners (oops! another Berserker). Explore carefully and you'll see that the only accessible way out of this room is a door at the lower level. Clear away the enemies from above before dropping down or, if you prefer, fall into their midst and blast away. Either of the two lift platforms will bring you back up should you wish this. By the way, if you suspect that the tee-shaped catwalk above leads to the Supply Station and the Warehouse, you're correct, but there's a ways to go yet before you're up there.
Be Careful Where You Stand[edit]
You will come to a door that opens when you press a wall button on the right. There is a hole in the ceiling here, so don't get shot at while you're standing there deliberating. It turns out to be an elevator that takes you up two levels. You will spot two Berserkers on the level that you pass by, but resist the temptation to take pot shots at them. You'll see why soon enough. When the elevator door opens at the top, be ready for Guards. There are two crates here suspended by cranes. If you look below, you'll see that the crates are directly over the Berserkers. Maybe there's a way to drop the crates on their unsuspecting heads. If you need any of the supplies down there, you can get them, without fall damage if you're careful, and then just drop through the aforementioned hole in the ceiling to take the elevator up again.

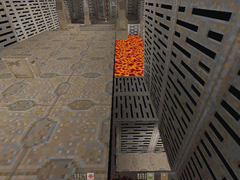
The wall button at the other end of the room again just opens the door to an elevator, but when you go in equip a Shotgun and turn to face to the right. Continue, watching for Guards lurking around corners and overhead, to a room with a large molten lava lake with a bridge over it. This looks like a trap, so you'll feel like saving the game, but is it a trap for you? Experiment with the wall button nearby. When you've done whatever you decide to do, the path on the other side of the bridge turns to the right past some suspicious-looking alcoves. Get into the habit of tossing grenades into places where you think Strogg might be waiting to ambush you. Take a look at Secrets, below, before going much further.
The Flooded Room[edit]
Next you'll come to a flooded room with floating crates. Don't overthink this; it's pretty easy to figure out what to do and then do it. Ignore the sparking hole in the wall, there's nothing there but a lift platform that takes you back up to where you came into the room. However, before getting into water, be sure to check for Barracuda Sharks. They are often easier to kill from dry land than when you're swimming among them. Past this room (we're nearly there now) there are more Guards and Berserkers and a lift platform that must be called down with a button. Some of the Berserkers will attack you when you don't have much room to maneuver, so use your most powerful weapon.
The way ahead is through the door on the right, opposite the dim alcove from which a Berserker attacked you. Have a Shotgun ready. Out of curiosity, you can come back and go a little further to find a second door on the right. You are above the third room in which you met the first Technician. You've just killed the Berserkers that were making that scraping sound! If you go through the door, you'll recognize where you are, but there's little point in being there (unless you desperately need to drop down to re-supply) so go back through the other door and across the higher catwalk. Through the next door you will see that you are above the room with the canister on a rail that smashed the door.

Through the door beyond that, always watching out for enemies, you'll find an alcove on the left just before the passage turns to the right. Go in and press the wall button there. A hatch will open one floor down allowing you to use the ladder to return to the earlier parts of the level. This is the point at which it makes sense to go back for anything you left behind because you can conveniently use the ladder to return. Take the right turn, through the next door, kill an Enforcer and, finally, you're on the tee-shaped catwalk with the Supply Station on your left.
Entering the Supply Station[edit]
Go through the door over which is the sign "Supply Station". Inside a ramp leads down to the level exit that will actually take you there, but first look at the side room on the right. There are supplies inside (it's the Supply Station, after all) but you can't get to them due to a laser barrier across the door. You can also hear the scraping sound of a Berserker nearby. Go back up the ramp and, from a safe distance, shoot the exploding crate to reveal a hole in the ceiling of the side room. Show yourself to the Berserker, who will shout "trespasser" (yes, the Strogg have learned English in preparation for your visit) and start running about like ... well, like a berserker. Now go down the ramp, thumb your nose at him and wait from him to rush at you. That was fun. Up the ramp again, drop down into the side room, take what you need and turn off the laser barrier. You should have 69 kills out of a total of 71, the last two will have to wait until you return. Go now to the Supply Station.
Returning From the Supply Station[edit]
You will come back from the Supply Station the same way that you left. Your field computer will give your secondary objective as "Proceed directly to the Warehouse". You can probably figure out how to do do that. As you will be leaving the unit from the Warehouse, first consider going back for any supplies you left behind, for example the Jacket Armor in the room below. If you're careful, you can get down without fall damage by dropping first onto one of the light fixtures on the wall.

Use the ladder that you found earlier to get back up.
Through the door over which is the sign "Warehouse", you will find an area with a high, non-functional lift platform. In case you're a bit slow on the uptake, if you go much past the panel labelled "System Access", you'll receive the hint "Power cubes needed to restore power". Approach the panel so that it opens and step briefly inside to deposit a power cube. Lights come on at the top of the lift platform. Call it down with the wall button and go up with a powerful weapon in hand. The last two enemies in the level will greet you at the top. The exit to the Warehouse looks very much like the exit to the Supply Station but without the side room. You can grab some Machine Gun ammunition on the way out.
Secrets[edit]
This level has three (3) secrets:
- In the very first room of the level, look up at the ceiling in the corner far from the entry elevator and to the left. Shoot the glowing button there and a section of the wall hinges open. Walk along the narrow ledge into the alcove, receive the message "You found a secret" and take the Quad Damage.
- In the room with the canister suspended from a rail, you enter a small control room to send the canister crashing into a door. In addition to the button on a post that you press to do that, there's another button in a darkened area close by. Press it to slide open the floor back in the passage through which you came into the room. The area under the floor panel contains Machine Gun ammunition and health. When you enter, you receive the message "You have found a secret".
- On the far side of the bridge over the lava lake, look under the edge to see the entrance to a small tunnel. Drop down into it and take a lift platform up to an area high over the bridge where you will find a Chain Gun. A wall button operates the bridge, but it's hard to see what use you can make of this. There is no way down other than crouching and dropping onto the bridge. You will take fall damage of about 3 armor and 4 health, more if you forget to crouch.
- Secrets in the Ammo Depot.
-
Shoot the glowing button in the first room.
-
A Quad Damage in the secret alcove.
-
This button slides back the floor in the passage.
-
Drop down into the secret tunnel under the bridge.
-
The first Chain Gun in the game is in this secret area.


