(Opps, sorry about that.) |
E-123Wario54 (talk | contribs) (first visit) |
||
| Line 1: | Line 1: | ||
{{Stub}} | {{Stub}} | ||
{{Header Nav|game=Kingdom Hearts II}} | {{Header Nav|game=Kingdom Hearts II}} | ||
[[File: | [[File:KH2 logo Pride Lands.png|right|300px]] | ||
==First Visit== | |||
:''' | [[File:KH2 screen Pride Lands.png|thumb|right|Sora, Donald and Goofy in the Pride Lands]] | ||
This world is unique in that Sora's fighting style changes completely to suit his new four-legged state. He also loses the ability to use drives and summons, but he makes up for it with his quickness, dashing long distances mid-combo to avoid enemy attacks. The chests in this world also have a different shape, taking on the appearance of fruits. Open the large pear-shaped one for a '''Savannah Map''', then the smaller one to the left of it for a '''Dark Gem'''. On the other side of the area is a '''Mythril Stone'''. Exit the Gorge to the Elephant Graveyard, where Sora will step into battle against some Heartless. | |||
[[File:KH2 screen Pride Lands Living Bone.png|thumb|left|Use the Rodeo/Grand Cross reaction command combo to stun the otherwise persistent Living Bone.]] | |||
This world introduces the exclusive Living Bone Heartless, which may have Shaman Heartless that cast magic riding them. The Living Bone is powerful on its own, being fully capable of killing Sora in one combo. If you'd prefer to be cautious, guard the Living Bone's attacks before obtaining the opportunity to perform the Rodeo/Grand Cross reaction command combo, doing significant damage and stunning the Heartless so that Sora can finish it off. After the scene, return to the exit of the Gorge which you entered the area from. Head down this path to the right for an '''AP Boost'''. Keep continuing down this path and open the chest to the left for a '''Mythril Shard''', and the chest in the distance for a '''Bright Stone'''. Head up the ramp and grab the '''Mythril Stone''' across from the elephant skull. Continue down this path and take a right turn at the fork for a '''Frost Gem'''. Exit the area to the Savannah. Cross the long expanse of flat land, battling Heartless along the way, to Pride Rock. | |||
== | Head left and open the chest under Pride Rock for a '''Pride Rock Map'''. Take a right and open another chest under Pride Rock for a '''Serenity Crystal'''. Turn back for a '''Mythril Stone''' hiding directly under Pride Rock, then head to the Stone Hollow for a save point if you wish. | ||
== | ===Taking back Pride Rock=== | ||
Go to Wildebeest Valley straight ahead from Pride Rock and Sora will learn the Dash ability in his lion form. Hold {{psx|S}} and Sora's running speed will quicken, taking him further distances with his jumps. Open a chest by a rock in the center for an '''Energy Stone'''. A '''Myhtril Stone''' is by the right wall and a '''Mythril Gem''' is further ahead. Behind a rock to the left is an '''AP Boost'''. A '''Lucid Gem''' is by the exit. Enter the Wastelands and open chests along the winding path for a '''Mythril Shard''', a '''Serenity Gem''', and a '''Mythril Stone'''. Enter the Jungle at the end of the path and pick up the '''Serenity Crystal''' straight ahead. Head around to the top of the raised ledge for a '''Serenity Gem''', and to the northeast corner of the area for a '''Mythril Stone'''. Take the northwest path to the Oasis. | |||
The Oasis contains a save point and the world's moogle, as well as Simba. After the scene, open the large chest to the left for an '''Oasis Map''', then take another left across the log to the moogle. Open another large chest here for '''[[../100 Acre Wood|Torn Pages]]'''. Head up to the highest ledge in the corner for an '''AP Boost''', then return to the Jungle with Simba in tow. After the scenes, speak to Simba. After another scene, you'll receive the '''Circle of Life''' Keyblade and Simba will finally join the party, bringing his useful limit, Wildcat, with him. Return to Pride Rock for a scene in which Simba temporarily leaves the party, then enter the King's Den for a battle. | |||
====Bosses: Shenzi, Banzai, and Ed==== | ====Bosses: Shenzi, Banzai, and Ed==== | ||
[[File:KH2 screen Pride Lands Hyenas.png|thumb|right|Call Timon and Pumbaa over while you distract the hyenas.]] | |||
While the hyenas have a good amount of health, their attacks are relatively weak, so they shouldn't pose any threat to the party. They do, however, deal a good amount of damage to Timon and Pumbaa with every hit, indicated by the damage bar in the corner of the screen. Like the rest of these protection tasks, filling the gauge will result in a mandatory restart. To make matters more difficult, the hyenas are incredibly quick and evasive while Timon and Pumbaa stay in one place unless they are called over by Sora with {{psx|T}}. To start, lock on to whichever hyena is closest and combo them, then call Timon and Pumbaa over. Pursue the hyena after it runs off and attack it, using Dash if necessary to catch up to it, then call Timon and Pumbaa over again. Repeat this pattern with all three hyenas to defeat them while maintaining Timon and Pumbaa's health. If you do not call the duo over to keep them constantly moving, whichever hyenas Sora isn't keeping distracted will target them, making the strategy of calling them over before pursuing the targeted hyena the safest. Clearing the battle will earn Sora and Donald an increase in maximum HP while Goofy obtains the '''Lucky Lucky''' ability, which should come in handy for synthesis farming. Head through the upward passage to the Peak for another boss fight. | |||
====Boss: Scar==== | ====Boss: Scar==== | ||
[[File:KH2 screen Pride Lands Scar.png|thumb|left|When his health gets low enough, Scar will surround himself in darkness and charge around the field; use Dash to avoid him.]] | |||
While the lack of drive forms and summons may make this battle difficult, Simba rejoins the party for the fight, tipping the scales in your favor. Use Simba's limit whenever your MP permits it, and Potions if necessary. You can perform some combos on Scar in between attacks (particularly immediately after the limit, as the final attack will stun him if he's in range) but be warned that he's difficult to stun. He can easily cancel combos by striking with lightning bolts, occasionally performing a charge that leaves lightning in its wake. About halfway into the battle, Scar will also add fire to his arsenal, which has an even greater range than his lightning. Fortunately, the battlefield is large, so escaping Scar to heal is always doable. | |||
When you knock off enough of Scar's health, he will begin to get desperate, floating into the air with the power of darkness and charging around the battlefield with hyper speed. Dash around the field to avoid him, as he cannot be attacked in this state. There is a benefit to seeing him begin this attack, as he will be tired out once he finishes. Get in close when he drops back to the ground and perform combos, as well as Simba's limit if available. Drain his health to earn an increase in maximum MP for Sora, '''Fire Boost''' for Donald, and an increase in maximum HP for Goofy and Simba, as well as clear the world for an upgrade in Sora's fire magic. You can now continue the main story by returning to [[../Twilight Town (Sora)#Second visit|Twilight Town]]. | |||
==Second Visit== | ==Second Visit== | ||
====Bosses: Shenzi, Banzai, and Ed==== | ====Bosses: Shenzi, Banzai, and Ed==== | ||
Revision as of 13:55, 26 September 2017

First Visit

This world is unique in that Sora's fighting style changes completely to suit his new four-legged state. He also loses the ability to use drives and summons, but he makes up for it with his quickness, dashing long distances mid-combo to avoid enemy attacks. The chests in this world also have a different shape, taking on the appearance of fruits. Open the large pear-shaped one for a Savannah Map, then the smaller one to the left of it for a Dark Gem. On the other side of the area is a Mythril Stone. Exit the Gorge to the Elephant Graveyard, where Sora will step into battle against some Heartless.
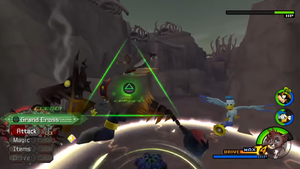
This world introduces the exclusive Living Bone Heartless, which may have Shaman Heartless that cast magic riding them. The Living Bone is powerful on its own, being fully capable of killing Sora in one combo. If you'd prefer to be cautious, guard the Living Bone's attacks before obtaining the opportunity to perform the Rodeo/Grand Cross reaction command combo, doing significant damage and stunning the Heartless so that Sora can finish it off. After the scene, return to the exit of the Gorge which you entered the area from. Head down this path to the right for an AP Boost. Keep continuing down this path and open the chest to the left for a Mythril Shard, and the chest in the distance for a Bright Stone. Head up the ramp and grab the Mythril Stone across from the elephant skull. Continue down this path and take a right turn at the fork for a Frost Gem. Exit the area to the Savannah. Cross the long expanse of flat land, battling Heartless along the way, to Pride Rock.
Head left and open the chest under Pride Rock for a Pride Rock Map. Take a right and open another chest under Pride Rock for a Serenity Crystal. Turn back for a Mythril Stone hiding directly under Pride Rock, then head to the Stone Hollow for a save point if you wish.
Taking back Pride Rock
Go to Wildebeest Valley straight ahead from Pride Rock and Sora will learn the Dash ability in his lion form. Hold ![]() and Sora's running speed will quicken, taking him further distances with his jumps. Open a chest by a rock in the center for an Energy Stone. A Myhtril Stone is by the right wall and a Mythril Gem is further ahead. Behind a rock to the left is an AP Boost. A Lucid Gem is by the exit. Enter the Wastelands and open chests along the winding path for a Mythril Shard, a Serenity Gem, and a Mythril Stone. Enter the Jungle at the end of the path and pick up the Serenity Crystal straight ahead. Head around to the top of the raised ledge for a Serenity Gem, and to the northeast corner of the area for a Mythril Stone. Take the northwest path to the Oasis.
and Sora's running speed will quicken, taking him further distances with his jumps. Open a chest by a rock in the center for an Energy Stone. A Myhtril Stone is by the right wall and a Mythril Gem is further ahead. Behind a rock to the left is an AP Boost. A Lucid Gem is by the exit. Enter the Wastelands and open chests along the winding path for a Mythril Shard, a Serenity Gem, and a Mythril Stone. Enter the Jungle at the end of the path and pick up the Serenity Crystal straight ahead. Head around to the top of the raised ledge for a Serenity Gem, and to the northeast corner of the area for a Mythril Stone. Take the northwest path to the Oasis.
The Oasis contains a save point and the world's moogle, as well as Simba. After the scene, open the large chest to the left for an Oasis Map, then take another left across the log to the moogle. Open another large chest here for Torn Pages. Head up to the highest ledge in the corner for an AP Boost, then return to the Jungle with Simba in tow. After the scenes, speak to Simba. After another scene, you'll receive the Circle of Life Keyblade and Simba will finally join the party, bringing his useful limit, Wildcat, with him. Return to Pride Rock for a scene in which Simba temporarily leaves the party, then enter the King's Den for a battle.
Bosses: Shenzi, Banzai, and Ed
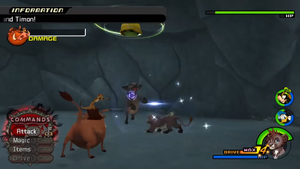
While the hyenas have a good amount of health, their attacks are relatively weak, so they shouldn't pose any threat to the party. They do, however, deal a good amount of damage to Timon and Pumbaa with every hit, indicated by the damage bar in the corner of the screen. Like the rest of these protection tasks, filling the gauge will result in a mandatory restart. To make matters more difficult, the hyenas are incredibly quick and evasive while Timon and Pumbaa stay in one place unless they are called over by Sora with ![]() . To start, lock on to whichever hyena is closest and combo them, then call Timon and Pumbaa over. Pursue the hyena after it runs off and attack it, using Dash if necessary to catch up to it, then call Timon and Pumbaa over again. Repeat this pattern with all three hyenas to defeat them while maintaining Timon and Pumbaa's health. If you do not call the duo over to keep them constantly moving, whichever hyenas Sora isn't keeping distracted will target them, making the strategy of calling them over before pursuing the targeted hyena the safest. Clearing the battle will earn Sora and Donald an increase in maximum HP while Goofy obtains the Lucky Lucky ability, which should come in handy for synthesis farming. Head through the upward passage to the Peak for another boss fight.
. To start, lock on to whichever hyena is closest and combo them, then call Timon and Pumbaa over. Pursue the hyena after it runs off and attack it, using Dash if necessary to catch up to it, then call Timon and Pumbaa over again. Repeat this pattern with all three hyenas to defeat them while maintaining Timon and Pumbaa's health. If you do not call the duo over to keep them constantly moving, whichever hyenas Sora isn't keeping distracted will target them, making the strategy of calling them over before pursuing the targeted hyena the safest. Clearing the battle will earn Sora and Donald an increase in maximum HP while Goofy obtains the Lucky Lucky ability, which should come in handy for synthesis farming. Head through the upward passage to the Peak for another boss fight.
Boss: Scar
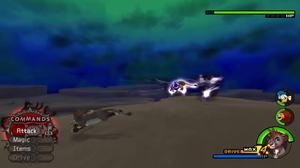
While the lack of drive forms and summons may make this battle difficult, Simba rejoins the party for the fight, tipping the scales in your favor. Use Simba's limit whenever your MP permits it, and Potions if necessary. You can perform some combos on Scar in between attacks (particularly immediately after the limit, as the final attack will stun him if he's in range) but be warned that he's difficult to stun. He can easily cancel combos by striking with lightning bolts, occasionally performing a charge that leaves lightning in its wake. About halfway into the battle, Scar will also add fire to his arsenal, which has an even greater range than his lightning. Fortunately, the battlefield is large, so escaping Scar to heal is always doable.
When you knock off enough of Scar's health, he will begin to get desperate, floating into the air with the power of darkness and charging around the battlefield with hyper speed. Dash around the field to avoid him, as he cannot be attacked in this state. There is a benefit to seeing him begin this attack, as he will be tired out once he finishes. Get in close when he drops back to the ground and perform combos, as well as Simba's limit if available. Drain his health to earn an increase in maximum MP for Sora, Fire Boost for Donald, and an increase in maximum HP for Goofy and Simba, as well as clear the world for an upgrade in Sora's fire magic. You can now continue the main story by returning to Twilight Town.
