Notmyhandle (talk | contribs) (cleanup) |
E-123Wario54 (talk | contribs) (un-stubbed) |
||
| Line 1: | Line 1: | ||
{{Header Nav|game=Kingdom Hearts II}} | {{Header Nav|game=Kingdom Hearts II}} | ||
[[File:KH2 logo Beast's Castle.png|right|300px]] | |||
When you | ===Investigation=== | ||
After the scene, Sora and friends must battle a group of Shadow Heartless in the Parlor. After this is done, a save point and moogle shop will appear. Exit to the entrance hall and battle the Heartless here, then exit to the Courtyard (the door which the trio entered the world from). Here you can find three treasure chests containing an '''AP Boost''', a '''Hi-Potion''', and a '''Mythril Shard'''. Reenter the castle and head up the stairs to the right to enter the East Wing, where the gang will find Belle in her room. She directs you to the Dungeon in the West Hall. Open the chests for a '''Mega-Recipe''' and a '''Castle Map'''. | |||
[[File:KH2 screen Beast's Castle Wardrobe.png|thumb|right|Push the Wardrobe while she sleeps, stop when she wakes up, and repeat.]] | |||
Exit through the East Wing, picking up the '''Hi-Potion''' and '''Tent''' along the way, and cross the stairs in the Entrance Hall to the West Hall. To the right, in between some suits of armor, you'll find a '''Hi-Potion''', and to the left, a '''Myhtril Shard'''. To the right of the staircase is a '''Power Shard''' and to the left, a '''Bright Stone''' and a '''Mythril Shard'''. Approach the Wardrobe and press {{psx|T}} to begin a simple mini-game. Press {{psx|T}} rapidly and Sora will slowly push the Wardrobe so that she no longer blocks the entrance to the Undercroft, but pay attention, as pushing her for a short amount of time will cause her to wake up. Simply stop pushing immediately and wait for her to look around. She will then return to her slumber and you can resume pushing. If she catches you, she will move back so that she is once again completely blocking the doorway, but continue the pattern successfully long enough and she'll realize her mistake (and most importantly, allow you passage). Once prepared for a boss battle, enter the Undercroft. | |||
====Boss: Thresholder and Possessor==== | |||
[[File:KH2 screen Beast's Castle Boss.png|thumb|left|If you wish to be cautious, remove the Gargoyle Warriors first. If you'd rather perform with haste, lock-on to the Thresholder and attack away.]] | |||
This boss battle has a few elements to it that should be noted. Firstly, Gargoyle Warriors will occasionally appear in an attempt to impede your progress. They can be quite vicious if left alone, so if you'd like a bit of safety on your side (which is recommended on Proud and Critical), get them out of the way first (preferably out of reach of the Thresholder's long arms). They drop munny and drive orbs, the latter which may prove useful if your drive gauge isn't full. After they're a defeated, a wave of Hook Bats will appear, but these are more easily ignored as they're not nearly as strong (they may also be open to reaction commands from time to time, so make sure to make use of it if you're caught struggling). Next, lock-on to the Thresholder and deplete its health as quickly as possible. If all Heartless are out of the way, this task will be accomplished much faster, as well as if Valor Form or Blizzard combos ({{psx|L1}} {{plus}} {{psx|C}} in succession) are used. | |||
[[File:KH2 screen Beast's Castle Possessor.png|thumb|right|Catch the Possessor with aerial combos before it can retreat and restart the cycle.]] | |||
Once the Thresholder's health is depleted, it will be stunned, dropping a large amount of HP orbs and leaving it open to the "Release" reaction command. This will unleash the true evil behind the Thresholder: the Possessor. In actuality, the Possessor is a weak ball of dark energy that is completely defenseless against Sora's attacks. It will simply float around until it can return to the Thresholder, in which case you will once again have to deplete the Thresholder's HP. Reach it with aerial combos to do a good amount of damage and it will drop a plethora of drive orbs. If you haven't already, this is your cue to go into Valor Form (although you may want to wait until you've used up all of your MP on Blizzard and your HP is low, as going into a Drive Form will completely restore both Sora's HP and MP). Repeat the pattern of attacking the Thresholder until it is stunned, perform the reaction command, and attack the Possessor until it, too, loses all of its HP. Clearing the battle will earn Sora '''Upper Slash''', Donald the ability to use fire in the form of '''Donald Fire''', and Goofy a boost in his maximum HP. | |||
===Reaching the Beast=== | |||
A scene will follow in which Sora, Donald, and Goofy learn more about the Beast's situation. Open the chests in the small room for an '''AP Boost''' and a '''Basement Map''', then leave and another mini-game will commence. | |||
[[File:KH2 screen Beast's Castle Mini-Game.png|thumb|left|A bar at the top of the screen shows Cogsworth's grip. When it is lost completely, everyone must return.]] | |||
In order to escape the Dungeon, Sora must light torches with his Keyblade (and the aid of Lumiere and Mrs. Potts), but he can only do so when the torches are lowered with a crank. Cogsworth does his best to hold the crank, but he will occasionally find himself tired and lose his grip, represented by a bar in the top-right corner of the screen. In this case, Mrs. Potts will have to return to give him some water, and his gauge will be full once again. Begin by lighting the torch up ahead, making sure to wait for the arrival of Lumiere and Mrs. Potts, with the "Sprinkle" reaction command. Walk ahead of Lumiere and Mrs. Potts to next torch, where you must destroy the boxes so that the two small allies can pass. Return to Cogsworth if you must, then head up the ramp to the last torch, making sure to once again destroy the boxes while Lumiere and Mrs. Potts make their way over. After the task is completed, you are directed to Beast's Room in the West Hall. Pick up the treasures ('''Mythril Shard''', '''Hi-Potion''', and '''Mega-Potion''') and proceed. | |||
Right where you enter, you should find an '''AP Boost'''. Head up the stairs ahead to enter the '''West Wing''', where you'll find more Heartless. Once they're defeated, open the chests here for a '''Tent''' and a '''Mythril Shard''', then enter Beast's room for a scene and another boss fight. | |||
====Boss: Beast==== | |||
[[File:KH2 screen Beast's Castle Charge.png|thumb|right|Use the reaction commands at every opportunity to make this battle as easy as possible.]] | |||
Friend has turned to foe in this fight, if only temporarily. Sora and Cogsworth are not ready to give up on the Beast, providing the gimmick for the battle. When Cogsworth is close by, you can utilize the "Wake Up!" reaction command, which will stun the Beast. This reaction command makes this battle a very simple one; while the Beast's attacks are powerful, you can always stun him after every combo to avoid giving him an opportunity. The battle will conclude with another reaction command, in which case Sora will "Charge" light with his Keyblade alongside Cogsworth. Make sure to press {{psx|T}} rapidly and in quick succession; failure to do so will result in a restoration of Beast's HP, in which case you must attack him once again to receive the reaction command. Succeed and the Beast will be defeated, getting Sora a bonus armor slot, Donald an increase in maximum HP, and Goofy the '''Defender''' ability. After the scene, Beast will join the party (although if you wish to keep Donald and Goofy around, his presence is not mandatory). | |||
===Attack=== | |||
Open the chest in Beast's Room for a '''Myhtril Shard''', then exit into the West Wing and through the West Hall, defeating the Heartless along the way (you can also test out the Beast's limit, Twin Howl, which may prove useful for big crowds). Head through the Entrance Hall to the East Wing, and through there, enter Belle's Room. The gang finds only the Wardrobe, who notifies them of the presence of a man in black. Enter the Entrance Hall and the group will subsequently enter the Ballroom at the sound of Belle's scream to combat a new threat. | |||
====Bosses: Shadow Stalker and Dark Thorn==== | |||
[[File:KH2 screen Beast's Castle Boss 2.png|thumb|left|Make sure to make heavy use of reaction commands in both battles.]] | |||
The first boss is a Heartless similar to the Possessor that will make use of its environment. It will begin the battle by occupying the windows, turning them pitch-black and sending rays of energy Sora's way. Avoid them by jumping or simply walking between them, then follow it (the camera will follow it for you if you make sure to lock-on) as it possesses the chandelier, again attempting to harm Sora with rays of energy as it turns. Attack it quickly, before it can do to much damage, and use the reaction command once the chandelier's health is depleted to "Release". This will stun it and give Sora the opportunity to attack freely until it returns to a gaseous state, floating around until it finds another object to possess. The columns on the sides of the room should become the next target. It will choose one to possess at random, but it can be spotted easily by simply spotting the sole black column and locking on. Attack it and perform the reaction command once again, then continue to combo it until its health is depleted. The following scene will lead into the next boss, which should prove a bit more threatening. | |||
Dark Thorn will begin the battle by appearing invisible, but this can be mitigated by locking on to it. Attack until you are given the opportunity to perform the Step Vault/Catch reaction command combo, in which case Sora will launch himself onto the chandelier and ride it, catching Dark Thorn in his path. If it happens to catch Sora and throw him, while it will do a significant amount of damage, Sora can return with another reaction command. Make use of the reaction commands and Beast's limit in order to defeat Dark Thorn swiftly, earning Sora '''Retaliating Slash''', Goofy an extra item slot, and a boost in maximum HP for Donald and Beast. For clearing the world, Sora will obtain the ability to use '''Cure'''. You can now continue to [[../Olympus Coliseum|Olympus Coliseum]]. | |||
{{Footer Nav|game=Kingdom Hearts II|prevpage=|nextpage=}} | {{Footer Nav|game=Kingdom Hearts II|prevpage=|nextpage=}} | ||
Revision as of 19:41, 23 September 2017

Investigation
After the scene, Sora and friends must battle a group of Shadow Heartless in the Parlor. After this is done, a save point and moogle shop will appear. Exit to the entrance hall and battle the Heartless here, then exit to the Courtyard (the door which the trio entered the world from). Here you can find three treasure chests containing an AP Boost, a Hi-Potion, and a Mythril Shard. Reenter the castle and head up the stairs to the right to enter the East Wing, where the gang will find Belle in her room. She directs you to the Dungeon in the West Hall. Open the chests for a Mega-Recipe and a Castle Map.
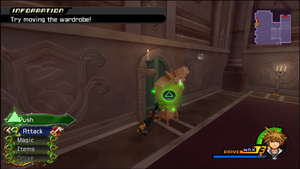
Exit through the East Wing, picking up the Hi-Potion and Tent along the way, and cross the stairs in the Entrance Hall to the West Hall. To the right, in between some suits of armor, you'll find a Hi-Potion, and to the left, a Myhtril Shard. To the right of the staircase is a Power Shard and to the left, a Bright Stone and a Mythril Shard. Approach the Wardrobe and press ![]() to begin a simple mini-game. Press
to begin a simple mini-game. Press ![]() rapidly and Sora will slowly push the Wardrobe so that she no longer blocks the entrance to the Undercroft, but pay attention, as pushing her for a short amount of time will cause her to wake up. Simply stop pushing immediately and wait for her to look around. She will then return to her slumber and you can resume pushing. If she catches you, she will move back so that she is once again completely blocking the doorway, but continue the pattern successfully long enough and she'll realize her mistake (and most importantly, allow you passage). Once prepared for a boss battle, enter the Undercroft.
rapidly and Sora will slowly push the Wardrobe so that she no longer blocks the entrance to the Undercroft, but pay attention, as pushing her for a short amount of time will cause her to wake up. Simply stop pushing immediately and wait for her to look around. She will then return to her slumber and you can resume pushing. If she catches you, she will move back so that she is once again completely blocking the doorway, but continue the pattern successfully long enough and she'll realize her mistake (and most importantly, allow you passage). Once prepared for a boss battle, enter the Undercroft.
Boss: Thresholder and Possessor
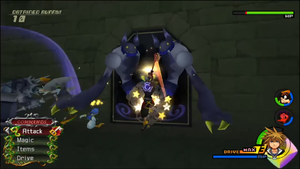
This boss battle has a few elements to it that should be noted. Firstly, Gargoyle Warriors will occasionally appear in an attempt to impede your progress. They can be quite vicious if left alone, so if you'd like a bit of safety on your side (which is recommended on Proud and Critical), get them out of the way first (preferably out of reach of the Thresholder's long arms). They drop munny and drive orbs, the latter which may prove useful if your drive gauge isn't full. After they're a defeated, a wave of Hook Bats will appear, but these are more easily ignored as they're not nearly as strong (they may also be open to reaction commands from time to time, so make sure to make use of it if you're caught struggling). Next, lock-on to the Thresholder and deplete its health as quickly as possible. If all Heartless are out of the way, this task will be accomplished much faster, as well as if Valor Form or Blizzard combos (![]() +
+ ![]() in succession) are used.
in succession) are used.
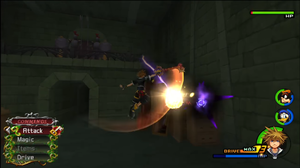
Once the Thresholder's health is depleted, it will be stunned, dropping a large amount of HP orbs and leaving it open to the "Release" reaction command. This will unleash the true evil behind the Thresholder: the Possessor. In actuality, the Possessor is a weak ball of dark energy that is completely defenseless against Sora's attacks. It will simply float around until it can return to the Thresholder, in which case you will once again have to deplete the Thresholder's HP. Reach it with aerial combos to do a good amount of damage and it will drop a plethora of drive orbs. If you haven't already, this is your cue to go into Valor Form (although you may want to wait until you've used up all of your MP on Blizzard and your HP is low, as going into a Drive Form will completely restore both Sora's HP and MP). Repeat the pattern of attacking the Thresholder until it is stunned, perform the reaction command, and attack the Possessor until it, too, loses all of its HP. Clearing the battle will earn Sora Upper Slash, Donald the ability to use fire in the form of Donald Fire, and Goofy a boost in his maximum HP.
Reaching the Beast
A scene will follow in which Sora, Donald, and Goofy learn more about the Beast's situation. Open the chests in the small room for an AP Boost and a Basement Map, then leave and another mini-game will commence.
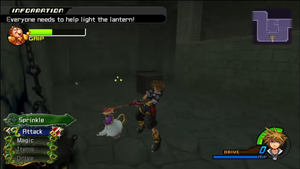
In order to escape the Dungeon, Sora must light torches with his Keyblade (and the aid of Lumiere and Mrs. Potts), but he can only do so when the torches are lowered with a crank. Cogsworth does his best to hold the crank, but he will occasionally find himself tired and lose his grip, represented by a bar in the top-right corner of the screen. In this case, Mrs. Potts will have to return to give him some water, and his gauge will be full once again. Begin by lighting the torch up ahead, making sure to wait for the arrival of Lumiere and Mrs. Potts, with the "Sprinkle" reaction command. Walk ahead of Lumiere and Mrs. Potts to next torch, where you must destroy the boxes so that the two small allies can pass. Return to Cogsworth if you must, then head up the ramp to the last torch, making sure to once again destroy the boxes while Lumiere and Mrs. Potts make their way over. After the task is completed, you are directed to Beast's Room in the West Hall. Pick up the treasures (Mythril Shard, Hi-Potion, and Mega-Potion) and proceed.
Right where you enter, you should find an AP Boost. Head up the stairs ahead to enter the West Wing, where you'll find more Heartless. Once they're defeated, open the chests here for a Tent and a Mythril Shard, then enter Beast's room for a scene and another boss fight.
Boss: Beast
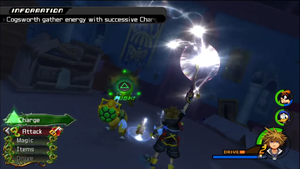
Friend has turned to foe in this fight, if only temporarily. Sora and Cogsworth are not ready to give up on the Beast, providing the gimmick for the battle. When Cogsworth is close by, you can utilize the "Wake Up!" reaction command, which will stun the Beast. This reaction command makes this battle a very simple one; while the Beast's attacks are powerful, you can always stun him after every combo to avoid giving him an opportunity. The battle will conclude with another reaction command, in which case Sora will "Charge" light with his Keyblade alongside Cogsworth. Make sure to press ![]() rapidly and in quick succession; failure to do so will result in a restoration of Beast's HP, in which case you must attack him once again to receive the reaction command. Succeed and the Beast will be defeated, getting Sora a bonus armor slot, Donald an increase in maximum HP, and Goofy the Defender ability. After the scene, Beast will join the party (although if you wish to keep Donald and Goofy around, his presence is not mandatory).
rapidly and in quick succession; failure to do so will result in a restoration of Beast's HP, in which case you must attack him once again to receive the reaction command. Succeed and the Beast will be defeated, getting Sora a bonus armor slot, Donald an increase in maximum HP, and Goofy the Defender ability. After the scene, Beast will join the party (although if you wish to keep Donald and Goofy around, his presence is not mandatory).
Attack
Open the chest in Beast's Room for a Myhtril Shard, then exit into the West Wing and through the West Hall, defeating the Heartless along the way (you can also test out the Beast's limit, Twin Howl, which may prove useful for big crowds). Head through the Entrance Hall to the East Wing, and through there, enter Belle's Room. The gang finds only the Wardrobe, who notifies them of the presence of a man in black. Enter the Entrance Hall and the group will subsequently enter the Ballroom at the sound of Belle's scream to combat a new threat.
Bosses: Shadow Stalker and Dark Thorn
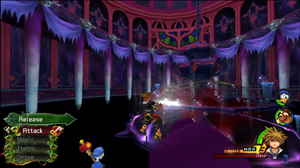
The first boss is a Heartless similar to the Possessor that will make use of its environment. It will begin the battle by occupying the windows, turning them pitch-black and sending rays of energy Sora's way. Avoid them by jumping or simply walking between them, then follow it (the camera will follow it for you if you make sure to lock-on) as it possesses the chandelier, again attempting to harm Sora with rays of energy as it turns. Attack it quickly, before it can do to much damage, and use the reaction command once the chandelier's health is depleted to "Release". This will stun it and give Sora the opportunity to attack freely until it returns to a gaseous state, floating around until it finds another object to possess. The columns on the sides of the room should become the next target. It will choose one to possess at random, but it can be spotted easily by simply spotting the sole black column and locking on. Attack it and perform the reaction command once again, then continue to combo it until its health is depleted. The following scene will lead into the next boss, which should prove a bit more threatening.
Dark Thorn will begin the battle by appearing invisible, but this can be mitigated by locking on to it. Attack until you are given the opportunity to perform the Step Vault/Catch reaction command combo, in which case Sora will launch himself onto the chandelier and ride it, catching Dark Thorn in his path. If it happens to catch Sora and throw him, while it will do a significant amount of damage, Sora can return with another reaction command. Make use of the reaction commands and Beast's limit in order to defeat Dark Thorn swiftly, earning Sora Retaliating Slash, Goofy an extra item slot, and a boost in maximum HP for Donald and Beast. For clearing the world, Sora will obtain the ability to use Cure. You can now continue to Olympus Coliseum.
