Quake II/Grid Control
| Map Name | Initial Coordinates |
|---|---|
| security | (188 -163 94) : 90° (facing west) |
Level objective
The objective of this level is to locate and destroy the grid control computer. This completes the unit objective, which is to destroy the security grid protecting the industrial region. Your field computer will list two secondary objectives and after you destroy the grid control computer it will credit you with the first and display "Proceed to next combat unit". Presumably, you achieve this by pressing the exit button, but as you can then no longer use your field computer in this level you won't see the credit. This appears to be a minor game programming error.
Strategy
This is the first real boss battle in the game. Typically, for this and many first-person shooters, it takes place in an "arena", i.e. an enclosed area that you can't get out of until you've defeated the powerful boss enemy. There are just a few other enemies that serve mostly as annoyances and the level is small with no secrets. Charging in with your best weapon just isn't going to work due to the endurance of the boss and the destructive power of his return fire. Some subtlety is going to be needed and your main options are shooting from cover and, if you can do it effectively, the circle-strafe. Plan to start the level with high health and armor and to leave it in somewhat poorer shape.
Walkthrough
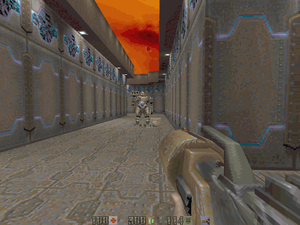
Proceed up the illuminated stairs directly in front of you. On the platform on either side you'll see a Jacket Armor and a Grenade Launcher in the midst of four large columns with pulsing, blue laser beams. The items are worth getting, but the beams are too low to crawl underneath without taking severe damage. Quick-save and time your dash into and out of the laser rings.
Walk through the door to the west. As you stand in the "T" intersection, look down the gallery on either side of you. To the north you'll see a red wall button that operates force fields in the portals at both ends of the gallery. You can toggle the force fields on and off, from there, but as soon as you take a couple of steps past either portal to the inner gallery, the force fields are activated and you can't go back; there is no corresponding button beyond that to deactivate the fields.[1]
There are two lift platforms at the opposite end of the room, one in the southwest corner, the other in the northwest corner. Your objective is to get to the southwest lift, but you need to get past arrays of scanning and pulsing blue laser beams. There is a column in the center of the area surrounded by deadly red laser beams. You can go down the outer gallery, timing short dashes between the pulsing beams, or — more easily — crawl under the diagonally-scanning steady beams in the inner area, staying close to the wall.
Entering the Arena

Beyond the corridors crossed by laser beams is a hallway that goes from left to right. There are two lift platforms, one at each end. Step on one and ride it up to take a look around, but don't yet move out into the arena. There is a structure with high walls in the center and a high wall all around the outside. Between these is a wide path that presumably travels completely around. The lift platform will lower you back down, but step off and on and it will take you up again. Equip your HyperBlaster, move out a short distance and look around the corner. You will see a tank in the middle of the section between the two lifts. Give him a good stream of blaster fire and duck back onto the platform before his return fire reaches you. Get off at the bottom. You can hear him clumping about up above and what he's doing is lumbering towards the lift from which you shot at him. There is also a second tank on the opposite side of the arena and what he's doing is making for the closest corner to where he thinks you are. Therefore, run to the other lift and take it up. Finish off the first Tank with the HyperBlaster. He's far enough away that you will have no trouble dodging return fire, but use the corner of the central structure if necessary. Now you can play cat and mouse with the second Tank. Unless you're a crummy shot, both Tanks will be down before you've used up 100 units of ammunition and there are two packs of 50 each just waiting to be picked up along one side of the arena. If you like, you can get fancy and pick the lift platform so as exploit your ability to shoot slightly around a corner, depending on the hand in which you're holding the weapon, but it really isn't necessary with the slow-moving Tanks.

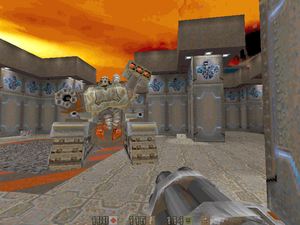
When the Tanks are eliminated, everything starts shaking violently and there are sounds of explosions. You have time here to catch your breath, save the game and switch weapons. Things grow calm again briefly and then the middle parts of the walls of the central structure crumble, leaving just "L"-shaped corners. There are four Berserkers hiding in those corners, but what will immediately get your attention is the Super Tank in the middle (sometimes known as the "Tank Boss"). Get on the move, because he's armed with a triple Rocket Launcher and a Chaingun that he is able to turn on you very quickly and with devastating effect.
Although his weapons pack a severe punch, he's slow, and you can use the four columns for cover while you take pot-shots with any of your more powerful weapons. Grenades and the HyperBlaster work well. Weapons that take more time to shoot, such as the Chaingun, are not as useful, as they put you in jeopardy for additional time.
You might also consider taking the Berserkers and Super Tank out with help from a Quad Damage.
After the Boss Goes Down
Once the Super-Tank has been destroyed, the force-fields in the doorways near the start of the level turn back off. If you want to, you can go back and collect the Jacket Armor, get five Grenades by picking up the Grenade Launcher and collect other heath and ammunition on the way. Also, a hatchway opens in the middle of the arena floor, at the center of a square marked by red and black diagonal stripes. Get onto the ladder and climb down the shaft below the hatch. Be careful to stay on the ladder; the drop is long and if you lose your grip you will suffer fall damage.

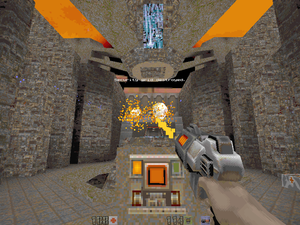
Once you have climbed down the shaft, there are no more enemies in the level. Proceed along a tunnel until you come to a vertical structure with blue laser beams in its center. Step onto a small, circular lift platform nearby and ride up, then walk around to the other side of the machine. Press the button on the post to lift up a shielding cylinder, exposing the blue, lozenge-shaped computer core. Blue laser beams sweep the area, but as long as you stay at the button, you are safe. Shoot the core with your Blaster to destroy it. Your field computer updates instructing you to "Proceed to next combat unit". Take the short corridor to an elevator and press the button there marked "EXIT".
Secrets
Like most (or all?) boss-fights, this level has no secrets.
Notes
- ↑ After all enemies have been destroyed, the force fields are deactivated, so if you didn't get the armor and grenade launcher at first, it gives you a chance to go back and get them.
