(→Photo locations: Table) |
(add ing pics and complete page.) |
||
| (One intermediate revision by the same user not shown) | |||
| Line 1: | Line 1: | ||
{{Header Nav|game=Professor Layton and the Diabolical Box}} | {{Header Nav|game=Professor Layton and the Diabolical Box}} | ||
The camera minigame, like the other minigames, consists of two parts. You first have to collect all the pieces of the camera and reassemble it. | [[File:PLPB_Camera_Minigame2.png|thumb|In the second part search for locations in which you can make a Photo.]] | ||
[[File:PLPB_Camera_Minigame.png|left|thumb|Collect Camera Part and repair the Camera.]] | |||
{{floatingtoc|left}} | |||
The camera minigame, like the other minigames, consists of two parts. You first have to collect all the pieces of the camera and reassemble it. You will receive it from Sammy in the Train in [[../Chapter 1: The Legendary Molentary Express|Chapter 1]]. | |||
{{-}} | |||
==Camera parts== | ==Camera parts== | ||
{|{{prettytable}} | {|{{prettytable}} | ||
! Camera part !! Earliest chapter obtainable !! Condition to obtain | ! Camera part !! Earliest chapter obtainable !! Condition to obtain | ||
|- | |- | ||
| Squarish | | [[File:PLPB_Squarish_Camera_Part.png]] Squarish || [[../Chapter 1: The Legendary Molentary Express|Chapter 1]] || The first part you get. Try to enter the deluxe car after talking to Beluga. | ||
|- | |- | ||
| Button | | [[File:PLPB_Button_Camera_Part.png]] Button || [[../Chapter 1: The Legendary Molentary Express|Chapter 1]] || Solve [[../Puzzles 1-25#Puzzle 021|Puzzle 021]]. | ||
|- | |- | ||
| Glass | | [[File:PLPB_Glass_Camera_Part.png]] Glass || [[../Chapter 1: The Legendary Molentary Express|Chapter 1]] || Solve [[../Puzzles 1-25#Puzzle 012|Puzzle 012]]. | ||
|- | |- | ||
| Round | | [[File:PLPB_Round_Camera_Part.png]] Round || [[../Chapter 1: The Legendary Molentary Express|Chapter 1]] || Solve [[../Puzzles 26-50#Puzzle 026|Puzzle 026]]. | ||
|- | |- | ||
| Two-Sided | | [[File:PLPB_Two-sided_Camera_Part.png]] Two-Sided || [[../Chapter 2: The Country Village of Dropstone|Chapter 2]] || Solve [[../Puzzles 26-50#Puzzle 027|Puzzle 027]]. | ||
|- | |- | ||
| Spring | | [[File:PLPB_Spring_Camera_Part.png]] Spring || [[../Chapter 2: The Country Village of Dropstone|Chapter 2]] || Solve [[../Puzzles 26-50#Puzzle 029|Puzzle 029]]. | ||
|- | |- | ||
| Tiny | | [[File:PLPB_Tiny_Camera_Part.png]] Tiny || [[../Chapter 2: The Country Village of Dropstone|Chapter 2]] || Solve [[../Puzzles 26-50#Puzzle 038|Puzzle 038]]. | ||
|- | |- | ||
| Screw | | [[File:PLPB_Screw_Camera_Part.png]] Screw || [[../Chapter 2: The Country Village of Dropstone|Chapter 2]] || Solve [[../Puzzles 26-50#Puzzle 042|Puzzle 042]]. | ||
|- | |- | ||
| Battery || [[../Chapter 2: The Country Village of Dropstone|Chapter 2]] || Solve [[../Puzzles 26-50|Puzzle | | [[File:PLPB_Battery_Camera_Part.png]] Battery || [[../Chapter 2: The Country Village of Dropstone|Chapter 2]] || Solve [[../Puzzles 26-50#Puzzle 043|Puzzle 043]]. | ||
|- | |- | ||
| Gear-Filled | | [[File:PLPB_Cog-Filled_Camera_Part.png]] Gear-Filled (Cog-Filled) || [[../Chapter 4: The Phantom Town of Folsense|Chapter 4]] || Solve [[../Puzzles 51-75#Puzzle 072|Puzzle 072]]. | ||
|} | |} | ||
===Building=== | |||
[[File:PLPB_complete_Camera.png|thumb|In the second part search for locations in which you can make a Photo.]] | |||
Once you've collected every Camera Parts in the game, put the Parts together according to the screenshots. After repairing it, you can use it to take photos of suspicious locations. You can play a little spot-the-difference game by comparing two scenes of that location and finding the three differences. | |||
{{-}} | |||
==Photo locations and differences== | ==Photo locations and differences== | ||
{|{{prettytable}} | Two of these differences are hint coin locations while one of them is the location of a hidden puzzle. It will be revealed by checking the photo again after solving it. | ||
! No. !! Location !! Differences | {|{{prettytable|text center=1}} | ||
! No. !! Location !! Differences !! Unlocks | |||
|- | |- | ||
| 001 || Hotel Room || [[File:PLatDB_Photo_001_Differences.png]] | | 001 || Hotel Room || [[File:PLatDB_Photo_001_Differences.png]] || [[../Puzzles 101-125#Puzzle 114|Puzzle 114]] | ||
|- | |- | ||
| 002 || Garbage Heap || [[File:PLatDB_Photo_002_Differences.png]] | | 002 || Garbage Heap || [[File:PLatDB_Photo_002_Differences.png]] || [[../Puzzles 101-125#Puzzle 118|Puzzle 118]] | ||
|- | |- | ||
| 003 || Seedy Alley || [[File:PLatDB_Photo_003_Differences.png]] | | 003 || Seedy Alley || [[File:PLatDB_Photo_003_Differences.png]] || [[../Puzzles 101-125#Puzzle 124|Puzzle 124]] | ||
|- | |- | ||
| 004 || Museum 2nd Floor || [[File:PLatDB_Photo_004_Differences.png]] | | 004 || Museum 2nd Floor || [[File:PLatDB_Photo_004_Differences.png]] || [[../Puzzles 76-100#Puzzle 095|Puzzle 095]] | ||
|- | |- | ||
| 005 || Watchtower 1st Floor || [[File:PLatDB_Photo_005_Differences.png]] | | 005 || Watchtower 1st Floor || [[File:PLatDB_Photo_005_Differences.png]] || [[../Puzzles 101-125#Puzzle 119|Puzzle 119]] | ||
|- | |- | ||
| 006 || Mine Entrance || [[File:PLatDB_Photo_006_Differences.png]] | | 006 || Mine Entrance || [[File:PLatDB_Photo_006_Differences.png]] || [[../Puzzles 51-75#Puzzle 066|Puzzle 066]] | ||
|- | |- | ||
| 007 || Dark Forest 2 || [[File:PLatDB_Photo_007_Differences.png]] | | 007 || Dark Forest 2 || [[File:PLatDB_Photo_007_Differences.png]] || [[../Puzzles 76-100#Puzzle 097|Puzzle 097]] | ||
|- | |- | ||
| 008 || Granny R's || [[File:PLatDB_Photo_008_Differences.png]] | | 008 || Granny R's || [[File:PLatDB_Photo_008_Differences.png]] || [[../Puzzles 126-138#Puzzle 129|Puzzle 129]] | ||
|- | |- | ||
| 009 || Machine Room || [[File:PLatDB_Photo_009_Differences.png]] | | 009 || Machine Room || [[File:PLatDB_Photo_009_Differences.png]] || [[../Puzzles 76-100#Puzzle 088|Puzzle 088]] | ||
|} | |} | ||
===Solving=== | |||
Once you found all nine locations and spotted all differences, you will gain access to the [[../Layton's Challenges|The Musician's House]] which have 3 new Puzzles ready for you. | |||
{{Footer Nav|game=Professor Layton and the Diabolical Box|prevpage=Hamster|nextpage=Tea Set}} | {{Footer Nav|game=Professor Layton and the Diabolical Box|prevpage=Hamster|nextpage=Tea Set}} | ||
Latest revision as of 11:15, 16 June 2013
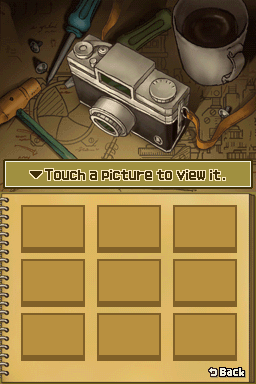
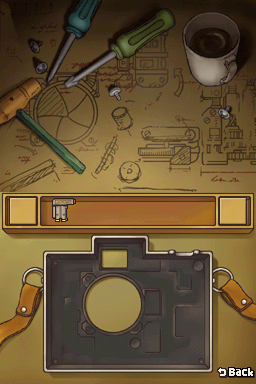
The camera minigame, like the other minigames, consists of two parts. You first have to collect all the pieces of the camera and reassemble it. You will receive it from Sammy in the Train in Chapter 1.
Camera parts[edit]
| Camera part | Earliest chapter obtainable | Condition to obtain |
|---|---|---|
| Chapter 1 | The first part you get. Try to enter the deluxe car after talking to Beluga. | |
| Chapter 1 | Solve Puzzle 021. | |
| Chapter 1 | Solve Puzzle 012. | |
| Chapter 1 | Solve Puzzle 026. | |
| Chapter 2 | Solve Puzzle 027. | |
| Chapter 2 | Solve Puzzle 029. | |
| Chapter 2 | Solve Puzzle 038. | |
| Chapter 2 | Solve Puzzle 042. | |
| Chapter 2 | Solve Puzzle 043. | |
| Chapter 4 | Solve Puzzle 072. |
Building[edit]
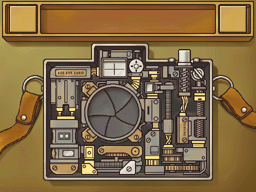
Once you've collected every Camera Parts in the game, put the Parts together according to the screenshots. After repairing it, you can use it to take photos of suspicious locations. You can play a little spot-the-difference game by comparing two scenes of that location and finding the three differences.
Photo locations and differences[edit]
Two of these differences are hint coin locations while one of them is the location of a hidden puzzle. It will be revealed by checking the photo again after solving it.
| No. | Location | Differences | Unlocks |
|---|---|---|---|
| 001 | Hotel Room | 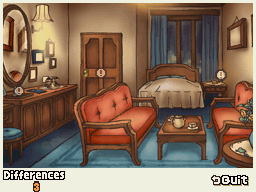 |
Puzzle 114 |
| 002 | Garbage Heap | 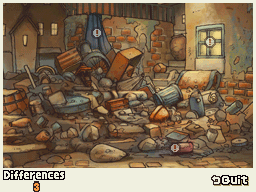 |
Puzzle 118 |
| 003 | Seedy Alley | 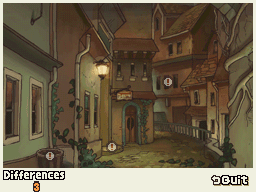 |
Puzzle 124 |
| 004 | Museum 2nd Floor | 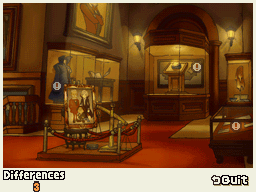 |
Puzzle 095 |
| 005 | Watchtower 1st Floor | 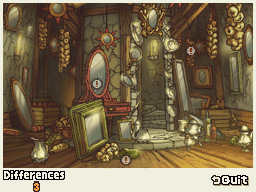 |
Puzzle 119 |
| 006 | Mine Entrance | 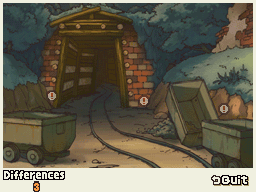 |
Puzzle 066 |
| 007 | Dark Forest 2 | 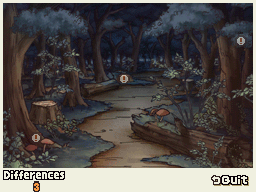 |
Puzzle 097 |
| 008 | Granny R's | 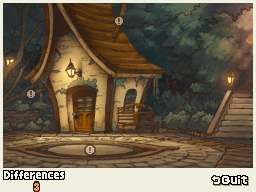 |
Puzzle 129 |
| 009 | Machine Room | 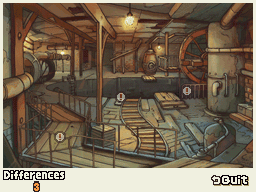 |
Puzzle 088 |
Solving[edit]
Once you found all nine locations and spotted all differences, you will gain access to the The Musician's House which have 3 new Puzzles ready for you.