First Visit
Chasing and Escaping Hades
After landing with the Gummi Ship, Sora and co. will find themselves in the Underworld Entrance. Approach Megara and press ![]() to help her up. After the scene, head through the large blue door to find yourself in the Cave of the Dead Entrance. Keep in mind that, as Sora and his friends are weakened in the Underworld, he cannot use his drive gauge. Battle the Heartless at the entrance of the tunnel and head through to enter the Cave of the Dead Passage. After a short scene in which an Organization member sneaks by, continue forward and pick up the treasures on both sides of the fork along the way (Mythril Shard, Ether, and AP Boost can be found on the left path while a Hi-Potion can be found on the right and a Mythril Stone can be found at the very end of the passage, by the entrance to the next area).
to help her up. After the scene, head through the large blue door to find yourself in the Cave of the Dead Entrance. Keep in mind that, as Sora and his friends are weakened in the Underworld, he cannot use his drive gauge. Battle the Heartless at the entrance of the tunnel and head through to enter the Cave of the Dead Passage. After a short scene in which an Organization member sneaks by, continue forward and pick up the treasures on both sides of the fork along the way (Mythril Shard, Ether, and AP Boost can be found on the left path while a Hi-Potion can be found on the right and a Mythril Stone can be found at the very end of the passage, by the entrance to the next area).
Enter the next area, the Cave of the Dead Inner Chamber, for another short scene in which the mysterious Organization member escapes. In Final Mix, this is where you are introduced to Absent Silhouettes, optional boss battles against Organization members previously defeated in Kingdom Hearts: Chain of Memories. Here you can battle Zexion, though it isn't recommended until gaining some more experience. Open the chests for a Mythril Shard and an Underworld Map before continuing to the next area, the Valley of the Dead. Head up the path and into Hades' Chamber to begin what should be a boss fight. Attempt to attack him for a few seconds and a scene will interrupt the battle, as none of Sora's attacks have any effect on the Lord of the Underworld. Thus begins the chase.
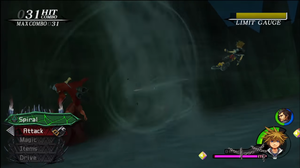
Take note that you can now swap Auron into your party and make use of his limit, Bushido. Ignore Hades and defeat all of the Heartless in the area to continue. Once the party reaches the next landing, their path will once again be blocked, and you must once again defeat all of the Heartless before continuing. Do this one more time to finally escape from Hades' clutches. After the scene, you are given a moment of reprieve to save and do some shopping. Continue back to the Cave of the Dead Passage, and continue to backtrack as you battle Heartless along the way. Exit to be presented with another boss battle, this time necessary.
Boss: Cerberus
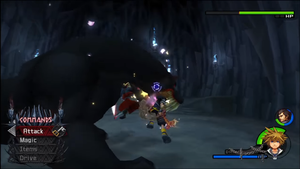
Cerberus, despite its size, is not a difficult boss fight. Sora lacks the aid of Donald and Goofy as well as the ability to go into Valor Form or use Chicken Little, but he has a powerful ally in Auron. Use Bushido in a pinch to become invincible and deal a great amount of damage, then continue to attack while Sora's MP recharges. Simply lock-on to a head (it doesn't matter which, as they all share a health bar) and perform aerial combos until your MP is recharged or it performs an attack to be dodged.
Beyond the occasional biting, Cerberus has only a couple of devastating attacks to look out for; the first of these involves it swerving around, whipping Sora into the air if he is in close range and putting him out of reach of the heads. Use Cure or a Potion if you must before racing around to Cerberus' heads and continuing the assault. The other attack to look out for will have it jump up into the air for a very brief period, then come crashing back onto the ground to create a massive shockwave. The only way to dodge this attack is to jump at the right time, a maneuver which proves difficult mid-aerial combo. Nevertheless, even with these attacks, Cerberus shouldn't be that difficult, as his strength has seen a significant nerf since his previous appearance. For defeating Cerberus, Sora will obtain Counterguard while Auron will obtain a boost in his maximum HP.
Back to the Underworld
Auron will leave the party, leaving Sora with Donald and Goofy in the Underworld Entrance. Exit the Underworld and head to the Coliseum, where Phil will have some training for you to do. Speak to him after the scenes and perform the Practice training session first, then Maniac. You should have little trouble collecting enough orbs within the time limit for both rounds. After the scenes, return to the Underworld. Head through the green door this time to enter the Underworld Cavern.
Jump down through the mist and find a chest containing a Mythril Shard on a ledge amidst the Heartless. Defeat them and continue through the passageway into the Lost Road. Stick to a path on the left, which should lead you back to the Cavern Entrance; here you can find two chests containing a Hi-Potion and an AP Boost. Return and collect the chests in this area, which should all be in plain sight: a Hi-Potion, an Ether, a Mythril Stone, and lastly, a Mythril Shard, which can be found by taking a path to the right of the entrance to the Atrium. Once all Heartless are defeated and treasures are collected, exit to the Atrium. Open the chest at the end of the path for a Lucid Stone and another up the ramp and on a ledge to the right of the exit containing an AP Boost. Continue through the doorway and into a meeting with a member of Organization XIII.

Demyx will send a plethora of water clones after Sora. Attack until the reaction command "Wild Dance" makes an appearance, in which case use it to send one of the water clones into many others. Like Phil's training, defeating them all within the time limit shouldn't be much of a problem, as they only take one hit to kill and can easily be squashed in bunches with reaction commands. However, if necessary, Fire is incredibly effective against them (and should be taken note of for future encounters). Sora and Goofy will obtain increases in their maximum HP for completing the event and Donald will obtain MP Rage. But of more importance, you will receive Secret Ansem Report 5 and the Olympus Stone, giving the party power in the Underworld and allowing Sora to once again make use of his drive gauge.
Exit the Atrium to the Lock, where you can collect the treasures scattered about the small area (a Mythril Shard, the Caverns Map, and an AP Boost). Once that's done, use the reaction command on the rock in the center of the room, then exit through the newly-opened passage to begin the next boss fight.
Boss: Pete
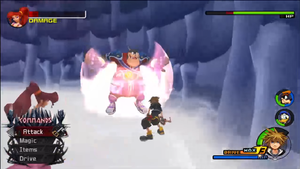
Pete will begin by surrounding himself with Hook Bats. Clear them out before they can do too much damage to Meg (if she takes too much damage as signified by the gauge, you'll have to restart the battle), then go after Pete himself. Pete's attacks aren't too intimidating. He throws colorful balls that are actually bombs, but these are easily avoided. He'll also encase himself in a defensive bubble from time to time, but he doesn't actually do any damage in this state. Simply wait for his shield to expire and attack. Eventually, a scene will play, and the second phase of the battle begins.
Here, instead having to worry about protecting someone, you'll have to worry about defeating Pete in time. If Pete has an advantage, it's his high health. However, with Hercules by your side, the battle should be much more manageable; his presence has opened up a new reaction command, Pinball, which can be performed when Pete activates his spherical shield. Valor Form can also be used to make this battle move much quicker. For defeating Pete, Sora obtains Trinity Limit, a powerful limit that makes use of both Donald and Goofy, while Donald's maximum HP increases and Goofy obtains Hyper Healing. This battle will lead right into the next against the Hydra.
Boss: Hydra
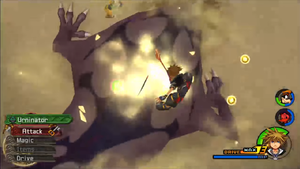
The Hydra is actually a relatively easy boss battle, even on Critical. Begin by constantly staying on the move and jumping throughout the arena to avoid both its tail sweep and the lightning that it summons at random. Lock on to the Hydra's head and wait for it to lower before performing a combo. Once you deal enough damage, you can perform a reaction command that has Sora slash through its head. It will summon three more heads after this, appearing out of the ground in front of it. Do as Phil says and get on the Hydra's back before attacking the new heads, as performing a reaction command there will stun all three. Feel free to attack all three once that's done (performing the Vanquish reaction command once each one has its HP depleted), as they'll remain stunned long enough to carry you into the next phase of the battle.
The Hydra will now grow many more heads, all snapping at Sora. Lock on to the lowest-hanging head and combo it, as hurting just one head affects the entire monster's health as long as the head is attached to its body. You will also receive the Pegasus Run/Attack reaction command combo after enough damage is done, giving Sora the chance to get hits in on every head. Continue long enough and another Vanquish reaction command will be presented, this time having Sora slash off all of the Hydra's head, defeating it once and for all. Sora earns Thunder magic while Donald gains an armor slot and Goofy's maximum HP increases. You can now leave the world, continuing onto 100 Acre Wood if you are directed to or, if you have already been back to Hollow Bastion, Disney Castle.

