Jump to navigation
Jump to search
Mechamind90 (talk | contribs) |
(Coin Count) |
||
| Line 22: | Line 22: | ||
[[Image:SMB1 Map Heaven A.png]] | [[Image:SMB1 Map Heaven A.png]] | ||
* Hop on top of the flat cloud platform, and jump forward to collect the coins. If you accidentally fall off, accelerate to pass the cloud, and jump on from the right. | * Hop on top of the flat cloud platform, and jump forward to collect the coins. If you accidentally fall off, accelerate to pass the cloud, and jump on from the right. | ||
* This Heaven has a 41 coin potential. | |||
==Coin Heaven B== | ==Coin Heaven B== | ||
[[Image:SMB1 Map Heaven B.png]] | [[Image:SMB1 Map Heaven B.png]] | ||
* Once you reach the small clouds at the end, the best way to get all of the coins is to use {{nes|B}}. If you accelerate, you won't fall through. | * Once you reach the small clouds at the end, the best way to get all of the coins is to use {{nes|B}}. If you accelerate, you won't fall through. | ||
* This Heaven has a 52 coin potential. | |||
==Coin Heaven C== | ==Coin Heaven C== | ||
[[Image:SMB1 Map Heaven C.png]] | [[Image:SMB1 Map Heaven C.png]] | ||
* The only difference between Coin Heaven B and C is the size of the platform that carries you through the area. Coin Heaven C's platform is shorter. | * The only difference between Coin Heaven B and C is the size of the platform that carries you through the area. Coin Heaven C's platform is shorter. | ||
* Just like Coin Heaven B, this one has a 52 coin potential. | |||
==Swim Area A== | ==Swim Area A== | ||
[[Image:SMB1 Map Swim A.png]] | [[Image:SMB1 Map Swim A.png]] | ||
Revision as of 14:26, 18 June 2008
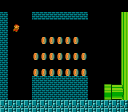
Coin Room A
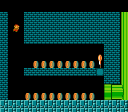
Coin Room B
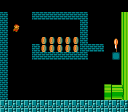
- The last block, right above the pipe entrance, has 10 coins hidden inside.
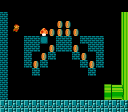
Coin Room C
- There is a power up hidden among the top row of bricks, just left of center.
- To access the coins at the top, break the bottom two blocks in either the right most or left most columns.
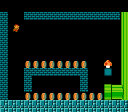
Coin Room D
- Super Mario can access the coins along the bottom just like regular Mario can. You just need a running start from the left, and push down to make Mario slide.
- You can also use a running start to pick up a Fire Flower, but don't smash any of the highest level of the ceiling/floor before this.
Coin Room E
- The right most block above the pipe entrance has 10 coins hidden inside.
- To access the coins above the bricks, jump on the right most block, and then jump left to cross the ceiling. From the ceiling, jump to the top of the left wall, and then take a small hop to the right, in to the gap.
Coin Heaven A
- Hop on top of the flat cloud platform, and jump forward to collect the coins. If you accidentally fall off, accelerate to pass the cloud, and jump on from the right.
- This Heaven has a 41 coin potential.
Coin Heaven B
- Once you reach the small clouds at the end, the best way to get all of the coins is to use
 . If you accelerate, you won't fall through.
 - This Heaven has a 52 coin potential.
Coin Heaven C
- The only difference between Coin Heaven B and C is the size of the platform that carries you through the area. Coin Heaven C's platform is shorter.
- Just like Coin Heaven B, this one has a 52 coin potential.
Swim Area A
Swim Area B
- The only difference between Swim Area A and B is the size of the platforms that fall through the water. Swim Area B's platforms are shorter.
Warp Zone
- This is the Warp Zone that you access through the vine found in World 4-2. From here, you can warp to Worlds 6, 7, or 8.
