Jump to navigation
Jump to search
(Difference between versions) |
Mechamind90 (talk | contribs) (→Part C) |
||
| Line 53: | Line 53: | ||
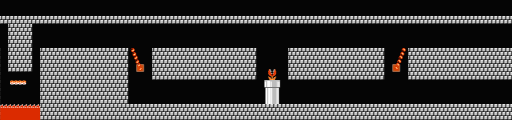
=== Part C === | === Part C === | ||
{{Scrolling map|SMB2j_WorldB-4_C.png}} | {{Scrolling map|SMB2j_WorldB-4_C.png}} | ||
* If you sink into the only pipe in Part B, or | * If you sink into the only pipe in Part B, or either pipe in this section, you'll go back to the first pipe in Part A. | ||
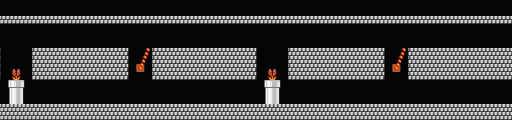
=== Part D === | === Part D === | ||
{{Scrolling map|SMB2j_WorldB-4_D.png}} | {{Scrolling map|SMB2j_WorldB-4_D.png}} | ||
* However, if you sink into the last pipe in the dungeon, you will go straight to a [[Super Mario Bros. 2 (Japan)/Coin Rooms#Warp Zone B|Warp Zone B]] which will lead you to [[Super Mario Bros. 2 (Japan)/World D|World D]]. | * However, if you sink into the last pipe in the dungeon, you will go straight to a [[Super Mario Bros. 2 (Japan)/Coin Rooms#Warp Zone B|Warp Zone B]] which will lead you to [[Super Mario Bros. 2 (Japan)/World D|World D]]. | ||
{{Footer Nav|game=Super Mario Bros. 2 (Japan)|prevpage=World A|nextpage=World C}} | {{Footer Nav|game=Super Mario Bros. 2 (Japan)|prevpage=World A|nextpage=World C}} | ||
Revision as of 15:29, 23 June 2008
| Note to All-Stars players |
| World B contains one difference in Super Mario Bros. The Lost Levels. Instead of green Super Springs, you will find red Springs that only launch you into the air for a very short time. This will likely change your progress. |
World B-1
Part A

- Since you have endless chance to continue, don't risk your life for the early 1-Up Mushroom.
Part B

- Watch out! If you wait under a hidden block to stomp a Koopa, you'll jump with less height than you expected.
- Hit the block above the first pipe to reveal a vine that leads to coin heaven C. However, only a super-sized character will be able to punch a hole in the brick in order to reach the vine before it scrolls off the screen.
- A trio of hidden blocks in the gapped row of bricks make for a solid platform when they materialize.
- Hit the "?" block on the far right and jump when the Power-Up Mushroom flies.
Part C

- Poison Mushrooms still abound and can ruin a perfectly good game. Let them slide out of harms way if you make one appear.
World B-2
Part A

- A Koopa Paratroopa bounds down the stairs near the beginning of this water stage. If you're not careful, you'll be trampled.
Part B

- Go below the floating platform to avoid the Koopa Paratroopa that rules the top of the blocks. You won't get the Coins, but you'll be safe.
Part C

- The low route is safe and Coin-filled. Swim steadily and make sure that you don't let your hero go below the bottom of the screen.
- The extended Fire-Bar swings freely in the wide open space. Follow it as it goes around and head for the exit, another standard exit.
World B-3
Part A

- Instead of stomping the pair of Koopa Paratroopas in this section, you should target the pulleyed platforms for a better chance to advance.
- Pop the "?" block as you ride the sliding platform in the middle of this section, and grab the Power-Up Mushroom before it drops. Then, secure your footing on the platform or the block and jump to the next challenge.
Part B

- If your character is super-sized at the end of this section, hit the bricks quickly to clear away one and make a Fire Flower appear in the other. However, you need to collect the coin above the power-up block before hitting the brick itself. Otherwise, the power-up won't appear, yet the block is still emptied.
Part C

- Move forward on the first ledge until you can see the next ledge, then wait for the Koopa to approach and take two quick hops to your goal.
- A Koopa Troopa patrols the last bluff. Make sure that you react to the Koopa right when you land before it gets too close.
World B-4
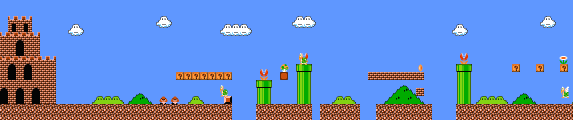
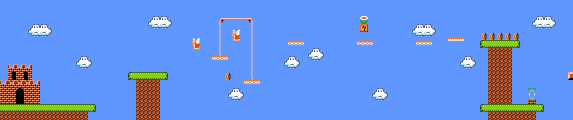
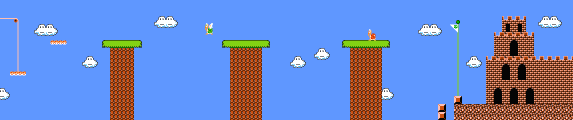
Part A

- You can catch the Fire-Bar guarded Power-Up if you're fast. But if you're already super-sized, it won't do you much good.
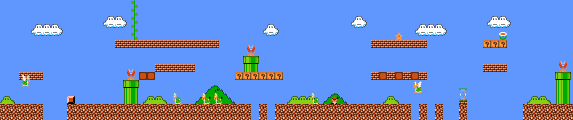
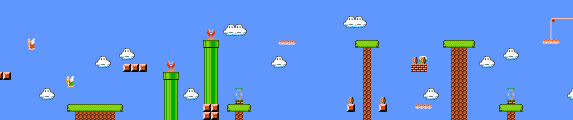
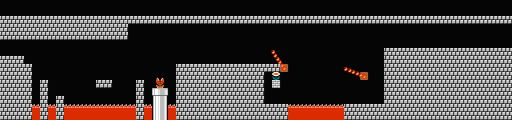
Part B

- Riding the sliding platform at the very beginning of this section is the only way across the gap. If your hero is super-sized, he'll have to duck in order to squeeze under the bricks.
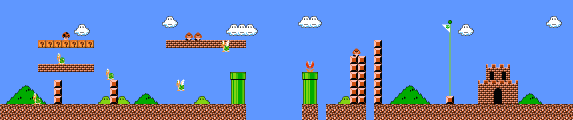
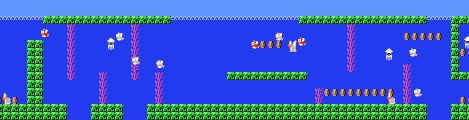
Part C

- If you sink into the only pipe in Part B, or either pipe in this section, you'll go back to the first pipe in Part A.
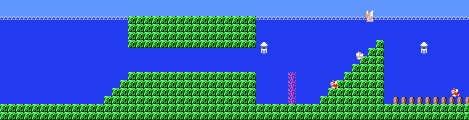
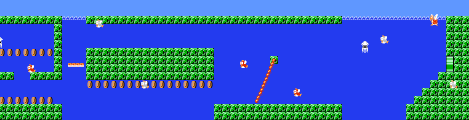
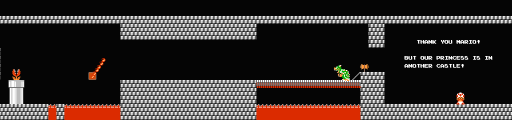
Part D

- However, if you sink into the last pipe in the dungeon, you will go straight to a Warp Zone B which will lead you to World D.