From StrategyWiki, the video game walkthrough and strategy guide wiki
Jump to navigation
Jump to search
The printable version is no longer supported and may have rendering errors. Please update your browser bookmarks and please use the default browser print function instead.
| Note to All-Stars players
|
| World B contains one difference in Super Mario Bros. The Lost Levels. Instead of green Super Springs, you will find red Springs that only launch you into the air for a very short time. This will likely change your progress.
|
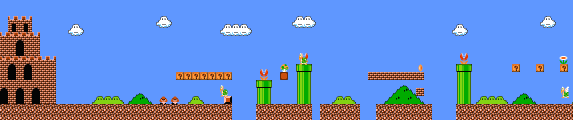
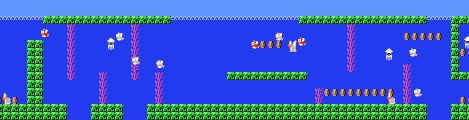
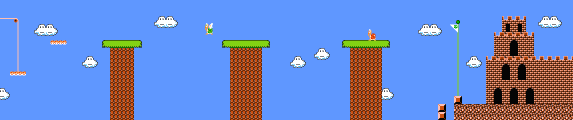
World B-1
Part A
- Since you have endless chances to continue, don't risk your life for the early 1-Up Mushroom. Unless:
- Your hero is on his Fire Suit so he can eliminate the Green Koopa Troopa guarding the booty with ease.
- You're a super player! You can knock out the Green Koopa Troopa at one far-side of this reduced space, hit the hidden block in the middle, and wait for the 1-Up Mushroom to come to you. It can be tricky, but it's good for practicing those super skills needed in this game!
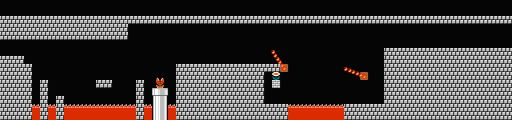
Part B
- Watch out! If you wait under a hidden block to stomp a Koopa, you'll jump with less height than you expected.
- Hit the block above the first pipe to reveal a vine that leads to coin heaven C. However, only a super-sized character will be able to punch a hole in the brick in order to reach the vine before it scrolls off the screen.
- A trio of hidden blocks in the gapped row of bricks make for a solid platform when they materialize, so you can catch that Starman with ease.
- Hit the "?" block on the far right and jump when the Power-Up Mushroom flies.
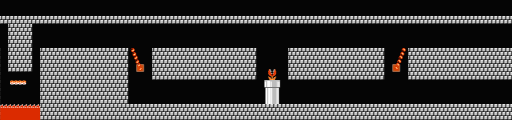
Part C
- Poison Mushrooms still abound and can ruin a perfectly good game. Let them slide out of harms way if you make one appear.
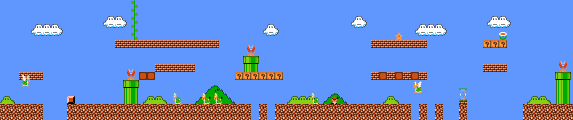
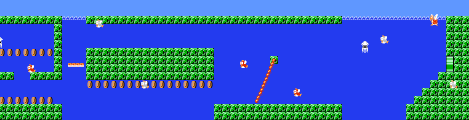
World B-2
Part A
- A Koopa Paratroopa bounds down the stairs near the beginning of this water stage. If you're not careful, you'll be trampled.
Part B
- Go below the floating platform to avoid the Koopa Paratroopa that rules the top of the blocks. You won't get the Coins, but you'll be safe.
Part C
- The low route is Coin-filled. But careful, as one Cheep-Cheep swims in the same straight line of the coins. Swim steadily and make sure that you don't let your hero go below the bottom of the screen.
- The extended Fire-Bar swings freely in the wide open space. Follow it as it goes around and head for the exit, another standard exit.
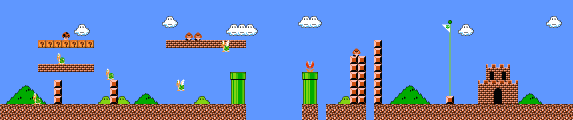
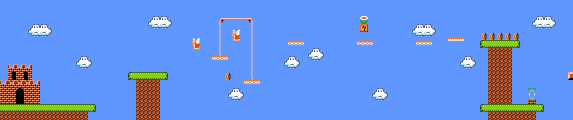
World B-3
Part A
- Instead of stomping the pair of Koopa Paratroopas in this section, you should target the pulleyed platforms for a better chance to advance.
- Pop the "?" block as you ride the sliding platform in the middle of this section, and grab the Power-Up Mushroom before it drops. Then, secure your footing on the platform or the block and jump to the next challenge.
Part B
- If your character is super-sized at the end of this section, hit the bricks quickly to clear away one and make a Fire Flower appear in the other. However, you need to collect the coin above the power-up block before hitting the brick itself. Otherwise, the power-up won't appear, yet the block is still emptied.
Part C
- Move forward on the first ledge until you can see the next ledge, then wait for the Koopa to approach and take two quick hops to your goal.
- A Koopa Troopa patrols the last bluff. Make sure that you react to the Koopa right when you land before it gets too close.
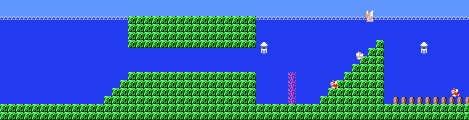
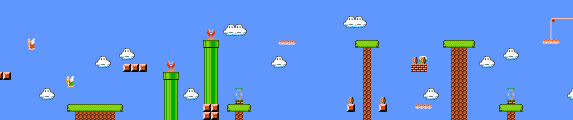
World B-4
Part A
- You can catch the Fire-Bar guarded Power-Up if you're fast. But if you're already super-sized, it won't do you much good.
- In Super Mario All-Stars, the right side of the pipe in Part A is sealed in, so you are in no danger of over-jumping and falling into the lava pit right beside it.
Part B
- Riding the sliding platform at the very beginning of this section is the only way across the gap. If your hero is super-sized, he'll have to duck in order to squeeze under the bricks.
Part C
- If you sink into the only pipe in Part B, or either pipe in this section, you'll go back to the first pipe in Part A.
Part D
- However, if you sink into the last pipe in the dungeon, you will go straight to a Warp Zone C which will lead you to World D.