|
|
| (24 intermediate revisions by 11 users not shown) |
| Line 1: |
Line 1: |
| {{wikify}} | | {{Header Nav|game=Super Sprint}} |
| {{needcontrols|NES}} | | {{Game |
| | | |completion=3 |
| {{infobox|
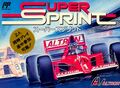
| | |image=Super Sprint flyer.jpg |
| |title=Super Sprint | | |title=Super Sprint |
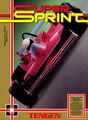
| |boxart=[[Image:SuperSprintBoxArt.jpg|250px]]
| | |developer=[[Atari Games]] |
| |developer=[[Tengen]], [[Atari]]] | | |publisher={{colist|Atari Games|Electric Dreams Software|Tengen}} |
| |publisher=[[Tengen]], [[Atari]] | | |year=1986 |
| |categories=[[Racing]] | | |systems={{syslist|cade|cpc|atarist|c64|nes|zx}} |
| |systems=[[NES]], [[Arcade]] | | |genre=[[Racing]] |
| |releasedates=[[1986]] ([[Arcade]])<br />[[1989]] ([[NES]]) | |
| |players=1-3 | | |players=1-3 |
| |ratings=ESRB: None | | |modes=[[Single player]], [[Multiplayer]] |
| |requirements=(optional) | | |preceded by=[[Sprint 1]] |
| | |followed by=[[Championship Sprint]] |
| | |series=Sprint |
| }} | | }} |
| | {{marquee|Super Sprint marquee.png}} |
| | '''Super Sprint''' is a [[racing]] arcade game which was released by [[Atari Games]] in [[1986]]. It runs upon their System 2 hardware. It is the fifth title for their {{c|Sprint}} series. [[Tengen]] produced several home conversions of the game for the [[Amstrad CPC]], [[Atari ST]], [[Commodore 64]], [[Nintendo Entertainment System]], and [[Sinclair ZX Spectrum]] - but they are all (with the possible exception of the ST) inferior to the original, due to the fact that they were released on 8-bit systems (the AS2 is a good example of a 16-bit board released before [[1987]]). |
|
| |
|
| {{sidebar2|title=imported GFDL content|contents=This guide has been released under the GNU Free Documentation License (see talk page for more). However it is still in text-only format. If you know how please convert it into wiki format and use subpages accordingly.}}
| | <gallery> |
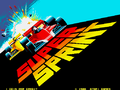
| <br clear=all /> | | File:Super Sprint title screen.png|Title screen. |
| <br clear=all />
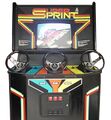
| | File:Super Sprint cabinet.jpg|Upright arcade cabinet. |
| <br clear=all />
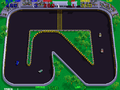
| | File:Super Sprint gameplay.png|Screenshot of the game. |
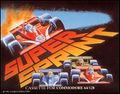
| | | File:Super Sprint cover.jpg|Commodore 64 cover art. |
| ==FAQ==
| | File:Super Sprint JP NES Box Art.jpg|Japanese NES cover art. |
| Q: Are there any other games similar to this game?
| | File:SuperSprintBoxArt.jpg|American NES cover art. |
| | | </gallery> |
| Super Off Road and Micro Machines are the only games I can think of that are similar to this one.
| |
| | |
| ==Introduction==
| |
| Super Sprint is an overhead racing game that was released by Tengen in 1989. | |
| It’s not one of the best racing games on the NES but it’s good if you are
| |
| looking for a quick spin because of it’s fast-paced yet simple game play. This
| |
| guide isn’t a walkthrough since it doesn’t really need one, nor does it have
| |
| any deep insight on how to win races. Instead, this guide will try to help you
| |
| with the difficult turns and stuff to watch out for on the track.
| |
| | |
| ==Game Basics==
| |
| <pre>
| |
| Controls
| |
| --------
| |
| | |
| Start Button: Pauses the game.
| |
| | |
| Select Button: Not used.
| |
| | |
| B Button: Accelerates your car.
| |
| | |
| A Button: Exit the Game Over/Victory Screen quickly.
| |
| | |
| Directional Pad: Turns your car. You only need to use Up/Down buttons though.
| |
| | |
| | |
| Screen Info
| |
| -----------
| |
| | |
| # of Players: Located in the top left corner. It indicates the number of people
| |
| playing. If there are two people playing, it will say P1 and P2 there.
| |
| | |
| Score: Located to the right of the # of players. It show the score for the
| |
| current player(s). If there are two people playing, the score will appear
| |
| beside the P1 and P2 on the left.
| |
| | |
| Level: Located to the right of the score. It shows which track your on.
| |
| | |
| Lap: Located to the right of the level. It shows how many laps you’ve done.
| |
| There are five laps to each race. If there are two people playing, the current
| |
| lap will appear at the same height as the P1 and P2 on the left.
| |
| | |
| | |
| Stuff on the Track
| |
| ------------------
| |
| | |
| Red Bar: Gives you points. These aren’t too helpful. Don’t bother grabbing them
| |
| unless they are in your way.
| |
| | |
| Wrench: Gives you one point to use toward an upgrade. Two of them will appear
| |
| during a race. The other cars won’t go out of their way to get them but you
| |
| should as long as it doesn’t cost you the race.
| |
| | |
| Water: Slows you down when you go through it.
| |
| | |
| Oil: Spins you out when you go through it. These are trouble. Avoid them if you
| |
| can.
| |
| | |
| Pylon: Slows you down when you hit it.
| |
| | |
| Tornado: Spins you out when you go through it. These are a pain in the ass
| |
| because they move around on the track but try to avoid them if you can.
| |
| | |
| | |
| Upgrades
| |
| --------
| |
|
| |
| Super Traction: Increases the grip of your tires. It’s hard to gauge the | |
| results of this upgrade but it seems to help you slightly when you going around
| |
| turns. The Higher Top Speed upgrade will negate it somewhat.
| |
| | |
| Higher Top Speed: Increases the top speed of your car. Use this sparingly
| |
| because it makes it harder to take turns and easier to blow up and spin out
| |
| when you run into the barrier or other objects.
| |
|
| |
| Turbo Acceleration: Increases how fast your car speeds up. It makes it a little
| |
| harder to take turns if you put a lot of points into it but you don’t have to
| |
| worry too much about the negative effects.
| |
| | |
| Increase Score: Increases your score. You don’t need to use this until later in
| |
| the game, maybe after you finish track 7 and beyond. | |
| | |
| ===============================================================================
| |
| Tracks
| |
| ===============================================================================
| |
| | |
| Track 1
| |
| -------
| |
| Difficulty: 1/5
| |
| | |
| Start
| |
| T1 ##########=############### T7
| |
| ###########=################
| |
| ############=#################
| |
| ############=#################
| |
| ##### T4 #####
| |
| ##### ###### #####
| |
| ##### ######### #####
| |
| ##### ########### #####
| |
| ##### ##### ####### #####
| |
| ############# ###############
| |
| ############# ############# T6
| |
| T2 ########### ###########
| |
| T3 T5
| |
| | |
| Track 1 is a simple to complete since there are no significantly difficult
| |
| turns, the cars are slow as hell, and the track is wide all throughout. You
| |
| should be able to lap the cars at least once. The only turns you should watch
| |
| out for are turn 3 to turn 5, which can make your run into the wall and crash.
| |
| You can take those turns at full speed but take your finger off the gas if it
| |
| looks like you are going to crash.
| |
| | |
| | |
| Track 2
| |
| -------
| |
| Difficulty: 2/5
| |
| | |
| Start
| |
| T1 #######=################## T8
| |
| ########=###################
| |
| ########=###################
| |
| ##### T6 #####
| |
| ##### ##################
| |
| ##### ####################
| |
| ######################## T7
| |
| #######
| |
| ######################### T3
| |
| ##### #####################
| |
| ##### ###################
| |
| ##### T2 #####
| |
| #############################
| |
| #############################
| |
| T5 ########################### T4
| |
| | |
| Track 2 is a little more difficult because of the numerous turns but they are
| |
| still simple to go around. Be careful when you drive through the crossover
| |
| since you can spin out or possibly crash if you run into another car. The cars
| |
| are little faster but you should be able to lap most or all of them again.
| |
| | |
| | |
| Track 3
| |
| -------
| |
| Difficulty: 2/5
| |
| | |
| T8 ############################ T7
| |
| ##############################
| |
| ##############################
| |
| ##### T5 ######
| |
| ##### ##################
| |
| ######## ###################
| |
| ######### ################## T6
| |
| T10 ######## #####
| |
| ##### ##### ########## T2
| |
| ##### ##### ############
| |
| T11 ######## ##### ############
| |
| ######### ############ #####
| |
| ######## ########## #####
| |
| ##### T4 T3 #####
| |
| ############=#################
| |
| ############=#################
| |
| T12 ###########=################ T1
| |
| Start
| |
| | |
| Track 3 is more difficult because there are a series of somewhat difficult
| |
| turns at turn 2 to turn 4 and turn 10 to turn 12. Those turns form a rough S
| |
| shape that can be hard to negotiate, especially if you have a Higher Top Speed
| |
| upgrade since it’s easier to crash. The cars move a little faster as well. The
| |
| white car in particular is getting quite fast.
| |
| | |
| | |
| Track 4
| |
| -------
| |
| Difficulty: 3/5
| |
| | |
| T8 T3
| |
| T7 ############# ############### T2
| |
| ############### #################
| |
| ############### #################
| |
| ##### ##### ##### T4 #####
| |
| ##### ##### ########## #####
| |
| ##### ##### ########## #####
| |
| ######### ## ##### #####
| |
| ######### ## ##### #####
| |
| ######################### #####
| |
| ##### #################### #####
| |
| ##### ################## #####
| |
| ##### T6 T5 #####
| |
| #######################=##########
| |
| #######################=##########
| |
| T9 ######################=######### T1
| |
| Start
| |
| | |
| Track 4 is roughly as difficult as the previous track. The only problem that I
| |
| can notice is turn 3 and turn 4 and the shortcut where you can get caught on
| |
| the inside of the barrier if you are not going straight. The crossover can
| |
| cause some problems if you run into another car though. The others cars are
| |
| about the same speed as the previous track.
| |
| | |
| | |
| Track 5
| |
| -------
| |
| Difficulty: 4/5
| |
| | |
| Start
| |
| T1 #######=####### ############# T10
| |
| ########=######## ###############
| |
| ########=#########################
| |
| ##### ######### #####
| |
| ############# ##### ############
| |
| ############## T11 #############
| |
| T2 ############# ############ T9
| |
| ##### #####
| |
| T5 #######|#####|#####|#####|###### T6
| |
| ########|#####|#####|#####|#######
| |
| ########|#####|#####|#####|#######
| |
| ###### ##### ##### #####
| |
| ############## #############
| |
| ############## #############
| |
| T4 ############ ########### T7
| |
| T3 T8
| |
| | |
| Track 5 is more difficult, solely because of the twisty nature of the track.
| |
| The underpass sections aren’t too difficult if you keep straight on and don’t
| |
| run into the barrier. You also don’t have to take Turn 11 because of the hole
| |
| in the barrier which lets you bypass it nicely. The cars are starting to get
| |
| fast now. The white car will be able to keep pace with you.
| |
| | |
| | |
| Track 6
| |
| -------
| |
| Difficulty: 3/5
| |
| | |
| Start
| |
| T1 ##################=####### T10
| |
| ###################=########
| |
| ###################=########
| |
| ##### T3 #####
| |
| ##################### #####
| |
| ###################### #####
| |
| T2 ##################### #####
| |
| T7 ##### #####
| |
| T6 ########### ##### #####
| |
| ############# ##### #####
| |
| ################### #####
| |
| ##### ######### #####
| |
| ##### ####### #####
| |
| ##### ######### #####
| |
| ############################
| |
| ############# #############
| |
| T5 ########### ########### T9
| |
| T4 T8
| |
| | |
| Track 6 is a step down in difficulty from the previous track since there are no
| |
| tough turns and the cars are around the same speed. There are a lot of sections
| |
| of track that are straight where you can get to full speed and some moderate
| |
| turns that shouldn’t be much trouble to get through. The crossover isn’t much
| |
| trouble as long as you don’t run into another car.
| |
| | |
| | |
| Track 7
| |
| -------
| |
| Difficulty: 4/5
| |
|
| |
| Start
| |
| T1 ############=################ T7
| |
| #############=#################
| |
| #############=#################
| |
| ##### #####
| |
| ##### T3 ###############
| |
| ##### ########## #################
| |
| ##### ############ #################
| |
| ##### ############ ##### ##### ####
| |
| ##### ##### ##### ############ ####
| |
| ################## ############ ####
| |
| ################## ########## ####
| |
| T2 ################ T6 ####
| |
| ##### ####
| |
| ##############################
| |
| ##############################
| |
| T4 ############################ T5
| |
|
| |
| Track 7 is the last unique track that you have to race in the game. That being
| |
| the case, it’s a difficult one to complete because of the two loops dominating
| |
| the track and the speed that the cars travel now. Take it easy around those
| |
| loops and try not to run into the walls, which is easy if you don’t watch
| |
| out... or you have a Higher Top Speed upgrade.
| |
| | |
|
| |
|
| After Track 7
| | ==Gameplay== |
| -------------
| | Up to three players must use a steering wheel and gas pedal, to take control of a car (blue for 1P, red for 2P, and yellow for 3P), with the CPU filling in for missing players (along with the fourth, green car). Unlike the previous Sprint titles, the players will have to choose one of eight different tracks at the start of the game, and complete a preset number of laps on it. Powerups will also occasionally appear on the track during the race, and the players may collect them for bonuses. Players may tune up their cars between races, but as soon as they fail to finish a race first their game will be over and the remaining players shall continue without them. |
|
| |
|
| You will start on track 1 again but this time there will be more obstacles. The
| | {{ToC}} |
| cars will reset to their original speed as well so you can beat them handily
| | {{Sprint}} |
| again until the later tracks.
| |
| </pre>
| |
|
| |
|
| [[Category:Atari]]
| |
| [[Category:Tengen]]
| |
| [[Category:Racing]] | | [[Category:Racing]] |
| [[Category:Single player]] | | [[Category:Single player]] |
| [[Category:Multiplayer]] | | [[Category:Multiplayer]] |
| [[Category:NES]] | | [[Category:MAME]] |
| [[Category:Arcade]]
| |
| [[Category:1986]]
| |
| [[Category:1989]]
| |