Jump to navigation
Jump to search
m (minor) |
(this is not a spell) |
||
| (24 intermediate revisions by 7 users not shown) | |||
| Line 1: | Line 1: | ||
{{Header Nav|game=The 7th Saga}} | {{Header Nav|game=The 7th Saga}} | ||
{{floatingtoc}} | |||
{{ | |||
== Monsters == | == Monsters == | ||
Monsters are sorted here by experience points. | Monsters are sorted here by experience points. This order is close to the order they will be encountered in the video game. Only the area of the first encounter is listed, because as your characters proceeds in the game and gain experience levels, the same monsters become easier to beat. | ||
This order is close to the order they will be encountered in the | |||
Bosses are listed in a separate table at the bottom of the page. | Bosses are listed in a separate table at the bottom of the page. | ||
{|{{prettytable|sortable=1|text center | The abbreviations in the names are not explained. The following are generally assumed, but no confirmation exists: | ||
!Monster !!width=102|Image !! HP !! Exp !! GP !! Spells!! | * '''B.''' = Blue (demon) or Black (knight) | ||
* '''D.''' = Death (knight) | |||
* '''F.''' = Flame (knight) or Flint (witch) | |||
* '''K.''' = Killer (knight, trick and moon) | |||
* '''N.''' = Neo (brain) | |||
* '''P.''' = Poison (moon) | |||
* '''R.''' = Red (demon and trick) | |||
* '''S.''' = Stone (witch), Silver (demon and brain) | |||
* '''V.''' = Violet (knight) | |||
{|{{prettytable|sortable=1|text center=1}} | |||
! Monster !! width=102|Image !! HP !! Exp !! GP !! Spells!! First encountered | |||
|- | |||
! Hermit || style="background:#505050;"|[[File:Elnard_0026_Hermit.png]] | |||
| 18 || 26 || 12 || - || Ch.1-1: [[../The Gate of Earth|Lemele area]] | |||
|- | |- | ||
! | ! Statue || style="background:#505050;"|[[File:Elnard_0030_Statue.PNG]] | ||
| | | 50 || 30 || 14 || - || Ch.1-3: [[../The Gate of Earth|Aran Castle]] | ||
|- | |- | ||
! | ! Demon || style="background:#505050;"|[[File:Elnard_0033_Demon.png]] | ||
| | | 25 || 33 || 15 || Defense2 || Ch.1-2: [[../The Gate of Earth|Rablesk area]] | ||
|- | |- | ||
! | ! Wyvern || style="background:#505050;"|[[File:Elnard_0033_Wyvern.png]] | ||
| | | 22 || 33 || 15 || - || Ch.1-1: [[../The Gate of Earth|Lemele area]] | ||
|- | |- | ||
! | ! Chimera || style="background:#505050;"|[[File:Elnard_0035_Chimera.png]] | ||
| | | 35 || 35 || 16 || MPCatcher || Ch.1-3: [[../The Gate of Earth|Aran castle]] | ||
|- | |- | ||
! | ! Android || style="background:#505050;"|[[File:Elnard_0088_Android.png]] | ||
| | | 60 || 88 || 40 || HPCatcher || Ch.1-5: [[../The Gate of Earth|after the cave]] | ||
|- | |- | ||
! | ! Undead || style="background:#505050;"|[[File:Elnard_0088_Undead.png]] | ||
| | | 70 || 88 || 40 || Revive2 || Ch.1-4: [[../The Gate of Earth|Cave of Earth]] | ||
|- | |- | ||
! | ! Manrot || style="background:#505050;"|[[File:Elnard_0132_Manrot.png]] | ||
| | | 75 || 132 || 60 || Ice1, Petrify || Ch.2-1: [[../The Wind Rune|Bonro area]] | ||
|- | |- | ||
! | ! Orc || style="background:#505050;"|[[File:Elnard_0136_Orc.png]] | ||
| | | 70 || 136 || 62 || - || Ch.2-2: [[../The Wind Rune|cave to Melenam]] | ||
|- | |- | ||
! | ! B. Demon || style="background:#505050;"|[[File:Elnard_0165_BlueDemon.png]] | ||
| | | 80 || 165 || 75 || Fire1, Heal1, Defense1 || Ch.2-2: [[../The Wind Rune|cave to Melenam]] | ||
|- | |- | ||
! | ! Cocoon || style="background:#505050;"|[[File:Elnard_0176_Coccoon.png]] | ||
| 80 || | | 80 || 176 || 80 || HPCatcher, Defense2, Laser2, <br> MPCatcher, Poison Attack, Heal2 || Ch.4-1: [[../The Star Rune|Patrof area]] | ||
|- | |- | ||
! | ! Despair || style="background:#505050;"|[[File:Elnard_0220_Despair.png]] | ||
| | |200 || 220 || 100 || Petrify, Fire Bird, Heal1 || Ch.2-1: [[../The Wind Rune|Bonro area]] | ||
|- | |- | ||
! | ! Trick || style="background:#505050;"|[[File:Elnard_0220_Trick.png]] | ||
| | | 80 || 220 || 100 || Poison Attack, Petrify || Ch.1-4: [[../The Gate of Earth|Cave of Earth]] | ||
|- | |- | ||
! | ! Manta || style="background:#505050;"|[[File:Elnard_0242_Manta.png]] | ||
| 80 || | | 80 || 242 || 100 || Agility || Ch.3-2: [[../The Water Rune|Pell area]] | ||
|- | |- | ||
! | ! Titan || style="background:#505050;"|[[File:Elnard_0264_Titan.png]] | ||
| | |210 || 264 || 120 || - || Ch.4-1: [[../The Star Rune|Patrof area]] | ||
|- | |- | ||
! | ! Sage || style="background:#505050;"|[[File:Elnard_0330_Sage.png]] | ||
| | | 150 || 330 || 150 || Revive2, MPCatcher, Defense2, Fire Bird || Ch.5-1: [[../Diverging Paths|cave of Milto]] | ||
|- | |- | ||
! | ! Spidek || style="background:#505050;"|[[File:Elnard_0330_Spidek.png]] | ||
| | | 115 || 330 || 110 || Defense2, Poison Attack <br>''(a centipede, not a spider)'' || Ch.4-2: [[../The Star Rune|Patrof dungeon]] | ||
|- | |- | ||
! | ! S. Witch || style="background:#505050;"|[[File:Elnard_0330_StoneWitch.png]] | ||
| | | 160 || 330 || 150 || MPCatcher || Ch.4-1: [[../The Star Rune|Patrof area]] | ||
|- | |- | ||
! | ! Defeat || style="background:#505050;"|[[File:Elnard_0440_Defeat.png]] | ||
| | | 175 || 440 || 220 || Fire1, Poison Attack, Petrify, Defense2 || Ch.5-2: [[../Diverging Paths|Dowaine area]] | ||
|- | |- | ||
! | ! Plater || style="background:#505050;"|[[File:Elnard_0440_Plater.png]] | ||
| | | 200 || 440 || 200 || - || Ch.6-2: [[../The Sky Rune|cave to Beore]] | ||
|- | |- | ||
! | ! R. Trick || style="background:#505050;"|[[File:Elnard_0440_RedTrick.png]] | ||
| | | 175 || 440 || 200 || Fire Bird, Poison Attack, Vacuum1, HPCatcher || Ch.4-2: [[../The Star Rune|Patrof dungeon]] | ||
|- | |- | ||
! | ! P. Moon || style="background:#505050;"|[[File:Elnard_0462_P-Moon.png]] | ||
| | | 400 || 462 || 210 || Petrify, MPCatcher || Ch.9-2: [[../The Wizard Rune|cave of Kapel]] | ||
|- | |- | ||
! | ! R. Demon || style="background:#505050;"|[[File:Elnard_0462_RedDemon.png]] | ||
| | | 120 || 462 || 210 || Defense1, Fire2, Fire Bird, Blizzard2 || Ch.5-2: [[../Diverging Paths|Dowaine area]] | ||
|- | |- | ||
! | ! Brain || style="background:#505050;"|[[File:Elnard_0484_Brain.png]] | ||
| 120 || | | 120 || 484 || 220 || {{yes|Laser2, Poison Attack <br /> '''DROPS''' Life Recoveries}} || Ch.3-1: [[../The Water Rune|Eygus area]] | ||
|- | |- | ||
! | ! Griffin || style="background:#505050;"|[[File:Elnard_0484_Griffin.png]] | ||
| | | 200 || 484 || 220 || Petrify, Poison Attack <br>''(an echidna, not a griffin)'' || Ch.8: [[../The Light Rune|Bilthem castle]] | ||
|- | |- | ||
! | ! Mutant || style="background:#505050;"|[[File:Elnard_0506_Mutant.png]] | ||
| | | 250 || 506 || 230 || Heal2, Petrify, Revive2, Ice1 || Ch.6-1: [[../The Sky Rune|Belaine area]] | ||
|- | |- | ||
! | ! Soidiek || style="background:#505050;"|[[File:Elnard_0550_Soldiek.png]] | ||
| 250 || | | 250 || 550 || 250 || - || Ch.7-1: [[../The Moon Rune|Padal area]] | ||
|- | |- | ||
! | ! Wyrock || style="background:#505050;"|[[File:Elnard_0550_Wyrock.png]] | ||
| | | 200 || 550 || 250 || Blizzard, Ice2, Thunder2 || Ch.7-3: [[../The Moon Rune|Baran castle]] | ||
|- | |- | ||
! | ! Chimere || style="background:#505050;"|[[File:Elnard_0660_Chimere.png]] | ||
| 200 || | | 200 || 660 || 330 || MPCatcher, Defense2, HPCatcher || Ch.9-5: [[../The Wizard Rune|Gorfun castle]] | ||
|- | |- | ||
! | ! K. Moon || style="background:#505050;"|[[File:Elnard_0660_K-Moon.png]] | ||
| | | 440 || 660 || 300 || Fire Ball, Ice2 || Ch.9-4: [[../The Wizard Rune|Baron cave]] | ||
|- | |- | ||
! | ! V. Knight || style="background:#505050;"|[[File:Elnard_0705_V-Night.png]] | ||
| | | 320 || 705 || 320 || Fire Ball || Ch.9-5: [[../The Wizard Rune|Gorfun castle]] | ||
|- | |- | ||
! | ! B. Knight || style="background:#505050;"|[[File:Elnard_0771_BlackKnight.png]] | ||
| | | 175 || 771 || 350 || Vacuum2, Defense2, Ice2 || Ch.7-1: [[../The Moon Rune|Padal area]] | ||
|- | |- | ||
! | ! Doom || style="background:#505050;"|[[File:Elnard_0771_Doom.png]] | ||
| | | 325 || 771 || 350 || Fire Ball, MPCatcher, Fire2 || Ch.9-1: [[../The Wizard Rune|Valenca area]] | ||
|- | |- | ||
! | ! Ghoul || style="background:#505050;"|[[File:Elnard_0881_Ghoul.png]] | ||
| | | 200 || 881 || 400 || Heal2 || Ch10-1: [[../The Final Quest|Pharano area]] | ||
|- | |- | ||
! | ! K. Trick || style="background:#505050;"|[[File:Elnard_0881_KingTrick.png]] | ||
| | | 275 || 881 || 400 || Blizzard2, Ice2, HPCatcher, Poison Attack || Ch.6-2: [[../The Sky Rune|Belaine castle]] | ||
|- | |- | ||
! | ! Reaper || style="background:#505050;"|[[File:Elnard_0881_Reaper.png]] | ||
| | | 650 || 881 || 400 || MPCatcher, Vacuum1, Fire Ball || Ch10-4: [[../The Final Quest|Melenam area]] | ||
|- | |- | ||
! | ! Flame || style="background:#505050;"|[[File:Elnard_0991_Flame.png]] | ||
| | | 400 || 991 || 450 || Fire2 || Ch.7-2: [[../The Moon Rune|Polasu area]] | ||
|- | |- | ||
! | ! N. Brain || style="background:#505050;"|[[File:Elnard_0991_N-Brain.png]] | ||
| 400 || 991 || 450 || | | 400 || 991 || 450 || Revive2, HPCatcher || Ch.9-3: [[../The Wizard Rune|Bugask area]] | ||
|- | |- | ||
! | ! Falock || style="background:#505050;"|[[File:Elnard_1057_Falock.png]] | ||
| | | 600 || 1057 || 480 || - || Ch10-7: [[../The Final Quest|Gorfun castle]] | ||
|- | |- | ||
! | ! Dergun || style="background:#505050;"|[[File:Elnard_1101_Dergun.png]] | ||
| | | 300 || 1101 || 500 || - || Ch10-1: [[../The Final Quest|Pharano area]] | ||
|- | |- | ||
! | ! Dogun || style="background:#505050;"|[[File:Elnard_1101_Dogun.png]] | ||
| | | 350 || 1101 || 500 || - || Ch10-4: [[../The Final Quest|Melenam area]] | ||
|- | |- | ||
! | ! Sword || style="background:#505050;"|[[File:Elnard_1101_Sword.png]] | ||
| | | 9 || 1101 || 500 || {{yes|Vacuum1, Defense2, Petrify, MPCatcher <br /> '''DROPS''' Wilme's Sword}} || Ch.9-1: [[../The Wizard Rune|Valenca area]] | ||
|- | |- | ||
! | ! Unded || style="background:#505050;"|[[File:Elnard_1101_Unded.png]] | ||
| | | 550 || 1101 || 500 || Vacuum1, Revive2 || Ch.9-4: [[../The Wizard Rune|Baron cave]] | ||
|- | |- | ||
! | ! F. Witch || style="background:#505050;"|[[File:Elnard_1211_FlintWitch.png]] | ||
| | | 300 || 1211 || 550 || Vacuum2 || Ch10-2: [[../The Final Quest|Pasanda area]] | ||
|- | |- | ||
! | ! Serpant || style="background:#505050;"|[[File:Elnard_1211_Serpant.png]] | ||
| | | 225 || 1211 || 550 || MPCatcher, Blizzard2, Petrify || Ch10-2: [[../The Final Quest|Pasanda area]] | ||
|- | |- | ||
! | ! Spirit || style="background:#505050;"|[[File:Elnard_1275_Spirit.png]] | ||
| | | 260 || 1255 || 570 || Thunder1, Thunder2, Agility || Ch10-3: [[../The Final Quest|Ligena area]] | ||
|- | |- | ||
! | ! K. Knight || style="background:#505050;"|[[File:Elnard_1321_K-Night.png]] | ||
| | | 370 || 1321 || 600 || Ice2, Blizzard2 || Ch10-5: [[../The Final Quest|Barluca area]] | ||
|- | |- | ||
! | ! S. Demon || style="background:#505050;"|[[File:Elnard_1321_S-Demon.png]] | ||
| | | 300 || 1321 || 600 || Defense1, Fire2 || Ch10-6: [[../The Final Quest|Western cave]] | ||
|- | |- | ||
!Undeed||style="background:#505050;"|[[File:Elnard_1321_Undeed.png]] | ! Undeed || style="background:#505050;"|[[File:Elnard_1321_Undeed.png]] | ||
| 350 || 1321 || 600 || Revive2, MPCatcher <br>''(Undead indeed)''|| | | 350 || 1321 || 600 || {{yes|Revive2, MPCatcher <br /> '''DROPS''' Life Recoveries <br> ''(Undead indeed)''}} || Ch10-6: [[../The Final Quest|Western cave]] | ||
|- | |- | ||
! | ! F. Knight || style="background:#505050;"|[[File:Elnard_1410_FlameNight.png]] | ||
| 450 || 1410 || 640 || Fire Ball, Fire2 || | | 450 || 1410 || 640 || Fire Ball, Fire2 || Ch10-7: [[../The Final Quest|Gorfun castle]] | ||
|- | |- | ||
!Serpint||style="background:#505050;"|[[File:Elnard_1476_Serpint.png]] | ! Serpint || style="background:#505050;"|[[File:Elnard_1476_Serpint.png]] | ||
| 300 || 1476 || 670 || Petrify, MPCatcher || | | 300 || 1476 || 670 || Petrify, MPCatcher || Ch10-5: [[../The Final Quest|Barluca area]] | ||
|- | |- | ||
!Crab||style="background:#505050;"|[[File:Elnard_1542_Crab.png]] | ! Crab || style="background:#505050;"|[[File:Elnard_1542_Crab.png]] | ||
| 425 || 1524 || 700 || Petrify || | | 425 || 1524 || 700 || Petrify || Ch10-5: [[../The Final Quest|Barluca area]] | ||
|- | |- | ||
! | ! D. Knight || style="background:#505050;"|[[File:Elnard_1630_DarkNight.png]] | ||
| 580 || 1630 || 740 || MPCatcher, Defense2, HPCatcher, Petrify || | | 580 || 1630 || 740 || MPCatcher, Defense2, HPCatcher, Petrify || Ch10-7: [[../The Final Quest|Gorfun castle]] | ||
|- | |- | ||
! | ! S. Brain || style="background:#505050;"|[[File:Elnard_1762_SilverBrain.png]] | ||
| 400 || 1762 || 800 || HPCatcher, MPCatcher, Vacuum1 || | | 400 || 1762 || 800 || HPCatcher, MPCatcher, Vacuum1 || Ch.7-1: [[../The Moon Rune|Brush area]] | ||
|} | |} | ||
=== Enemy spoils === | |||
Some enemies occasionally drop an item when defeated. | |||
* Many enemies in [[../The Gate of Earth|Chapter 1]] drop '''Potions-1'''; | |||
* Chimeras in [[../The Gate of Earth|Aran Castle]] drop '''M. Herbs-1'''; | |||
* Lots of enemies throughout the game drop '''Opals'''; | |||
* Tricks, R. Tricks and K. Tricks always drop one jewel, most often a '''Topaz''', but never a Opal nor a Diamond; | |||
* Brains in [[../The Water Rune|Chapter 3]] and Undeeds in [[../The Final Quest|Chapter 10]] drop '''Life Recoveries'''; | |||
* The Sword monster in [[../The Wizard Rune|Chapter 9]] can drop several different swords, including the '''"sword-sword"''', that is the only weapon that Wilme can use. | |||
=== Enemy magic === | |||
; Enemy healing magic | |||
* '''Revive:''' enemies that can revive allies should be defeated first! | |||
* '''Heal:''' enemies that can heal are a nuisance, but when an enemy heals he deals no damage to you, i.e. you gain a bit of time. | |||
* '''Support:''' some enemies can cast a defense-up spell, but you can use a Shield Destroyer (Lejes can also cast Defense-2) or a Power spell (alternatively, use a Bottle of Power); some other enemies can cast an agility spell, and the only counter-attack is to use a Bottle of Agility on your characters to compensate (Valsu can also cast an Agility spell); luckily, no enemy can cast any attack-up spell! | |||
; Enemy Debuff spells | |||
* '''Poison:''' not a big deal by itself; the real nuisance is to spend 8 MP to cast a Purify spells or 80 G to buy an Antidote; if you can, ignore the status and cure poison at at a House of Healing: it only costs 1 G per character level (e.g. if your character is Level 20, the cure costs 20 G). | |||
* '''Petrify:''' all you've got to do is buy 8 Mirrors in Zellis ([[../The Wind Rune|Chapter 2]]), and replenish your stock whenever you need so. | |||
* '''Defense 2:''' this can be countered with a Bottle of Protection (100 G) or a Defense-1 spell (5 MP), but it's faster to ignore it and keep fighting. | |||
* '''HP-Catcher:''' it is annoying in early chapters, but it can never steal more than 40 HP; a simple Potion or a Heal spell is all you need, but later on you can just ignore it. | |||
* '''MP-Catcher:''' this is annoying, very annoying! It steals up to 40 MP, and a M. Herb can only replenish 20; the only real protection against this spell is the Amulet, found in Chapter 8. | |||
** The '''Amulet''' actually protects from all these four Debuff spells (except from Poison). | |||
; Enemy Vacuum spells: | |||
* These can be countered by '''Harps''', that can be purchased in Chapter 7; also, in Chapter 8 you can find a '''Ring''' that makes one character (almost) immune to Vacuum; finally, all the spellcasting characters (Esuna, Valsu and Lejes) can learn the Protect spell, that shields one character from one Vacuum spell. | |||
; Enemy Elemental spells: | |||
* There are three elements: Fire, Ice and Thunder. | |||
** A '''Cloak of Fire''' (Chapter 5) and a '''Cloak of Ice''' (Chapter 7) reduce damage from the same elements. | |||
** The '''F. Shield''' spell (Valsu and Lejes only) fully protects one character from the next damage-dealing spell. | |||
== Bosses == | == Bosses == | ||
Sorted in the same order as they are encountered following the main plot in the game. | |||
{|{{prettytable|sortable=1|text center=1}} | {|{{prettytable|sortable=1|text center=1}} | ||
!width=102| Image !! | !width=102| Image !! Boss !! Chapter !! HP !! Exp !! GP !! Spells | ||
|- | |- | ||
|style="background:#505050;"|[[File: | |style="background:#505050;"| [[File:Elnard_b0528_Romus.png]] || <b>Romus</b> || [[../The Gate of Earth|1.1]] || 300 || 528 || 240 || ATTACK: HPCatcher | ||
|- | |- | ||
|style="background:#505050;"| [[File: | |style="background:#505050;"|[[File:Elnard_b0264_Pison.png]] || <b>Pison</b> || [[../The Gate of Earth|1.2]] || 250 || 264 || 120 || - | ||
|- | |- | ||
|style="background:#505050;"| [[File:Elnard_b2203_RedPison.png]] || <b>Red Pison</b> || 275 || 2203 || 1000 || SUPPORT: Heal2 | |style="background:#505050;"| [[File:Elnard_b2203_RedPison.png]] || <b>Red Pison</b> || [[../The Wind Rune|2]] || 275 || 2203 || 1000 || SUPPORT: Heal2 | ||
|- | |- | ||
|style="background:#505050;"| [[File:Elnard_b1000_Lemele'sWarrior.PNG]] || one of <br> Lemele's Warriors || ? || ? || ? || | |style="background:#505050;"| [[File:Elnard_b1000_Lemele'sWarrior.PNG]] || one of <br> Lemele's Warriors || [[../The Star Rune|4]] || ? || ? || ? || Gained Exp. = 63 times your level <br /> Gained Gold = 20 times your level | ||
|- | |- | ||
|style="background:#505050;"| [[File:Elnard_b2203_Dragon.png]] || <b>Dragon</b> || 1050 || 2203 || 1000 || SUPPORT: Defense1 <br> DEBUFF: Petrify, Defense2 <br> ATTACK: Fire Ball | |style="background:#505050;"| [[File:Elnard_b2203_Dragon.png]] || <b>Dragon</b> || [[../The Sky Rune|6.1]] || 1050 || 2203 || 1000 || SUPPORT: Defense1 <br> DEBUFF: Petrify, Defense2 <br> ATTACK: Fire Ball | ||
|- | |- | ||
|style="background:#505050;"| [[File: | |style="background:#505050;"| [[File:Elnard_b2345_Lemele'sWarrior2.PNG]] || another one of <br> Lemele's Warriors || [[../The Sky Rune|6.2]] || ? || ? || ? || Gained Exp. = 63 times your level <br /> Gained Gold = 20 times your level | ||
|- | |- | ||
|style="background:#505050;"| [[File: | |style="background:#505050;"| [[File:Elnard_b3084_Serpent.png]] || <b>Serpent</b> || [[../The Moon Rune|7]] || 2000 || 3084 || 1400 || DEBUFF: Petrify, Defense2, MPCatcher <br> ATTACK: HPCatcher, Ice1, Blizzard | ||
|- | |- | ||
|style="background:#505050;"| [[File:Elnard_b2423_Doros.png]] || <b>Doros</b> || 1700 || 2423 || 1100 || DEBUFF: MPCatcher <br> ATTACK: Fire2, Fire Ball, Vacuum1 | |style="background:#505050;"| [[File:Elnard_b2423_Doros.png]] || <b>Doros</b> || [[../The Light Rune|8]] || 1700 || 2423 || 1100 || DEBUFF: MPCatcher <br> ATTACK: Fire2, Fire Ball, Vacuum1 | ||
|- | |- | ||
|style="background:#505050;"| [[File: | |style="background:#505050;"| [[File:Elnard_b2203_MetalPison.png]] || <b>Metal Pison</b> || [[../The Wizard Rune|9.1]] || 2400 || 2203 || 1000 || SUPPORT: Defense1 <br> DEBUFF: Petrify, Defense2, MPCatcher <br> ATTACK: Vacuum1 | ||
|- | |- | ||
|style="background: | |style="background:#505050;"| [[File:Elnard_b4406_Monmo.png]] || <b>Monmo</b> || [[../The Wizard Rune|9.2]] || 7500 || 4406 || 2000 || SUPPORT: Heal2 <br> DEBUFF: MPCatcher, Petrify <br> ATTACK: HPCatcher | ||
|- | |- | ||
|style="background:#505050;"| [[File: | |style="background:#505050;"| [[File:Elnard_b4846_Gariso.png]] || <b>Gariso</b> || [[../The Wizard Rune|9.3]] || 3000 || 4846 || 2200 || ATTACK: Fire Ball, Ice2, Vacuum2 | ||
|- | |- | ||
|style="background: | |style="background:black"| [[File:Elnard_b3475_Foma.png]] || <b>Foma</b> || [[../The Final Quest|10.1]] || 1700 || 3745 || 1700 || DEBUFF: MPCatcher <br> ATTACK: Thunder1, Thunder2 | ||
|- | |- | ||
|style="background:#505050;"| [[File:Elnard_b6609_Goron.png]] || <b>Goron</b> || 2500 || 6609 || 3000 || ATTACK: Blizzard2 | |style="background:#505050;"| [[File:Elnard_b6609_Goron.png]] || <b>Goron</b> || [[../The Final Quest|10.2]] || 2500 || 6609 || 3000 || ATTACK: Blizzard2 | ||
|- | |- | ||
|style="background:#505050;"| [[File:Elnard_b8812_Griffan.png]] || <b>Griffan</b> || 3500 || 8812 || 4000 || DEBUFF: Petrify <br> ATTACK: Vacuum2, Blizzard2 | |style="background:#505050;"| [[File:Elnard_b8812_Griffan.png]] || <b>Griffan</b> || [[../The Final Quest|10.3]] || 3500 || 8812 || 4000 || DEBUFF: Petrify <br> ATTACK: Vacuum2, Blizzard2 | ||
|- | |- | ||
|style="background:black"| [[File:Elnard_b9999_Gorsia.PNG]] || <b>Gorsia</b> || 4000 || 0 || 0 || ATTACK: Fire2, Ice2, Blizzard2, Vacuum1, Thunder1 | |style="background:black"| [[File:Elnard_b9999_Gorsia.PNG]] || <b>Gorsia</b> || [[../The Final Quest|10.4]] || 4000 || 0 || 0 || ATTACK: Fire2, Ice2, Blizzard2, Vacuum1, Thunder1 | ||
|} | |} | ||
== Palette swaps of monsters == | |||
{{col|2|begin}} | |||
{|{{prettytable|sortable=1|text center=1|notwide=1}} | |||
! Monster names !! Sprites | |||
|- | |||
! Statue <br /> Plater <br /> Falock || style="background:#505050;"|[[File:Elnard_0030_Statue.PNG]] [[File:Elnard_0440_Plater.png]] [[File:Elnard_1057_Falock.png]] | |||
|- | |||
! Demon <br /> B. Demon <br /> R. Demon <br /> S. Demon || style="background:#505050;"|[[File:Elnard_0033_Demon.png]] [[File:Elnard_0165_BlueDemon.png]] [[File:Elnard_0462_RedDemon.png]] [[File:Elnard_1321_S-Demon.png]] | |||
|- | |||
! Chimera <br /> Chimere || style="background:#505050;"|[[File:Elnard_0035_Chimera.png]] [[File:Elnard_0660_Chimere.png]] | |||
|- | |||
! Undead <br /> Unded <br /> Undeed || style="background:#505050;"|[[File:Elnard_0088_Undead.png]] [[File:Elnard_1101_Unded.png]] [[File:Elnard_1321_Undeed.png]] | |||
|- | |||
! Despair <br /> Doom <br /> Reaper || style="background:#505050;"|[[File:Elnard_0220_Despair.png]] [[File:Elnard_0771_Doom.png]] [[File:Elnard_0881_Reaper.png]] | |||
|- | |||
! Trick <br /> R. Trick <br /> K. Trick || style="background:#505050;"|[[File:Elnard_0220_Trick.png]] [[File:Elnard_0440_RedTrick.png]] [[File:Elnard_0881_KingTrick.png]] | |||
|- | |||
! Spidek <br/> P. Moon || style="background:#505050;"|[[File:Elnard_0330_Spidek.png]] [[File:Elnard_0462_P-Moon.png]] | |||
|- | |||
! S. Witch <br /> F. Witch || style="background:#505050;"|[[File:Elnard_0330_StoneWitch.png]] [[File:Elnard_1211_FlintWitch.png]] | |||
|- | |||
! Brain <br /> N. Brain <br /> S. Brain || style="background:#505050;"|[[File:Elnard_0484_Brain.png]] [[File:Elnard_0991_N-Brain.png]] [[File:Elnard_1762_SilverBrain.png]] | |||
|- | |||
! Griffin <br /> Serpant <br /> Serpint || style="background:#505050;"|[[File:Elnard_0484_Griffin.png]] [[File:Elnard_1211_Serpant.png]] [[File:Elnard_1476_Serpint.png]] | |||
|- | |||
! K. Moon <br /> Flame <br /> F. Knight || style="background:#505050;"|[[File:Elnard_0660_K-Moon.png]] [[File:Elnard_0991_Flame.png]] [[File:Elnard_1410_FlameNight.png]] | |||
|- | |||
! V. Knight <br /> B. Knight <br /> K. Knight <br /> D. Knight || style="background:#505050;"|[[File:Elnard_0705_V-Night.png]] [[File:Elnard_0771_BlackKnight.png]] [[File:Elnard_1321_K-Night.png]] [[File:Elnard_1630_DarkNight.png]] | |||
|- | |||
! Dergun <br /> Dogun <br /> Dragon <br /> Monmo || style="background:#505050;"|[[File:Elnard_1101_Dergun.png]] [[File:Elnard_1101_Dogun.png]] [[File:Elnard_b2203_Dragon.png]] [[File:Elnard_b4406_Monmo.png]] | |||
|- | |||
! Romus <br /> Goron || style="background:#505050;"| [[File:Elnard_b0528_Romus.png]] [[File:Elnard_b6609_Goron.png]] | |||
|- | |||
! Pison <br /> R. Pison <br /> M. Pison || style="background:#505050;"|[[File:Elnard_b0264_Pison.png]] [[File:Elnard_b2203_RedPison.png]] [[File:Elnard_b2203_MetalPison.png]] | |||
|- | |||
! Serpent <br /> Griffan || style="background:#505050;"| [[File:Elnard_b3084_Serpent.png]] [[File:Elnard_b8812_Griffan.png]] | |||
|} | |||
{{col|2}} | |||
{|{{prettytable|sortable=1|text center=1|notwide=1}} | |||
! Monster names !! Sprites | |||
|- | |||
! Hermit || style="background:#505050;"|[[File:Elnard_0026_Hermit.png]] | |||
|- | |||
! Wyvern || style="background:#505050;"|[[File:Elnard_0033_Wyvern.png]] | |||
|- | |||
! Android || style="background:#505050;"|[[File:Elnard_0088_Android.png]] | |||
|- | |||
! Manrot || style="background:#505050;"|[[File:Elnard_0132_Manrot.png]] | |||
|- | |||
! Orc || style="background:#505050;"|[[File:Elnard_0136_Orc.png]] | |||
|- | |||
! Coccoon || style="background:#505050;"|[[File:Elnard_0176_Coccoon.png]] | |||
|- | |||
! Manta || style="background:#505050;"|[[File:Elnard_0242_Manta.png]] | |||
|- | |||
! Titan || style="background:#505050;"|[[File:Elnard_0264_Titan.png]] | |||
|- | |||
! Sage || style="background:#505050;"|[[File:Elnard_0330_Sage.png]] | |||
|- | |||
! Defeat || style="background:#505050;"|[[File:Elnard_0440_Defeat.png]] | |||
|- | |||
! Mutant || style="background:#505050;"|[[File:Elnard_0506_Mutant.png]] | |||
|- | |||
! Soidiek || style="background:#505050;"|[[File:Elnard_0550_Soldiek.png]] | |||
|- | |||
! Wyrock || style="background:#505050;"|[[File:Elnard_0550_Wyrock.png]] | |||
|- | |||
! Ghoul || style="background:#505050;"|[[File:Elnard_0881_Ghoul.png]] | |||
|- | |||
! Sword || style="background:#505050;"|[[File:Elnard_1101_Sword.png]] | |||
|- | |||
! Spirit || style="background:#505050;"|[[File:Elnard_1275_Spirit.png]] | |||
|- | |||
! Crab || style="background:#505050;"|[[File:Elnard_1542_Crab.png]] | |||
|- | |||
! Doros || style="background:#505050;"| [[File:Elnard_b2423_Doros.png]] | |||
|- | |||
! Gariso || style="background:#505050;"| [[File:Elnard_b4846_Gariso.png]] | |||
|- | |||
! Foma || style="background:black"| [[File:Elnard_b3475_Foma.png]] | |||
|- | |||
! Gorsia || style="background:black"| [[File:Elnard_b9999_Gorsia.PNG]] | |||
|} | |||
{{col|2|end}} | |||
{{Footer Nav|game=The 7th Saga|prevpage=Walkthrough|nextpage=}} | {{Footer Nav|game=The 7th Saga|prevpage=Walkthrough|nextpage=}} | ||
Latest revision as of 11:40, 27 August 2023
Monsters[edit]
Monsters are sorted here by experience points. This order is close to the order they will be encountered in the video game. Only the area of the first encounter is listed, because as your characters proceeds in the game and gain experience levels, the same monsters become easier to beat.
Bosses are listed in a separate table at the bottom of the page.
The abbreviations in the names are not explained. The following are generally assumed, but no confirmation exists:
- B. = Blue (demon) or Black (knight)
- D. = Death (knight)
- F. = Flame (knight) or Flint (witch)
- K. = Killer (knight, trick and moon)
- N. = Neo (brain)
- P. = Poison (moon)
- R. = Red (demon and trick)
- S. = Stone (witch), Silver (demon and brain)
- V. = Violet (knight)
| Monster | Image | HP | Exp | GP | Spells | First encountered |
|---|---|---|---|---|---|---|
| Hermit | 18 | 26 | 12 | - | Ch.1-1: Lemele area | |
| Statue | 50 | 30 | 14 | - | Ch.1-3: Aran Castle | |
| Demon | 25 | 33 | 15 | Defense2 | Ch.1-2: Rablesk area | |
| Wyvern | 
|
22 | 33 | 15 | - | Ch.1-1: Lemele area |
| Chimera | 35 | 35 | 16 | MPCatcher | Ch.1-3: Aran castle | |
| Android | 60 | 88 | 40 | HPCatcher | Ch.1-5: after the cave | |
| Undead | 
|
70 | 88 | 40 | Revive2 | Ch.1-4: Cave of Earth |
| Manrot | 75 | 132 | 60 | Ice1, Petrify | Ch.2-1: Bonro area | |
| Orc | 70 | 136 | 62 | - | Ch.2-2: cave to Melenam | |
| B. Demon | 80 | 165 | 75 | Fire1, Heal1, Defense1 | Ch.2-2: cave to Melenam | |
| Cocoon | 80 | 176 | 80 | HPCatcher, Defense2, Laser2, MPCatcher, Poison Attack, Heal2 |
Ch.4-1: Patrof area | |
| Despair | 
|
200 | 220 | 100 | Petrify, Fire Bird, Heal1 | Ch.2-1: Bonro area |
| Trick | 80 | 220 | 100 | Poison Attack, Petrify | Ch.1-4: Cave of Earth | |
| Manta | 
|
80 | 242 | 100 | Agility | Ch.3-2: Pell area |
| Titan | 
|
210 | 264 | 120 | - | Ch.4-1: Patrof area |
| Sage | 150 | 330 | 150 | Revive2, MPCatcher, Defense2, Fire Bird | Ch.5-1: cave of Milto | |
| Spidek | 
|
115 | 330 | 110 | Defense2, Poison Attack (a centipede, not a spider) |
Ch.4-2: Patrof dungeon |
| S. Witch | 160 | 330 | 150 | MPCatcher | Ch.4-1: Patrof area | |
| Defeat | 
|
175 | 440 | 220 | Fire1, Poison Attack, Petrify, Defense2 | Ch.5-2: Dowaine area |
| Plater | 200 | 440 | 200 | - | Ch.6-2: cave to Beore | |
| R. Trick | 175 | 440 | 200 | Fire Bird, Poison Attack, Vacuum1, HPCatcher | Ch.4-2: Patrof dungeon | |
| P. Moon | 
|
400 | 462 | 210 | Petrify, MPCatcher | Ch.9-2: cave of Kapel |
| R. Demon | 120 | 462 | 210 | Defense1, Fire2, Fire Bird, Blizzard2 | Ch.5-2: Dowaine area | |
| Brain | 120 | 484 | 220 | Laser2, Poison Attack DROPS Life Recoveries |
Ch.3-1: Eygus area | |
| Griffin | 
|
200 | 484 | 220 | Petrify, Poison Attack (an echidna, not a griffin) |
Ch.8: Bilthem castle |
| Mutant | 250 | 506 | 230 | Heal2, Petrify, Revive2, Ice1 | Ch.6-1: Belaine area | |
| Soidiek | 250 | 550 | 250 | - | Ch.7-1: Padal area | |
| Wyrock | 200 | 550 | 250 | Blizzard, Ice2, Thunder2 | Ch.7-3: Baran castle | |
| Chimere | 200 | 660 | 330 | MPCatcher, Defense2, HPCatcher | Ch.9-5: Gorfun castle | |
| K. Moon | 440 | 660 | 300 | Fire Ball, Ice2 | Ch.9-4: Baron cave | |
| V. Knight | 320 | 705 | 320 | Fire Ball | Ch.9-5: Gorfun castle | |
| B. Knight | 175 | 771 | 350 | Vacuum2, Defense2, Ice2 | Ch.7-1: Padal area | |
| Doom | 
|
325 | 771 | 350 | Fire Ball, MPCatcher, Fire2 | Ch.9-1: Valenca area |
| Ghoul | 
|
200 | 881 | 400 | Heal2 | Ch10-1: Pharano area |
| K. Trick | 275 | 881 | 400 | Blizzard2, Ice2, HPCatcher, Poison Attack | Ch.6-2: Belaine castle | |
| Reaper | 
|
650 | 881 | 400 | MPCatcher, Vacuum1, Fire Ball | Ch10-4: Melenam area |
| Flame | 400 | 991 | 450 | Fire2 | Ch.7-2: Polasu area | |
| N. Brain | 400 | 991 | 450 | Revive2, HPCatcher | Ch.9-3: Bugask area | |
| Falock | 600 | 1057 | 480 | - | Ch10-7: Gorfun castle | |
| Dergun | 
|
300 | 1101 | 500 | - | Ch10-1: Pharano area |
| Dogun | 
|
350 | 1101 | 500 | - | Ch10-4: Melenam area |
| Sword | 9 | 1101 | 500 | Vacuum1, Defense2, Petrify, MPCatcher DROPS Wilme's Sword |
Ch.9-1: Valenca area | |
| Unded | 
|
550 | 1101 | 500 | Vacuum1, Revive2 | Ch.9-4: Baron cave |
| F. Witch | 300 | 1211 | 550 | Vacuum2 | Ch10-2: Pasanda area | |
| Serpant | 
|
225 | 1211 | 550 | MPCatcher, Blizzard2, Petrify | Ch10-2: Pasanda area |
| Spirit | 
|
260 | 1255 | 570 | Thunder1, Thunder2, Agility | Ch10-3: Ligena area |
| K. Knight | 370 | 1321 | 600 | Ice2, Blizzard2 | Ch10-5: Barluca area | |
| S. Demon | 300 | 1321 | 600 | Defense1, Fire2 | Ch10-6: Western cave | |
| Undeed | 
|
350 | 1321 | 600 | Revive2, MPCatcher DROPS Life Recoveries (Undead indeed) |
Ch10-6: Western cave |
| F. Knight | 450 | 1410 | 640 | Fire Ball, Fire2 | Ch10-7: Gorfun castle | |
| Serpint | 
|
300 | 1476 | 670 | Petrify, MPCatcher | Ch10-5: Barluca area |
| Crab | 
|
425 | 1524 | 700 | Petrify | Ch10-5: Barluca area |
| D. Knight | 580 | 1630 | 740 | MPCatcher, Defense2, HPCatcher, Petrify | Ch10-7: Gorfun castle | |
| S. Brain | 400 | 1762 | 800 | HPCatcher, MPCatcher, Vacuum1 | Ch.7-1: Brush area |
Enemy spoils[edit]
Some enemies occasionally drop an item when defeated.
- Many enemies in Chapter 1 drop Potions-1;
- Chimeras in Aran Castle drop M. Herbs-1;
- Lots of enemies throughout the game drop Opals;
- Tricks, R. Tricks and K. Tricks always drop one jewel, most often a Topaz, but never a Opal nor a Diamond;
- Brains in Chapter 3 and Undeeds in Chapter 10 drop Life Recoveries;
- The Sword monster in Chapter 9 can drop several different swords, including the "sword-sword", that is the only weapon that Wilme can use.
Enemy magic[edit]
- Enemy healing magic
- Revive: enemies that can revive allies should be defeated first!
- Heal: enemies that can heal are a nuisance, but when an enemy heals he deals no damage to you, i.e. you gain a bit of time.
- Support: some enemies can cast a defense-up spell, but you can use a Shield Destroyer (Lejes can also cast Defense-2) or a Power spell (alternatively, use a Bottle of Power); some other enemies can cast an agility spell, and the only counter-attack is to use a Bottle of Agility on your characters to compensate (Valsu can also cast an Agility spell); luckily, no enemy can cast any attack-up spell!
- Enemy Debuff spells
- Poison: not a big deal by itself; the real nuisance is to spend 8 MP to cast a Purify spells or 80 G to buy an Antidote; if you can, ignore the status and cure poison at at a House of Healing: it only costs 1 G per character level (e.g. if your character is Level 20, the cure costs 20 G).
- Petrify: all you've got to do is buy 8 Mirrors in Zellis (Chapter 2), and replenish your stock whenever you need so.
- Defense 2: this can be countered with a Bottle of Protection (100 G) or a Defense-1 spell (5 MP), but it's faster to ignore it and keep fighting.
- HP-Catcher: it is annoying in early chapters, but it can never steal more than 40 HP; a simple Potion or a Heal spell is all you need, but later on you can just ignore it.
- MP-Catcher: this is annoying, very annoying! It steals up to 40 MP, and a M. Herb can only replenish 20; the only real protection against this spell is the Amulet, found in Chapter 8.
- The Amulet actually protects from all these four Debuff spells (except from Poison).
- Enemy Vacuum spells
- These can be countered by Harps, that can be purchased in Chapter 7; also, in Chapter 8 you can find a Ring that makes one character (almost) immune to Vacuum; finally, all the spellcasting characters (Esuna, Valsu and Lejes) can learn the Protect spell, that shields one character from one Vacuum spell.
- Enemy Elemental spells
- There are three elements: Fire, Ice and Thunder.
- A Cloak of Fire (Chapter 5) and a Cloak of Ice (Chapter 7) reduce damage from the same elements.
- The F. Shield spell (Valsu and Lejes only) fully protects one character from the next damage-dealing spell.
Bosses[edit]
Sorted in the same order as they are encountered following the main plot in the game.
| Image | Boss | Chapter | HP | Exp | GP | Spells |
|---|---|---|---|---|---|---|
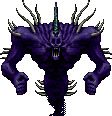 |
Romus | 1.1 | 300 | 528 | 240 | ATTACK: HPCatcher |
 |
Pison | 1.2 | 250 | 264 | 120 | - |
 |
Red Pison | 2 | 275 | 2203 | 1000 | SUPPORT: Heal2 |
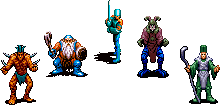 |
one of Lemele's Warriors |
4 | ? | ? | ? | Gained Exp. = 63 times your level Gained Gold = 20 times your level |
 |
Dragon | 6.1 | 1050 | 2203 | 1000 | SUPPORT: Defense1 DEBUFF: Petrify, Defense2 ATTACK: Fire Ball |
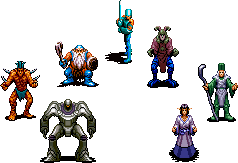 |
another one of Lemele's Warriors |
6.2 | ? | ? | ? | Gained Exp. = 63 times your level Gained Gold = 20 times your level |
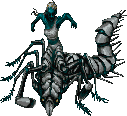 |
Serpent | 7 | 2000 | 3084 | 1400 | DEBUFF: Petrify, Defense2, MPCatcher ATTACK: HPCatcher, Ice1, Blizzard |
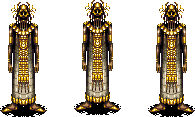 |
Doros | 8 | 1700 | 2423 | 1100 | DEBUFF: MPCatcher ATTACK: Fire2, Fire Ball, Vacuum1 |
 |
Metal Pison | 9.1 | 2400 | 2203 | 1000 | SUPPORT: Defense1 DEBUFF: Petrify, Defense2, MPCatcher ATTACK: Vacuum1 |
 |
Monmo | 9.2 | 7500 | 4406 | 2000 | SUPPORT: Heal2 DEBUFF: MPCatcher, Petrify ATTACK: HPCatcher |
 |
Gariso | 9.3 | 3000 | 4846 | 2200 | ATTACK: Fire Ball, Ice2, Vacuum2 |
 |
Foma | 10.1 | 1700 | 3745 | 1700 | DEBUFF: MPCatcher ATTACK: Thunder1, Thunder2 |
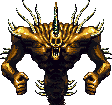 |
Goron | 10.2 | 2500 | 6609 | 3000 | ATTACK: Blizzard2 |
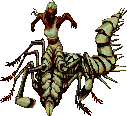 |
Griffan | 10.3 | 3500 | 8812 | 4000 | DEBUFF: Petrify ATTACK: Vacuum2, Blizzard2 |
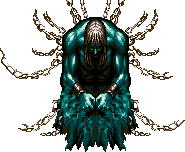 |
Gorsia | 10.4 | 4000 | 0 | 0 | ATTACK: Fire2, Ice2, Blizzard2, Vacuum1, Thunder1 |
Palette swaps of monsters[edit]