m (→Kakariko Village and Sahasrahla: swapping alignment to maintain proportional flow) |
Shadowsithe (talk | contribs) (doesn't really belong here. Section in between to be moved to end of "Eastern Palace" page) |
||
| Line 58: | Line 58: | ||
Talk to the old man and he will task you with getting the first pendant, in the East(ern) Palace, just a bit to the (you guessed it) east. Now exit the house, go up the stairs to the north and make your way east while fighting (or avoiding) the Armos Statues that come to life and the octorocks, until you come to the palace entrance. | Talk to the old man and he will task you with getting the first pendant, in the East(ern) Palace, just a bit to the (you guessed it) east. Now exit the house, go up the stairs to the north and make your way east while fighting (or avoiding) the Armos Statues that come to life and the octorocks, until you come to the palace entrance. | ||
Revision as of 20:22, 17 September 2006
Opening
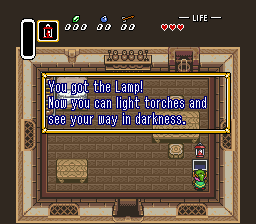
The game opens with a telepathic message from the imprisoned Princess Zelda. Link's uncle hears it and sets off to rescue her. However Link also heard it; naturally he leaves the house to go save her. To leave the bed press any direction. Go open the chest to get the Lamp, an item that will be very useful later on. Head outside.
You can't really go anywhere at the moment as the guards bar your way. Eventually Princess Zelda will tell you there's an entrance hidden in the garden. Find it.
Once under the castle you'll come across your Uncle, fatally wounded. With his dying breath he gives you his sword and shield and teaches you how to perform a 360° slash; for reference, simply hold down the attack button (B on SNES, R on GBA) until the magic sparks reach the tip of your sword. Head down and to the right for a chest and some magic meter refills.
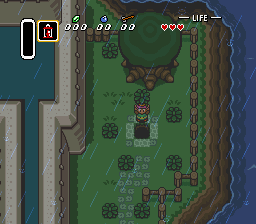
The guards in this room won't attack you but you do take damage if they touch you. The chest contains a Lamp; if you've already got one you get a Blue Rupee (worth 5). If you wish you can use the now-powered lamp to light the room, but this does nothing. In other rooms however lighting one of those floor lamps will almost always reveal a secret or open a door.
When you're ready head up the stairs to leave. Outside, slash the bushes out of your way. As before the gold-shield guards don't attack but there is a new guard type who will home in on you if he spots you. Make your way to the double doors exactly west of your starting position.
Hyrule Castle
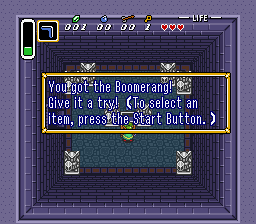
First off, save the Princess, and pick up some goodies along the way. From the entrance room head east and then north. Take either path, both lead to the dungeon. Once you reach the door head west and down the northern stairs. Kill the guard for a key, and open the chest for the Map. You can now view the map at any time (X on SNES, L on GBA). Unlock the door and head south.
In this new area you can knock the enemies off the edge with a little effort, but make sure they don't do the same to you! Follow the path until you reach the room with the horizontal overpass. Go to the far left here and up through the door. Kill the guard and the doors will unlock. Head right. Kill this guard for the key and open the chest for the Boomerang. This either stuns enemies (such as the soldiers) for a short time, or else injures or even kills them. Head back to the left and then up through the door.
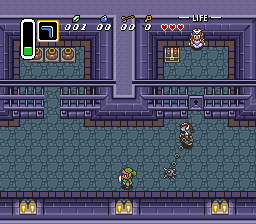
Go down the stairs and down the other stairs, and prepare for battle! This miniboss wields a morningstar-like weapon that he can swing quite a distance. The boomerang will stun him, but unlike other enemies he shakes himself straight away and therefore recovers almost instantly. The pots in the left-hand cell all contain hearts, so refill there if you need to. However he can still attack you through the bars so you aren't safe there. After eight hits he goes down. Grab the Big Key and use it to open Princess Zelda's cell. If you haven't got one already, there's a Lamp in the chest. Be sure to get it if you didn't before, as you can't progress without it.
Now with the princess in tow, return to the central room of the castle. From the southern entrance go directly up and don't stop until you come to the ornamental shelf. Zelda explains you can push it. Go in.
Sewers
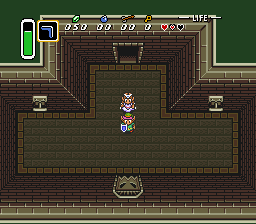
Once inside the sewers it's very dark. Watch out for rats in this room. They typically run in a straight line and turn at right angles meaning they're mostly at the edge of the room, but they do run into pots or across the central areas. Make your way up and to the right and through the door to the next area. This one has snakes. They move much the same, but if they see you they'll dash towards you at faster than usual speed. The door is directly to the left of the one you came through.
In the next room are more snakes, as well as a chest with a small key. The moment you come to a fork in the room's layout head right to find the chest. The door it opens is directly north of where you entered from.
In the next area all the rats are on a northern stretch of flooring. They can't swim so won't bother you as much as in the previous rooms. A solitary rat runs madly around on a tiny island in the middle.
The next room is much the same. The moment you enter head up and then left. You'll only encounter a Keese this way, the other enemies are all on other floor areas. You can smash the pots scattered around the room for hearts if you wish. Anyway head north.
In this room a rat to your left has swallowed a key. Get it and then head to the top-right corner for the door, watching out for the Keese and the two other rats.
In the next room you can see again. Take note of the cracked walls on the left-hand side, once you have bombs you can knock them down. For now just kill the rats and head up and through the door.
In the next room just head down, killing or avoiding rats on your way. But now you're presented with a choice. The left-hand lever releases seven snakes, while the right-hand one opens the door.
Now you get a short cutscene where more of the story is revealed. Once they finish yapping open the chest for a Heart Container. Sweet! Anyway, head off west to explore Kakariko Village.
Kakariko Village and Sahasrahla
Head to the X and talk to the old lady in the house there. Unfortunately it turns out the wise man has disappeared, so now you have to find out where. To do this you'll need to talk to people in town.
During your time in Kakariko watch out for the women patrolling outside the north-west and north-eastern houses; they'll cry out if they see you and a soldier will attack.
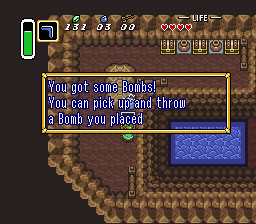
But first, goodies! The house to the left of the wise man's has chests full of red rupees just begging to be taken. But what about that cracked wall? Well, first you need some bombs. Fall down the well in the north-western corner of the village for a chest full of bombs. Blow down the wall directly above it for your very own Piece of Heart! Now head back to the thieves' hideout and bomb that wall for a second Piece.
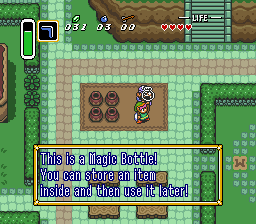
If you have at least a hundred Rupees, head to the marketplace and buy a Magic Bottle. It isn't a necessary item but it's very useful.
Head to the bottom of the village and look for some chickens, called cuccos in the Zelda universe. Talk to the boy there and you'll find out where the old man's gone.
Now the spot where the old man is hiding is marked on the map. To get there, exit town trough the south entrance, you will come to a screen with some other houses (a library, a chest game and a house of two twins). Exit through the southeast then go south. From here go east, then north to where your house is located. Keep going east until you come to a bridge to the north. Cross the bridge and go east from there, following the road. In the next screen go north and you will enter the palace area. Now just keep going north until you find a small, fat T shaped building, Sahasrahla resides here.
Talk to the old man and he will task you with getting the first pendant, in the East(ern) Palace, just a bit to the (you guessed it) east. Now exit the house, go up the stairs to the north and make your way east while fighting (or avoiding) the Armos Statues that come to life and the octorocks, until you come to the palace entrance.