[[Image:WL4 level icon Palm Tree Paradise.png|left]]
[[File:WL4 level icon Palm Tree Paradise.png|left]]
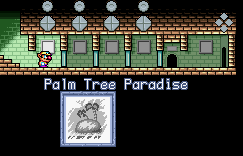
[[Image:WL4-PalmTree.png|right|thumb|300px|The level in [[Wario Land 4/Emerald Passage|Emerald Passage]].]]
[[File:WL4 Map Palm Tree Paradise.png|thumb|right|Click for a larger map.]]
Palm Tree Paradise is set on a beach-like Terrain. Since it is the first level in the [[Wario Land 4/Emerald Passage|Emerald Passage]], It is very easy.
*Stage: Palm Tree Paradise
*Location: Emerald Passage, Stage 1
*Time: (Normal/Hard/Super Hard) 1:30/0:45/3:00
Palm Tree Paradise is set on a beach-like Terrain. Since it is the first level in the Emerald Passage, It is very easy.
{{-|left}}
{{-|left}}
==Normal and Hard Version==
==Normal and Hard Version==
When you start the level, just head to the right. You will appear in an area with a few block and two Spear Enemies. Past them are two Purple Enemies and more Spear Enemies. Ignore them and the little dotted lines in the air. Grab the first treasure chest and head on.
[[File:WL4-PalmTree.png|right|thumb|300px|The level in Emerald Passage.]]
*Room 1: You start at a simple room with nothing special. Head to the right.
The next area has some more blocks and enemies. Past the blue block is a platform next to a wall. The wall is actually fake and you can go inside it. Inside is the Second Treasure Chest. Keep going until you reach a bunch of blocks in a pile. Break them and you will reveal a secret door. Go inside and you will be in a cave. Head to the left up the stairs and dodge the Red Spikey Enemies or kill them by slamming the ground, flipping them over, then slamming on their underside. At the top, you will find the Third Treasure Chest, a purple pipe, and some gems floating in the air. Grab the chest, then head up the purple bonus pipe.
*Room 2: A room with blocks, a Heart, 200 Gems and a Bouncer. Clear them and proceed.
*Room 3: Two Hearts, 300 Gems, first Stone Chest, three Red Bouncers and one Spearman. You can collect the hearts and some Gems on your return, but for higher score, just use the Bouncers to make a Goomba Jump to collect them, but do not kill the Bouncers.
Inside will be an old guy wandering around. Grab him and chuck him at the purple switch, making the other blocks appear. Grab the big gem, then go down the pipe. Jump down the cliff and collect the floating gems while you go. Once at the bottom, go out the door. Head to the left and you will see some gems floating in the air. They are pointing at another fake wall, but ignore them for the moment. Head inside the cave. Inside will be a bunch of enemies. dodge them and head up the first platform. Head right into the wall and you will see it's another fake. Grab the CD Chest (If you don't know what the CD Does, head to the [[Wario Land 4/Sound Room|Sound Room]]) then head up the platforms. At the top of the platforms, head left through another fake wall to find the Fourth and Final Treasure Chest.
*Room 4: Eliminate the Bouncers and Spearman, clear the blocks (one of which is hard), collect the second Stone Chest, and stop at door A. From here, jump on the platform on the left, then jump into the fake wall to discover a hidden passage with a Big Diamond. To the right of door A is 140 Gems. Now enter door A to collect goodies.
*Room A: Climb the ladders to move up. You will encounter a new enemy: Pink Spiny. Obviously you cannot stomp him directly, but stomping the ground will make him flip upside-down, then you can stomp to finish him. Collect the third Stone Chest, 270 Gems and a Heart, then enter the purple pipe to access Bonus Room B. When everything is done, leave from door A and proceed to the right.
Head right and you should see a bonus pipe in the air. Make the monkey with the apples throw one to you, and you should become really fat. Jump on the space on the ground with uneven grass and you will fall through. Once in the underground cave, jump into the water right next to the left wall. If you are still fat, you will break a brown block at the bottom of the underground lake. Grab the big gem underneath the underground pool and swim to the surface. Make sure you dodge the fish on the way up. hit the green block and go up the pipe. Head back to the Bonus pipe and you will see that two green blocks have appeared. Go up the pipe.
*Bonus Room B: Just toss the old man at the purple switch and reach the Big Diamond above.
*Room 5: 230 Gems, a Bouncer and fourth Stone Chest. At the first platform right above the Bouncer, walk to the right to discover a hidden room with CD Chest. A hidden passage with a Big Diamond is on the left of Stone Chest. Move to the right.
*Room 6: The new enemy Apple Ape does not hurt you, instead, he throws apples which can trigger Fat Wario. Let him feed you, and stomp through the obvious hole.
*Room 7: Simply walk into the water and do another fall, and you can find a hidden area with a Big Diamond. Collect the 330 Gems in the water, then hit the green switch in order to return to Room 6.
*Room 6 (revisited): See the Key Ghost? Hit the red switch to reveal red blocks in order to reach him. There are also 150 Gems revealed by the red switch. Before moving on, take a visit on the Bonus Room C on the left, above the green blocks.
*Bonus Room C: Climb the ladder and platforms to find the old man. Throw him once to the right, then fall down, catch him, and throw him to the left to open the small room with a Big Diamond. Make a crouch jump to grab that. If for whatever reason the old man falls in the water, just leave the Bonus Room and enter again.
*Room 8: Defeat the Spearman, grab the Heart Chest and 120 Gems, then activate the Frog Switch. Hurry up!
*Way back: The rest thing is to run all the way back to Room 1 and leave. You may want to collect the missing goods as well.
In the bonus room, climb the ladder and get to the top with the old man. Chuck him at the two brown blocks and he will start bouncing off the walls. Drop down quickly to the platform near the pipe and catch the old man before he gets in the water. If he goes in the water, you must go down the pipe, go back up the pipe and try again. Once you catch him, chuck him at the two brown blocks across the water. Then, climb up the ladder and crawl off the ledge into the crack in the wall you just made. Grab the big gem and go down the pipe. Once outside, head to the right and hit the orange block in the air and head on. Get past all the enemies, grab the key, and jump on the Frog-Switch. You will have 45 seconds to get back to the warp at the beginning of the level. Just run as fast as you can to the entrance, grabbing anything you missed on the way.
Highest Score: 11640
==Very Hard Version==
==Super Hard Version==
Very Hard is pretty similar to the other version, except as soon as you enter the level, you will land on the Frog-Switch. You will have 3 Minutes to scurry through the level and collect things. Note that the Key is at the very right end of the level.
Nothing can be more deadly than landing on the Frog Switch upon entering the level. You have 3 minutes to scurry through the level and collect goods. Note that the Key Ghost is at the very right end of the level.
{{Footer Nav|game=Wario Land 4|prevpage=Emerald Passage|nextpage=Wildflower Fields}}
{{Footer Nav|game=Wario Land 4|prevpage=Spoiled Rotten|nextpage=Wildflower Fields}}
Palm Tree Paradise is set on a beach-like Terrain. Since it is the first level in the Emerald Passage, It is very easy.
Normal and Hard Version
The level in Emerald Passage.
Room 1: You start at a simple room with nothing special. Head to the right.
Room 2: A room with blocks, a Heart, 200 Gems and a Bouncer. Clear them and proceed.
Room 3: Two Hearts, 300 Gems, first Stone Chest, three Red Bouncers and one Spearman. You can collect the hearts and some Gems on your return, but for higher score, just use the Bouncers to make a Goomba Jump to collect them, but do not kill the Bouncers.
Room 4: Eliminate the Bouncers and Spearman, clear the blocks (one of which is hard), collect the second Stone Chest, and stop at door A. From here, jump on the platform on the left, then jump into the fake wall to discover a hidden passage with a Big Diamond. To the right of door A is 140 Gems. Now enter door A to collect goodies.
Room A: Climb the ladders to move up. You will encounter a new enemy: Pink Spiny. Obviously you cannot stomp him directly, but stomping the ground will make him flip upside-down, then you can stomp to finish him. Collect the third Stone Chest, 270 Gems and a Heart, then enter the purple pipe to access Bonus Room B. When everything is done, leave from door A and proceed to the right.
Bonus Room B: Just toss the old man at the purple switch and reach the Big Diamond above.
Room 5: 230 Gems, a Bouncer and fourth Stone Chest. At the first platform right above the Bouncer, walk to the right to discover a hidden room with CD Chest. A hidden passage with a Big Diamond is on the left of Stone Chest. Move to the right.
Room 6: The new enemy Apple Ape does not hurt you, instead, he throws apples which can trigger Fat Wario. Let him feed you, and stomp through the obvious hole.
Room 7: Simply walk into the water and do another fall, and you can find a hidden area with a Big Diamond. Collect the 330 Gems in the water, then hit the green switch in order to return to Room 6.
Room 6 (revisited): See the Key Ghost? Hit the red switch to reveal red blocks in order to reach him. There are also 150 Gems revealed by the red switch. Before moving on, take a visit on the Bonus Room C on the left, above the green blocks.
Bonus Room C: Climb the ladder and platforms to find the old man. Throw him once to the right, then fall down, catch him, and throw him to the left to open the small room with a Big Diamond. Make a crouch jump to grab that. If for whatever reason the old man falls in the water, just leave the Bonus Room and enter again.
Room 8: Defeat the Spearman, grab the Heart Chest and 120 Gems, then activate the Frog Switch. Hurry up!
Way back: The rest thing is to run all the way back to Room 1 and leave. You may want to collect the missing goods as well.
Highest Score: 11640
Super Hard Version
Nothing can be more deadly than landing on the Frog Switch upon entering the level. You have 3 minutes to scurry through the level and collect goods. Note that the Key Ghost is at the very right end of the level.