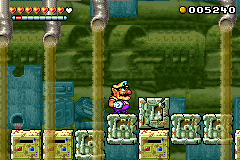
Room 1: You start in middle of a large room. Follow the Gems and go downwards. You can see a Stone Chest below frog blocks, so ignore that. Instead, break into the right wall to find a path and leave.
Room 2: The two Apple Apes can help you break through the hard blocks. For the right one, it leads to a small room with 90 Gems and an Archer who can help you get into Room 3 above. For the left one, you will first stop in front of a Soda Jerk, then you can continue pummelling the hole on the right to reach bottom floor. When you return to normal, you can collect the first Stone Chest, a Big Diamond behind the left wall, and another 280 Gems on the left of that Soda Jerk. Enter Door A on the right.
Room 3: Carefully move upward while dodging spikes. Reach the Big Diamond at the ceiling. Above that is a pipe to Bonus Room 4. You need to visit this room twice to collect all Gems.
Bonus Room 4: You have four rocks on the ground. Use one to hit the green switch at the right wall, then climb the green blocks, and use another rock to hit the red switch. Before hitting the remaining switches, remember to carry both remaining rocks to the red blocks. The Big Diamond will be available once you reach the upper red blocks.
Room A: Beware of the Piranha in the water. Stand on the two blocks on the right side of Apple Ape, get fed into Fat Wario and break through these blocks to make a hole under water, revealing some Gems and a Big Diamond. Return above and proceed to Door B via the blocks.
Room B: Grab the second Stone Chest on the right. In this room, you need to reach the top floor with help of two Malletapes. While the Coin Blocks show the correct location of two exits, in order to collect those coins, you must first reach the top of blocks from a third path, then stomp the blocks one another. A Soda Jerk is on top of the blocks. The left exit leads to Room C with treasure, and the right exit leads to Room 5 and proceed.
Room C: Super stomp into the right pit to break in the lower portion of water. Defeat the Spiked Clam, move to the left end and float up to find a Big Diamond above the water. Return below, collect the Gems in the circle of water flow, and leave.
Room 5: A large room with lots to do. To start, break the hard block, remove the Soda Jerk and grab the third Stone Chest. Break the wall behind the chest, and follow the blocks to find another Soda Jerk, a Heart Chest and 330 Gems. From the chest, break the second TV block on the ground to discover a route to Door D with treasure inside. Return to the entrance, continue breaking the blocks to clear a path to below, but right at the start of the tunnel, notice the three TV blocks on the ground, and break the rightmost one to reveal a hidden branch, and find the CD Chest at the end. Return to the tunnel and proceed, but stop at the two tiny blocks with Blue Gems below. Here, break the first tire block on the right to discover another hidden branch. You can find 280 Gems, some coins, a Big Diamond on the left end, and a pipe to Bonus Room 6 below. When everything is done, leave from Door E at lower right corner.
Room D: This one is tricky. First, move to the right and stun the Apple Ape, then use him for a Goomba jump to break the blocks above at right time, so that the Malletape will fall down. Get upstairs with Spring Wario to find a Big Diamond. Now stun the Apple Ape again, bring him to the left side of water pool, then get Fat Wario and stomp through the leftmost block of pool, into the water and find another Big Diamond and extra 730 Gems.
Bonus Room 6: Simply run to the right end, get Fat Wario and go smashing the Black Spinies. However, it is not easy to obtain max points, since there are not enough enemies outside to provide a full sub bar.
Room E: You have no choice but to hit the Frog Switch on the right. Hurry up! Now the Apple Ape is released, get Fat Wario, run to the left and break through the hard block. You will land in a pond below. There will be lots of blocks on the right shaft, and a small room to the right with nothing but a Heart. In order to obtain the Key Ghost, you must get Spring Wario and launch yourself at the 5th column from the left. From the top, you can spend some spare time to break the leftmost two columns for coin blocks, but your main objective is to start a super stomp at the 2nd column from the right. This will break the hard block on the floor and let you move on.
Room 7: You have to run through the blocked tunnels for a few times. Notice that the last few blocks at each run are coin blocks, and you will run into two Soda Jerks on your way. Reach the ladder at upper left corner and leave.
Room 1 (revisited): You appear at the floor with the fourth Stone Chest seen at the beginning. In order to escape, you must get Balloon Wario and float up, dodge the platforms and jump in the warphole. If you accidently move to top floor, there are two Hearts and some spikes.
High Score: 25430 (To get this score don't try to kill all the Black Spinies at the same time in the bonus section, because they don't drop all their coins.)