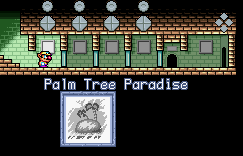
Palm Tree Paradise is set on a beach-like Terrain. Since it is the first level in the Emerald Passage, It is very easy.
Normal and Hard Version
The level in Emerald Passage.
Room 1: You start at a simple room with nothing special. Head to the right.
Room 2: A room with blocks, a Heart, 200 Gems and a Bouncer. Clear them and proceed.
Room 3: Two Hearts, 300 Gems, first Stone Chest, three Red Bouncers and one Spearman. You can collect the hearts and some Gems on your return, but for higher score, just use the Bouncers to make a Goomba Jump to collect them, but do not kill the Bouncers too early.
Room 4: Eliminate the Bouncers and Spearman, clear the blocks (one of which is hard), collect the second Stone Chest, and stop at door A. From here, jump on the platform on the left, then jump into the fake wall to discover a hidden passage with a Big Diamond. To the right of door A is 140 Gems. Now enter door A to collect goodies.
Room A: Climb the ladders to move up. You will encounter a new enemy: Pink Spiny. Obviously you cannot stomp him directly, but stomping the ground will make him flip upside-down, then you can stomp to finish him. Collect the third Stone Chest, 270 Gems and a Heart, then enter the purple pipe to access Bonus Room B. When everything is done, leave from door A and proceed to the right.
Bonus Room B: Just toss the old man at the purple switch and reach the Big Diamond above.
Room 5: 230 Gems, a Bouncer and fourth Stone Chest. At the first platform right above the Bouncer, walk to the right to discover a hidden room with CD Chest. A hidden passage with a Big Diamond is on the left of Stone Chest. Move to the right.
Room 6: The new enemy Apple Ape does not hurt you, instead, he throws apples which can trigger Fat Wario. Let him feed you, and stomp through the obvious hole.
Room 7: Simply walk into the water and do another fall, and you can find a hidden area with a Big Diamond. Collect the 330 Gems in the water, then hit the green switch in order to return to Room 6.
Room 6 (revisited): See the Key Ghost? Hit the red switch to reveal red blocks in order to reach him. There are also 150 Gems revealed by the red switch. Before moving on, take a visit on the Bonus Room C on the left, above the green blocks.
Bonus Room C: Climb the ladder and platforms to find the old man. Throw him once to the right, then fall down, catch him, and throw him to the left to open the small room with a Big Diamond. Make a crouch jump to grab that. If for whatever reason the old man falls in the water, just leave the Bonus Room and enter again.
Room 8: Defeat the Spearman, grab the Heart Chest and 120 Gems, then activate the Frog Switch. Hurry up!
Way back: The rest thing is to run all the way back to Room 1 and leave. You may want to collect the missing goods as well.
Highest Score: 11640 (Normal)
Super Hard Version
Nothing can be more deadly than landing on the Frog Switch upon entering the level. You have 3 minutes to scurry through the level and collect goods. Note that the Key Ghost is at the very right end of the level.