Pinball Zone, as name implies, is the stage where you need to use pinballs to clear the path and proceed.
Stage Specific Gimmicks
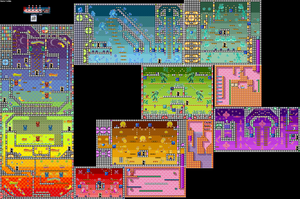
Wario carrying a Pinball, standing on a Goal Block, with a Feeder above.
Pinballs and Feeders: These are the main features in every pinball room. A Goal Block will appear at the room exit, with a number indicating the remaining Feeders in the room. There will be exactly the same numbers of Pinballs in the same room. In order to proceed to next room, you must find the Pinballs and put them into the Feeders when they open the mouth. A Feeder will become a Bronze Coin after inhaling a Pinball. When all Feeders are cleared and you return to the Goal Block, it will become a Gold Coin. There will be flashing dots in the background, to guide the path to the Feeders.
Spike Ball Spitter: These will only appear in the main room. While they act as standing platforms, if the yellow light is flashing, that means two spike balls will be sent out to both sides. Do not get caught.
Spark Generator: Found in the pinball rooms. While these downward pointers are harmless normally, sometimes they will release spack balls which moves on the ground. Watch out.
Normal Version
Main Room: You start at the lowest floor. Use the left slope to roll to the right, then move upward and climb the iron webs to proceed. There is a Heart above the Spike Ball Spitters. Find door A on the left.
Room A: This is the tutorial room of Pinballs and Feeders. All Pinballs are on the ground, and the Feeders are not far away. Collect the coins from Feeders and Goal Block, then jump in door B.
Main Room (2nd visit): Use the slope to move right. You will see the first Stone Chest. Slam the wall to the right to reach the chest. Leave at door C on the right.
Room C: The Pinballs are at four corners, and the Feeders are at ceiling and both walls. You need to stomp the ground to shake the higher Pinballs off the ledge in order to grab them. Behind the left Feeder is a room with a Big Diamond, and a Heart is above the Feeder. Another Heart is above the right Feeder, and below is the second Stone Chest and an obvious block hiding the path to bonus room 1. When everything is done, leave from door D at the center.
Bonus Room 1: Catch fire and start running. Quickly jump on the trigger blocks, reach the platform at the end, and hit the switch to enable the trigger blocks above, then repeat twice more until you reach the fire block. Burn the block and grab the Big Diamond behind. There is an additional switch on the ground floor, to reset the state if messed up.
Main Room (3rd visit): Climb the iron webs all the way to the left. Beware of both blue Spitters, while the red ones are not active. You can find a Heart before entering door E.
Room E: While the background has muscle apes, there is only an Apple Ape in the room. Use his assist to reach the bottom floor with the third Stone Chest, stomp the ground to shake a Pinball into the Feeder, and grab another Pinball for the Feeder high in the middle of room. The other Feeders are at the upper corners of the room, just stomp to shake the Pinballs. To the right of the lowest Feeder is a Heart and the pipe to bonus room 2, but you need to fat-stomp the block above the pipe. Leave from door F in the center.
Bonus Room 2: Swim to the surface to attract the Apple Ape throwing apples, then, let him feed you at the right place in order to stomp the switch. Now dive deeper and watch the Pink Spinies falling down and be drown, leaving Silver Coins.
Main Room (4th visit): Again start the trip with a slope, then move to the left, climb the platforms and move right to door G. To the left of the leftmost Spitter is a small area with CD Chest.
Room G: Find the fourth Stone Chest on the right. All Pinballs are at the entrance, but the Feeders are all around. Stomp the left ground to make a hole to the basement, with a Feeder to the right. At the left wall is an Ice Yeti, and above is a Feeder which requires throwing the Pinball upwards. Break the wall on the left of Ice Yeti, for a room with a Big Diamond. There is a hole in the right wall, throw a Pinball inside to reveal another Feeder and a pipe to bonus room 3. The top floor of the room has the last Feeder and another Ice Yeti. The exit is again in the middle.
Bonus Room 3: Go down the ladder and bring the Old Man up, and use him to break a hole on the left. Then, use the Old Man again to make a second hole in the middle of ladder shaft. Now get in the hole and find a Heart Chest and additional 500 Gems.
Main Room (5th visit): Climb upwards. You can find a Heart in the middle of two green Spitters. Below the right one is a narrow passage which leads you to the Frog Switch. Hurry up! Now enter door I.
Room I: A Spark Generator is active on the right. Quickly run to the left. All Pinballs are at the left end, break the roof to free them. Two Pinballs shall be thrown to the far right, while the other two shall be brought upwards. Find the guided slope and put the Pinballs in, and they will reach the Feeders at the end. Before moving to the right, use the other slope to make a super change in order to break the left wall, for a Big Diamond. Now bring the rest Pinballs to the right, climb upward and throw them into the two tunnels on both sides, for the Feeders at the end. The exit is at the middle of left wall.
Main Room (6th visit): You find the Key Ghost. Enter door K.
Room K: All Feeders can only be accessed from the middle shaft. The Spark Generator on the left is active. For the Pinballs, two of them are in the right shaft, remove the Ice Yeti and shake them off. The other two are in the left shaft, one on the left of another Ice Yeti, and the other after breaking the platforms the Yeti is standing on. In order to collect all coins from the Feeders, throw two Pinballs each run. The exit is above the entrance.
Main Room (7th visit): The rest thing is to reach the top and use the slopes to roll all the way down, and finally into the warphole.
High Score: 15250
Hard and Super Hard Version
While you have less time on the clock, more Spark Generators will be active. Prepare for the electric dodge run.