The Industrial Complex is a large abandoned manufacturing plant that built many of the robotic drones which service various aspects of life on the planet. Many systems are still on-line despite their age. Many important items must be obtained here, and your search will take you deep into the complex, where you must become one with the machinery if you wish to advance. No less than ten Metroid must be defeated, many of which occupy a dangerous nest below the complex.
Reaching the complex[edit | edit source]

After you've left the Hydro Station, roll back through the narrow passage beneath the floor in room A, and return to room B where you were previous blocked by lava. You can head a bit further down, but it won't take long before you encounter the lava again. Drop down and head to the left, and you will be taken to room C, where more lava blocks your progress.
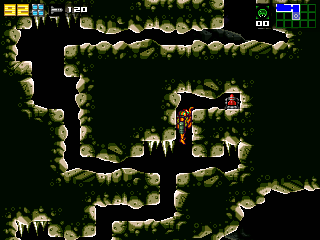
Drop down and return to room B through the lower passage. Run right through the bottom of room B to the entrance of room D. Here you are forced to navigate a short series of narrow passages. There's an item hidden here for you to find. Drop to the bottom and head to the right to enter room E. You'll see another pool of lava at the bottom, forcing you to continue to the right, where you will find a save station at the entrance to the Industrial Complex.
Item Gathering[edit | edit source]
- Missile Tank A
- As you make your way to the bottom of the room, there is a split in the path where you can go right, but it leads to a dead-end. Right around the split, there's actually a third option. If you jump up just to the right of the ceiling spikes in the middle of the room, you will expose a hidden passage that leads to the missiles.
Investigating the complex[edit | edit source]
Goals[edit | edit source]
- Obtaining the Space Jump (A → D)
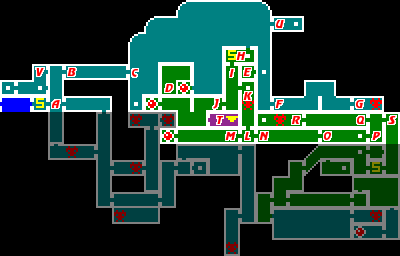
After entering the complex from the save station, you are present with a vertical corridor. The bottom of room A leads to some Metroid nests, but you should visit the complex to power Samus up first. Start climbing to the top. Along the way, a wall on the left side can be destroyed for easy access to a missile tank. When you reach the top, shoot the right wall to gain access to room B.
Run right through room B, shooting the enemies that escape from the pipes if they get in your way. Continue right until you reach a wall. Bomb the lower right corner to discover a hidden path that takes you further right. Shoot the block above the passage end to jump out and continue.
Once you reach the other side, you will enter room C which, like many rooms before, serves as a large cavern around the complex. Many sections near the bottom of room C are covered in a sand-like substance that is easily clear away by your gun. Before you explore more to the right, it's worth investigating the area below the entrance for an easy missile tank.
Make your way to the right and climb up the first wall by hopping up the ledges. In addition to some flying insects, there is a new ground enemy that can prove to be a bit tricky to kill. They wear helmets which are invulnerable to attack. It's best to jump over them and avoid dealing with them. Continue right along the first roof top, and drop down when you reach the end. Shoot through the sand to the floor below, and shoot the red door on the left with a missile to open it.
Inside, you'll find a Chozo statue holding an orb, and inside that orb will be the amazing Space Jump item which allows you to continuously jump again in mid-air. However, when you attempt to escape through the door, it will close and lock shut. The Chozo statue known as Torizo will come to life, and the wall behind it will extend to the left. Those familiar with the Chozo statue fight in the beginning of Super Metroid will find this battle similar. The legs of Torizo are invulnerable, so you'll have to aim your weapons upward at his chest or head. Pummel Torizo with missiles as fast as possible, dodging the statue and the waves it creates when it claws the air. It will sometimes stop and spit rocks at you. You can shoot these rocks for more energy and missiles.
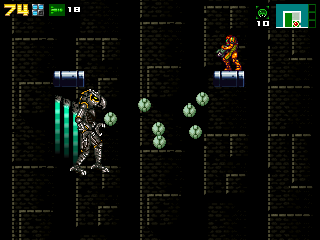
The closer you are to destroying Torizo, the faster it becomes. Hit Torizo with enough firepower to destroy it. However, it will not be truly destroyed at this time. In a big twist, the statue will grow wings. The ceiling will now rise, revealing a set of platforms high off the ground. The ground will be covered in spikes. You must now use the Space Jump power to get off the ground and up on to the platforms. Torizo will resume its attack on you, flying over to knock you off whichever platform you are trying to occupy, or occasionally flying incredibly fast back and forth across the room at whatever height you happen to be at when it appears. You must shoot it whenever you get the chance, ideally when you are stable on a platform. Fortunately, its whole body is vulnerable to attack now. The best chance you have to fight it is when it stops to spit out rocks (which hatch into small insects). Try to get behind it where your shots will be unobstructed by the rocks.
Once you eliminate Torizo, the door will unlock, and you can continue on your way.
- Eliminate a Metroid (D → G)
From Torizo's room, you can shoot through the sand and make your way to the right. You will soon reach a tall wall that you can't Hi-Jump over, and the spikes make using the Spider Ball impossible. Fortunately, you just obtained the item you need to proceed over the wall: the Space Jump. Simply use the Space Jump to continuously jump in mid-air, and rise to the top of the wall. Then proceed to the right.
As your run along the roof, you will reach a hole that leads to room H. Down there is where you will collect the next set of power-ups. But for the purpose of this walkthrough, we will continue to the right first to destroy one of the Metroids in this area. Drop down the left side of the building. Along the way, you may notice a Missile Tank embedded in the wall. There is a hole in the wall leading to a narrow passage just above it that leads to room E if you want to explore it and find some useful items.
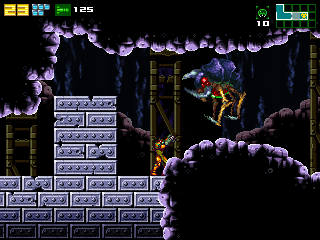
Shoot through the sand below to reach the bottom and explore the right passage to room F. The lower portion of room F is designed to allow you to quickly get from one side to the other if you happen to have the Speed Boost item. But even if you don't, you can easily access the other side by climb up to the upper portion and shooting a passage through the wall in the middle. Proceed to the right to room G.
Jump over the wall and continue right until you encounter a Gamma Metroid. Once the Metroid begins to attack, you may find it easier to fight it if you lure it back to the wall. The wall and the rocky floor create a bit of a barrier for you which keeps you lower than the Metroid, making it a little easier to strike it's underbelly.
- Obtaining the Spazer Beam (G → J)
Once you destroy the Gamma Metroid, you must turn around and go back the way you came, until you return to the hole in the roof which leads to room H. Drop down to discover a room full of sand. Clear the sand away and use the Morph Ball to access the narrow passage to the rest of the room on the left, where you will find a save station. Save your game before proceeding down the hole to room I below.
Shoot a path through the sand until you can reach the bottom of the room, and take the door on the left to reach room J. In addition to the laser security sentries, you'll be introduced to a new type of enemy, a narrow machine composed of two pieces connected together. When you shoot the machine enough, the pieces break apart and attack you individually. You may feel that, even with the Wave Beam, attacking these narrow enemies is a bit of a challenge.
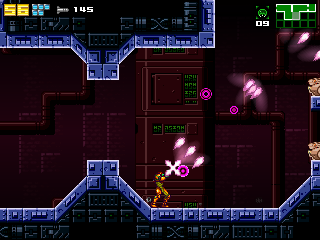
Continue left, drop down to the floor below, and then climb back up the other side to access the red door at the end. Shoot it with a missile and step inside. The Chozo statue inside will be holding an orb containing the Spazer Beam. This Chozo statue hides no surprises, and there's nothing else to find here. The Spazer Beam will significantly increase the width of your beam, making it much easier to fight the narrow machines which occupied the hallway outside.
- Obtaining the Speed Boost (J → M)
From the Chozo statue, return right through room J to reach room I again. Jump up half way to the entrance to room K on the right. You'll be at the top of a long vertical corridor. As you drop down to the bottom, you'll discover that a Gamma Metroid lives here. It will follow you down to the bottom, where you should attempt to dispose of it as quickly as possible. Avoid standing on the thin sliver of sand that separates you from room L below. If the Metroid releases its electric attack, it can clear the sand away, causing you to fall through. If you change rooms, you will lose the progress you made attacking the Metroid, as it will gain all of its health back the next time you encounter it.
There is an item hidden at the top of room K, but you will not be able to obtain it until you collect the Speed Boost. Down in room L, you will see one of those hopping robots that you first encountered in the Hydro Station. You can go to the left or to the right. Start by going through the left door to room M. As you run to the left, you will start to encounter pillars from the floor and the ceiling that get closer and closer until you are forced to bomb your way through. As you bomb gaps through the upper pillars, the bottom pillars reveal a tile which indicates that they can be removed with the Speed Boost. Continue left to the red door and shoot it with a missile.
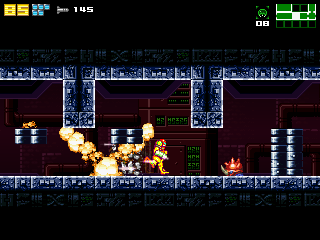
Inside the next room, you will find a Chozo statue containing the Speed Boost. The Speed Boost is a particular powerful and useful item which grants Samus a host of new abilities. It is activated by getting Samus to run continuously in one direction uninterrupted. If Samus runs far enough, she will begin to glow with what is known as Shinespark. While running with Shinespark, she is fairly invincible and can destroy most basic enemies, as well as run through blocks that can be destroyed with normals guns, and blocks which can only be destroyed if Samus is running fast enough.
Shinespark typically ends when Samus stops. However, it is possible to store Shinespark by pressing down before coming to a stop. If done properly, Samus will go from running at full speed to squatting motionless, causing the Shinespark to persist for just a few seconds longer. During this time, if you press and hold the jump button, Samus will rise in the air like a rocket until she hits something solid like a ceiling. However, if she hits blocks that can be destroyed by Speed Boost, she will blast through them. Additionally, you can aim which direction Samus moves in by pressing the joystick in the desired direction after holding jump, but before she starts to move. On top of all this, you can even perform these actions while in Morph Ball form.
- A small Metroid problem (M → R)
After collecting the Speed Boost, you can run through room M to the right, and you will pick up enough speed to literally blast through all the blocks and enemies in the room. You can even continue running straight through room L to destroy the robot, and continue into room N. However, you will not be able to burst through the blocks in the middle of the corridor in room N. You'll need to bomb them to discover their weakness. All four of the floating gates can only be destroyed with missiles. Clear them and the floating robots that patrol the corridor, until you reach a wall. This wall is susceptible to Speed Boost, so return to the entrance of room N, and then run to the right to build up speed. Jump up to break through the wall, and continue on to room O.
The left half of room O contains a very fast moving conveyor belt with spikes on the left side. If you don't run fast enough on the conveyor belt, you will be drawn into the spikes. Jump a bit to the right to give yourself enough padding, and begin running to the right until you are running fast enough to Shinespark. Then leap to the right through the wall that separates the room and continue on to room P.
Room P is a short vertical corridor with spike-lined walls on either side. There are two ways to reach the top: Shinespark jump up from the floor below, or simply Space Jump your way up. At the top, you can go left or right. Investigate room Q on the left first. In this room, you'll find some flying robots, and a unique type of creature that looks like a floating Nautilus shooting a stream of lava down at the floor. They are invulnerable to all attacks, and you have to wait for the stream of lava to stop if you want to avoid taking damage (although you won't lose much energy if you decide to rush through it.)
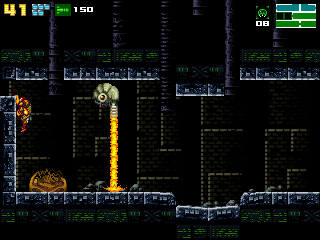
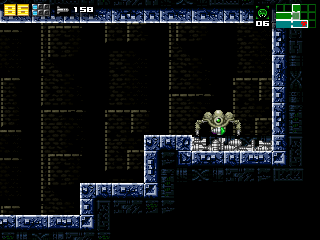
The left end of room Q will appear to dead-end, although there is a Metroid shell on the ground. If you try bombing the upper left corner of the room, you will discover the entrance to a narrow passage that leads to room R beyond. In room R, you will discover an Alpha Metroid which will probably seem easy in comparison to the Gamma Metroids you've been fighting lately. Beyond the Metroid is a fairly easy Energy Tank to obtain. See the Gathering Items section below.
- Obtaining Super Missiles (R → S)
After defeating the Alpha Metroid, return to the right through room Q, to vertical room P, and then on to the other side to room S. There you will find a lone hopping robot in a small chamber, with an obviously visible narrow passage snaking through the floor beneath. Bomb the lower right corner of the room to gain access to this passage. In Morph Ball form, drop and hop your way through the passages until you can access the bottom of the room. Save your game at in the save station room on your right.

The next portion of the walkthrough will take place throughout the map displayed above, and refer rooms designated by the blue letters, starting with the room indicated by the blue A. At the bottom, you'll be greeted by two laser sentries. Up above are groups of flying machines that hinder your progress to room B on the left. Observant players may notice an item hidden beneath the corner of the floor just as you reach the top of the room, but you're not able to obtain it just yet.
In room B, destroy any enemies that get in your way as you drop to the bottom and head left into room C. Drop to the bottom of the virtually empty room and head right to room D. Room D contains the flying machines and the nautilus-looking enemies that you encountered before the Alpha Metroid. It also contains a tremendous amount of lava along the bottom, so don't fall in. If you do fall into the lava, quickly turn into a Morph Ball to move quickly to the left, and climb out using the platforms that lead back up.
Space Jump your way across the room to reach the right side, and enter room E. Room E contains a shallow pool of lava along the floor, as well as a Gamma Metroid. You are very likely to get knocked off the tiny platforms, and spend a considerable amount of time trying to get back on them, so you're best off simply remaining in the lava while you fight the Metroid, provided you're wearing the Varia Suit and have a good supply of energy.
Destroy the Metroid, and then make your way back to the left, through room D back to room C, and then back up to the bottom of room B. Now take the right doorway to room F. Room F contains another conveyor belt, but your goal isn't really to achieve the Speed Boost here. It's merely to get past the automated tools that hang from the ceiling in order to reach the entrance to room G on the right.
Room G is a special room, and you'll be spending a bit of time here. At first, it looks like you're relegated to the lower left portion of the room. You may discover that its possible to shoot away a portion of the ceiling, but even if you begin to climb up the left side, you'll discover a floor that you can break open. They require Super Missiles, and you haven't acquired any yet. But there is still hope to get you through this room.
Back on the floor, there's a device with an indentation that looks big enough for the Morph Ball to fit in. Sure enough, if you roll into that spot, the machine will activate. Suddenly the view will shift to a lone hopping robot in the upper right corner of the room. The machine that you rolled into actually gives you the ability to command the robot.
Moving as the robot is limited to a few options. You can hold the jump button to engage the robot's legs into a squat, and release it to jump. The longer you hold down the button, the higher it will jump. Hold left or right before releasing jump to leap in either direction. You can also press the fire button to activate the robots grip hand. It will reach down and pick up any item on the floor below it. Once you are holding something, you can press the fire button again to release the item.
It just so happens that there a large pile of Super Missiles just lying on the floor to the right. You'll need to pick up one of these Super Missiles and drop it over any floor that Samus can't currently break. In fact, you will need to destroy three floors; one in the upper left corner, one in the middle, and one in the lower right corner. The problem, however, is the automated tools that activate while you are controlling the robot which can damage the robot and prevent it from reaching your goal before you can drop the Super Missile and break a hole in the floor. Whenever a robot is destroyed, simply remain a Morph Ball and return to the device to trigger the appearance of a new robot.
Destroy the three necessary floors, while doing your best to avoid the damaging machinery, before proceeding through the room as Samus. (Note that as Samus, you have no ability to interact with the pile of Super Missiles in the upper right corner.) From the lower right corner, drop down to room H below, and descend to the bottom before heading left into room I.
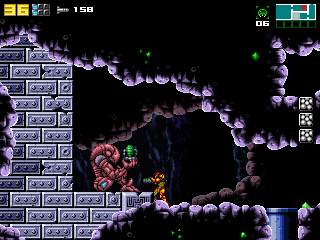
When you first enter room I, you'll notice a large green crystalline structure that bars your path through the lower portion. You are forced to take the upper path. After running a short distance to the left, however, you will drop through the rocks to the floor below. Waiting for you on the left is a Chozo statue holding, not an orb, but your first Super Missile Tank. Each tank will only expand your Super Missile storage by two, but Super Missiles are five times as powerful as regular missiles. And you'll be required to shoot at least one in order to escape, as the green crystal blocking your exit can only be shattered with a Super Missile.
Now that you escape, it's time to return all the way to the entrance of the complex, back to the room labeled with the red S on the original map. Retrace your steps to escape until you are back in the blue labeled room A. Examine the upper right corner of the room. You'll see a narrow passage leading to the left, blocked by a wall. You can bomb your way into the passage, which takes you through a small room, and back over to the passage below the floor of the red S room.
- Clearing the nest (S → A)
After returning to room S, you must now journey back all the way to the entrance of the complex, at room A. You'll need to Speed Boost and Space Jump your way through particular sections, but you should have all the power and training you need to make it back. Your map should be complete enough to show you the way, or you can refer to the map at the top of the page. Ideally, you should visit the save station to the left of room A before you continue.
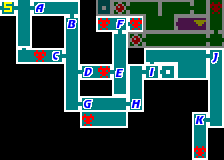
The next portion of the walkthrough will take place throughout the map displayed above, and refer rooms designated by the blue letters. There's actually two ways to enter the next. You can also use Super Missiles to punch a hole through the floor of the room labeled with the red A, and drop down to the room with the blue C where a Metroid is waiting. For the purposes of this walkthrough, we will access the nest through the room indicated by the blue A. Enter the room, and hop over the block. In the lower portion of the room, you must carefully bomb away the blocks along the floor, but not the pair of blocks that cover the two pipes in the floor. If you do, you will lose the perfect runway you need to Speed Boost through the wall on the right and drop down into room B.
Room B is a vertical corridor with a few passages on either side. Drop down far enough to reach the first entrance on the left, and enter it to reach room C. Inside you'll find a Gamma Metroid waiting for you. Destroy and return to room B. Drop down a bit farther and explore the first entrance on the left to room D. You'll find another Gamma Metroid waiting for you there. It should be noted that the thorny ends of the vegetation in the room can be shot to find energy and missile refills.
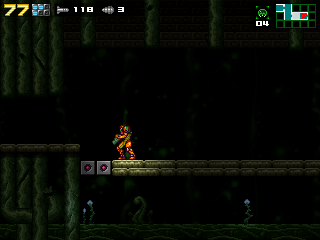
After you destroy the Gamma Metroid, return to the left side of the floor before the entrance to the room. You can bomb your way through the floor to access the passage beneath, and head to room E on the right. Room E is another vertical corridor that is considerably dark. There's nothing but thorns along the bottom which you can shoot for energy. Your goal is to reach the top of the room to access room F.
Up in room F, you'll face a less threatening Alpha Metroid. After you destroy it observe the pipe that extends along the ceiling. There is a gap along the far left side. Jump up to grab it, and roll on top of the pipe in Morph Ball form to the right. You enter a hidden room containing a Gamma Metroid. Bomb the block to drop down to the floor. This Metroid won't attack you until you get closer to it. Take it out in the customary manner, and then proceed all the way back to vertical corridor B.
Once you return to room B, drop down to the bottom, where you will find a Metroid shell lying on the floor. You can actually bomb your way through the floor to find a winding narrow passage that allows you to get lower, and reach an entrance to room G on the right.
Room G is especially dark as well. As you run to the right, you will reach a vine that creates a wall from the ceiling to the floor. You have no choice but to bomb it, but in doing so, you will actually destroy the whole floor along with the vine, dropping you into the lower portion of the room where a Gamma Metroid is waiting. This Gamma Metroid is no different than any other, but the particularly dark environment can make tracking it much more difficult. Stick as close to it as possible while you fight, and try to end the fight quicker by hitting it with Super Missiles. Once you defeat it, Space Jump your way up to the exit on the right side, and into room H.
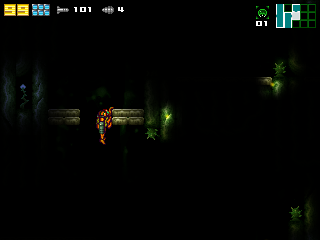
Make your way up to the top of room H, and through the entrance on the right to room I. At first, room I will look like a small cramped room, but you can shoot a hole through the ceiling above the entrance to gain access to the greater portion of the room. From the top, you can shoot you way through several groups of vines until you can drop back down to the bottom again. If you hug the wall as you drop down, you may notice a Super Missile Tank that's particularly tricky to obtain. Read Super Missile Tank B below to learn how to collect it.
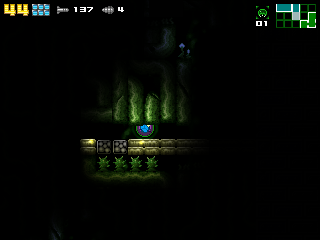
Get to the far right side of room I and shoot through the wall near the top to access the entrance to room J. When you hit the floor, you'll need to bomb the lower left corner to gain access to a series of narrow passages that get you further below. Along the way, you'll encounter several thorns which need to cleared away with bombs in order to proceed. At a certain point, you'll encounter a section of the passage that crumbles as you roll across it. Avoid rolling on top of it and falling through the floor, by using the Spider Ball power to connect to the ceiling directly above it and roll along that instead.
Once you're through, drop to the bottom. You'll find the entrance to room K on the left. Room K is another vertical corridor, and as you drop to the bottom, you'll awaken a Gamma Metroid. Thorns line the bottom of this room, so shoot them away so that you have a safe place to stand. Then fight the Metroid from the bottom of the room. Once you defeat it, if you've been following along with this walkthrough, you will trigger the next earthquake. At this time, you should leave the nest and return to the entrance of the Industrial Complex to make your way to the next section of the game.
When making your return to the entrance, there is a shortcut back up through room J so that you don't have to navigate your way back to the top in Morph Ball form. If you notice the Metroid shell lying on the floor, explore the wall to it's right. It actually hides a hidden shaft which you can use to make it back up to the top of the room. You could slowly Spider Ball your way up, but it's considerably faster to Space Jump your way to the top.
Once you make it back to room B, you can either head to the top and return through room A (there are a set of dissolving bricks just before the Speed Boost barrier), or you can return through the exit in the ceiling on the left side of room C, which sends you back to the bottom of the main map room A (red), where you can climb up to the entrance, and shoot a hole in through the floor with Super Missiles.
Item Gathering[edit | edit source]
- Missile Tank A (room V)
- On you way up room A, destroy one of the walls on the left. This will allow you to access a passage to a sectioned off chamber in room V where the missile tank is waiting.
- Missile Tank B (room C)
- Upon entering the left side of room C, drop down to the bottom. Shoot away the sand beneath you to access the missile tank in the lower left corner.
- Missile Tank C (room C)
- To collect the Missile Tank embedded in the wall of the right side of the Industrial Complex, first you must follow the procedure to collect Energy Tank A described below. After you obtain it, you can bomb the floor below to fall into a completely dark passage. Start rolling to the right until you are no longer able to proceed. Then use the Spring Ball to jump up, or bomb you way up, so that you can continue to the right. This will lead you back out of room E, and over to the Missile Tank in the wall. Bricks below the tank will crumble to let you escape.
- Missile Tank D (room H)
- When you land in room H from the hole in the roof, you will arrive in a room loaded with sand. Shoot the sand away, particularly near the floor, to discover a Missile Tank hidden within.
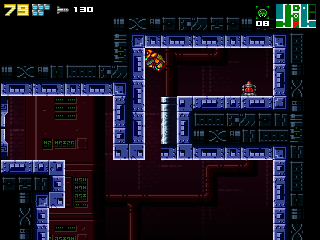
- Missile Tank E (room K)
- After collecting the Speed Boost, run through room M to the right so that you gain enough speed to Shinespark. When you reach room L, squat down to store the Shinespark. Jump diagonally up to the platform below the entrance to room K. Stay closer to the left side of the platform, and hold the jump button to boost Samus up through the entrance and all the way to the top of room K, where you'll crash through the ceiling and reveal a hidden passage containing a Missile Tank.
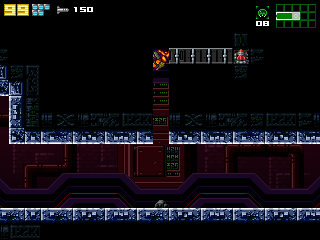
- Missile Tank F (room O)
- Once you make it to the right side of the room by Speed Boosting through the wall, run to the right so that you begin to Shinespark, and squat down to store it before you leave the room. One of the blocks in the ceiling can be broken with the Speed Boost, so you may need to bomb the low ceiling to figure out precisely where it's located. Shinespark jump through this block to break through the ceiling and discover a hidden Missile Tank.
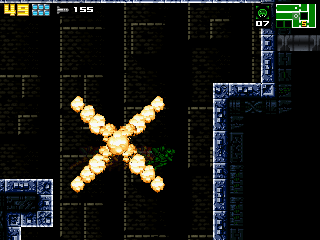
- Missile Tank G (room blue A)
- The blocks on the floor are destroyable by Speed Boost. But to have enough room to boost, you'll need to head into room B, and start from the very edge of the ledge on the platform that leads back to room A. Start running to the right, and just before you reach the top of the slope, you should begin to Shinespark. Once you are shining, you can press down at any time along the floor (you do not need to be standing on the far right edge.) With the Shinespark stored, press and hold jump and quickly press right to cause Samus to fly off to the right. If done correctly, she will glide just above to floor, across the gap, and smash into the opposite wall, where you will discover a hidden Missile Tank.
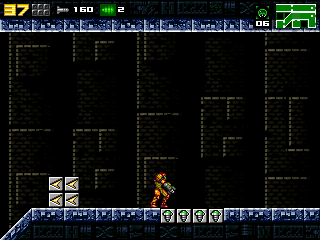
- Super Missile Tank A (complex room blue J)
- In room blue A, if you bomb a portion of the floor near the top, you will find the indication of a weakness to Super Missiles. After you successfully collect the Super Missiles from room blue I, return here and shoot the floor with Super Missiles to expose a hidden passage to a secret room. Roll through the narrow passage in Morph Ball form, standing up momentarily to destroy the laser sentry in the passage, before continuing to the right and jumping up to reach the Super Missile Tank beyond.
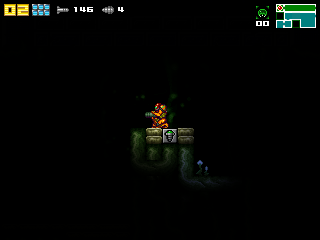
- Super Missile Tank B (nest room blue I)
- It will take some work to collect this tank. To start, you must find a single block in the room which can be destroyed with a Super Missile. Shoot it open and fall down in Morph Ball form. Follow the passage as it heads to the right until you reach a dead-end, and you will suddenly fall through a set of disintegrating blocks. These blocks will not reassemble until you leave the room. Return to the top of the room. Along the top, shoot out anything on the floor to give yourself a good runway to Speed Boost. From the right side of the floor, begin running to the left. The Speed Boost should activate just before you reach the gap in the floor, so you need to press down and store the Shinespark before you fall through it. If you do it correctly, drop down through the gap so that you land on the ledge that extends from the entrance. Before your Shinespark wears off, face right and jump a little bit into the air before holding right and flying across the room, past the bricks you dissolved, and into the small chamber containing the Super Missile. You need to make sure that you lift off the ground just high enough or you will hit part of the wall leading to the tank.
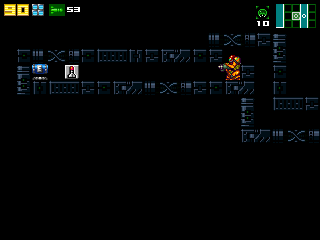
- Energy Tank A (room E)
- As you fall down the right side of the Industrial Complex in room C, hug the wall to grab hold of the entrance to a narrow passage right above where you can see a Missile Tank in the wall. Roll into room E, and jump over the ledge to the other side. If you try to roll to the Energy Tank on the left, you will hit a block. If you bomb the block, it will be evident that you can only remove the block with a missile. Roll back to the left, come out of Morph Ball and squat down to fire a missile to the left. Then roll over to collect the tank. From there, it is possible to collect Missile Tank C above.
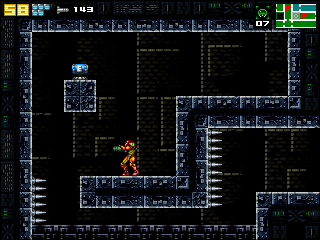
- Energy Tank B (room R)
- After defeating the Alpha Metroid in room R, which is hidden behind a blocked passage from room Q which you must bomb to get through, you'll notice a conveyor belt in the back. Shrink down into a Morph Ball and ride the conveyor belt through the narrow passage. Before you hit the spikes on the left, jump up to the platform on the right, and then leap up to collect the Energy Tank. To escape, simply run to the right to discover some bricks that disintegrate and allow you to fall through to the floor below.
Return visit[edit | edit source]
After discovering the transportation chutes in the Distribution Center, you should return here to collect a few previously unreachable items. The chute deposits you in room T. Run to the left through the sand, and use the Screw Attack to crash through the left wall and arrive at room J.
- Power Bomb A (Room U)
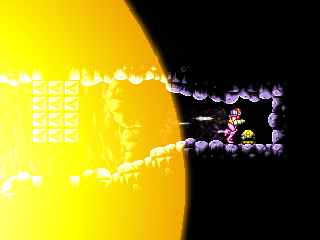
- Return to exterior room C by way of room H. In the upper right corner of room C is a green door which you must open with a Super Missile. If you step inside of room U, you will find a wall that is only breakable with Power Bombs. However, even if you use a Power Bomb here, you will find that the wall beyond requires you to use Shinespark to break through it. In order to accomplish this, you must return to room C. Make sure the door to room U is open, and jump to the left of the door to find a platform just below the ceiling. Start from the left edge of this platform and run to the right to build up enough speed for Shinespark. Then squat down when you reach the end before you fall off. You must then somersault through the air to reach the door, then press jump, and hold right. Your feet will catch the ledge before the door, allowing you to continue running through the door and squat back down to preserve your Shinespark. Quickly drop to the ground below, switch to Morph Ball form, and release a Power Bomb. Before the bomb's explosion is complete, press jump and hold right to crash through the wall beyond and collect the Power Bombs on the other side.
- Power Bomb B (room V)
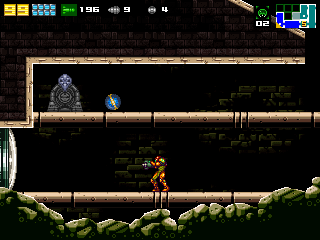
- Return to room A. At the very top is a barrier on the left side which can only be destroyed with Super Missiles. Blast the barrier away and step into room V. If you activated the Distribution Center, there will be a Power Cell waiting for you in an upper portion of the room. Use Missiles to create explosions beneath the cell which will propel it to the left. Use a Power Bomb to create holes in the platforms for the cell to fall through. Then drop to the bottom of the room and continue to blast the cell through the floor with missiles, in order to drive it over to the structure on the left. When the cell attaches, the door to the left will activate. Head through the door to collect more Power Bombs.