Before the next quest[edit]
Using the new power of Autumn, Link can access two new small areas. First and foremost, a L-4 Gasha spot on Mount Cucco. Then, a cave in Horon North, holding a chest with a ring.
Furthermore, there's a cave holding a Gasha seed in the east suburbs. Link needs the new magnet gloves to reach it, as well as the power of spring and the power bracelet. Another cave requiring the same three items is in Winter Woods, just near the dungeon entrance; a magic ring can be found there.
During this chapter the trading sequence can be completed, therefore make sure you collected all the necessary items so far.
Tarm ruins[edit]
Subrosian market, forge and wilds[edit]
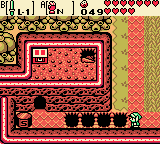
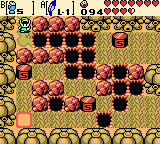
The only way to enter the Tarm ruins is to collect the four jewels.
If Link goes back to the Subrosian market, right now the owner sells a Member card. This card allows to access the secret backstore of the shop in Horon Village.
It's not time to go leave Subrosia yet! Many Subrosian are talking about special minerals that can be obtained at the forge. One such mineral, the blue ore can be found in the western Subrosian Wilds using the magnet glove. The red ore, instead, is quite near to the forge, and the magnet glove is required there, too. Bring the two different minerals to the forge, and they'll turn it into hard ore. Bring it to the Subrosian smith, and the master will use it to upgrade the shield.
The four jewels[edit]

Trave back to Horon Village, and enter the shop. Thanks to the membership card, the owner allows Link to go downstairs. There, he can buy a treasure map and a seed satchel upgrade.
Press select and check the map: the location of the four gems is now highlighted.
- Let's start from the closest gem: on the west coast. In order to reach the marked islet, Link should first light a brazier. Just put your feet in the water and use the slingshot. The islet features a rock in the shape of a question mark: it's the same shape of mystery seeds. Use one, defeat the monster, then collect the first jewel.
- Let's move on to the farthest jewel, on Mount Cucco. Change the season to springtime and get to the dungeon entrance. Once there, dive in the north-east corner of the water pond.
- The third jewel is on the opposide side of the river bordering the Holodrum Plains.
- Keep swimming west in the Holodrum river and reach Spool Swamp. Change the season to winter, then go to the south-east corner. Blast a wall with a bomb, and enter the cave.
Now that Link has collected all four jewels, he can return to the Tarm Ruins gate crossing the Spool Swamp.
Lower Tarm ruins[edit]
The default season is autumn. Put the for jewels in the four slots, and the gate will open.
Use the scepter to change the seasons accordingly:
- Summer: Climb the vines then descend them on the next screen. Push the armos statue sideways. Go back to the stump.
- Winter: Walk on the snow and reach the ladder. Push all the armos statues in the water.
- Autumn: Before continuing north, Link can pick up mushrooms in the east. A Deku Scrub in the cave gives the solution for the Lost Woods maze.
Lost woods[edit]
The Lost Woods are a distinct area within Tarm Ruins. A lone sapling is in the southeast corner: if Link burns it down using an ember seed, and if he completed the trading sequence, a Deku Scrub will tell a solution of the woods that allows to get the Noble sword L-2.
There is a tree stump in the center of the Lost Woods. Both solutions of the maze require the same sequence of seasons: winter, autumn, spring, summer. The directions are in the game: just talk to the two Deku Scrubs.
Upper Tarm ruins[edit]
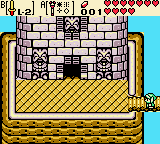
The default season here is spring. There is a L-5 Gasha spot here.
- Autumn: get a Gasha seed by picking up the mushrooms and burning down the small tree near the gale seeds tree.
- Winter: the snowfield allows to reach the upper area; push an armos statue sideways, so that Link can come back up in springtime.
- Spring: use the "spring flower" to access the upper area, the cut down the stone flower and cross the bridge.
Link is now at the entrance of the 6th dungeon.
Ancient ruins[edit]
Map[edit]
- From the entrance to the map
In the second room there are two possible exits: to the east and to the north. Take the one to the north, the one to the east ultimate leads to a dead end. Follow the only possible path. Notice the coloured tiles under the locked door, as you pass by it. In another room you'll get a chest with a blue Rupee (5R). There is a secret passage in the room where a door closes behind Link: place a bomb at the middle of the southern wall.
After a five rooms loop, you're back to the rotatory room, but this time you can go west. There are two exit from this room: north or south. In the north room you can obtain a key by using together the magnet glove, the Roc's feather and the Pegasus seeds.
Now go to two rooms south, then back up, open the chest and get the dungeon map.
Compass[edit]
- From the map to the compass
The room next to the map chest (to the west) leads to another dead end (for the time being). Go back to the rotatory room, then go south. Use the small key to open the locked block. Then, use the magnet glove to position the iron sphere on the button, and keep your way back open.
Anyway, continue north and back to the rotatory. This time, you can go north. Use the magnet glove to move the iron sphere on the button, then climb up the new stairs.
Upstairs, use the Roc's feather to get past the various obstacles. In the next room, use the shield to defeat the Spike turtles. Open the chest and claim a key, then backtrack to the rotatory.
Another four-room loop, counterclockwise. After you defeat the Rope snakes, push the central block to open the door. Repeat the loop, and then the rotatory will send link to the east. You now have a key to open that locked door! Equip the Roc's feather and jump over the laser beam, while you make your way to the chest in the north-west corner. There, you'll find the compass.
Magic Boomerang[edit]
- From the compass to the Magic Boomerang
After you got the compass, get to the opposite (south-east) corner of the room. In the next one, defeat the Keese bats, then equip the Roc's feather (again) and the Pegasus seeds. Press the button, the run to the north-west before all the floor crumbles away.
Upstairs, use the bombs to open a visible passage in the south wall; the chest in the room contains some bombs.
Next comes a room with a chest and two exits. Defeat the Armos statues before opening the chest, or they will activate at the same time; the chest has just 5 Rupees. The south room is a "trap": defeat the easy enemies and backtrack. The west room has a chasm and two Spike turtles: equip the shield and the Roc's feather. Move the trampoline onto the violet tile and jump on it to get on the next floor.
Cross three rooms, then open the chest and claim the Magic Boomerang. it's also one of the few weapons that can defeat the Armos statues.
Boss key[edit]
- From the Magic Boomerang to the boss key
After you claimed the Magic Boomerang, backtrack. There is a shortcut (a hole surrounded by cristals), that leads back near the entrance.
Back on the ground floor, go west, pass by the chest where the map was, and continue west. In the next room (to the west), there's a chest with a red Rupee (10R). Use the Roc's feather to jump over the spikes. Press the button tile and open the door.
Use the magic boomerang to hit the blue sphere, so that a stairway will appear.
Upstairs, there are two exits from the room: the east path joins back the south one after two pointless rooms. Therefore, in the south room, use the magic boomerang on the blue sphere to open the door. Go south and jump down. Two rooms later, use the slingshot with ember seeds and light up all the braziers: a stairway will appear.
In order to get past the shrinking walls, use the Roc's feather together with a Pegasus seed. The Quicksand ring will be useful, too, if you have it. Past the rush, open the chest and claim the boss key.
Sub-boss: Vire[edit]
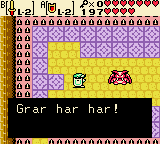
- From the boss key to the sub-boss
Go back to the room before the boss key: now that the walls are not moving, you can easily climb up the stairs.
In the room with a locked door, jump down the hole instead. Open the chest for a key, then use the trampoline to get back up.
Use the charged-up sword to attack, and the shield to parry the fireballs.
Boss door[edit]
- From the sub-boss to the boss door
After the sub-boss, use a Pegasus seed for the first room and the Roc's feather for the second. In the third one, press the right button for a stairway, the left one to fight some enemies.
Upstairs, use the magnet glove to defeat the Hardhat turtles and thus open the door. Then, turn all the moving blue spheres to red using any ranged item. In order to get to the top floor, push the trampoline against the south floor, then right and align it with the stairs.
Hit the blue sphere, go back down, push the trampline near the south-west, go up again. Push a block, and you can finally get to the boss.
BOSS: Manhandla[edit]
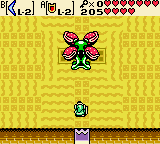
This is another boss from The Legend of Zelda 1, because Oracle of Seasons was originally meant to be a remake.
The Quicksand ring is very useful during this battle.
Use the magic boomerang to defeat each of the four heads, while the shield can protect you from the fireballs.
Then, use the boomerang again to open up the core, and finally slash it with the sword.
