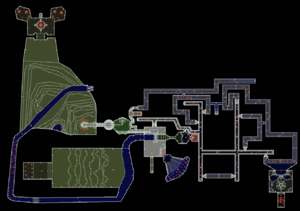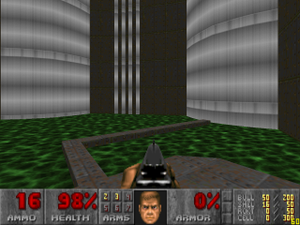
Map 22, Habitat, can be a rough level unless you know the secrets and tricks. At the start, you are under immediate attack, and you are up against heavy hitting enemies. However, it contains a sequence break that allows you to skip most of the map and proceed directly to the exit.
Start and blue key[edit]
In the starting room, the zombies to your right are in line of fire. In addition, there are imps in the slime cage ahead. You may either fight or evade them.
Head to the left and follow the river. On your right, you should see a wide open area and a plasma gun. Collect it, and advance. When you apporach the door, it will open, causing enemies to activate and teleport all over the arena. Retreat and take cover behind the corner to the south until you defeat the archvile (which won't appear on easy). Once you have a safe number of monsters, you can pass through that door, and walk through the fake wall to get some health and the blue key.
Yellow key[edit]
To reach the yellow key, head into the slime cage to the right by passing through the slime pillars. This will lower part of the slime cage, where you can reach blue water. In this small room, look for a door on the north wall and open it. This leads to a tunnel network.
Take a right turn after going through the door, and take a right at the first branch. Turn left and run to the end of the corridor. When you reach the end, a door to the south should open behind you.
The southern wall in this side tunnel is opened by the blue key. The yellow key is visible, but approaching it will start monsters to teleport into the room. It is safe to quickly grab the key and run.
With the yellow key, head to the slime pit to the norhtwest of the starting location. Jump into the slime pit and press the switch on the north wall to lower the right-hand lift. When it reaches the ground, you should see a yellow key gate which may be opened. Head to the top of the stairs (although you may continue to kill enemies), and backtrack to see a side wall lowering. This contains a pain elemental, which should be defeated. Enter the alcove to reveal a switch. Flip it, and the slime pit will have a path raised.
Level exit[edit]

You may do all of the above, or skip to this section.
In the slime pit northwest of the starting area, walk towards the western metal wall, at the direct center. The path is shown if you perform the above steps, and it will start to lower once you cross the tip of that path. It will trigger even if the path hasn't been raised from the pit.
Run across the additional slime, and climb the lift. This leads to Invulnerability and a Berserk pack. When you take them, the walls will open to the outside. The exit is directly to the north.
If you want to collect additional ammo and a green armor, you can follow the south river. There are a large number of imps that will try to block access. Once you reach the ammo, additional enemies will be released at the exit.
Secrets[edit]
There are nine sectors in this level considered secret:
- In the starting area, there is a supercharge behind a fake wall.
- Collecting the supercharge counts as another secret.
- Enter the above secret, and quickly exit. You will notice that one box to the right has lowered, revealing a switch. Press it and head to the south east corner. In this large room, you can find a rocket launcher and a BFG, but it is also guarded by lots of monsters.
- When heading for the yellow key, you might see a chainsaw behind a barrier. Head through the north door and backtrack for the barrier to be removed. Collecting the chainsaw will release demons. To claim the secret, you need to advance into the room containing the demons.
- From the start of the tunnel network, take a right turn, then a left turn. As you approach the corner, a door behind you to the right will open. Enter this doorway to lower a passage between the middle and eastern side corridors.
- In the middle side tunnel in the tunnel network, enter by the southern door. This opens a connector between the right-most and left-most side tunnel, containing additional health.
- In the above secret, there is a fake wall on the south part of the corridor. This has more health bonuses and the red key.
- In the middle side tunnel, enter or exit the northern door. This opens a connector on the western side tunnel, and provides an alternate (and faster) route to the yellow key door.
- If you collected the red key, this secret will be visible at the exit. Open the red skull key door, and enter the teleporter. This lets you collect blue armor (or a megasphere on easy).