m (→Controls) |
PanchamBro (talk | contribs) |
||
| (One intermediate revision by one other user not shown) | |||
| Line 1: | Line 1: | ||
{{Header Nav|game=Animal Crossing: New Horizons}} | {{Header Nav|game=Animal Crossing: New Horizons}} | ||
[[File:ACNH Camera Icon.png|60px|left]] | [[File:ACNH Camera Icon.png|60px|left]] | ||
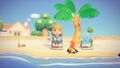
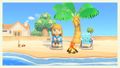
The '''Camera''' app is available in your NookPhone at the beginning of the game. It is useful for taking screenshots of all your island decorations and to obtain [[Animal Crossing: New Horizons/Nook Miles|Nook Miles]]. The | The '''Camera''' app is available in your NookPhone at the beginning of the game. It is useful for taking screenshots of all your island decorations and to obtain [[Animal Crossing: New Horizons/Nook Miles|Nook Miles]]. The advantage of using the camera app instead of the Switch's snapshot button is the ability to use filters and frames and zooming in and out. | ||
==Controls== | ==Controls== | ||
| Line 14: | Line 14: | ||
:Press {{switch|Plus}} to take a photo. This will save the screenshot into your Switch Album. It will be either stored in your Switch storage or on your SD card, based on your setting. | :Press {{switch|Plus}} to take a photo. This will save the screenshot into your Switch Album. It will be either stored in your Switch storage or on your SD card, based on your setting. | ||
:To exit the camera, press {{switch|Minus}} or {{switch|B}}. | :To exit the camera, press {{switch|Minus}} or {{switch|B}}. | ||
; Hiding the user interface | |||
:Click {{switch|Press|Rstick}} to hide the user interface. This will allow the recording of video files without the user interface. This was added in version 1.4.0, after a glitch was patched in the previous patch that allowed players to hide the user interface. | |||
==Obtaining the screenshots== | ==Obtaining the screenshots== | ||
Latest revision as of 21:14, 28 May 2021
The Camera app is available in your NookPhone at the beginning of the game. It is useful for taking screenshots of all your island decorations and to obtain Nook Miles. The advantage of using the camera app instead of the Switch's snapshot button is the ability to use filters and frames and zooming in and out.
Controls[edit]

- Changing the camera position
- You can zoom in the camera by pressing
 and zoom out by pressing
  .
. - To move the camera, use
 .
. - Setting the scene
- Choose one of the available filters by pressing
 and choose a frame by pressing down the
  .
. - If you press the
 button, your character will look at the camera.
 - Taking the photo
- Press
 to take a photo. This will save the screenshot into your Switch Album. It will be either stored in your Switch storage or on your SD card, based on your setting.
 - To exit the camera, press
 or
or  .
. - Hiding the user interface
- Click
 to hide the user interface. This will allow the recording of video files without the user interface. This was added in version 1.4.0, after a glitch was patched in the previous patch that allowed players to hide the user interface.
Obtaining the screenshots[edit]
The stored screenshots in your Switch Album can be shared via Facebook or Twitter. If you do not have a microSD card, this is a good way to move the screenshots to your computer.
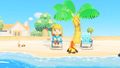
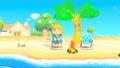
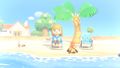
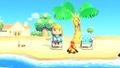
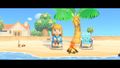
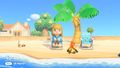
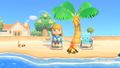
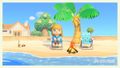
Filters[edit]
-

No filter
-
Sharp filter
-
Pop filter
-
Soft filter
-
Dramatic filter
-
Film filter
-
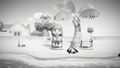
Monochrome filter
-
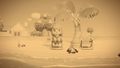
Antique filter


Frames[edit]
-
Frame
-
Cinema frame
-
Time frame
-
Date frame
-
Frame + Date


Nook Miles[edit]
One of the Nook Miles tasks, the Island shutterbug gives a reward for first photo taken using the Camera app.
After obtaining the Nook Miles+ upgrade, you might occasionally see the Capture a Moment task, which also involves the use of this app.