It has been one year since Zero came back to life to fight for peace. He has helped Ciel, a human scientist, along with the Resistance, a group of Reploids falsely accused of being Mavericks, escape the reaches of Neo Arcadia's Iron-Fisted Policy. A Reploid from a century in the past, Zero was forced to adjust to this new, crueler world, and has been constantly fighting ever since he defeated Copy X, a corrupt take of the original X. Copy X's protectors, the Four Guardians, have been reduced to three, with Hidden Phantom's misguided attempt to stop Zero resulting in his death. Sage Harpuia, the wisest of the Guardians, has stepped in to take Copy X's place as leader of Neo Arcadia, reassuring the public all is well in their leader's absence.
Ever since these events, Neo Arcadia has sent out garrisons of troops day in, day out, to pursue and punish those who would threaten the haven of humanity. Up against millions upon millions of robot soldiers, Zero's fight is a bleak one. Exhausted from unending battle, Zero has barely put a dent the massive hordes of Pantheon troops advancing their way to the Resistance, forcing them to abandon their damaged base. Zero is hopelessly lost, extremely worn down from fighting for a full year. His weapons are breaking, and his skills have diminished from continued injuries. The fighting has gone on so long, the battles have become meaningless to him. He must find the Resistance, if he wishes to restore his sense of purpose, put a stop to the fighting, and above all, survive to see tomorrow...
The Toll of an Endless War
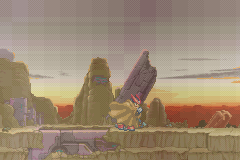
As the game begins, you'll see a worn-out Zero fighting his way through a thick sandstorm, and be given a prologue of what has happened since the last game concluded.
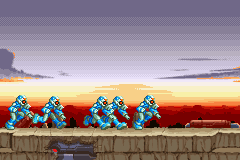
In a brief moment, the sandstorm clears up, but Zero hears oncoming metal footsteps from behind. A quick glance behind him soon reveals he's about to be swamped by an incoming unit of Pantheons.
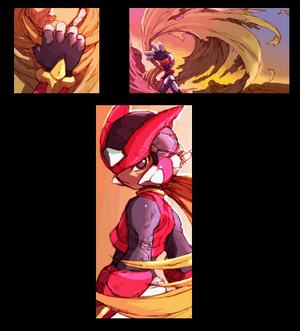
Knowing it has outlived its usefulness and will only hinder him in battle, he tosses aside his tattered cloak and gets ready to fight, even in his despairingly weary state.
With that, the game has begun...
Items to collect
Elves to obtain (5):
- File:MMZ Hacker Elf Icon.PNG Cyber-Elf M-orina
- File:MMZ Hacker Elf Icon.PNG Cyber-Elf Itemeter
- File:MMZ Hacker Elf Icon.PNG Cyber-Elf Stoccum
- File:MMZ Animal Elf Icon.PNG Cyber-Elf Birwin
- File:MMZ Nurse Elf Icon.PNG Cyber-Elf Arnue
Mission Requirements
- Clear Time Limit: 2:10
- Enemies Killed: 37
Sand Wilderness
You start out in the opening level with Zero constantly hunched down in agony from his damaged state, with a worn-down version of the Sub Screens from the first game, right down to Zero's mugshot. It's no suprise that means most of the items you had are gone as well. The Triple Rod is busted, the Shield Boomerang is wrecked, and the Element Chips are broken. It's just you, a Buster Shot Gun, and the Z-Saber. Make skillful use of your weapons- you'll need them right off the bat.
This intro stage is simplistic at best, but has a few dangers along the way that can result in disastrous mistakes. Notice many of the enemies here are ingeniously designed to blend in with the desert environment. Alongside them are the malicious Pantheon Gunners that have been around since the first game, which have been dogging Zero for 365 days straight, morning, noon, and night.
The controls and gameplay are the same as before. Adjust them as you like, and get ready to fight.
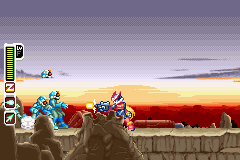
You must start advancing to the right from the get-go, as Pantheon Gunners are coming from behind, and they'll never stop pouring in. Up to five will appear on screen at a time, but as soon as you kill one, another appears to take its place. Kill about a dozen or so quickly to help rack up a kill count high enough to meet the mission criteria. The rest of the enemies in the stage will make up the difference.
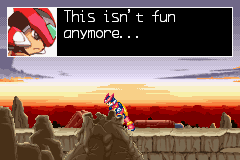
It's futile to keep shooting down these Pantheons forever, and even Zero is sick of the perpetual battles. If you do keep attacking them, you'll get a disheartening message from Zero to drive it on home.
It's time to make your move and get through the desert, and you only have a worn down Buster and Z-Saber at the ready, which means there's some leveling up to do before they can really do some damage. This puts you at a disadvantage in this mission and all others to come until you restore fully Zero's skills.
The first strech ahead has a couple Pantheon Gunners ready to fire three shots at you, unlike the group coming up from behind. They can be easily destroyed, but then after getting past two, you'll approach a pair of Shabarollers, weaponized mechanical cacti. They have two spinning sections guarded by rotating shields, which only move out of the way to let the cacti segments fire needles at you, alternating from top and bottom. Pound them with Buster gunfire when the shields aren't in the way and their weak spots are exposed.
Next, there will be a few pits to jump over, which can be made easier by dash-jumping, but lead to instant death should you botch the jumps and fall down them to your doom. While this area looks clear, another new enemy, Shaball, a spiked tumbleweed, appears several times in ambush, hurtling through the air to knock the wind out of an already winded Zero. You can get hit if one of these suckers rolls into you, or if you ignore one when it comes to a rest, it will open up and fire spiked bombs from its pod. Cut through them before they get you and move on.
However, this is merely the start of your troubles. An old enemy is back to get you, with some new weaponry equipped...
Sub-Boss: Golem Type E
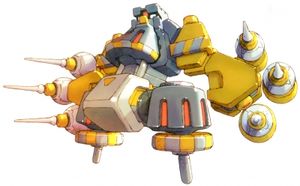
Right away, this intro stage gives you a real challenge with the first sub-boss in the game, Golem Type E. It's a variant of the original you first faced, but instead of hands, it has electric rod appendages that fire three beams on each side and continually adjust their positions to alter the course of the beams so they either crisscross or fan out. The sub-boss itself is simple; pay attention to the side that it's going to fire from, as that's the direction you need to dash to get away unharmed. If you don't, you have to be standing in just the right spot to avoid being hurt. The hard part is the timing. Golem Type E is unforgiving, and the damage it causes packs a wallop. Its hit box is a little awkward, so using the Z-Saber is risky. Charge up the Buster Shot Gun and fire at its upper chest where its furnace vents are located to cause some damage. You can dash-jump if you seem to be missing it, or aim for its head, another weak spot. Be careful taking this one down, because this is just the first Golem in your way. That's right: it isn't the only Golem in this stage.
After a few more bottomless pits, and a couple more Pantheons dotted between them, you'll encounter a second Golem-Type E, this time with pits in the ground, making it much harder to dodge the shots from the Golem. Be careful and destroy it (make sure you're below solid ground when you do, as the controls lock up when it explodes), and you'll get File:MMZ Hacker Elf Icon.PNG Cyber-Elf Stoccum.
Dangerous territory
As you keep going, you'll find yet another new enemy feeding off a dead Pantheon's remains, Condoroid MK2. It's a nastier version of the old Condoroids from the first game. They elude attacks better than the former model possibly could, and swoop down to attack much faster than the old ones. Disturbing it, or destroying the dead Pantheons they eat will make them mad in a heartbeat. Keep your reaction time honed to face off with any Condoroids pestering your mission. Mind the increasing degree of pits, because the cliffs are getting sketchier as you travel deeper through the wilderness.
You'll find some piles of junk from scrapped troops have piled up all over. You can jump onto them and climb up, but be fast, because they are unstable and crumble as soon as you make contact with even so much as a corner of scrap metal. There is also a Life Energy Capsule further along the way if you've been roughed up by the Mechaniloids in the desert.
The enemies are coming in greater numbers still. Condoroid MK2's, Shaballs, and a few Pantheons are up ahead. Get through with caution, and you'll eventually make it to solid ground, devoid of any hostile machines. But... you're not out of harm's way yet. What's up ahead is even worse than the enemies you've just seen...
Boss: Mecha Scorpia

As Zero finally reaches a clearing, a group of Pantheons is there to head him off. However, a gigantic, glowing pincer claw comes rocketing in from behind! Zero realizes it only a few seconds to jump over this sudden attack, which creams the Pantheons in front of him. As Zero looks from behind, a huge Mechaniloid beast emerges from crumbling ruins; Mega Scorpia.
Mega Scorpia is the first boss of the game, a giant mechanical scorpion sent to destroy Zero. The beast is more than twice the size of him, with two iron claws, plasma guns, and a recoiling tail sporting a needlepoint stinger on the end. For an intro boss, the battle against it won't be mind-numbing, but the monstrous Mechaniloid has some nasty tricks it can pull than can leave you on edge.
You'll have to keep up with a scroll, since this beast refuses to let you get away. You also need that extra space to dodge its weaponry. As you might have already spotted, Mega Scorpia's weak point is its car-sized head. You can damage it quite well with a charged Buster shot, but you'll do massive damage with the Z-Saber on tap.
Mega Scorpia's simplest attack is a round of three bullets from its smaller claw; simply dash-jump over the attacks. Mega Scorpia will ocassionaly stop inching toward you, but only to lash out its tail. The weapon packs so much power, it's strong enough to smash through the ground and leave you a pit you'll be forced to jump over. If the tail can break through solid rock in a canyon, you definitely don't want that thing to spear you!
The most brutal attack Mega Scorpia can unleash involves its fearsome pincer. A few clicks of the claw and an eerie orange glow will signal that Mega Scorpia is getting ready to launch it. This requires a decently-timed jump to avoid it, since it's oversized and you can get clipped by it if the jump is improperly executed. After Mega Scorpia launches the claw, you'll have to avoid it again as it returns to re-attach itself to the arachnid. Mega Scorpia will also try to block your attacks with the very same pincer, but the more you hit it, the more it will be damaged, until it finally gets destroyed, stripping Mega Scorpia of its pincer attack and allowing you to finish off the boss with relative ease.
Mission Report
After Mega Scorpia is wasted, you'll receive a Mission Report. Like the previous game, this happens any time you successfully accomplish a mission. There is no Cyber-Elf reward for beating a boss now, so the Mission Report appears immediately. You'll be graded on how complete your objective was, how fast you were, how many enemies you wiped out, the damage you took in battle, if you died and had to retry part of the mission, and for the use of Cyber-Elves. Since this is the first mission, you don't have to worry about an objective or Cyber-Elf penalties, unless you played the game before. How well your final total is affects your ranking. The ranks are S, A, B, C, D, E, and F, the worst being F, and the best being S, or Hero rank. Here is the list of where rankings fall for future reference:
- S - 96 to 100
- A - 86 to 95
- B - 76 to 85
- C - 66 to 75
- D - 56 to 65
- E - 46 to 55
- F - 45 and under
There are repercussions to having ranks below A, as you'll find out later that bosses will see you as less of a threat, and restrain themselves from fighting at their full potential.
Your average score must total at least 86 points to achieve a solid A-Rank, and at least 96 for a solid S-Rank. Your final scores will be averaged and determine if your rank goes up or down in future missions. If you do well enough, you'll be rewarded later. Try to shoot for A-Rank or higher on this first mission. The sooner you have a high score cemented, the better.
Finally, you'll be given a code name depending on how you got through a mission, and the skills you used to accomplish it, such as "Lightning" for speed, or "Edge" for using the Z-Saber as your go-to weapon, whereas a nickname like "Wounded" means you got butchered by the enemies a few times too many. S-Rank code names are much more noble and worthwhile, as you'll start off with "Hero" and work your way up to "Redeemer" if you stay at S-Rank for a long time.
Along with this, you may unlock Forms if you accomplished a secret objective during a mission. See the list for more details.
As you'll see, keeping at least an A-Rank throughout the game long enough will allow you to accumulate all the powerful EX Skills. If you get an A or S rank, i.e. at least 86% of maximum score, the next boss will use an EX Skill, a weapon/attack that Zero can learn. If you ever drop to B-Rank, you can make use of Hacker Cyber-Elves to bump your rank back up for a mission, but the penalties may start a downward spiral into lower ranks.
As you have just seen, the number of cyber-elves collected in the mission does not affect at all the final score, so don't waste time looking for any, and just grab those that are dropped by enemies and right in front of you to bag, thus saving time and increasing your score. Time is a valuable commodity you can't squander during the missions.
After you complete the mission, you can re-access the area and collect every remaining cyber-elf. The previous game wasn't as smoothed out: some captured Cyber-Elves would only be dropped when enough enemies unique to a particular mission were destroyed. If you missed an Elf, the enemies would be permanently gone from the explorable overworld, meaning in order to collect it, you would have to repeat a playthrough of the game to re-access the mission so you could get it. This time around, the process of getting all the Elves has been perfected.
Cyber-Elves Walkthrough
When you've completed the mission, come back for the remaining Cyber-Elves in the Sand Wilderness. You are free to explore the area again without any penalties incurred. Zero also has an Escape Unit that you may use after the completion of a stage to immediately vacate the area at will.
- Destroy three Shabarollers and you'll get File:MMZ Hacker Elf Icon.PNG Cyber-Elf M-orina.
- Destroy four Shaballs and you'll get File:MMZ Hacker Elf Icon.PNG Cyber-Elf Itemeter.
- Destroy the two Golems Elec-type and you'll get File:MMZ Hacker Elf Icon.PNG Cyber-Elf Stoccum.
- Destroy five Condoroid Mk.2, and you'll get File:MMZ Animal Elf Icon.PNG Cyber-Elf Birwin.
- Just before another Shabaroller rolls onto the screen, make the junk crumble, drop down, and you'll find a Cyber Elf box with File:MMZ Nurse Elf Icon.PNG Cyber-Elf Arnue, an Elf that gives you 2 extra lives when full-grown.
A Difficult Choice
With Mega Scorpia gone, Zero realizes he's finally cleared out all the troops heading towards the Resistance Base, but has exhausted himself to the breaking point and lost everything, passing out in the desert. However, none other than the newly-appointed leader of Neo Arcadia, Harpuia discovers him, riding a mindless copy of Aztec Falcon. Harpuia, given the choice to finish his sworn enemy off here and now, wonders if it is honorable to kill him while he's helpless. Refusing to throw away his honor, he spares his adversary for the time being, carrying him to the location of the New Resistance Base in a rare act of mercy...
