Jump to navigation
Jump to search


Dukeruckley (talk | contribs) m (spelling) |
m (Added noincludes) |
||
| Line 1: | Line 1: | ||
{{Header Nav|game=Super Mario Bros.}} | <noinclude>{{Header Nav|game=Super Mario Bros.}}</noinclude> | ||
__NOTOC__ | __NOTOC__ | ||
== World 4-1 == | == World 4-1 == | ||
| Line 76: | Line 76: | ||
{{Scrolling map|SMB1_Map_4-4_p3.png}} | {{Scrolling map|SMB1_Map_4-4_p3.png}} | ||
* Be careful not to get hit by Bowser's fire breath. You can rest for a while in the low spot to plan your next move. | * Be careful not to get hit by Bowser's fire breath. You can rest for a while in the low spot to plan your next move. | ||
{{Footer Nav|game=Super Mario Bros.|prevpage=World 3|nextpage=World 5}} | <noinclude>{{Footer Nav|game=Super Mario Bros.|prevpage=World 3|nextpage=World 5}}</noinclude> | ||
Revision as of 01:51, 17 August 2007
World 4-1
| Meet Lakitu, the flying menace |
| This troublesome creature from the sky will pop up and try to stop Mario's noble quest. The egg-to-Spiney combination is the most challenging and dangerous enemy on this level. Why are these guys so bad? Because they never quit. |
part 1

- Get on top of a high "?" block, and wait for the wily Lakitu. You'll make him drop to the ground if you jump on top of him--an effective ambush.
part 2

- Collect all of the coins in the "?" block platform. Then quickly get back to the top. Stand on top of the third block, and jump to collect a hidden 1-up mushroom.
- You can't reach the coins from the ground, so use the wall as a stepping stone. Then clean up!
- The second pipe leads to coin room D.
part 3

- The mid-air block below the stairs is a 10-coin block, so first go down and collect all 10 coins. Then jump up on top of the same block, go back to the top of the stairs, and make your victory leap to the flagpole.
World 4-2
| Will the real warp zone please stand up |
| World 4-2 gives Mario access to not one, but two warp zones. If you follow the conventional route laid out by World 1-2 and travel along the ceiling, you'll reach the warp zone where a lonely pipe will only advance you to World 5. The warp zone that leads to Worlds 6, 7, and 8 is preceded by a tree top world full of coins. |
part 1

- Get the three coins and blast the block that's farthest to the right overhead to collect a power-up.
- It's difficult to deal with Goombas when the ceiling is low. But if you are Super Mario, you can blast through the overhead blocks and gain valuable headroom.
- There is a 10-coin block hidden inside the low ceiling. It's the 5th block from the right, second one up. Cash in!
- The area after the lift is full of hidden coin blocks and a secret beanstalk. Punch the blocks except for the hidden coin directly beneath the beanstalk. If you reveal the highest coin too early, it will be difficult to make the beanstalk appear. Climb the beanstalk to find a Warp Zone.
part 2

- There is a 10-coin block hidden to the left of the first pipe, and a star to the right of the pipe. Beware of the Troopas and Buzzies lurking below.
- The second pipe in this section leads to coin room E.
- By pressing the "right" button while you jump to the right lift from the left lift, you can land on the lower block even if you hit the blocks above you. The center block of the second block set contains a power-up. You can also use the lifts to go above the ceiling to the Warp Zone which leads to World 5.
part 3

- Find a power-up in the block that's farthest to the left under the row of coins.
- To reach the top of the pipe, use the stairs to the left. If you fall to the left of the pipe, the Buzzy will almost surely get you. When you go to the right from the top of the pipe, be sure not to bump your head on the ceiling because you'll fall into the bottomless pit! It's better to jump down to the right first, and jump across. If you're Super Mario, you can also go to the Warp Zone by punching through the ceiling.
World 4-3
| Score high on the balance lifts |
| Stay on the balance lift until the rope breaks, and score a whopping 1000 points! Be prepared to jump at the last moment to save your life. |
part 1

- You have double trouble on the third island: 2 nasty Troopas pacing back and forth. You have to carefully kick them out of your way and right off the 'shroom. Of course, Fire Mario can blast them with fireballs.
- Use the "accelerate-jump" combination to get to the high fourth island.
- Paratroopas fly up and down. Since they don't chase you, you can easily avoid them. If you're an advanced player, however, you can even stomp them as you jump. Be careful not to lose your balance trying to get the power-up on the right. You don't want to fall off.
- If you try to get the coin beneath the first lift just by jumping, you will bump your head and fall. Hop on the lift, then get the coin.
part 2

- Study the movements of these balance lifts before you cross. The best strategy is to get on the left side, and wait until the right side becomes the same height. Then jump.
- Stay on the final lift until it reaches the top and use
 to accelerate, then leap to the flagpole.
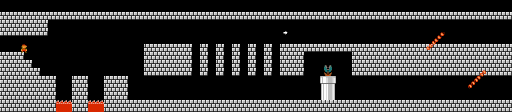
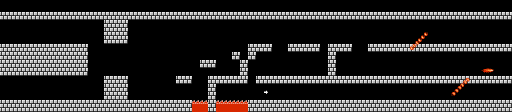
World 4-4
| Navigate the maze |
| Some of Bowser's castles have fake pathways that go in circles. If Mario doesn't choose the right paths in these fortresses, he may find himself right where he started. Learn the correct paths and steer Mario to Bowser. |
part 1

- There are two routes. The lower hall is a trap. You'll be stuck there with no hope of escape. Use the top route to find your way.
part 2

- In this second half of the castle, you must take the lowest route or you'll be trapped forever.
part 3

- Be careful not to get hit by Bowser's fire breath. You can rest for a while in the low spot to plan your next move.