Notmyhandle (talk | contribs) (sect-stub) |
(improved guide layout) |
||
| Line 19: | Line 19: | ||
|- | |- | ||
|[[Image:Zelda LA Dungeon C graveyard step 4.png]] | |[[Image:Zelda LA Dungeon C graveyard step 4.png]] | ||
|| Push the top- | || Push the top-center gravestone right. | ||
|- | |- | ||
|[[Image:Zelda LA Dungeon C graveyard step 5.png]] | |[[Image:Zelda LA Dungeon C graveyard step 5.png]] | ||
| Line 50: | Line 50: | ||
|- | |- | ||
|[[Image:Zelda LA Dungeon C room G-6 step 1.png]] | |[[Image:Zelda LA Dungeon C room G-6 step 1.png]] | ||
|| In this room your goal is to hit the | || In this room your goal is to hit the colored shell beetles to make them curl up into balls, and then throw them in the appropriate holes. If you put them in the wrong hole they'll pop out of it. Your reward is a stone beak. | ||
|- | |- | ||
|[[Image:Zelda LA Dungeon C room F-6.png]] | |[[Image:Zelda LA Dungeon C room F-6.png]] | ||
| Line 56: | Line 56: | ||
|- | |- | ||
|[[Image:Zelda LA Dungeon C room E-6 step 1.png]] | |[[Image:Zelda LA Dungeon C room E-6 step 1.png]] | ||
|| Aha! More | || Aha! More color-coded fun. | ||
|- | |- | ||
|[[Image:Zelda LA Dungeon C room E-6 step 2.png]] | |[[Image:Zelda LA Dungeon C room E-6 step 2.png]] | ||
| Line 70: | Line 70: | ||
|| More pitiful monsters. Unlock the door and go up. | || More pitiful monsters. Unlock the door and go up. | ||
|- | |- | ||
|[[Image:Zelda LA Dungeon C room D-7.png]] | |} | ||
===Miniboss #1: Giant Buzz Blob=== | |||
[[Image:Zelda LA Dungeon C room D-7.png|thumb|left|Giant Buzz Blob]] | |||
And now, you'll fight... the uber-sized Giant Buzz Blob! He says the sword can't harm him. Remember how the blue Stalfos told you to have Magic Powder with you? Use it. It will damage Giant Buzz Blob when you sprinkle it on him. After about five doses, he falls. Head left, and you'll get the Nightmare Key. | |||
{{-}} | |||
{| | |||
|- | |- | ||
|[[Image:Zelda LA Dungeon C room D-6.png]] | |[[Image:Zelda LA Dungeon C room D-6.png]] | ||
| Line 77: | Line 82: | ||
|- | |- | ||
|[[Image:Zelda LA Dungeon C room H-6.png]] | |[[Image:Zelda LA Dungeon C room H-6.png]] | ||
|| You know the | || You know the drill; kill kill kill. Head left. | ||
|- | |- | ||
|[[Image:Zelda LA Dungeon C room H-5.png]] | |[[Image:Zelda LA Dungeon C room H-5.png]] | ||
| Line 83: | Line 88: | ||
|- | |- | ||
|[[Image:Zelda LA Dungeon C room G-5.png]] | |[[Image:Zelda LA Dungeon C room G-5.png]] | ||
|| In this room simply head up. | || In this room, simply head up. | ||
|- | |- | ||
|} | |||
===Miniboss #2: Stone Hinox=== | |||
[[Image:Zelda LA Dungeon C room F-5.png|thumb|left|Stone Hinox.]] | |||
And now it's miniboss number two: Stone Hinox! He is quite tough, and drops boulder after boulder at you, and toss you if you get too close. He is basically a Hinox, but with a stone-armored body. It will take many hits to defeat him, but if you have the Fire Rod, he'll go down in two hits. | |||
{{-}} | |||
{| | |||
|[[Image:Zelda LA Dungeon C room F-4.png]] | |[[Image:Zelda LA Dungeon C room F-4.png]] | ||
|| In this room lift the top-left pot for a button and then go up. | || In this room lift the top-left pot for a button and then go up. | ||
| Line 95: | Line 105: | ||
|- | |- | ||
|[[Image:Zelda LA Dungeon C room E-5 step 1.png]] | |[[Image:Zelda LA Dungeon C room E-5 step 1.png]] | ||
|| | || Ooooh, more beetles. Put them in the right holes once more. | ||
|- | |- | ||
|[[Image:Zelda LA Dungeon C room E-5 step 2.png]] | |[[Image:Zelda LA Dungeon C room E-5 step 2.png]] | ||
| Line 104: | Line 114: | ||
|- | |- | ||
|[[Image:Zelda LA Dungeon C room F-3 step 1.png]] | |[[Image:Zelda LA Dungeon C room F-3 step 1.png]] | ||
|| Aha! Another | || Aha! Another color puzzle. | ||
|- | |- | ||
|[[Image:Zelda LA Dungeon C room F-3 step 2.png]] | |[[Image:Zelda LA Dungeon C room F-3 step 2.png]] | ||
|| Hit the top- | || Hit the top-center head first. | ||
|- | |- | ||
|[[Image:Zelda LA Dungeon C room F-3 step 3.png]] | |[[Image:Zelda LA Dungeon C room F-3 step 3.png]] | ||
|| Then the right- | || Then the right-center one... | ||
|- | |- | ||
|[[Image:Zelda LA Dungeon C room F-3 step 4.png]] | |[[Image:Zelda LA Dungeon C room F-3 step 4.png]] | ||
|| Then the left- | || Then the left-center one... | ||
|- | |- | ||
|[[Image:Zelda LA Dungeon C room F-3 step 5.png]] | |[[Image:Zelda LA Dungeon C room F-3 step 5.png]] | ||
|| And finally the bottom- | || And finally the bottom-center one. Now go through the door that just opened. | ||
|- | |- | ||
|[[Image:Zelda LA Dungeon C room E-3.png]] | |[[Image:Zelda LA Dungeon C room E-3.png]] | ||
| Line 122: | Line 132: | ||
|- | |- | ||
|[[Image:Zelda LA Dungeon C room E-2.png]] | |[[Image:Zelda LA Dungeon C room E-2.png]] | ||
|| In the next room wall-ride on the blocks after hitting the switch, then unlock the door to fight the | || In the next room, wall-ride on the blocks after hitting the switch, then unlock the door to fight the boss. | ||
|- | |- | ||
|[[Image:Zelda LA Dungeon C room D-2.png]] | |} | ||
==Boss: Giant Hardhat Beetle== | |||
[[Image:Zelda LA Dungeon C room D-2.png|thumb|left|Giant Hardhat Beetle.]] | |||
The boss is Giant Hardhat Beetle. "Blue is safe. Yellow is caution. Red is danger." This line he says refers to his own health. Simply keep him from turning back to blue. The darker he gets, the closer to victory. When he's red, hit him one final time to kill him. The Fire Rod should make quick work of him, if you have it. | |||
{{-}} | |||
{| | |||
|- | |- | ||
|[[Image:Zelda LA Dungeon C room D-3.png]] | |[[Image:Zelda LA Dungeon C room D-3.png]] | ||
||And you've made it! Talk to the fairy to claim your reward. To double your attack like the Piece of Power does, choose red. To double your defense like the Guardian Acorn does, choose blue.<BR><BR> | ||And you've made it! Talk to the fairy to claim your reward. She will give you a new color of clothes: red, or blue. To double your attack like the Piece of Power does, choose red. To double your defense like the Guardian Acorn does, choose blue.<BR><BR> | ||
NOTE: after this change you can come back any time to change between the red and blue tunics, but you can never ever return to the green tunic without cheats.<BR><BR> | NOTE: after this change you can come back any time to change between the red and blue tunics, but you can never ever return to the green tunic without cheats.<BR><BR> | ||
After making your choice and confirming that that is final, she returns you outside. Congratulations, you've completed the Color Dungeon! | After making your choice and confirming that that is final, she returns you outside. Congratulations, you've completed the Color Dungeon! | ||
Revision as of 20:27, 11 June 2009
The Color Dungeon contains a small yet intricate set of puzzles that you could spend hours working out if you don't pay close attention to the patterns.
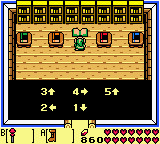
First of all go to the Mabe Village library. You'll notice a book on the top of the centre shelf. Equip the Pegasus Boots and ram into the shelves, knocking the book down in the process.
|
Ram the book down, choose to read it, and follow its instructions. You can push the gravestones in any order you wish (this guide covers only one solution of many), but the fifth must always be last. |
| File:Zelda LA Dungeon C graveyard step 1.png | Push the bottom-right gravestone down. |
| File:Zelda LA Dungeon C graveyard step 2.png | Push the bottom-left gravestone right. |
| File:Zelda LA Dungeon C graveyard step 3.png | Push the top-left gravestone up. |
| File:Zelda LA Dungeon C graveyard step 4.png | Push the top-center gravestone right. |
| File:Zelda LA Dungeon C graveyard step 5.png | Push the top-right gravestone up. Congratulations, you've found the Color Dungeon! Now enter the dungeon and prepare for an interesting experience. |
|
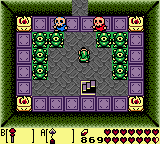
Talk to each of the skeletons. Each will ask what color his tunic is. This check is an attempt to prevent monocrome Game Boy players from accessing the dungeon. Be sure to answer each question correctly. After this they will move aside and allow you entry. |
|
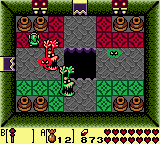
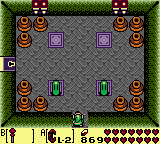
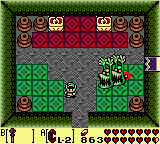
In this room the goal is simple; awaken each of the floor-hugging creatures and kill them. Head right. |
|
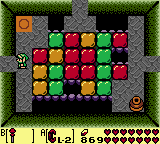
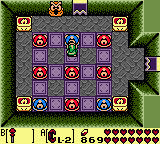
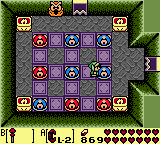
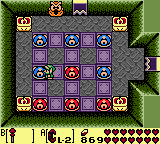
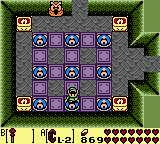
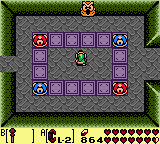
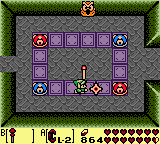
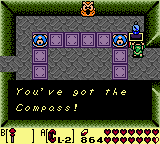
In this puzzle you need to make all the red blue. |
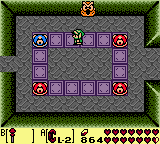
|
Hit the top-left head. |
|
Hit the bottom-right head. |
|
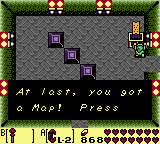
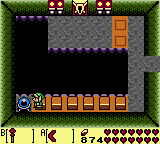
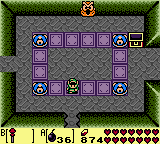
Open the chest for the Compass. |
|
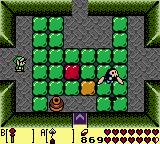
Bomb the bottom wall for some goodies. |
|
Head to the right. |
|
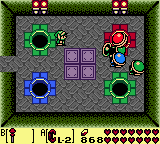
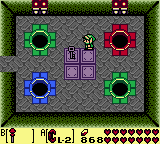
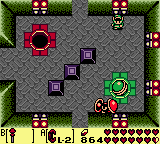
In this room your goal is to hit the colored shell beetles to make them curl up into balls, and then throw them in the appropriate holes. If you put them in the wrong hole they'll pop out of it. Your reward is a stone beak. |
|
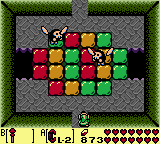
Avoid or kill the creatures and head up. |
|
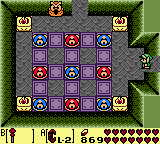
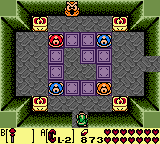
Aha! More color-coded fun. |
|
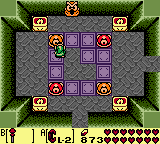
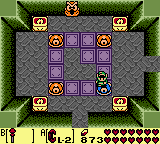
Hit the top-left head. |
|
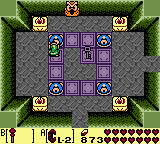
Hit the bottom-right head. |
|
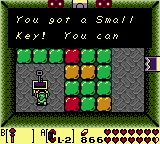
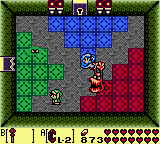
Hit the top-left head. Take the key and go to the right. |
|
More pitiful monsters. Unlock the door and go up. |
Miniboss #1: Giant Buzz Blob
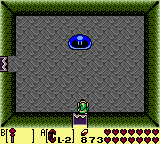
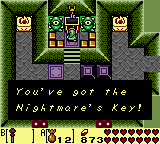
And now, you'll fight... the uber-sized Giant Buzz Blob! He says the sword can't harm him. Remember how the blue Stalfos told you to have Magic Powder with you? Use it. It will damage Giant Buzz Blob when you sprinkle it on him. After about five doses, he falls. Head left, and you'll get the Nightmare Key.
Miniboss #2: Stone Hinox
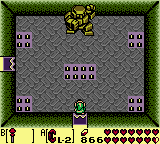
And now it's miniboss number two: Stone Hinox! He is quite tough, and drops boulder after boulder at you, and toss you if you get too close. He is basically a Hinox, but with a stone-armored body. It will take many hits to defeat him, but if you have the Fire Rod, he'll go down in two hits.
Boss: Giant Hardhat Beetle
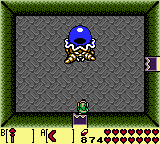
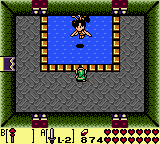
The boss is Giant Hardhat Beetle. "Blue is safe. Yellow is caution. Red is danger." This line he says refers to his own health. Simply keep him from turning back to blue. The darker he gets, the closer to victory. When he's red, hit him one final time to kill him. The Fire Rod should make quick work of him, if you have it.


