The Legend of Zelda: Oracle of Seasons/Woods of Winter and Snake's Remains
Upon claiming the Fertile Soil, you'll be warped out of the dungeon, and be contacted by the Maku Tree. The Fertile Soil has restored some of his strength, and he has dreamt that the Temple of Seasons is now in another, unknown land. He says there is a helpful item there. The question is: where is that land...?
Before the next quest[edit]
Now that you've recovered the first Essence of Nature, it's time to head back to Horon Village. Also, there are a few things that you may find with your new Seed Satchel.
North Horon[edit]
- Maple the Witch

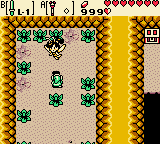
On the way back to Horon Village, you may encounter a strange witch. If you bump into her, you'll both spill items all over! When the witch sees you, she addresses herself as Maple, apprentice of the great witch Syrup. She'll mention she needs Lon Lon Eggs, but you don't have any yet.
Maple is so miffed, she decides to take your things as well. Hurry and recover the spilled items, so you can get more than she does!
Maple will appear after every time you slay 30 monsters, so keep your guard up. However, she does have some things of value, better described in Maple's guide page. Link can manage to collect the rarest items if he has some Pegasus Seeds, obtained in chapter 3. If you happen to obtain ![]() Maple's ring, she'll appear after you slay 15 monsters. The more times you meet Maple, the faster she gets: therefore, DO NOT equip Maple's ring until you have some Pegasus Seeds.
Maple's ring, she'll appear after you slay 15 monsters. The more times you meet Maple, the faster she gets: therefore, DO NOT equip Maple's ring until you have some Pegasus Seeds.
- Secret sage cave

Near where Maple appears are two trees. Burn the one on the left with an Ember Seed to discover a secret cave. A Sage is inside. Talk to him, and he gives you 100 Rupees!
Horon Village[edit]

Another Sage is in Horon Village. Go far to the southeast, and you'll find a house (Dr. Left's house) with three small trees. Burn the middle one to find him. You'll get 100 more Rupees!
There are several generous sages living in Holodrum who will give you Rupees if you find them. However, there are imposters out there, too, and they take Rupees!
- The Cuccodex
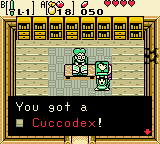
While you're in Horon Village, pay a visit to Dr. Left. He is having trouble reading because his torch isn't lit. Fortunately, one Ember Seed will fix his problem. In gratitude, Dr. Left gives you a ![]() Cuccodex, a book on the different types of Cuccos. It will be important later.
Cuccodex, a book on the different types of Cuccos. It will be important later.
While you're visiting Dr. Left, bomb the cracked wall in his house. It will open up a path to a chest, but only in the winter. The chest has 20 Rupees inside.
- The ember seed tree

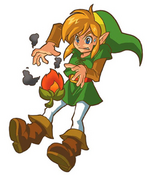
West from Dr. Left's house is a mystical tree shaped like a flame. There are Ember Seeds growing from it. Remember this tree, because you can warp to it when you get another type of Mystical Seeds. Simply strike the tree with your sword to replenish on Ember Seeds and gain the power to warp there later on.
- Vasu's ring appraisals


In Horon Village, enter the building marked with a ![]() . Inside is Vasu, a ring appraiser. He and his companions, Red Snake and Blue Snake are known for giving value to great rings of power.
Vasu will give you a
. Inside is Vasu, a ring appraiser. He and his companions, Red Snake and Blue Snake are known for giving value to great rings of power.
Vasu will give you a ![]() L-1 Ring Box. He'll also give you an
L-1 Ring Box. He'll also give you an ![]() Unidentified Ring and teach you how ring identifying works. Once identified it turns into the
Unidentified Ring and teach you how ring identifying works. Once identified it turns into the ![]() Friendship Ring (#01). This time's free, but it costs 20 Rupees afterward. Most Rings will have some sort of power, but the power will only work if they are equipped after being identified. If by chance Vasu appraises a ring you already have, he'll let you sell it for 30 Rupees.
Friendship Ring (#01). This time's free, but it costs 20 Rupees afterward. Most Rings will have some sort of power, but the power will only work if they are equipped after being identified. If by chance Vasu appraises a ring you already have, he'll let you sell it for 30 Rupees.
- A piece of heart

Southwest of Horon Village is a small path to the right. Take it, and you'll see a strange object near a tree. However, the tree is in the way, so you'll need to get rid of it. Equip your Seed Satchel and use an Ember Seed on the Tree. You'll burn it, and gain access to your first ![]() Piece of Heart.
Piece of Heart.
Heart Pieces are rare and hard to get in Holodrum, some requiring special items or conditions to get. Whenever you obtain four Heart Pieces, you'll get another heart in your Health Meter.
- Mayor Ruul's Gasha Seeds


Ruul, Mayor of Horon Village, lives in a house to northeast. If you talk to him, he'll talk all about Gasha Seeds and the nuts that grow from the trees they sprout.
In fact, he gives you a ![]() Gasha Seed so you can find out what he means. Outside his house is a patch of soft soil that you can plant the seed in. Later, you can come back and see if a tree has grown, and reap the rewards of the Gasha Nut. However, the tree disappears after you get the reward. You can do this whenever you get a Gasha Seed and find soft soil. It's usually just an
Gasha Seed so you can find out what he means. Outside his house is a patch of soft soil that you can plant the seed in. Later, you can come back and see if a tree has grown, and reap the rewards of the Gasha Nut. However, the tree disappears after you get the reward. You can do this whenever you get a Gasha Seed and find soft soil. It's usually just an ![]() unidentified ring inside the nut. If you're lucky, you may get a
unidentified ring inside the nut. If you're lucky, you may get a ![]() Piece of Heart! You can improve your chances of getting it and better rewards with the
Piece of Heart! You can improve your chances of getting it and better rewards with the ![]() Gasha Ring equipped. Keep trying with Gasha trees, and this ring might become part of your collection.
Gasha Ring equipped. Keep trying with Gasha trees, and this ring might become part of your collection.
You may think Ruul has only one Gasha Seed to offer, but there's a cracked wall in his home. Bomb it, and you'll find a secret room with a second ![]() Gasha Seed.
Gasha Seed.
Holodrum[edit]
Eastern Suburbs[edit]
After you've explored Horon Village, it will be time to start hunting the item the Maku Tree mentioned.
- Sokra the Prophet

When you are ready to leave Horon Village, head to the far southeast to find a path blocked by trees. However, a prophet named Sokra will wish to talk to you. He sees that the Season Spirits are calling for help, and that the Temple of Seasons is hidden somewhere. Sokra tells you to visit the spirits if you can find the temple for help, and then takes a nap. With that advice, take an Ember Seed and burn one of the trees to unblock the path to the southeast and leave Horon Village.
- Following Rosa


As soon as you leave the village, head north past the Octoroks, then northeast past the windmill, and east past the monsters.
A hooded girl will show up, Rosa, apparently panicking about a temple falling into a place called "Subrosia." She won't tell where it is, and runs off to return to it in secret. Of course, she just gave away how to get there: it's time to follow her!
Head in the direction Rosa went, and you'll find her. She's looking to see if she's being followed. Don't let her spot you, or she'll run! Instead, sneak around as she heads to Subrosia. When she gets close to her destination, she'll take a final peek to make sure she's alone.
Eventually, you'll reach a small field, where Rosa will...vanish? Swipe your sword over the grass, and you'll find a strange portal. Step into it...
Subrosia[edit]

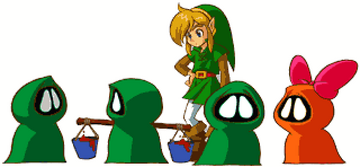
The portal will warp you to the underworld of Subrosia, much more different than Holodrum. Its people are strange and hooded, and dwell in lava. You'll see that your Rupee counter has changed: instead of Rupees, Subrosians use Ore as currency. You'll need to find some to buy items here.
If you talk to the Subrosians, they'll be in an uproar about a temple landing in the east plaza. That sounds familiar...
The first place you want to go to is down a path southwest. Head down that path until you reach a set of stairs. Go down them.
- The Subrosian Dance Hall

You'll enter the Subrosian Dance Hall, where you can be rewarded for good dancing. Talk to the leader in red, and he'll let you dance.
Now, you'll play a mini-game where you must move with the other dancers in perfect coordination. Listen to the leader's instructions and then watch his movements.
If you can last through the mini-game without bumping into the other dancers, you'll get the ![]() Boomerang (L-1) for your dance skills. The Boomerang can hit faraway objects and stun certain enemies. If you keep on playing you will eventually be rewarded with the
Boomerang (L-1) for your dance skills. The Boomerang can hit faraway objects and stun certain enemies. If you keep on playing you will eventually be rewarded with the ![]() Strange Flute which will become
Strange Flute which will become ![]() Dimitri's Flute later.
Dimitri's Flute later.
The Temple of Seasons: Tower of Winter[edit]

Now that you've got the Boomerang, head back to the location of the portal. This time, take the path on the far right. Go southeast, and you'll see the dancer who just won a boomerang himself. Keep going southeast, and you'll reach a small path, which will lead to a temple. Could it be...?
Your suspicions are realized as the four Season Spirits: Spring, Summer, Autumn, and Winter, greet you. This is indeed the Temple of Seasons. The Spirit of Winter tells you to get the Rod of Seasons and visit the spirits in the four corner towers.
With that, head straight forward to reach the central altar of the temple.
- The Rod of Seasons

You'll find the altar is much more inviting than harsh Subrosia. Head forward to find a pedestal. Stand on it, and the power of the Season Spirits will merge together and form the key item you need to restore Holodrum: the ![]() Rod of Seasons. When it holds the power of the Season Spirits, it can change the seasons.
Rod of Seasons. When it holds the power of the Season Spirits, it can change the seasons.
- The Tower of Winter


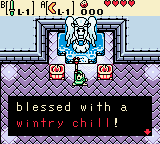
Now that you have the rod, the Spirit of Winter will mention to visit the towers again. Unfortunately, three of the towers can't be visited right now. Because of the damage it took, the Tower of Autumn is unreachable, the Tower of Summer is locked shut, and the Tower of Spring is sealed up, only accessible through a secret entrance. This leaves only the Tower of Winter, which is the only one you can visit. Head southeast to find it.
The first room of this tower is blocked by a path of lava. On the other side, there is a switch, but you can't reach it. Equip the Boomerang, and throw it at the switch to hit it. You can also use a bomb as an alternative.
Triggering the switch makes a bridge appear over the lava, which lets you cross it, and reach a staircase.
At the top is the altar of the Spirit of Winter, a blue fairy. She bestows the Rod of Seasons a wintry chill: the ![]() Power of Winter. With this power you can change the season to winter when you swing the Rod of Seasons atop a stump.
Power of Winter. With this power you can change the season to winter when you swing the Rod of Seasons atop a stump.
Woods of Winter[edit]
When you leave the Tower of Winter, you'll be contacted by the Maku Tree again. He sees the item you needed is the Rod of Seasons, and it has the power to open new roads. He has also dreamt of woods to the east. There might be an essence there...
For now, it's time to leave Subrosia. Go back to the portal, and you'll return to Holodrum.

- Wintry chills
Now that you have the both the Rod of Seasons and the Power of Winter, you'll find Sokra is waiting for you back in Holodrum on a tree stump. He'll explain what happens when you use the rod, and then tells you that he believes more entrances to Subrosia might exist. After he shares this advice, he heads back to Horon Village.
In order to trigger the rod's power, you need to hop onto the tree stump Sokra mentioned. Swing the rod, and you'll change the season to winter.
- Effects of winter
With one swipe of the rod, you'll find its power can alter the seasons almost anywhere. You'll find that with more season powers, you'll be able to unlock many hidden locations in Holodrum. However, some places have seasons that can't be changed. You can only use the power of the Rod of Seasons on a tree stump. Otherwise, nothing will happen.
Each season also has unique affects in Holodrum. During the winter, three things happen:
- Snowdrifts pile up, either blocking the way forward or acting as bridges to pave the way through.
- Water freezes, making bridges you can walk across.
- Trees with big leaves shed them, letting you get past the trees.
You'll also find that different enemies appear during different seasons. For instance, by changing the season to winter, a Blue Octorok has appeared nearby. It's tougher than a Red Octorok, and requires a few more hits to kill.
NOTE: along with new enemies, four Golden Monsters appear during certain seasons. They are exceedingly tougher to defeat. However, you may find hunting them will be worth it. The Golden Monsters sub-quest can only be completed during Chapter 7.
- Piece of Heart
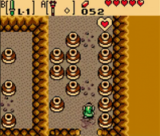
Head back to where you entered the woods through Horon Village while it's still winter. Go straight to the south-east corner, and then up north past the stump. Up here are two ledges, and a snowdrift has piled up to form a bridge between them. Cross it, and you'll discover a cave on the left ledge. The cave holds another ![]() Piece of Heart.
Piece of Heart.


- The Woods of Winter
Now that you have made it winter, go east across the frozen pond. You'll head into the Woods of Winter. The Woods of Winter houses another new enemy: the Leever. They burrow up from below the ground and attack, but they are weak and easy to kill. From there, travel south.
Two Spear Moblins are here, and they'll throw their spears at you. Ignore them, and quickly run by.
Go north, and you'll find snow blocks the way ahead. There's nothing to do to get rid of it, so you can only go east.
These trees would normally have thick leaves and block the way forward, but in winter, they don't. Simply go under them and continue onward. Note that a tree stump is here as well.
There is a Piece of Heart here, but a rock's in the way. It won't budge. Maybe you'll find something later.
Head further north, and you'll see a blue Spear Moblin. He is harder to defeat than his red kind, but he is completely avoidable.

- Unfriendly sage cave
If you continue north, you'll see several small trees. Burn the farthest one with an Ember Seed, and you'll uncover an entrance. However, DON'T go in. The sage inside wanted to be left alone, and he'll get 50 Rupees from you, because you burned down his door! Simply defeat the Moblins up north and head on.


- Holly's house
When you go as far north as possible, you'll reach a house. However, it's locked. A sign outside the door says Santa is welcome. Well, the house has a chimney, so you could make an entrance just like Santa!
Go west a little bit, and you'll find a tree stump. Use it to make it winter. Now, go up the nearby stairs and head east past the Moblin (ignore the nearby cave: there's nothing useful in there).
You'll see the door of the house is now open, but it's blocked by snow. However, a huge snowdrift has piled up by the house's chimney, and you can walk on it. Head right over to the chimney and hop inside.
Inside, you'll find Holly, who is rather shook up by your sudden entrance. She wants you to clean her walkway, and gives you a ![]() Shovel to keep.
Shovel to keep.
Now, you can dig up snow, dirt, and sand. Usually, you'll find hearts, Rupees, and seeds underneath, but you may come across Beetles. They're easily disposed with one sword swipe. If you're lucky, you may even find buried treasure!

Try digging up the snow outside Holly's house with the shovel. It's the same as the snow you saw before, so go to the blocked path and dig your way through.

- 30 Rupees
However, before moving on, if you want some easy money, head west past Holly's house when it's not winter to find a sealed cave. Blow it open, and inside is a chest with 30 Rupees.

- The mystery seed tree
When you get past the snow, you'll find a tree shaped like a question mark. This is the Mystery Seed tree. Growing on it is a new kind of seed: ![]() Mystery Seeds. Cut them down from the tree to start carrying them. These strange seeds have random effects on what they touch. Try one out on the owl statue nearby. Owl statues react to Mystery Seeds, and give you helpful hints when you need them.
Mystery Seeds. Cut them down from the tree to start carrying them. These strange seeds have random effects on what they touch. Try one out on the owl statue nearby. Owl statues react to Mystery Seeds, and give you helpful hints when you need them.
- The second dungeon
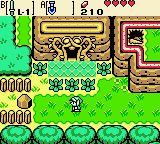
Head north past the tree and you'll find the path curves over to the west. There are a few caves here, but not much to do in them. Follow the path to the west, and you'll reach the entrance of dungeon number two, Snake's Remains.
DUNGEON: Snake's Remains[edit]


Snake's Remains may be only the second dungeon, but it is far more treacherous than Gnarled Root Dungeon. Deadly traps and more powerful foes await. The dungeon layout is vaguely reminiscent of the layout of the second dungeon in Legend of Zelda 1.
The dungeon has two parts to it, and it proves a step up from before. You'll find being in here isn't so safe.
Small key n.1[edit]
As soon as you enter the first room, you'll see it's dark, and the door ahead is locked. If you light both torches in this room with Ember Seeds, the door will open.
You can go north from there, or go west. Since there is a key located in the west path, you should go there first.
Upon going that way, you'll encounter two Blade Traps and many Green Zols as you have to cross a narrow path. If you go to the far left of the path, you'll find a chest with five Rupees. Not much, but still something.
When you head further north, you'll get locked in a room with several Ropes, dangerous snakes. They'll charge at you if you get near them. Defeat them all to get the ![]() Small Key.
Now, go back to the first room and head north.
Small Key.
Now, go back to the first room and head north.
 |
 |
 |
The compass[edit]
The room ahead seems harmless, but don't be tricked. The Face Lamps are bewitched, and they will shoot fireballs at you. They will stop attacking once the Green Zols in the room have been defeated, however. There is a small path to the southeast you can take.
In this room, Ropes will actually fall from the ceiling! Avoid them and take a look at the blocks here. One block is not in formation with the rest. Push it one space to the right, and a chest will appear. Open it, and instead of getting the Dungeon Map first, it's the ![]() Compass. With it, go back through the torch trap room into the next one.
Compass. With it, go back through the torch trap room into the next one.
 |
 |
 |
Secret room[edit]

This time, you'll get locked in with both Ropes and Spear Moblins. Before you defeat the enemies, take a good look at the blocks in this room. Notice how they're shaped like an arrow? Not just that, the arrow's pointing at a spot in the wall! Bomb that place, and you'll uncover a secret room. What's inside? 49 Green Rupees! Much better than 5!
The power bracelet[edit]


After you snag that big payday, go back and defeat all the enemies to open up all the doors. However, the one you want to go through is the locked door.
This room has another new and very annoying enemy: Hardhat Beetles. Their shells are so strong, you can't defeat them with your sword. However, there are two pits in this room. If you knock the Hardhat Beetles into the pits, you'll be rid of them and make the door to the west open.
A relative of Moblins, Pig Warriors, are in this room. However, they're on the other side of a large pit. You don't have the means to jump over it yet, but you do have bombs. Toss them over the pit so they blow up the Pig Warriors. If you run out of bombs, you can cut the plants for more, and they'll grow back.
You can use the Boomerang to stun them, then bomb them.
Once you defeat them, you'll be rewarded with a chest, and inside is the ![]() Power Bracelet. This bracelet's special powers make you strong when you wear it, and you can push or lift heavy objects while using it. Equip it, and go back to the last room.
Power Bracelet. This bracelet's special powers make you strong when you wear it, and you can push or lift heavy objects while using it. Equip it, and go back to the last room.
The dungeon map[edit]

Try out the Power Bracelet on the pot in front the chest. You can pick it up, and toss it out of your way. Press the button you've equipped it to and push the Control Pad in the opposite direction you're facing. Open the chest for the ![]() Dungeon Map.
Dungeon Map.
Small key n.2[edit]
Now that you have the Power Bracelet, go back to the room where the arrow block is. This time, head east.
There are several Ropes falling into the room and a few Red Zols. There is another set of blocks like in the Compass room. Push the one out-of-place block to where it belongs. This will open the doors.
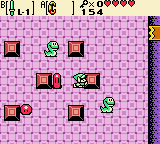
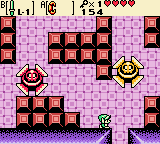
The next room has a very dangerous trap in it: the Giant Blade Trap. These monstrosities sweep across the floors, taking out anything in their way.
One is yellow, and the other is red. The yellow one moves fast, but the red is very fast. Run away from the traps to avoid taking damage, and go over to the chest in this room to get another ![]() Small Key.
Small Key.
When you get past the Giant Blade Traps, go south, because you're going to need two keys before moving on, and this path leads to another one.
 |
 |
 |
 |
Small key n.3[edit]
After you enter this room, you'll find several Keese, and several large, steel rollers blocking the path. By holding the button you've equipped it to, you can use the Power Bracelet to push the rollers out of your way. Push them as far as they can go, because they'll roll back after you let go, and they can hurt you.
Once you get past all the rollers, you'll reach a staircase. Go up it, and you'll actually end up leaving the dungeon for a minute.
You'll wind up at a small area with a chest. Inside is a ![]() Gasha Seed. Head left from there to reach a subsection of the dungeon.
Gasha Seed. Head left from there to reach a subsection of the dungeon.
The first room of the subsection has a few Green Zols and Ropes. Ignore them. Simply cut the grass and move on. If you're out of bombs, a Deku Scrub is hiding in this room. He'll give you 10 bombs for 30 Rupees.
The next room holds the Small Key, but there's a catch: take too long in here, and the chest goes away! You'll need to blow up the cracked blocks in your way with bombs, and hurry down the path to the chest. If you're fast, you'll get the ![]() Small Key. Now, go back to the main dungeon to the point where you went south.
Small Key. Now, go back to the main dungeon to the point where you went south.
 |
 |
 |
Towards the sub-boss[edit]
Blow up the cracked blocks and go east. If you're running low on bombs, cut the grass. There is a staircase at the end of the path. It will take you into the basement.


You'll find a Spiked Thwomp (from the Mario series) guarding the path to the left. He'll smash you if you get too close. Try to lure him to drop, and then run over his head across the spikes and past the Keese.
Four smaller Thwomps guard this area. However, a quick run past them without stopping will get you to safety. You'll reach the ladder that goes back upstairs.


This room has some more rollers in it. Push them out of the way. If you want to, look for a chest in here. It has 10 Rupees in it.
Once you get past the first set of rollers, the path will get more dangerous.
There are pits and cracked floors. You don't want to push the rollers over cracked tiles: you may fall through! If you are wearing ![]() Roc's Ring, then you're safe. When you enter the room ahead, you'll face the mini-boss.
Roc's Ring, then you're safe. When you enter the room ahead, you'll face the mini-boss.
SUB-BOSS: Facade[edit]
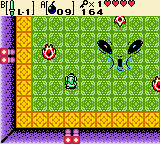


The mini-boss is Facade, a large, evil face. He has several vile attacks at his disposal.
He can shoot out fire, which will scatter across the room, summon Beetles, which you can defeat easily, and open holes in the floor, which will come after you.
However, when Facade shows himself, he is vulnerable. Drop a bomb on his face to injure him. The Beetles will drop bombs when defeated if you run out.
With enough hits, Facade will retreat, allowing you to move on. However, this won't be the last you see of him.
The boss key[edit]
After Facade is defeated, you'll be able to move on to the next room. Here, there are a few Keese and a Moblin. Defeat them to avoid conflict. Now, look for three pots in a corner. Use the Power Bracelet on the one furthest out, and then blow up the cracked wall behind it with a bomb. You'll open up another room.
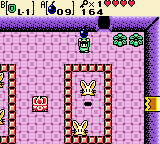
This room is filled with Pol's Voices, rabbit-like monsters. They can't be reached from where they are, and the torch in this room is bewitched like the two from earlier. Since you can't attack them, use bombs on them, and they'll be defeated. If you have the Strange Flute (either bought from the Horon Shop or won from the Subrosian Dance Hall), you can play it to kill all of them instantly.
When all the Pol's Voices are defeated, the door in here will open. Don't go ahead yet. Instead, backtrack to the room where you blew open the wall and head east. You'll reach a small block with a keyhole. Use your Small Key to on the block to open the path.
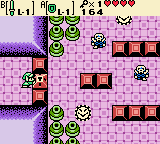
This room has several Blue Stalfos and Anti-Fairies, enemies that follow the edges of blocks and walls in a set path. You'll be damaged if they make contact with you. To defeat them, hit them with the boomerang, which will make a fairy appear.
The enemies in here don't guard anything in particular, so you can just go on through to the room to the east.
A pair of Blade Traps and numerous Ropes are in this room. Hurry past them before they can damage you. If they do, lift the pots in the room's upper-right corner to get hearts. After you get past, go south into the next room.
Another new puzzle is in this room: moving platforms over a pit. Seeing as how you can't jump yet, you'll have to time your movements correctly to cross onto the platforms when they come together. You'll need to go to the right in here, not left, because the platform that moves furthest to the right will lead you to a path that ends at a chest. Open it to get the ![]() Boss Key.
Boss Key.
 |
 |
 |
 |
Path to the boss[edit]


Now that you've acquired the Boss Key, go back through the room where the Pol's Voices were and go on to the room ahead.
A strange, new obstacle resides here: a turntable. Right now, the turntable is blue, and is showing a blue arrow going counter-clockwise. That means if you get on the turntable, you'll be moved counter-clockwise 90 degrees (west to south) You want to go that way, because it will lead to the boss.
Note that when you do, the turntable will turn red, flashing a yellow arrow clockwise. That means you'll be moved clockwise 90 degrees if you hop back on it, but you don't need to. The final thing keeping you from the boss is a set of three platforms moving across a pit. You can easily cross onto them to the other side of the pit, and defeat the Ropes from there.
Now, smash as many pots as you need to so you're at full health, and go east. Lift the pot out of the way with the Power Bracelet, and head onward to fight the boss.
BOSS: Dodongo[edit]
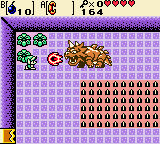
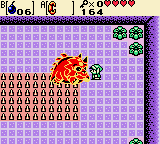
The boss of Snake's Remains is Dodongo, a fierce, fire-spitting lizard. His armored skin is impervious to your sword, and he will blast you with fire or charge at you if you get anywhere near him. He was already the boss of the second dungeon in Legend of Zelda 1.
However, there is one big weakness to this monster: when Dodongo opens his mouth to spit fire, toss a bomb inside his mouth.
When Dodongo eats the bomb, it will explode in his stomach, leaving him stunned. Even though Dodongo is unharmed by sword strikes, he has a soft underbelly. Using the Power Bracelet, pick the beast up and toss him onto the pit of spikes in the middle of the room. Dodongo will take damage! Keep stunning Dodongo with bombs, and tossing him onto the pit, and the monster will surrender.
 |
 |
 |

After Dodongo falls, you'll be rewarded with another ![]() Heart Container.
Heart Container.
Now, you can progress to the room in the southeast corner, where you'll obtain the ![]() Gift of Time, the second Essence of Nature. "Seeds sprout as seasons change with the Gift of Time!"
Gift of Time, the second Essence of Nature. "Seeds sprout as seasons change with the Gift of Time!"
