The Heat Man stage is perhaps one of the most difficult stages in the game, along with Quick Man's. Two immediate dangers are the molten lava, which kills instantly, and the bottomless pits which line significant portions of the stage. In a cue taken from Ice Man's stage from the first Mega Man game, sections of the stage contain blocks which appear and then disappear. If you've defeated Air Man prior to taking on Heat Man, you can take advantage of Transport Item 2, and bypass most of the danger towards the end of the stage.
Stage[edit]
- A: The stage starts off by pitting you against a series of chutes that drop Fly Boys from the ceiling. They land on the floor and wait a moment before hopping off the ground and attempt to land on you. Destroy each one that you encounter as quickly as possible, and advance to the right before the next one has a chance to attack you.
- B: Tellies slowly float through the air to wherever Mega Man is standing. They're speed doesn't make them much of a threat, but there can be up to three of them on the screen at any one time. Your best defense against them is the Metal Blade. You can fire them diagonally, and you can even fire them through walls to hit Tellies that are out of the Mega Buster's reach. Carefully time your jumps from column to column so that the coast is clear before you leap over the deadly lava.


- C: After you make it past the Tellies, you must leap to a few small platforms to make it over a giant pit. Springers await you on the platforms on the other side. You can use a few Bubble Leads to remove them if necessary. Then climb down the ladder to the room below.
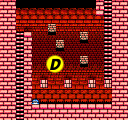
- D: Before moving on to the second half of the stage, you must overcome a small obstacle with appearing and disappearing blocks. Watch their timing, and make your way to the ladder on the left side of the screen by timing your jumps from one block to the next before they vanish.
- E: After you start running to the right again, you'll face the combined challenge of Tellies, and disappearing blocks. You'll have to time your jumps to the appearance of the blocks in order to leap over the columns, all while clearing the Tellies out of the way. Once again, use Metal Blades if you have them. If you happen to have Crash Bombs, you can use them to make shortcuts. Otherwise, learn the timing of the blocks, especially when you have to jump straight up from one block to another in order to advance.


- F: From here to the end of this section, you must now navigate an extremely long sequence of disappearing blocks in order to cross a very long chasm. This section is so challenging that the use of Transport Item 2 (obtained from Air Man) is recommended. If you don't have it, this section is still doable, it just takes a good deal of practice. These are the most important points to remember:
- Don't delay too long before making your move. Jump to the next block as soon as it becomes available.
- There are three occasions where in order to advance, you must jump straight up only moments before a block appears above the one you're standing on. Two of them happen before the lava, but the third happens over the pit, at which point making a mistake will cost you your life. Study the map carefully to identify those moments.
- The extra life at the end of the lava is a trap. If you don't have Item 2 and you drop down to collect it, you will be unable to proceed without ending your life and starting over.
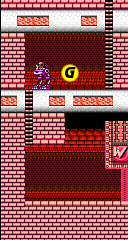
- G: Before you reach the entrance to Heat Man's lair, you'll have to get past this Sniper Armor. It's incredibly difficult to get past this guy without taking damage, so you may want to get hit intentionally and pass by him when you're invulnerable. Opt for getting shot instead of getting stomped on, as you will take far less damage.
Heat Man[edit]


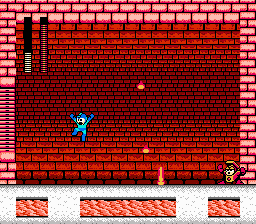
Using Fire Man as a basis, Dr. Wily created Heat Man to resemble a lighter. His weapon shoots condensed balls of flame that explode into pillars of fire upon hitting the ground. He can cloak himself in fire to make his body tackle attack even more destructive. Even if you don't know (or don't have access to) Heat Man's weakness, he is actually very predictable, and can be easily defeated with the Mega Buster. Whenever Heat Man is shot, he pauses briefly, and then flies across the ground to the location where you were standing. Once you hit him, prepare to jump over him as he flies over. As soon as he stands back up, turn around and immediately hit him before he has a chance to use his weapon. After you do, run as far away from him as you can. He will react, and then fly over the ground again, at which time you should jump over him and repeat the process until he is defeated. If possible, use the two solid portions of cement on the ground as guides for where you should run to and stop, in order to better predict where Heat Man will stand. Once you defeat him, you'll receive Atomic Fire, a weapon which can be charged by holding down the attack button before releasing in order to throw larger fireballs (at the expense of extra weapon energy). You'll also receive Transport Item 1, which will be very useful.
Heat Man is most vulnerable to the watery properties of the Bubble Lead. However, whether you use the Bubble Lead or the Mega Buster, the strategy to defeat him should be the same as the one outlined above. You'll simply beat him quicker by using the Bubble Lead.

