Your path to Amanda is blocked by an armored vehicle unit. To reach her, you must eliminate the unit, either by neutralizing the troops or destroying the vehicle.
- Eliminate the armored vehicle unit.
Mission Prep[edit]
The most effective and straightforward method for new players is to destroy the LAV-G. To do that, bring the ★1 LAW. You should also bring the ★1 M16A1 for safety. If you wish to try and rescue any of the soldiers, swap the M16 with the ★1 Mk.22. Finally, bring the ★1 Ration as your top item. Bring the ★1 Fulton Recovery System if you wish to try and rescue any enemy soldiers.
Destroy the LAV-G[edit]
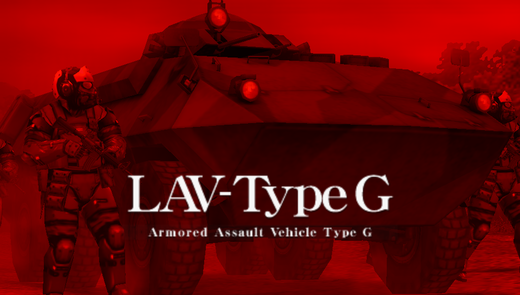
This is one of the game's two flavors of boss: the Vehicle Unit. Enemy vehicles are always accompanied by infantry escorts. This vehicle has 8 soldiers to send after you. There is a Stealth element to these fights, but getting spotted doesn't count as an Alert in your final score.
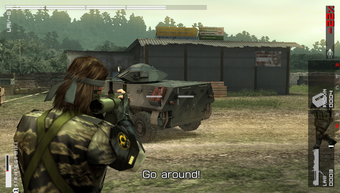
Start by moving to the westmost side of the map so that you can get the LAV-G from behind. Stealth isn't a huge consideration, just get yourself in a position to fire your ★1 LAW shots at the LAV-G's red fuel tanks. Fire at the red fuel tanks, occasionally dodging the gunfire of the enemy escorts.
If you wish, you can use your ★1 M16A1 or even your ★2 Mk.22 to neutralize any enemy escorts. Your lethal weapon can leave enemy escorts Near-Death and they can be extracted in this state, though they will go straight to Sick Bay. If you kill and/or extract every enemy escort, you will enter the endgame during which the Captain may appear once the LAV-G takes enough damage.
If you aim exclusively for the red fuel tanks, you can destroy the LAV-G in less than 8 shots. You can only carry 6 shots, so go grab the LAV AMMO pickup next to the west gate of the farm.
This method is effective and newbie-friendly but is not as rewarding.
Mission Prep (No Casualties)[edit]
This is a stealth walkthrough, and the best outcome is to take the vehicle unit out with stealth. You can neutralize and extract the escorts, expose and defeat the Captain, and capture the LAV-G for MSF's use. You will need the ★2 Mk.22 to Hold Up enemies and tranquilize the Captain. You will need to bring the ★1 Smoke Grenades to immobilize large groups of enemies.
For items, bring the ★1 Fulton Recovery System as your top item with the ★1 Ration right under it. Go ahead and put the ★1 Surround Indicator away.
Capture the LAV-G and All Its Escorts[edit]
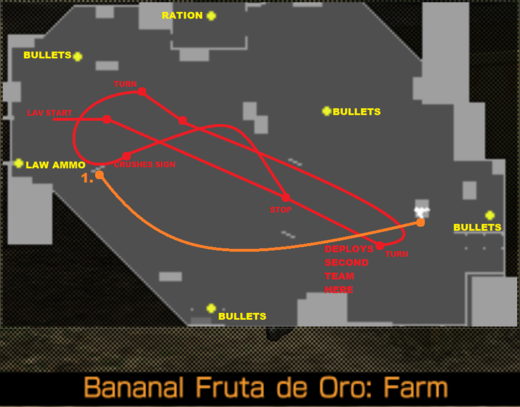
- 1. Hide Behind the Sign
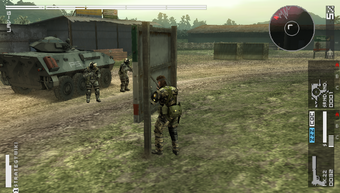
As you approach point 1, try and take a longer, curved route so you avoid the unit's lines of sight. The vehicle seems to have a longer line of sight than the escorts. When you reach point 1, wait behind the sign. Once you've stopped, stay standing straight up and don't move. The enemy cannot see your feet under the sign, but they will see you if you move at all. Wait for the enemy to be on the move again.
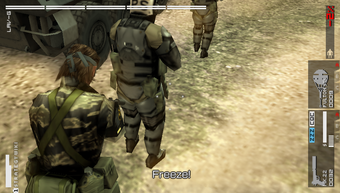
Run behind the enemy and turn on Auto-Aim. Stalk up to the soldiers one-by-one, starting with the ones in the back until you see the CQC Icon and hold down ![]() to neutralize them with a Hold-Up. Start with the soldier to the LAV-G's rear-right. Next, move to the rear-left. Then the front-left. Then wait for LAV-G to straighten its wheels, then neutralize the front-right soldier with a hold-up.
to neutralize them with a Hold-Up. Start with the soldier to the LAV-G's rear-right. Next, move to the rear-left. Then the front-left. Then wait for LAV-G to straighten its wheels, then neutralize the front-right soldier with a hold-up.
Equip the ★1 Fulton Recovery System and extract each soldier before the LAV-G reaches the point between the two signs. If at any time any of the soldiers spot you with a red Exclamation Point, restart the mission. If you accidentally run instead of walk while the CQC icon is visible, don't panic. Release the Analog Stick and hold down ![]() to quickly restrain him and stop the Alert. Tilt the Analog Stick to Throw him far away from the LAV-G and neutralize him with a hold-up. Extract all four held-up soldiers.
to quickly restrain him and stop the Alert. Tilt the Analog Stick to Throw him far away from the LAV-G and neutralize him with a hold-up. Extract all four held-up soldiers.
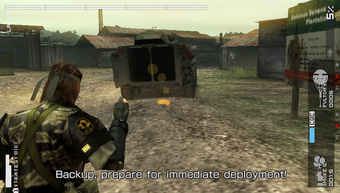
Equip the ★1 Smoke Grenades. Wait for the LAV-G to reach the point where it deploys the next wave of escorts. Once the Captain shouts "Backup, prepare for immediate deployment!" throw a Smoke Grenade or two at the rear of the LAV-G as the soldiers exit the LAV-G's crew compartment. They will be immobilized by the smoke.
If the LAV-G continues to turn rather than deploy the next set of soldiers, restart the mission.
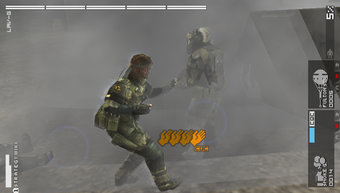
Move to the clump of soldiers. With the Analog Stick tilted, press ![]() to Throw one of the soldiers and initiate Consecutive CQC. Press
to Throw one of the soldiers and initiate Consecutive CQC. Press ![]() when the icon appears to take out all four soldiers one-by-one. When all four are down, extract them and watch the LAV-G. Quickly equip the ★1 Ration just in case the Captain sees you and attacks. The Captain seeing you does not count as an Alert.
when the icon appears to take out all four soldiers one-by-one. When all four are down, extract them and watch the LAV-G. Quickly equip the ★1 Ration just in case the Captain sees you and attacks. The Captain seeing you does not count as an Alert.
In the event you wish to attempt an S-Rank of this mission without the Smoke Grenades, you should try this strategy. When the LAV-G drives betwee the signs, get to the rear-right side of the vehicle. Follow it in that general orientation relative to the vehicle as it drives forward to the point when it deploys the second wave. Stay on the right side of the vehicle as the team deploys as they will move to its left. Stalk around the vehicle and neutralize them one-by-one with a hold-up. Be careful, as the vehicle will turn and crush the soldiers, so extract the ones closest to the vehicle before going back to the others.
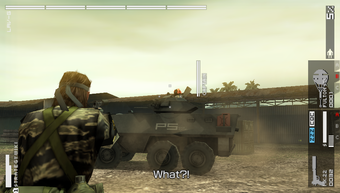
After all eight escorts are extracted, the Captain should expose himself, shouting "what!?". He has an extremely tight hitbox, but try and shoot him with the Mk.22. If you hit his head, his helmet will come off and his head will become vulnerable. It is okay if he sees you, but he'll be harder to hit with the Mk.22. If you run out of Mk.22 rounds, restart the mission.
Ideally, you want to pump Mk.22 rounds into the Captain without him seeing you so he stays in place. Reposition your aim such that you can keep hitting him. If he sees you, you will need to chase it around. Once the Captain is neutralized, he'll be extracted even if you're out of Fulton Recovery balloons. If you complete the mission this way, the LAV-G is yours.
Completion[edit]
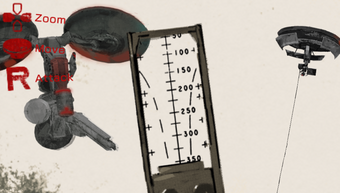
Following the mission, either method you complete it, you will find Amanda being accosted by Kidnappers. One of them will capture her, requiring you to shoot it down with a LAW. In the graphic novel cutscene, aim the LAW's reticle with the Analog Stick and fire with ![]() . You can aim at either TJ-Chrystalis 6000 or the Kidnapper; either way ultimately affects Amanda's condition. Be sure to skip all skippable cutscenes if you want an S-Rank.
. You can aim at either TJ-Chrystalis 6000 or the Kidnapper; either way ultimately affects Amanda's condition. Be sure to skip all skippable cutscenes if you want an S-Rank.
For completing the mission, you receive:
- Tortilla Chips recipe RANK 1
- Canned Soft Drink recipe RANK 1
Miller establishes the Medical Team and Sickbay. Move any Medics from the Combat Unit such as Lungfish and Lobster into the Medical Team.
Amanda Valenciano Libre will join MSF but be moved straight to Sickbay.
"Mechs" become available to view under R&D.
- Mother Base
Two of the mechanics extracted from the LAV-G will be high-D or even C-ranked. At least one of them joins MSF immediately. If you put any of the high-D or C-ranked Mechanics from this mission into the R&D team and meet the requirements for the ★1 Double Barrel Shotgun and ★2 Fulton Recovery System you'll be in great shape.
