Equipment[edit]
Hero's Clothes[edit]

The Hero's Clothes are the clothes Link receives from his grandmother at the beginning of the game. Because Link is turning the same age as the legendary Hero of Time was when he saved Hyrule, Link must wear a green tunic made by his grandmother similar to the one the Hero of Time wore due to the occasion.
Hero's Sword[edit]
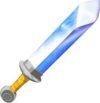
The Hero's Sword is the first sword Link can obtain in the game. After receiving the Hero's Clothes from Grandma, go to Aryll and she'll let you use her telescope for the day, but only because it's Link's birthday. After the cutscene in which Tetra falls onto the island, go to Orca and he'll give you the sword you used for training - the Hero's Sword. Use it with ![]() .
.
Master Sword[edit]
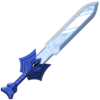
The Master Sword can be found in a hidden chamber in Hyrule Castle. The King of Red Lions will direct Link to the ruins of Hyrule Castle when the time comes. When you're inside, everything will be frozen. Go to the center, at the foot of the huge statue commemorating the Hero of Time. A large Triforce will be on the floor. Get the triangle blocks to fit onto the Triforce on the floor by pushing them to match their positions. A secret entrance will open below the statue. Go down the stairs and you'll be in the same room as the Master Sword, which is in its place in the Pedestal of Time. Although it does look much more powerful, it's actually not at full power. To defeat Ganondorf, you must go through two more temples to awaken the sages, who can restore the power to the Master Sword. This will replace the Hero's Sword.
Restored Master Sword[edit]
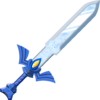
The Master Sword after it is restored to power by the sages. To get this, first go through the Earth Temple, then the Wind Temple. Before you go to the Earth Temple, make sure you're talked to by Laruto the sage, who will tell you to find someone with the same instrument as her. After completing the Earth Temple, Fado will tell you the same thing, and you must complete the Wind Temple. After the Master Sword is restored to full power, Link will finally be able to face off against Ganondorf.
Hero's Shield[edit]
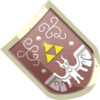
A shield Link receives at the beginning of the game, and Link's first shield. After Aryll is kidnapped and taken to the Forsaken Fortress, go to Grandma and she'll give you the Hero's Shield, a shield which was used by Link's ancestors and is an heirloom to the family. Defend yourself with ![]() , and use it while moving by L-targeting to allow for more mobility.
, and use it while moving by L-targeting to allow for more mobility.
Mirror Shield[edit]
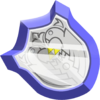
The second and last shield Link receives. It has the ability to reflect light, similar to Medli's harp. It is most useful in the dungeon where it is obtained (the Earth Temple). It can be used to deflect light onto enemies who are weak to it, and can also be used to shatter rocks or solve puzzles. It replaces the Hero's Shield once you obtain it.
Wallet[edit]
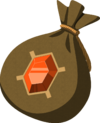
The Wallet holds all of Link's Rupees. Unfortunately, it can only hold so many Rupees, and once you've reached the limit you can't pick up any more Rupees (any excess will simply vanish). The Wallet you start the game with can hold up to 200 Rupees (or 500 in the HD version).
You can find two Great Fairies in the game who can expand your Wallet's capacity. The first is located on Outset Island, and upgrades the wallet to hold up to 1,000 Rupees at a time. The second is located on Northern Fairy Island, and upgrades your wallet to hold up to 5,000 Rupees at a time.
Pirate's Charm[edit]

A charm given to Link at the beginning of the game by Tetra. It allows Tetra to communicate with Link when they're separated from each other. The King of Red Lions can also talk to Link through the charm. It functions similar to Navi the fairy from The Legend of Zelda: Ocarina of Time and Tatl from The Legend of Zelda: Majora's Mask.
Bomb Bag[edit]
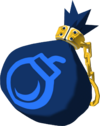
A bag that holds all of Link's bombs. The limit of bombs that can be held can be upgraded by a Great Fairy.
Quiver[edit]

Holds all of Link's arrows. The limit of arrows that can be held can be upgraded by a Great Fairy
Power Bracelets[edit]

The Power Bracelets give Link the ability to lift and push large objects that were too heavy to move before. They can be found on an island south of Dragon Roost Island, called Fire Mountain, located at F3. You'll need the Power Bracelets to enter the Earth Temple.
Inventory[edit]
Telescope[edit]

Link gets the Telescope early in the game from Aryll after the Hero's clothes. Link should tilt the left control stick up to zoom in and vice versa. Also, Link can tilt the right control stick in any direction to move where Link can see. In the Wii U version, you can also move the tablet to change your view.
Sail[edit]
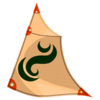
Link buys it from Zunari in Windfall Island after being chucked out of the Forsaken Fortress by the Helmroc King. Press A while on the King of Red Lions to take it out, speeding you up if the wind is in the direction Link is facing. Press A to put it back.
Wind Waker[edit]
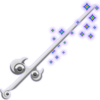
The King of Red Lions gives it to Link after reaching Dragon Roost Island for the first time. Link must learn songs to use it. One of them is Wind's Requiem. It changes the course of the wind. The Balled of Gales lets Link warp. The Command Melody lets Link control someone. The Song of Passing lets Link turn day to night and vice versa. The Earth God's Lyric lets Link open the Medli stone slab. The Wing God's Aria lets Link open the MedMarkarli stone slab.
Tingle Tuner[edit]
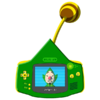
The Tingle Tuner (replaced by the now defunct Tingle Bottle in the HD remake) is received after rescuing Tingle from his imprisonment on Windfall Island. If you use this item with a Game Boy Advance connected to any controller socket other than socket 1, a friend can use the rupees you've earned to aid your quest in many different ways, which includes but is not limited to dropping bombs to destroy objects and giving instantaneous red, green or blue potions.
Note: This item is exclusively on the original GameCube release. The HD remake has the Tingle Bottle, which enables the player to take in game selfies and send them to Miiverse, which is why the item is now rendered useless, as Miiverse was shut down in June of 2018
Picto Box[edit]
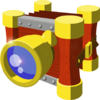
Link gets the Picto Box after freeing Tingle and finding the exit to the maze. It takes photos but they are only black and white.
Deluxe Picto Box[edit]

The Deluxe Picto Box can take color pictographs after Link completes the picture taking sidequest.
Grappling Hook[edit]
Deku Leaf[edit]

The Deku leaf is used at the forbidden woods. You get this from the great Deku tree. Use it with the item buttons (for the game cube its: ![]() ,
, ![]() , and
, and ![]() ). Use the Deku Leaf to glide over cliffs to the other side. When using the leaf, your magic bar drains, so you have a time-limit of sorts when using it for long distances. Later on you will get a larger magic bar, which will make this item easier to use. On the top left corner, where the hearts, you can see the green magic bar.
). Use the Deku Leaf to glide over cliffs to the other side. When using the leaf, your magic bar drains, so you have a time-limit of sorts when using it for long distances. Later on you will get a larger magic bar, which will make this item easier to use. On the top left corner, where the hearts, you can see the green magic bar.
Boomerang[edit]
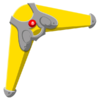
Bombs[edit]

Hero's Bow[edit]

Fire and Ice Arrows[edit]

Light Arrows[edit]

The Light Arrows are obtained very late in the game, during the final fight with Phantom Ganon. Not only are they one of the few weapons that can damage Ganondorf, they can also slay any non-boss enemy in one hit! Each Light Arrow fired takes up a small part of your Magic Meter.
Skull Hammer[edit]

Iron Boots[edit]

Hookshot[edit]

Hero's Charm[edit]

Magic Armor[edit]

To obtain magic armor (which only keeps you from losing health), you need to talk to Zunari in Windfall to get the Town Flower. Head over to Great Fish Isle, and trade the Town Flower to Goron Merchent-Man in exchange for the Sea Flower. Give this back to the merchant to get the Exotic Flower. Return to Windfall Island and talk to Zunari to obtain the Magic Armor.
Bags and their contents[edit]
Spoils Bag[edit]
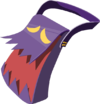
This bag is primarily used to hold up to eight different kinds of items that defeated enemies drop.
Knight's Crest[edit]

Darknuts drop these if you hit them with your Grappling Hook. If you give Orca on Outset Island ten Knight's Crests, he will teach you to perform the Hurricane Spin attack.
Joy Pendant[edit]
If you give a Joy Pendant to Mrs Marie (there is one in the tree next to the Bomb Shop) she will give Link 20 rupees. If you give her 20 (there is 4 you can get from the 3 Bokoboklins and a treasure chest in one room) you will get the Cabana Deed. If you give her 40 you will get a piece of heart in the wii u version. The best way to get them are from Bokoboblins.

Skull Necklace[edit]
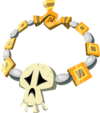
If you give Maggie's father twenty Skull Necklaces, he will give you Treasure Chart #2. You can find him on Windfall Island, after you defeat the Helmaroc King. The best way to get them are from Moblins.
Bokobaba Seed[edit]
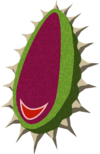
There is a Korok you can give 4 Bokobaba seeds to for a Blue Potion after the Forbidden Woods (not Markar). The best way to get them are Bokobabas.
Golden Feather[edit]
If you give 10 Golden Feathers to one of the Dragon Roost Island Guards you will get 100 rupees and a Peice of Heart. The best way to get Golden Feathers is by Kagroks, but you can get them from Peahats too.

Red Chu Jelly[edit]

- The Red ChuChu drop Red Chu Jelly which makes a Red Potion (+Health)
If brought to the Jelly Shop on Windfall Island, the owner can make Link potions to put into an Empty Bottle.
Green Chu Jelly[edit]

- The Green ChuChu drop Green Chu Jelly which makes a Green Potion (+Magic)
If brought to the Jelly Shop on Windfall Island, the owner can make Link potions to put into an Empty Bottle.
Blue Chu Jelly[edit]

- The Blue ChuChu drop Blue Chu Jelly which makes a Blue Potion (+Health and +Magic)
If brought to the Jelly Shop on Windfall Island, the owner can make Link potions to put into an Empty Bottle.
Bait Bag[edit]

All-Purpose Bait[edit]

Hyoi Pear[edit]
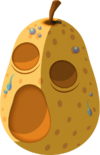
- Upon use, the pear is placed on Link’s head. A seagull will swoop down and eat the Pear, and you will temporarily have control over the seagull. This can be used to collect items and hit switches in remote places. A Pear can be purchased from Beedle for 10 Rupees. The Pear is consumed on use.
Delivery Bag[edit]
Letters[edit]

Flowers and Decorations[edit]

Cabana Deed[edit]
Complimentary ID[edit]

Fill-Up Coupon[edit]

Collectibles[edit]
Piece of Heart[edit]

Heart Container[edit]

Sea Chart[edit]

Treasure Chart[edit]
Ghost Ship Chart[edit]
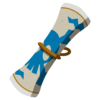
In-Credible Chart[edit]
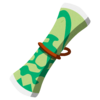
Triforce Chart[edit]
Din's Pearl[edit]

Farore's Pearl[edit]

Nayru's Pearl[edit]

Triforce Shard[edit]
Dungeon Items[edit]
Dungeon Map[edit]
Dungeon Compass[edit]

Small Key[edit]

Small Keys are found in dungeons, and are used to open locked doors. Small Keys can only be used once, and vanish after they are used — you'll need to find another Small Key if you come across another locked door. Every locked door in a dungeon has a corresponding Small Key, so don't worry about running out.
Big Key[edit]
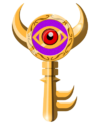
The Big Key is found once in every dungeon and is used to unlock the room that contains the dungeon's boss (Small Keys don't work on boss-room doors). As with Small Keys, Big Keys vanish once you use them.
Boko Stick[edit]
Enemy Weapons[edit]

Bomb Flower[edit]

Rupees[edit]

Rupees are the currency used across the world. You can find Rupees just about everywhere (not just in dungeons). When you collect Rupees, they will be stored in your wallet. If your wallet is full, then excess Rupees will vanish into nothingness. Rupees can be found in several different colors and each is worth a different amount. Accordingly, the more valuable Rupees are found less often than the less valuable ones.
- Green Rupee, worth 1 Rupee
- Blue Rupee, worth 5 Rupees
- Yellow Rupee, worth 10 Rupees
- Red Rupee, worth 20 Rupees
- Purple Rupee, worth 50 Rupees
- Orange Rupee, worth 100 Rupees
- Silver Rupee, worth 200 Rupees
Bottles[edit]
Empty Bottle[edit]

Fairy[edit]
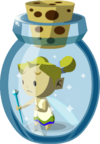
Fairies are relatively rare items that restore Link's health in a pinch. You can usually find them just before you fight the boss of a dungeon, or at Fairy Fountains hidden throughout the Great Sea. If you touch a Fairy, it will fill up to ten of Link's hearts. Alternatively, you can catch a Fairy in an empty bottle and carry it with you to use later. Even better, if you have a Fairy in a bottle and you run out of health, the Fairy will heal you automatically, averting a Game Over situation.
Red Potion[edit]

A Red Potion refills Link's hearts. You can get a Red Potion by giving Doc Bandham several Red Chu Jellies. You'll find him on Windfall Island.
Green Potion[edit]

A Green Potion refills Link's Magic Meter. You can get a Green Potion by giving Doc Bandham several Green Chu Jellies.
Blue Potion[edit]

A Blue Potion refills Link's hearts and his Health Meter. You can get a Blue Potion by giving Doc Bandham several Blue Chu Jellies.
Water[edit]

Link gets the Water from the dried up hot springs to pour onto the dry bomb flowers to release all of the water from the big rock.
Forest Water[edit]

Firefly[edit]

Elixir Soup[edit]

Elixir Soup is an amazing recipe that not only refills Link's hearts to full, it also energizes his sword arm. Link will then deal double damage with all of his attacks until he takes damage from an enemy. What's more, you can drink Elixir Soup twice before you have to get more (regular Potions are consumed in their entirety when you drink them).
To get Elixir Soup, heal your grandmother with a Fairy during a story event. After that, just talk to her and she will fill up your Bottle for you.